Negative Space
I began this assignment with no real idea of what negative space was. By definition (in art), negative space is the ‘space around and between the subjects of an image.’ Of course, this does not have an immediate link to engineering design, and so it took me a significant amount of time to contemplate the concept before I settled on my own definition, to be used for the assignment. That definition, arrived at during the course of my thinking on the topic, is as follows: negative space is the space defined by but not consisting of a prototype, and has significance to the user/sponsor/creator of the prototype. With this clearer concept in mind, I was able to begin my prototype brainstorming process.
Brainstorming
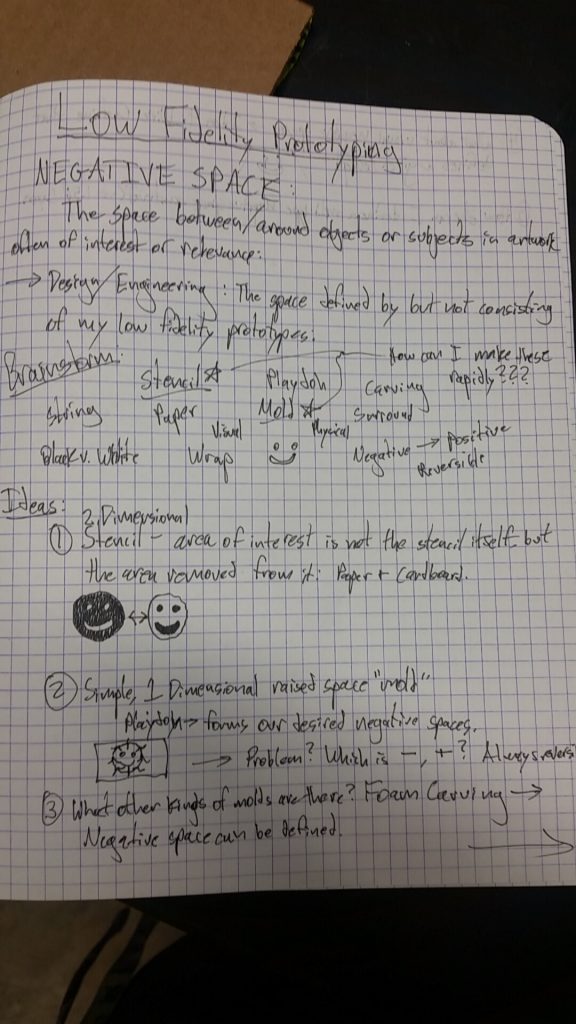
To brainstorm, I began by writing down all of the words and concepts that popped into my head, whether they be specific solutions, solution classes, prototyping materials, or something else entirely. I continued this process until I began to slow down, at which point I began crafting entire, complete solutions to the idea of negative space representation. IMPORTANT: One of my greatest realizations during this brainstorming was that negative space is used to produce positive space, and vice versa. The two define each other, and can be used to create one another, and so the majority of my pieces reflect this, as will be discussed for each model individually.
function model #1
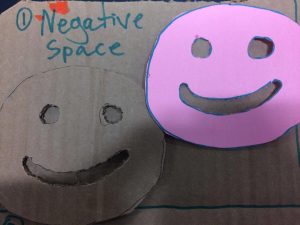
My first model is the simplest: a stencil. This was the first thought that popped into my mind, as it is a simple 2D object in which negative space is included (for the purpose of producing positive space elsewhere.) In order to prototype this model, I removed the area of interest (a smiley face, which became the subject of choice for all methods of representation) using scissors and an exacto knife, after tracing with pen. Given that I could not include two distinct materials in any conceivable way, I made stencils out of two materials, demonstrative the versatility of this technique.
function model #2
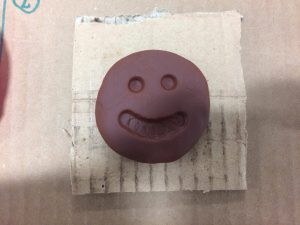
To me, simple 2 dimensionality is not the most riveting, and so I focused on the other word that cropped up early in my brainstorming process: ‘mold.’ A mold is truly the embodiment of negative space, a 3D object in which a very detailed area has been removed, once again for the purpose of reproducing the negative space as positive in an exact, precise way. In order to demonstrate my first model of a mold, I employed play-doh, indenting the material in certain areas using the end of my pen to implement the negative space comprising my subject, a smiley face. This mold is mounted on a second unique material, cardboard, which would allow the mold to be moved and used to take casts of other materials (though I doubt playdoh would hold up to much; we will see once it has dried). Of course, other materials could also be used to retain the external shape of the mold or provide external structural support. During the course of this exercise, I also found that malleable molding materials like play-doh provide the easiest, most precise, and most elegant method of introducing positive space into a prototype, a tidbit that may be useful moving forward.
function model #3
Moving on, my next thought was “what else can I remove material from to make a mold?” At this point, my eyes settled on the foam that is ubiquitous in the oedk. Grabbing a piece, I removed some of the material, creating a negative using an exacto knife (and safety glasses). At this point, I thought I had created another mold, but then I had an idea! What if I covered the end in ink? So I took it, sharpied the end thoroughly, then stamped it on a piece of paper. In doing so, the model transforms 3D negative space into 2D positive space (or negative space, depending on how you look at it) which I find quite interesting! Of course, the foam could also be used as a 3D to 3D mold if desired as well. Once again, negative space involves the removal of items, and so in this case multiple unique materials were not used. However, by incorporating ink and a separate piece of paper, multiple new materials are introduced in a more complex model, fulfilling the project requirements.
function model #4
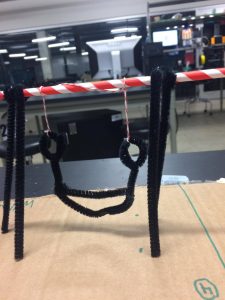
From there, I was out of normal ideas, so I tried to think outside of the box. Rather than using negative space to define something in a physical manner, I thought it would be interesting to prototype a visual negative space, but in a way different than just drawing outlines on a sheet of paper. Seeing various rapid prototyping items in the bins, I decided to construct a pipe cleaner outline of the same smiley, but one that is held up in a sort of miniature rope swing manner, using string, super glue, and a straw. When suspended, looking through the model allows you to identify the space that is defined by the prototype material, but consists of the outline background, thereby demonstrating negative space. Given its visual nature, this may be less relevant for more functional oriented prototypes, but I’m sure we can find a use for it!
function model #5
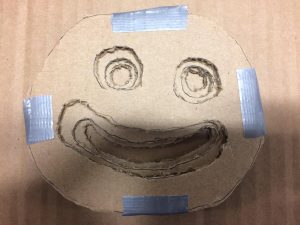
Last but not least, I decided to expand upon my first two ideas, mashing them together in a creative way. By merging a stencil (2D) with a clay mold (3D), I arrived at something halfway in between: a sort of 2.5D mold. This is composed of multiple stencils of slightly offset sizes, which when layered together, using the unique building materials of cardboard and duct tape, form a crude, low fidelity 3D mold with large step sizes. However, the intention is clear, easily demonstrating the negative space of the smiley face, and providing a 5th alternative for modeling this design function.
Summary
Overall, my most significant observations have been included above. One concluding thought though, is that you should not limit yourself to subtractions whet prototyping negative space. My first three models all featured the subtraction of materials to form the space, but this eventually lead to a mental block. Only when I realized that I could construct around the negative space, was I able to produce my last two ideas. Overall, I greatly enjoyed this process, and it certainly pushed my creative (and philosophical) boundaries!
