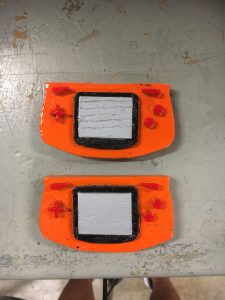
Final product
This assignment actually took much longer than I expected it to. Initially, I thought that all I had to do was find a cool shape to cut out, adjust a few settings in Easel, and wait a few minutes for the Carvey to do its job.

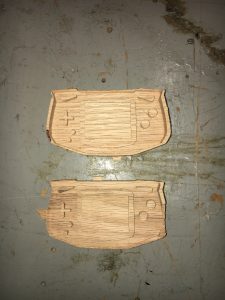
The Game Boy noun from thenounproject.com
However, once I downloaded my noun from thenounproject.com and imported it into the Easel program, I discovered that it would not be as easy as I thought. Once I imported the noun into Easel, the first thing I learned about the program is that it does extremely precise. By this, I mean that the program begins to run into issues when you try to CNC shapes that are really close to each other. For example, I had to move the buttons away from the screen area since the shapes began to merge in the program. Secondly, I had to delete the diagonal lines as well as the smaller circular buttons since they were so small that they were merging with each other rather than keeping their respective shapes.
Because the pieces of wood that we were working with were small (5.9in x 2.5in x 0.755in), this meant that we were limited to smaller designs rather than larger and more intricate ones. After preparing my design, I was ready to make my object on the Carvey, or so I thought.
I threw away my first attempt at making my Game Boy because I completely forgot to cut out the outline surrounding the body of the Game Boy. While I knew that there were two solutions to this problem, I decided to go back into Easel and copy-paste the frame of the Game Boy to surround the body, and then I set the frame to cut all the way through the wood. The first solution to the initial problem I had was that I could have simply cut out the carved Game Boy from the block of wood and then sanded down the edges to match the edges of the Game Boy. Personally, I do not think I would have liked how it would turn out, so I scratched this idea. The second solution to the problem was that I could have edited the easel design and added the frame while the wood block was still held down in the Carvey. However, in my eagerness to see how my first design came out, I took out the wood block and then made adjustments to the design on Easel, moving a few things around. Because I not only moved things around in Easel but also because I took out the wood block from the Carvey, I was not able to accurately add the frame to my design to fully cut out the Game Boy from the piece of wood.
Moving forward, I finished the Game Boy design in order for it to be completely cut out of the block and tried again.
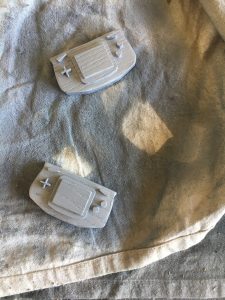
Game Boys fresh out of the Carvey
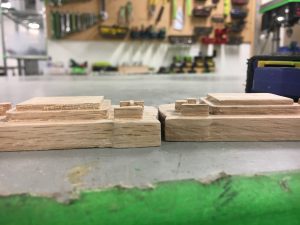
Above is the fresh cut-outs of my Game Boys, which each took 45 minutes. As you can see, there are wooden pegs on the sides of the bodies. This is a feature which Easel automatically adds once the user prompts that an etch will go all the way through the wood. This feature is useful as it allows you to cut all the way through the wood, yet it keeps it in place so that the piece does not move around as the drill does. Thus, once the cut is completed, all you have to do is pop out the larger piece of wood from the block of wood by breaking off the four small pegs on the sides. In order to make sure that they were cut all the way through, I would have to stop the process once it began to cut the edges, switch the bit to a larger size, and then resume the process.
Cleaning up the edges with sandpaper. Before is on the left, after is on the right.
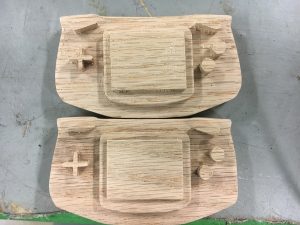
The next step to completing my pieces was sanding down the edges and the frame of the Game Boys. I first took off the frame of each piece of wood with a pair of pliers, where I then used the belt grinder to smooth out the faces of each block. After removing the excess framing and splinters, I used fine grit sandpaper in order to get in between the cracks of the screen and the buttons. This served to clean up the sides of each feature on the Game Boy. On the right, there is a picture which illustrates before and after using sandpaper to smooth out the sides of the features. You can see that the excess pieces of wood have been removed, leaving a nice a smooth surface.
Before (top) and after (bottom) sanding down the edges
After sanding down the wood, the only part left was spray painting the pieces so that they look like actual Game Boys. To do this, I would use tape to cover pieces which I did not need to spray paint a certain color and repeat this process for all the colors until I had reached my final design.
Spray painting the screen

Using tape to cover the screen
First I decided to spray paint the screen a metallic grey color. To do this, I simply spray painted the screen without any worry of spraying over the rest of the wood since I knew that I would eventually spray it over with another color. After waiting for it to dry, I then taped over the screen so that I could spray paint the rectangular part which the screen is on top of.
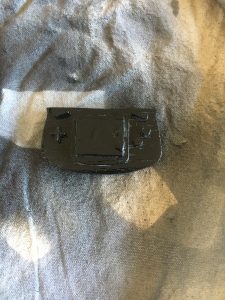
Painting the black portion of the screen
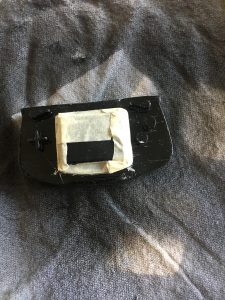
Covering the black portion of the screen
Following the same process as before, I then spray painted the entire wood pieces black, not worrying about painting over the screen (since it was covered in tape) or the rest of the wood (since it was going to be painted with another color). After this, I covered the bottom portion of the screen in tape so that I could spray paint the rest of the body.
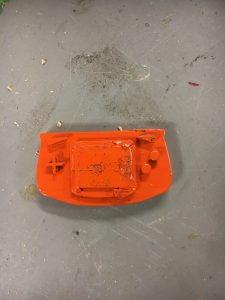
Spray painting the body of the Game Boy
After taking off all of the tape
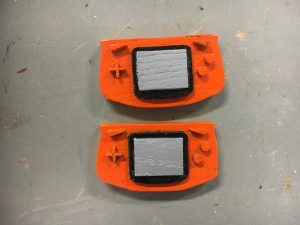
Once I spray painted the body orange, I was finally done spray painting. After letting the orange paint dry, I was ready to see what my final product would look like. Eager, yet nervous, I used an exacto knife to peel off the multiple layers of tape which were covered by multiple layers of paint. Although the paint job was not perfect, I was happy with the result after all the time that it took to obtain what I had gotten. The only thing left was giving the pieces a final touch by coloring all of the buttons red and applying a clear protective coat.
Final product
I learned many things from this assignment. The first was that you have to make sure that every etch and depth makes sense. I know that I struggled with this for a bit because it was hard for me to visualize what something would look like after you remove material from it, rather than when you add material to it. The second thing that I learned was that the smaller bit size you use on the CNC machines, the longer that the process will take. Each piece took me 45 minutes to cut out. I recommend that you bring some homework with you that you may work on while your pieces are being completed. Lastly, I learned that it is hard to accurately spray paint an object using tape. It is very tedious having to place tape on top of every layer and then making sure that it lines up exactly where you want to cover certain areas. If I were to do this again, I probably would use regular paint and a paintbrush. At the end of the day, I am very satisfied with how my Game Boys turned out, as they bring back amazing childhood memories.
