I found this to be pretty easy. All we had to do was make a mold of our finger and then a model of it. We got to use some materials that I have already used for sculpture class, like plaster and alginate, so that was nice. I found it to be pretty fun.
So first I had to make a negative of my hand, so I did this by using alginate. I do not enjoy mixing the alginate up, it reminds me of the orthodontist and how she made molds of my teeth… ugh. *shudder*. So I did that in the smaller mixing container, and then stuck my hand in. I put my hand into a position that I thought would work well for mounting on a wall. But I did more of my hand than I probably should have. I know we were told not to do our hand, but I thought it meant entire hand, and mine is only a partial hand. I learned later than I probably could have, and should have just done one finger in a small disposable cup, so it would use a lot less material. Moving on, putting my hand into the alginate was easy and it solidified rather quickly, just a few minutes. Then I got to pull my hand out of the damp mold and I got to clean off.
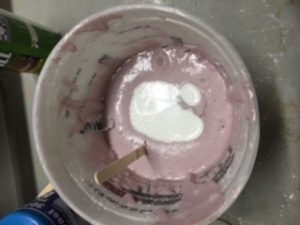
Then I had to make the positive of my hand. So in the class demo, we used plaster, but I decided to use Mold Cast 300/300Q, which is plastic and is more durable than plaster. The plaster breaks easily, and would probably not handle getting mounted into the wall well. The instructions on the bottle are strange, it said to shake the bottle well before opening, and then also to stir it as well. So I did that and then I followed the rest of the instructions to mix it. So I poured it into the mold, and it took less than a minute to set and harden, so that was nice. One thing that I learned is to mix the Mold Cast 300/300Q in disposable containers, so it is easier for clean up. For my first try, we asked lab techs where we could get a cup and they pointed us in the direction of the wet lab and beakers, so we used that, and then cleaning them was very difficult in the end. Thanks lab techs.
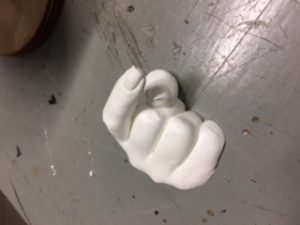
So I think the mold turned out pretty well. It has a few little marks that I don’t like, but I did not want to use any more material, so I just went with it. There was a big bump on the finger, and so I sanded that down and I sanded down the nails a bit to smoothen them out. When I made the mold, it was very detailed and got the indentations from my nail polish on them, so I sanded that down to be more normal. Then I gave the half hand a manicure. So it’s all purrty.
But it was really fun to demo the different materials in class, like Oomoo and see the other materials as well. I like the Mold Cast 300/300Q, it is rather simple. I think the hardest part about using it was trying to get the cap off of Part A because it was really stuck on there. Which is important, because if you shake the bottle, and the cap is a little loose, then liquid will start coming out.
One thing I noticed is that after I pulled the half hand out of the mold, it felt a little greasy, like maybe a little left over material from Mold Cast. I had to eyeball the proportions to where Part A was equal to Part B, so it could be the excess of one of those that I felt. But I wiped down the hand and let it dry a bit because it was really hot (temperature wise) when I pulled it out. So I let it sit and cool off in a paper towel so it would not feel greasy anymore. Another useful thing would have to known the volume of Smooth Cast I would need to fill the mold, because originally I was just going to fill the finger, but I just did my whole hand, and then I guessed on the volume, and I had mixed enough to do the half hand. So I think knowing the volume of just one finger would have helped and made things a bit easier and all.


