So the first step to learn how to box like Mayweather was to learn how to run away from my opponent. For inspiration, I watched the Pacquiao and McGregor fights on repeat… (My apologies for the terrible joke. I couldn’t resist.)
Actually, the first step of learning how to box was to go on https://makeabox.io/ and set my box dimensions. I decided to make a box with nice and simple 5”x5”x5” inner dimensions. Using the one pair of functional calipers outside of the laser cutting room, I measured the thickness of my piece of wood to be approximately 5.1 mm. The wood varied by up to 0.1 mm from place to place, but the measurement seemed to most consistently be around 5.1 mm, so I went with that value. For my first, I kept the kerf setting at the default of 0.0024 in because I just kind of assumed it was right enough. Once I set all my dimensions, I downloaded the PDF, adjusted it to be proper shapes and have the right stoke, and saved it to my flash drive.
However, before I could get to cutting my box, I had a lot of messing around with the laser cutter to do in the name of learning. Josh and I started of with an engraving from the Binding of Issac that turned out remarkably well given our inexperience. 
From there, things went downhill for a little while. First, I believe we tried to cut and etch and Rice war owl that turned out pretty horribly. We definitely did not follow proper procedure when it came to colors and stroke in the Illustrator file. We then spent a while trying to come up with various nerdy things that we could easily image trace in Illustrator. After a slightly unreasonable amount of time, we finally decided to cut and etch a Triforce from The Legend of Zelda series. The first set of cuts (the two on the left below) actually went pretty well. If I remember correctly, we cut the first two at 6% speed and 100% power. After those cuts, we tried experimenting with the cut by slightly raising the speed to 7% to see if we could get cleaner edges. This did not work… at all. As you can see on the right in the image below, the Triforce didn’t cut out at all with just a 1% speed change.
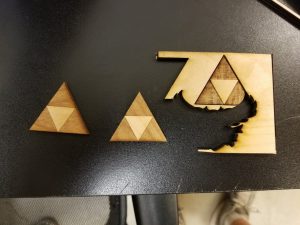
6% speed cuts for the two on the left. 8% speed cut for the one on the right.
After various other tiny cuts that failed to fully cut, we decided that 6% speed was the absolute minimum at which we could reasonably hope for the object to actually be cut out. Realistically, we decided that we needed to be around 4-5% with our cutting speed despite the face that it might make the edges look slightly more charred. Once we came to this conclusion, we called it a day.
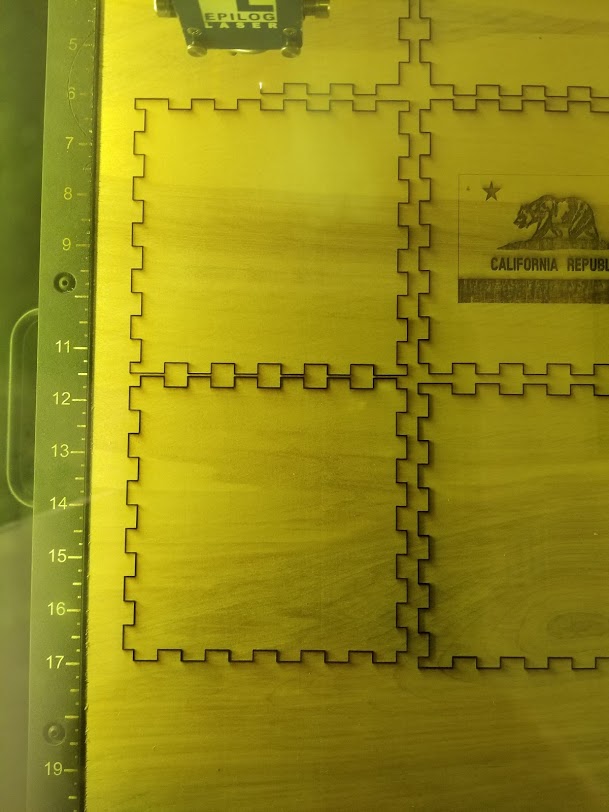
A couple of days later, we came back and got to work again. To test our new cut settings, I decided I wanted to cut a Californian flag because I may or may not be a addicted to Californian stuff and may or may not need an intervention. Anyway, I found a high quality image of the Californian flag online that vectorized really nicely in Illustrator. Due to the complexity of the bear, the cut itself, despite not being super huge, took nearly fifteen minutes. Luckily, I was very happy with the way the cut came out. 
Satisfied with the cut and raster settings, I put the flag on one side of my box and the proper text on the other side of the box and ran the job. The cut ran nicely with only one small corner not cutting all the way. Unfortunately, since I didn’t adjust the kerf setting, the box fit together loosely, and didn’t hold together well if it was moved excessively. If you look closely at the top left edge in the below image, you can see that there is some gap in the edge from the side falling off. I also messed up which sides I put my engravings, making them on adjacent sides rather than opposite sides.
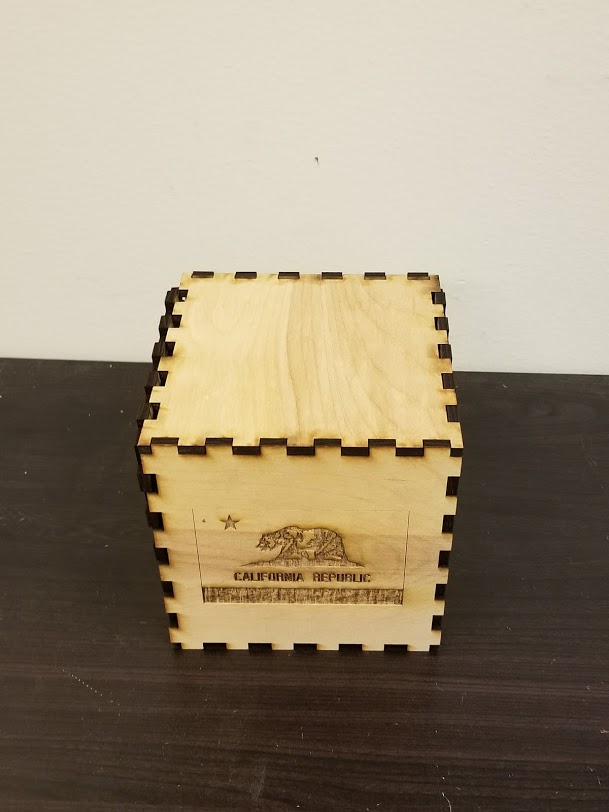
The first attempt at the box.
Given the failure of the first box, I went back to https://makeabox.io/ and adjusted the kerf setting from 0.0024 inches to 0.0070 inches based on a suggestion from Josh. Although, the magnitude of the change in kerf was tiny, the change made a huge difference. When I re-cut the box (with the engravings on opposite sides this time), the box fit together very snugly. So snugly in fact that in one or two spots, I was wishing that I hit the gym for arm days more. Once I had the box assembled, I sanded it with very fine sandpaper to get rid of the slight roughness to some parts of the wood. (Side note: While I was sanding the box, I was actually locked out of the laser cutting room and by extension the rest of my belongings because the laser cutting room had switched to after-hours security while I was in there without me noticing. When I stepped out for a second after my cut was finished to tell someone something, I found myself tragically locked out. Thank you Dr. Wettergreen for saving me from that situation.) Anyway, once I had sanded the box, I was done! One interesting note about the box is that the wood I used for the second cut must have had some hollow parts of the inside because there are some random holes in the tabs on what would have been the inside parts. Also, at the bottom of the letters in “Republic” there are some spots where the laser appear to have broken through a thin top layer to reveal a hollow layer during the engraving process.
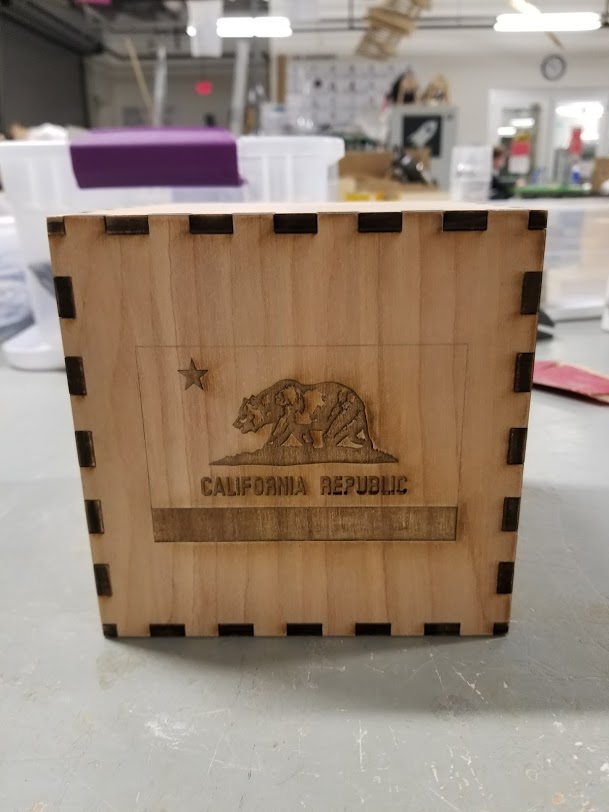
My final box.
The sandpaper I used to smooth the final box.
Just a cool mid-cut photo. You can somewhat see the laser working in this still shot.
– Nick
