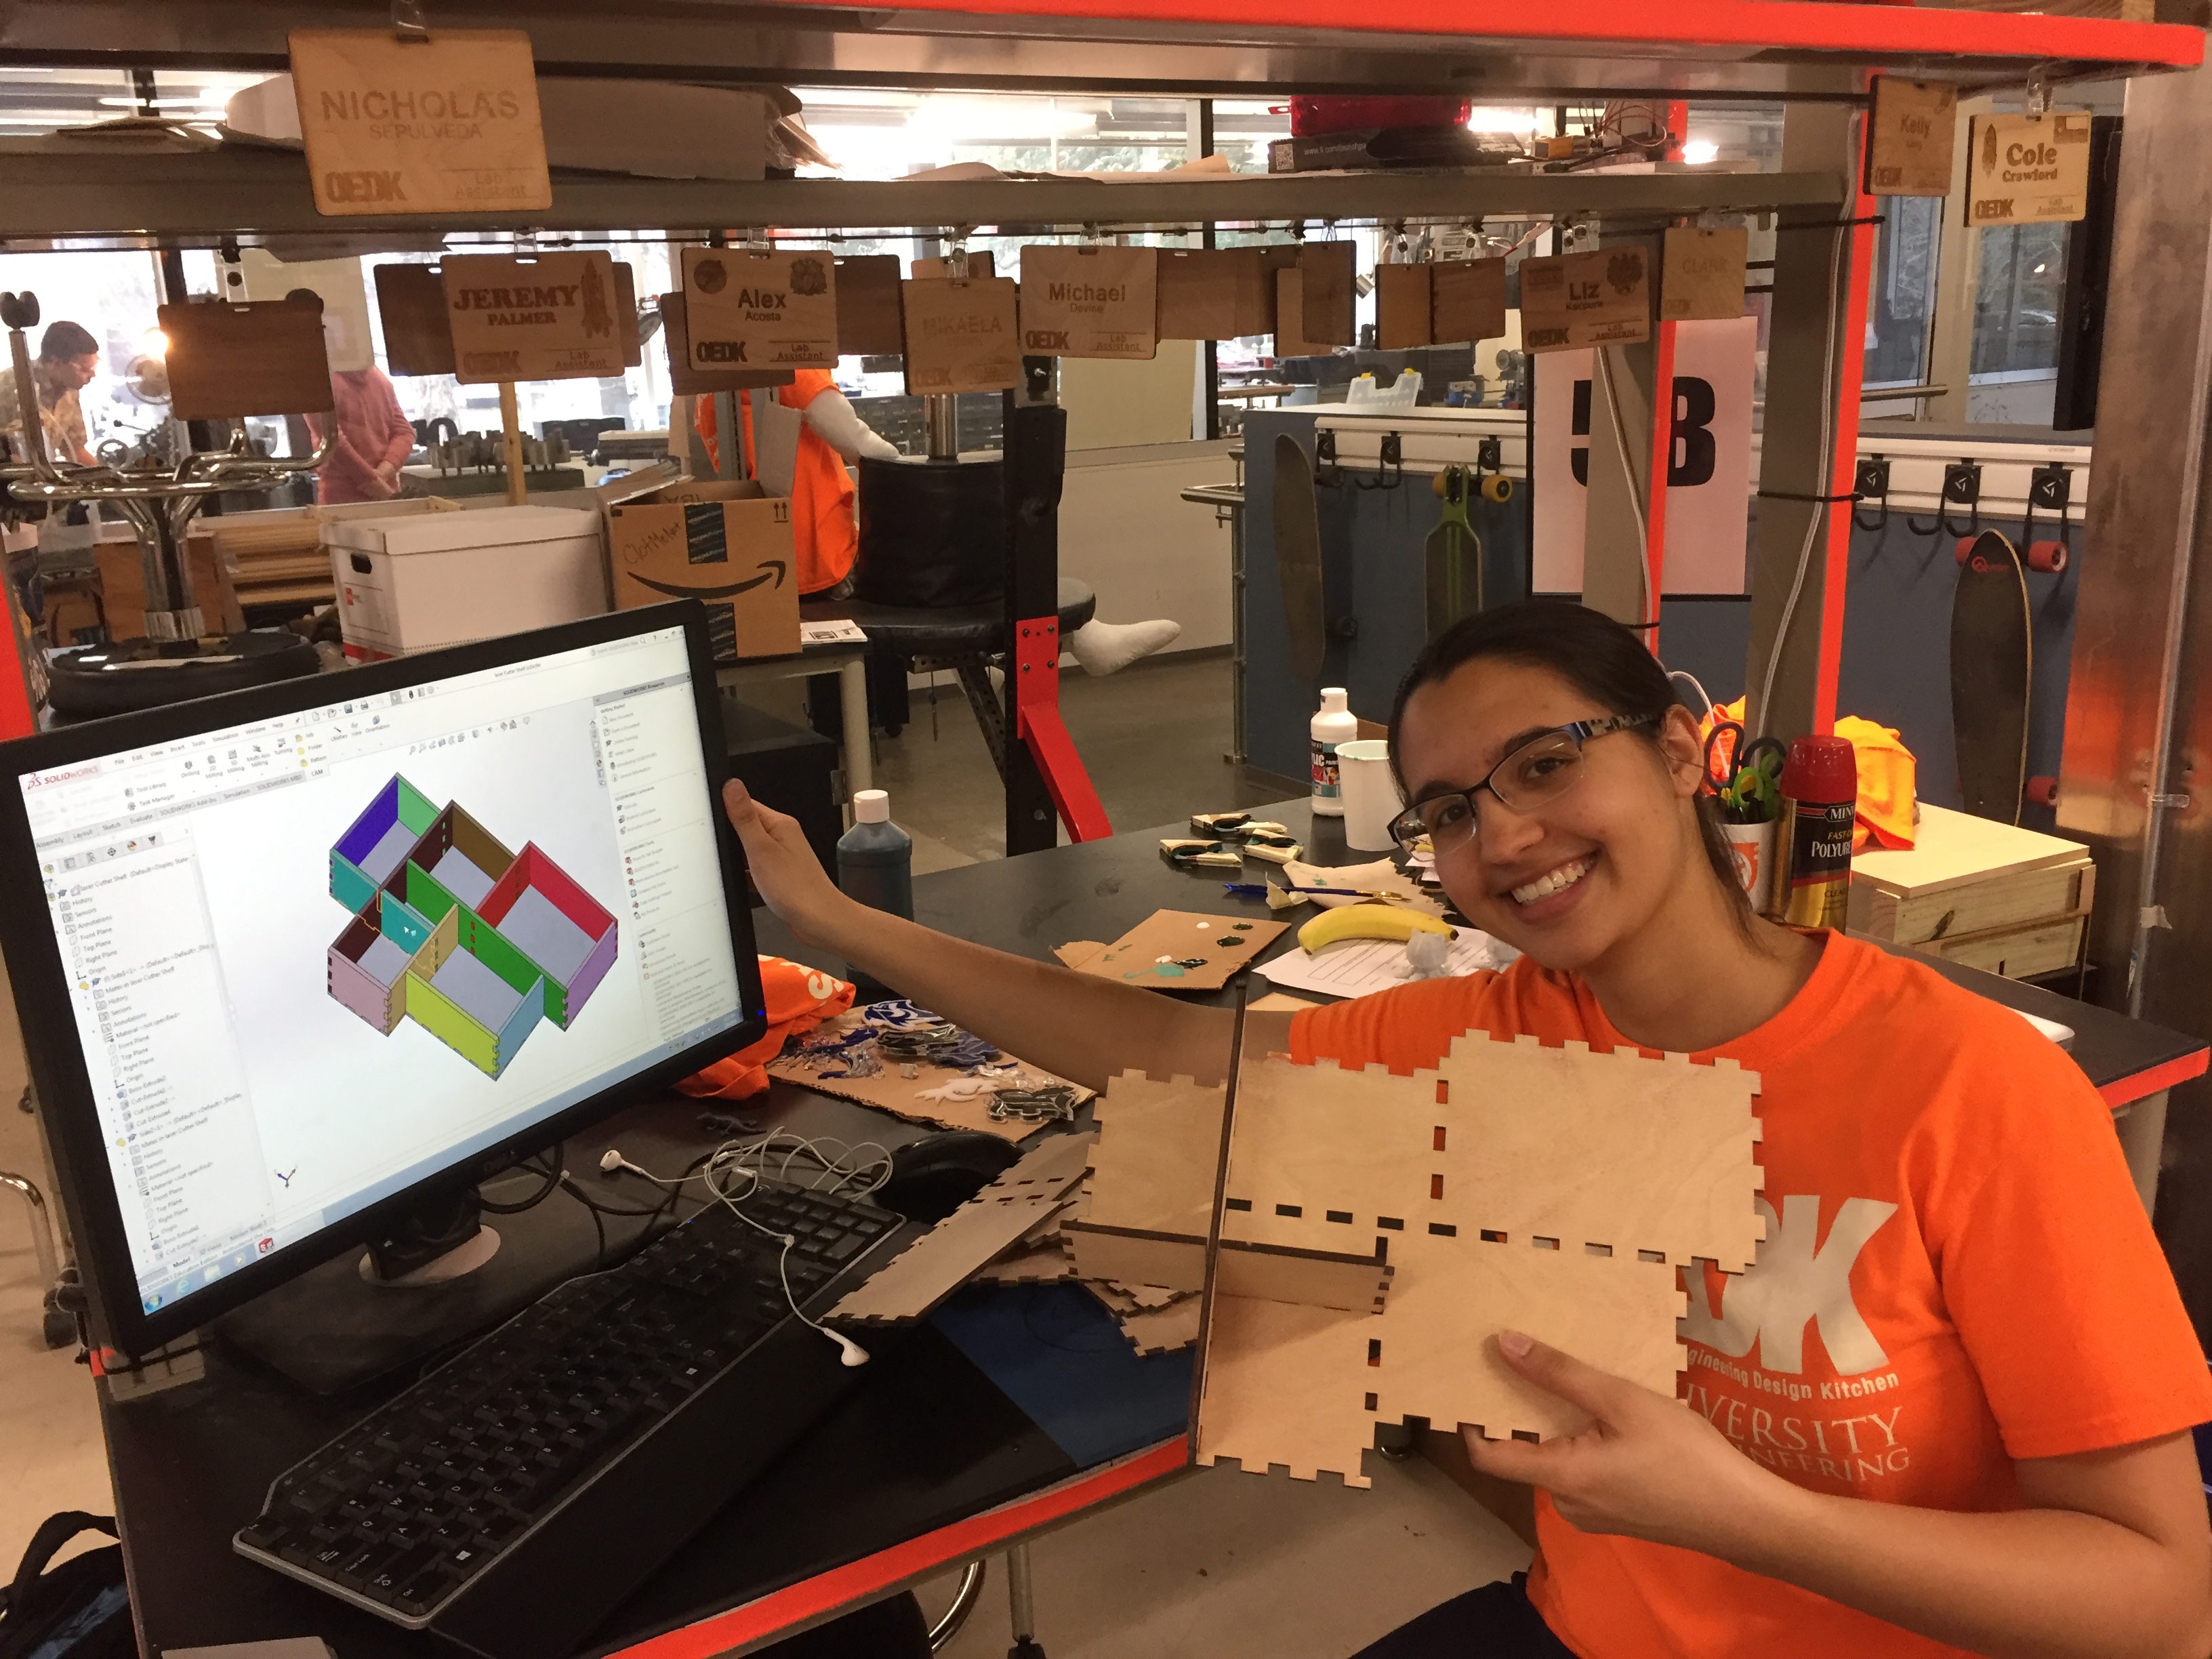
When Dr. Wettergreen asked each of us to tell him our experience with the laser cutter, the only thing I could do was look him dead in the eye and deliver possibly the biggest understatement ever uttered in ENGI 210: “Yes, I’ve used the laser cutter before.”
Because I know that he knows that I know how to use the laser cutter. He knows that I feel most comfortable on the laser cutter out of everything in the OEDK. He knows that I enjoy making random personal projects like earrings and picture frames on the laser cutter when I have free time. He may not know that my ultimate goal is to replace Mikaela as the Laser Cutter Queen once she graduates, but um, that’s also a thing.
So instead of wasting my time by having me cut another box, he decided to give me a more difficult challenge: Build a complicated box with internal walls and compartments. Most of my first semester of ENGI 120 was spent fighting with building internal walls in Illustrator, so I knew that this was going to be a somewhat difficult project. That being said, me being me, I decided to make my box even more complicated by building the entire thing from scratch with offset compartments instead of starting with a rectangular box and dividing it internally.
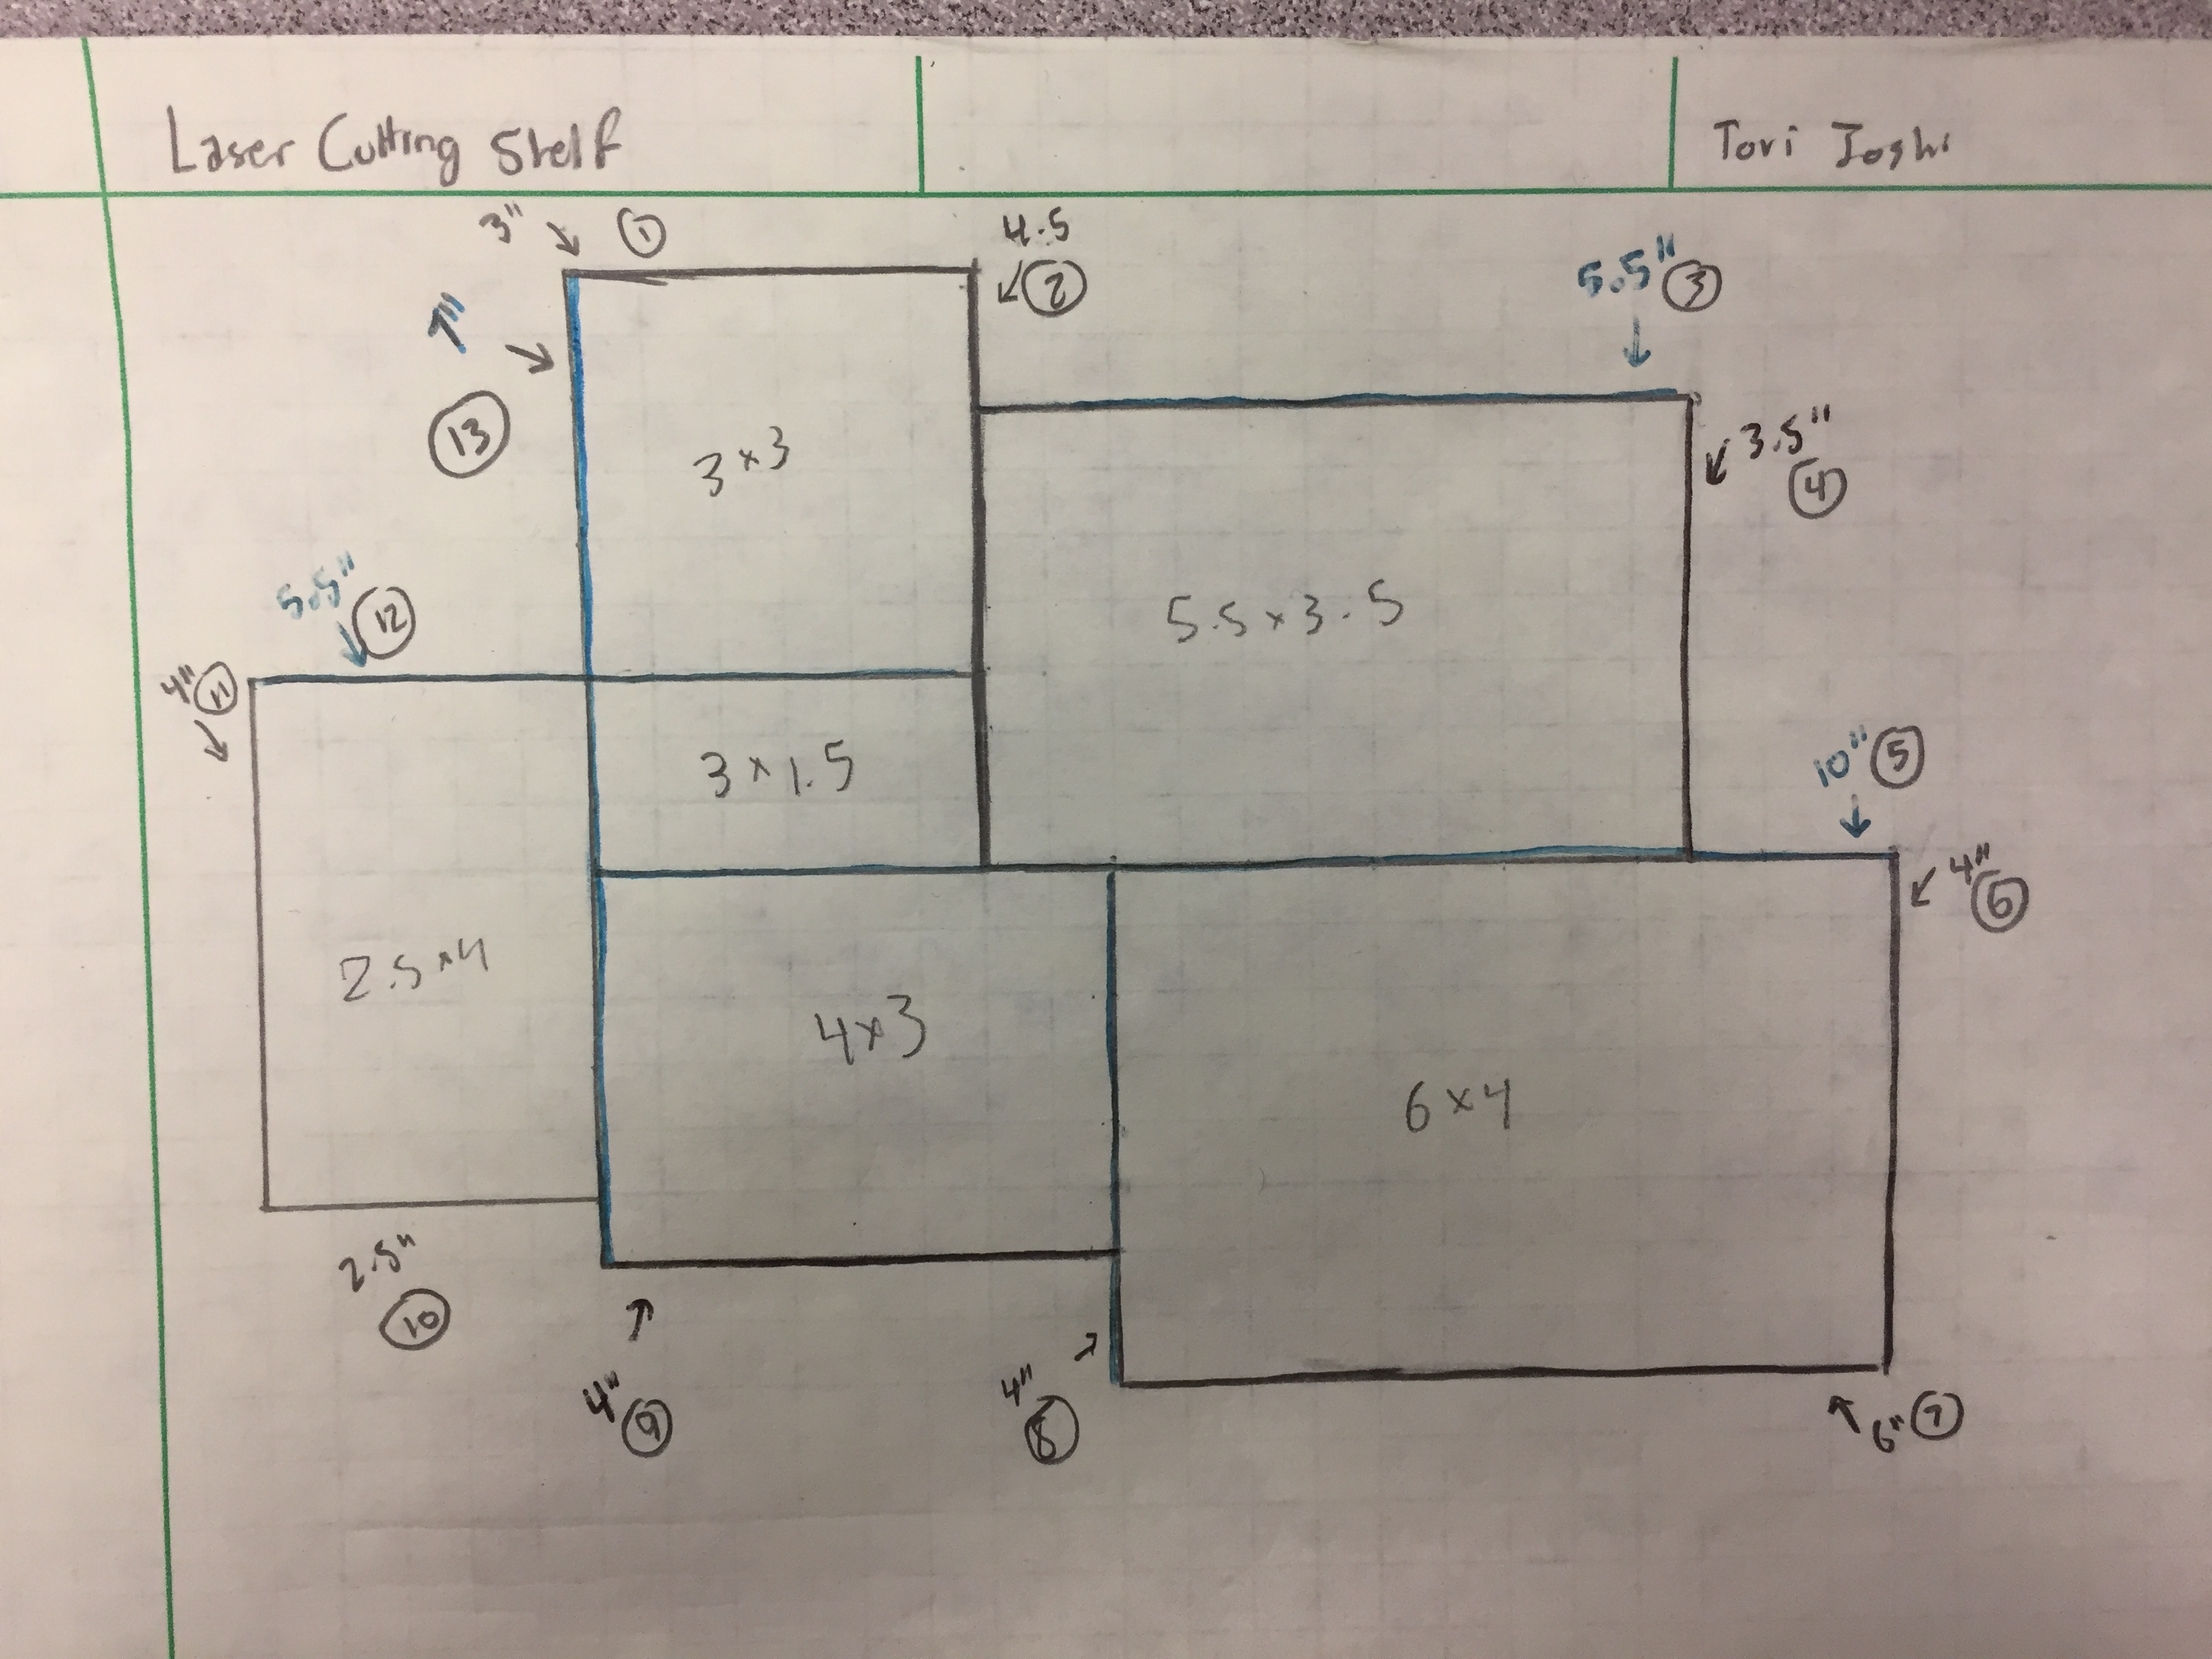
Hand-drawn sketch of my Box
Remember when I made that comment about my hubris getting the better of me? Yeah, we’re getting to that.
So I started designing the box in Illustrator before realizing that mentally attempting to visualize these sides and measure out these teeth without having a visual guide was going to absolutely suck, so I quickly switched to Solidworks. Why would I have done that?
A) It has Smart Dimension capabilities and Illustrator does not
B) Its Assembly feature actually allows for 3D modeling
C) I’m learning Solidworks for another class and am really excited about using it.
D) All of the above.
If you guessed D, you would be right.
I verified with Jeremy that it was fairly simple to remove overlapping material within an assembly, so I could go through and fairly quickly draw the teeth I needed to fit the piece together.
“Fairly simple” is the key thing here because my design called for 13 different wall pieces, all with slightly different sizes. It was pretty simple to start the design because all of my walls were merely rectangular prisms with specified dimensions, so making those was a cinch. The difficult part came with trying to assemble the parts into an assembly. I was not smart in defining the directions and axis for the assembly, so the entire assembly ended up upside down and backwards from what I originally intended. I was still able to work with it by manually moving the camera when I needed it, but it did make my work a bit more frustrating.

Assembling the sides of my box together
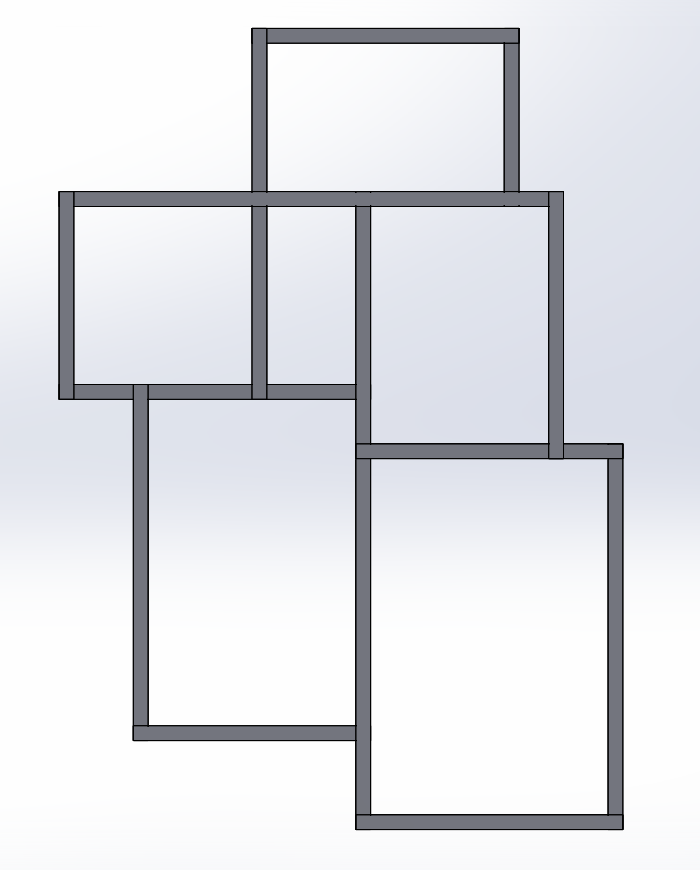
The walls are mated together! Notice the very different orientation from my original drawing.
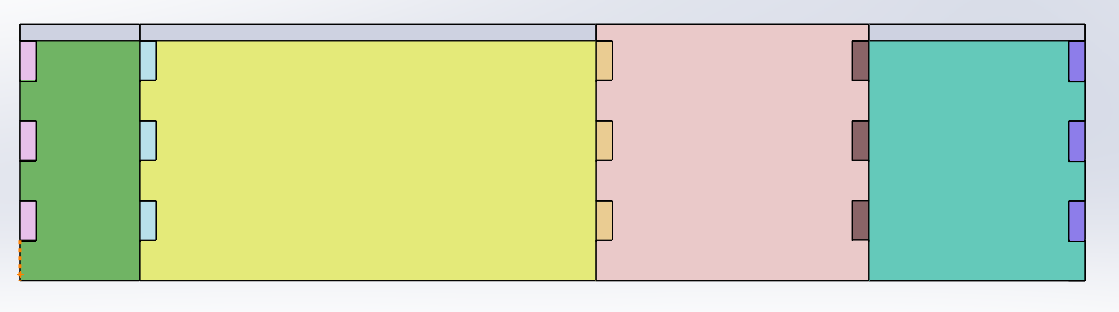
Now, I actually had to create the bottom, which was going to prove a little more difficult. I designed a basic shape for the base in Solidworks, and then armed with my diagram, the Smart Dimension tool, and a calculator, I was able to determine what size the bottom face needed to be to fit perfectly on the box by adding together the compartment sizes and the wood widths.
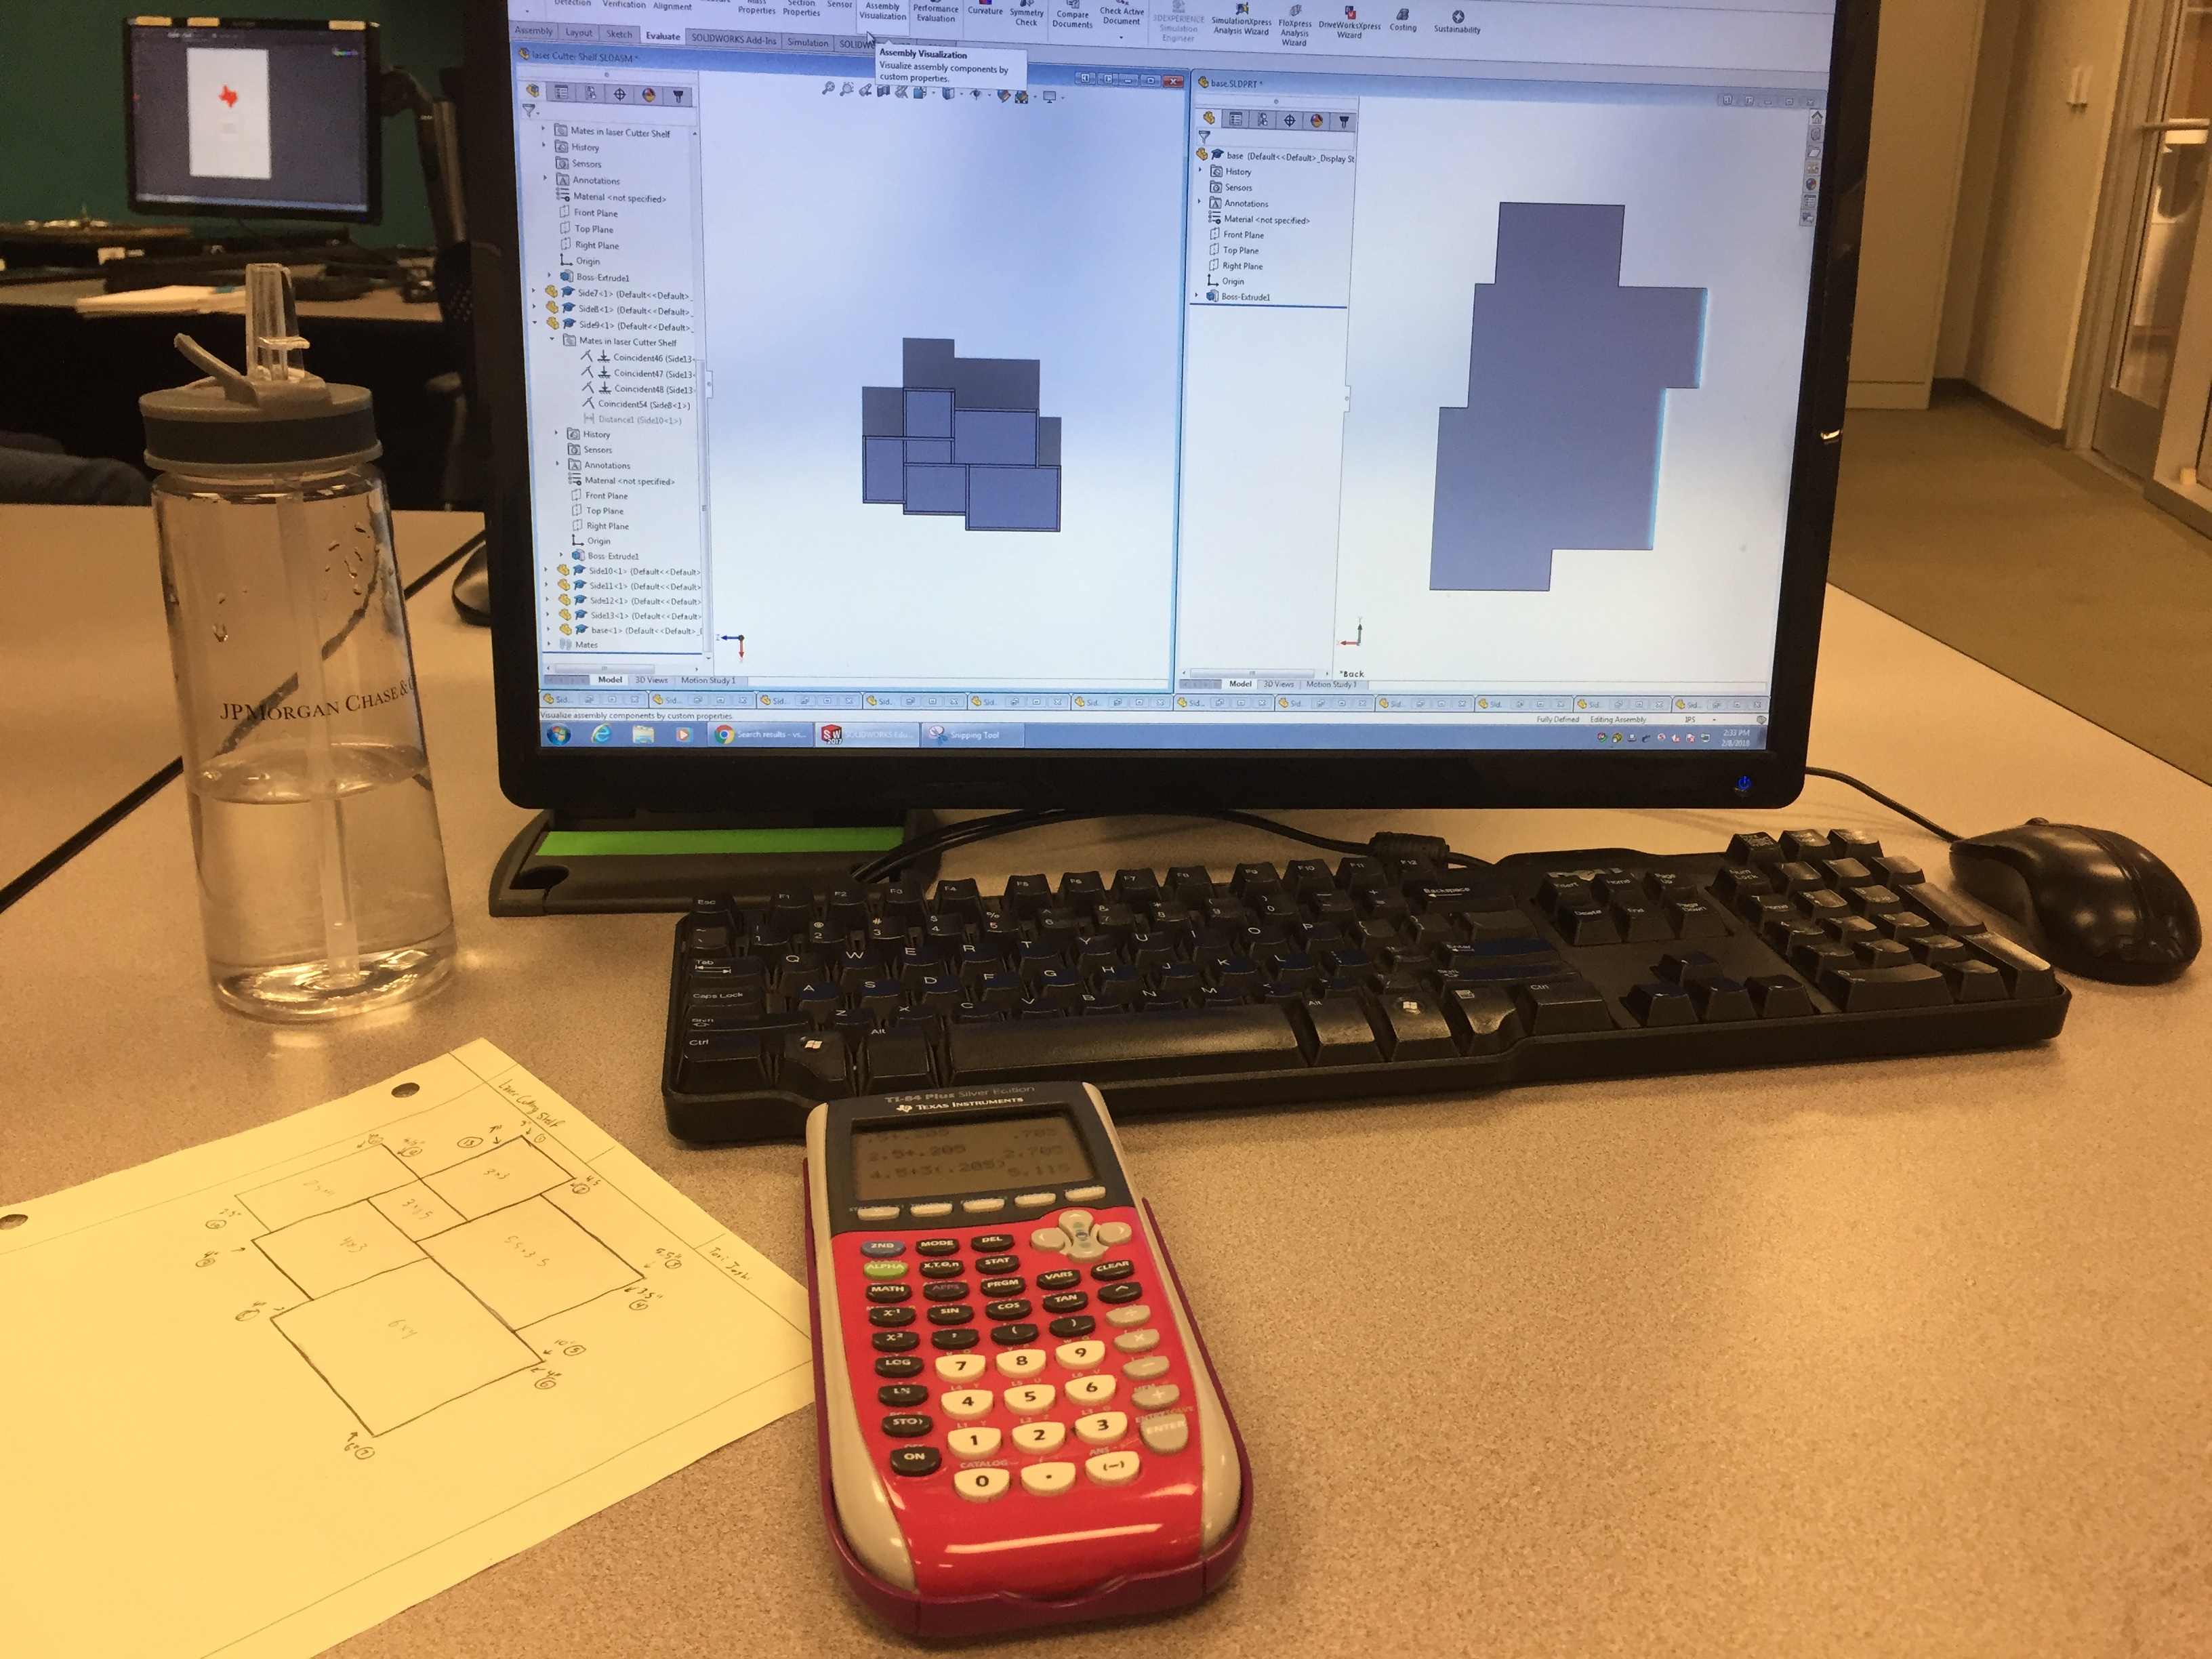
Calculating the base dimensions
The base is completed! Now for the difficult part…
Now that the base was completed, I needed to add fingerjoints to the design so that the pieces would actually fit together in physical space and not just awkwardly and impossibly overlap each other. I had originally assumed the wood was .25″ thick (because it is 5 mm thick and I thought that would have been close enough), so I made all my finger joints .25″ long to make them a lot easier for my mind to work with when creating them. However, I realized quickly that was too much work to calculate for who knows how many joints and also that Dr. Wettergreen was definitely going to scold me for using such small finger joints when they weren’t necessary. After seeing a cut that assumed .25″ thick wood, I decided that it was not precise enough for my taste because the wood did not fit together seamlessly. So, I remeasured the width of the wood that Dr. Wettergreen had grabbed and learned that the wood was actually .205″ thick, which is enough of a difference to have a significant impact.
So I went back, changed the thicknesses of all my wood, and redrew my cuts to use finger joints .50″ long because the .25″ didn’t work anymore anyway and “.50 would save me about half the work. I had spoken to Cole about how he was planning on making his box press-fit, and he told me to overlap the holes a little to make up for the kerf of the laser cutter. So following his advice, I made the tabs .01″ wider than the holes they stuck in so that there would be enough extra material that the box could stick together without adhesives (so my holes were all .49” long and the tabs were all “.51” long).
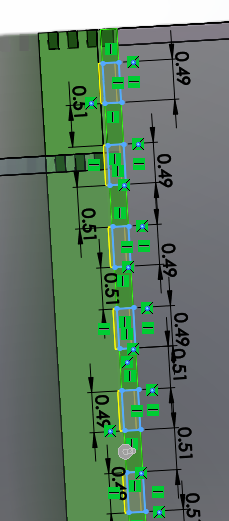
Dimensioning the Finger Joints
I made a test cut to ensure that it would work, and although I had to file down the tabs a bit with some baby files I found in Joe’s drawer, the two pieces stuck together really snugly. I should have probably readjusted my values a little after that so I could have gotten the teeth to fit without filing, but I stupidly believed that filing would be a necessary evil if I wanted the box to be press-fit. So I went ahead and began designing and applying the finger joints to all of the overlaps in the box.
There were a lot of finger joints to design. And for a lot of them, I couldn’t really tell how much / in what direction the cuts were overlapping between walls, so I started guessing how much to offset the cuts in an effort to keep them relatively centered between walls. I also was having a hard time telling the box walls apart from each other, so I changed the colors on the digital mode of the box so the walls were all different colors and I could easily tell where teeth were overlapping.
It was about halfway through this process that I started questioning the majority of my life decisions.
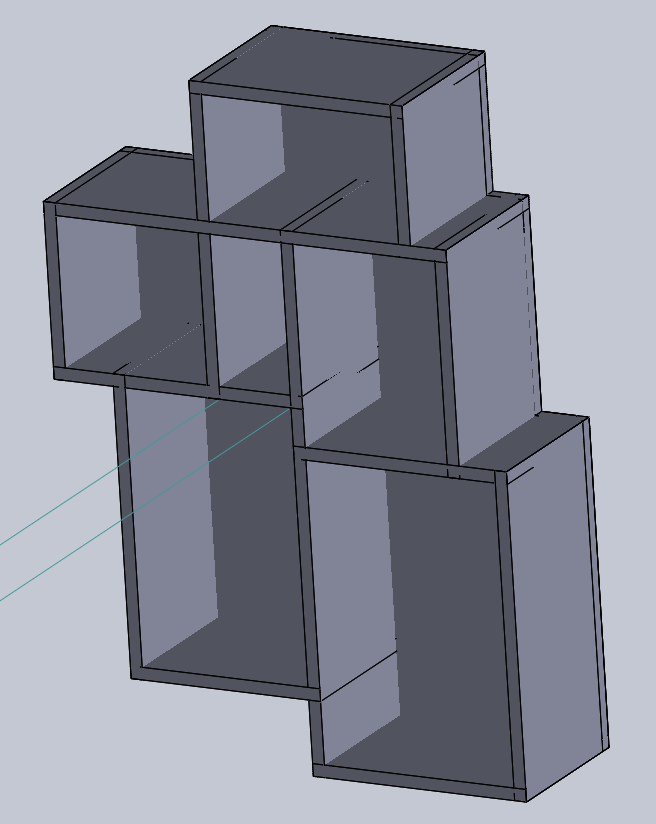
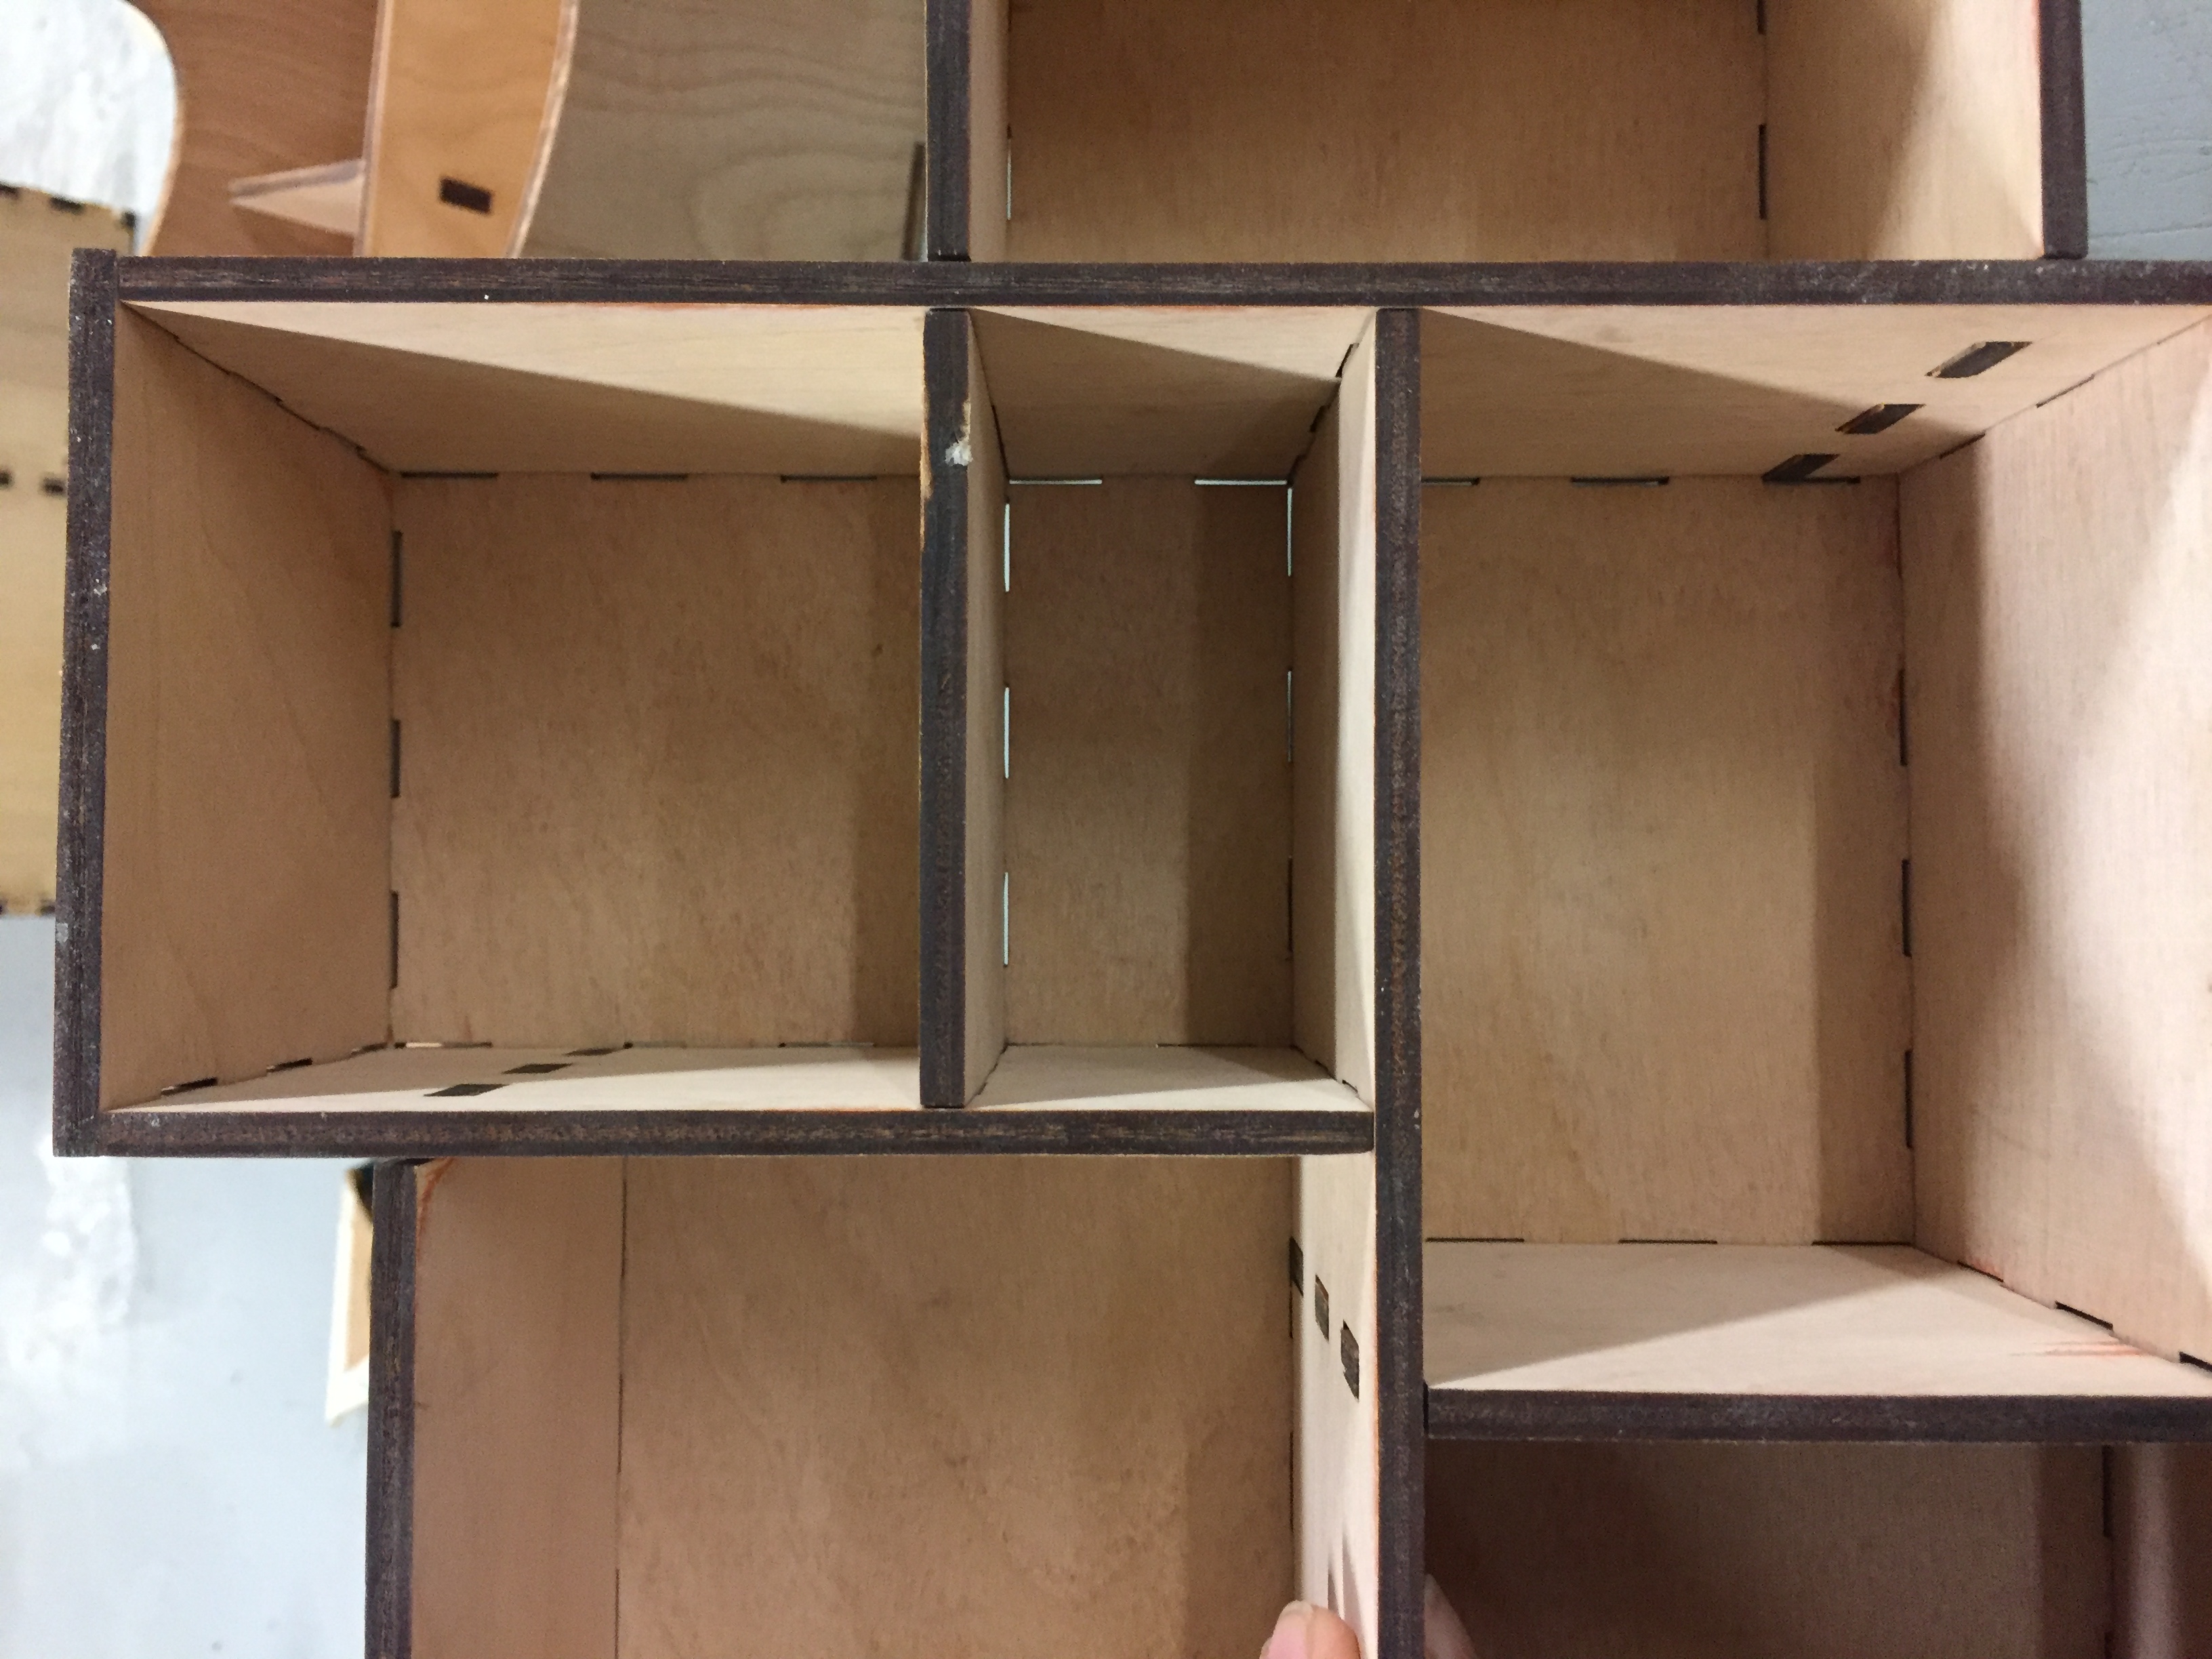
Side view of box model after manually cutting out finger joints
Side note, let’s take this opportunity to marvel at the fact that apparently Dr. Wettergreen built an entire open-source website with patterns for interesting laser-cut joints? I have one four-way intersection in my design, so I was able to dig through the prototyping library on the laser cutter room wall (which I had never really ever looked at before) and find some cool ideas for overlapping walls. I originally wanted to create a non-removable snapjoint for that intersection, but I ultimately decided that would be too complicated and designed a lap joint instead. It was way easier, and even if that particular joint wasn’t press-fit, all of the other ones were, so it would stay in place.
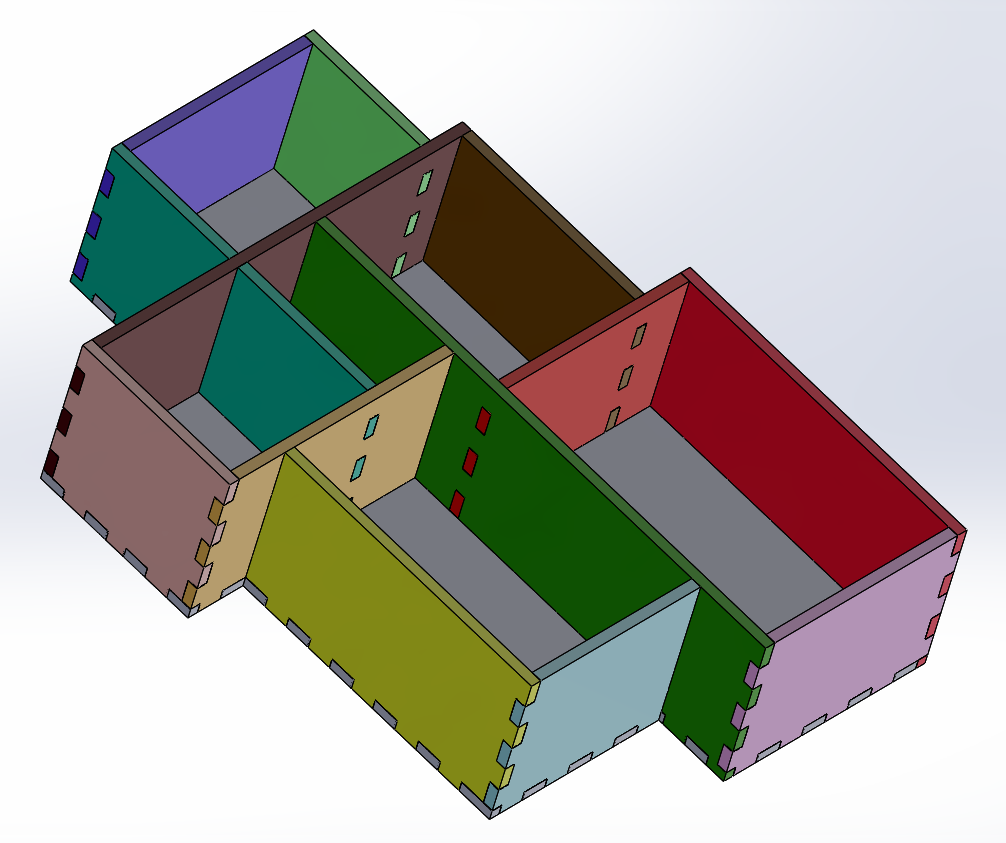
Finished, cut, colorful box! Yay! … Except now I have to actually build it.
Finally, after several hours of staring at Solidworks in the OEDK computer lab, I was ready to cut out my box. I was fairly confident in my work, but with a project as complex and somewhat imprecise as this, I was kind of just hoping for the best.
I was able to port all of my pieces into Solidworks drawings, save those as a PDF, and then pull the lines off those PDFs in Illustrator to create a template for cutting the box on the laser cutter.
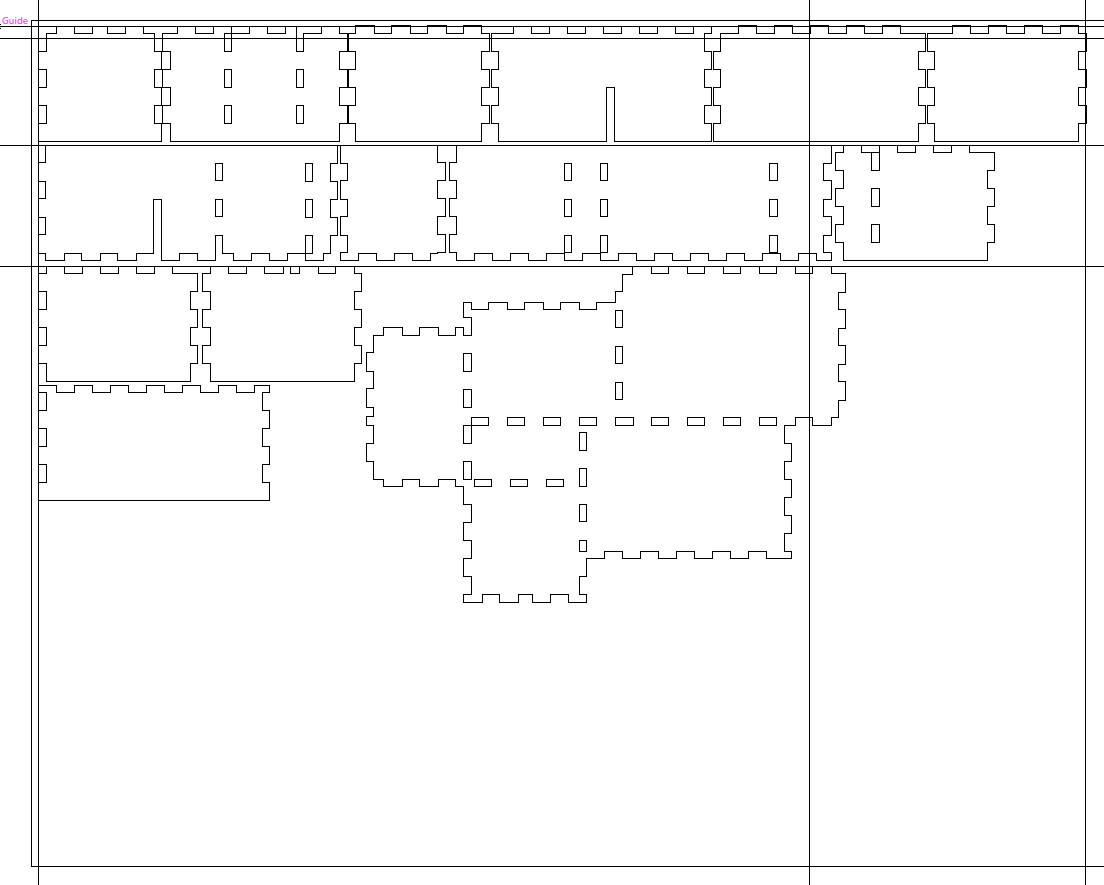
Template for my box in Adobe Illustrator
For this being an exercise in laser cutting, prepping and executing the cut was the easiest part of the whole project. In my year and a half of experience with the laser cutter, I have never found the settings for a so-called “perfect print” because the laser either doesn’t cut all the way through, or the wood ends up burnt. Or worse, both. I really admired Josh’s Mario box, and he told me the settings he used for it (5 speed, 100 power, 10 frequency), which is roughly what the sign in the laser cutter room says to use. So I decided to go with the setting that Josh recommended because his cut came out a really nice color and, to my knowledge, they sounded reasonable.
The cut only took about 16 minutes, a fact that pleasantly surprised me because I have definitely done 2-hour cuts with the laser cutter before (in my defense, there were a lot of really small parts being cut from a really large piece of wood). I actually used that time to fill out my Make48 competition application, which is essentially a 48-hour prototyping Hackathon that the OEDK is trying to build a team for. Do I get bonus points for filling out the application in the laser cutter room?
So Josh’s setting turned out fairly well. The pieces were a nice golden color, and the majority of pieces were easy to remove from the wood. (A few of the internal holes didn’t remove that easily, but that usually happens so I paid it no mind). However, when I turned the wood over, it was pretty scorched, so I decided to sand down the wood a bit. I clamped down the pieces on the Tool Table downstairs and used the orbital sander to sand the scorch marks off the surface of the wood.

Ready to sand the pieces for my box. Alex is in the background, laughing at my excessive use of clamps. Yes, the ones on the other table are also mine).
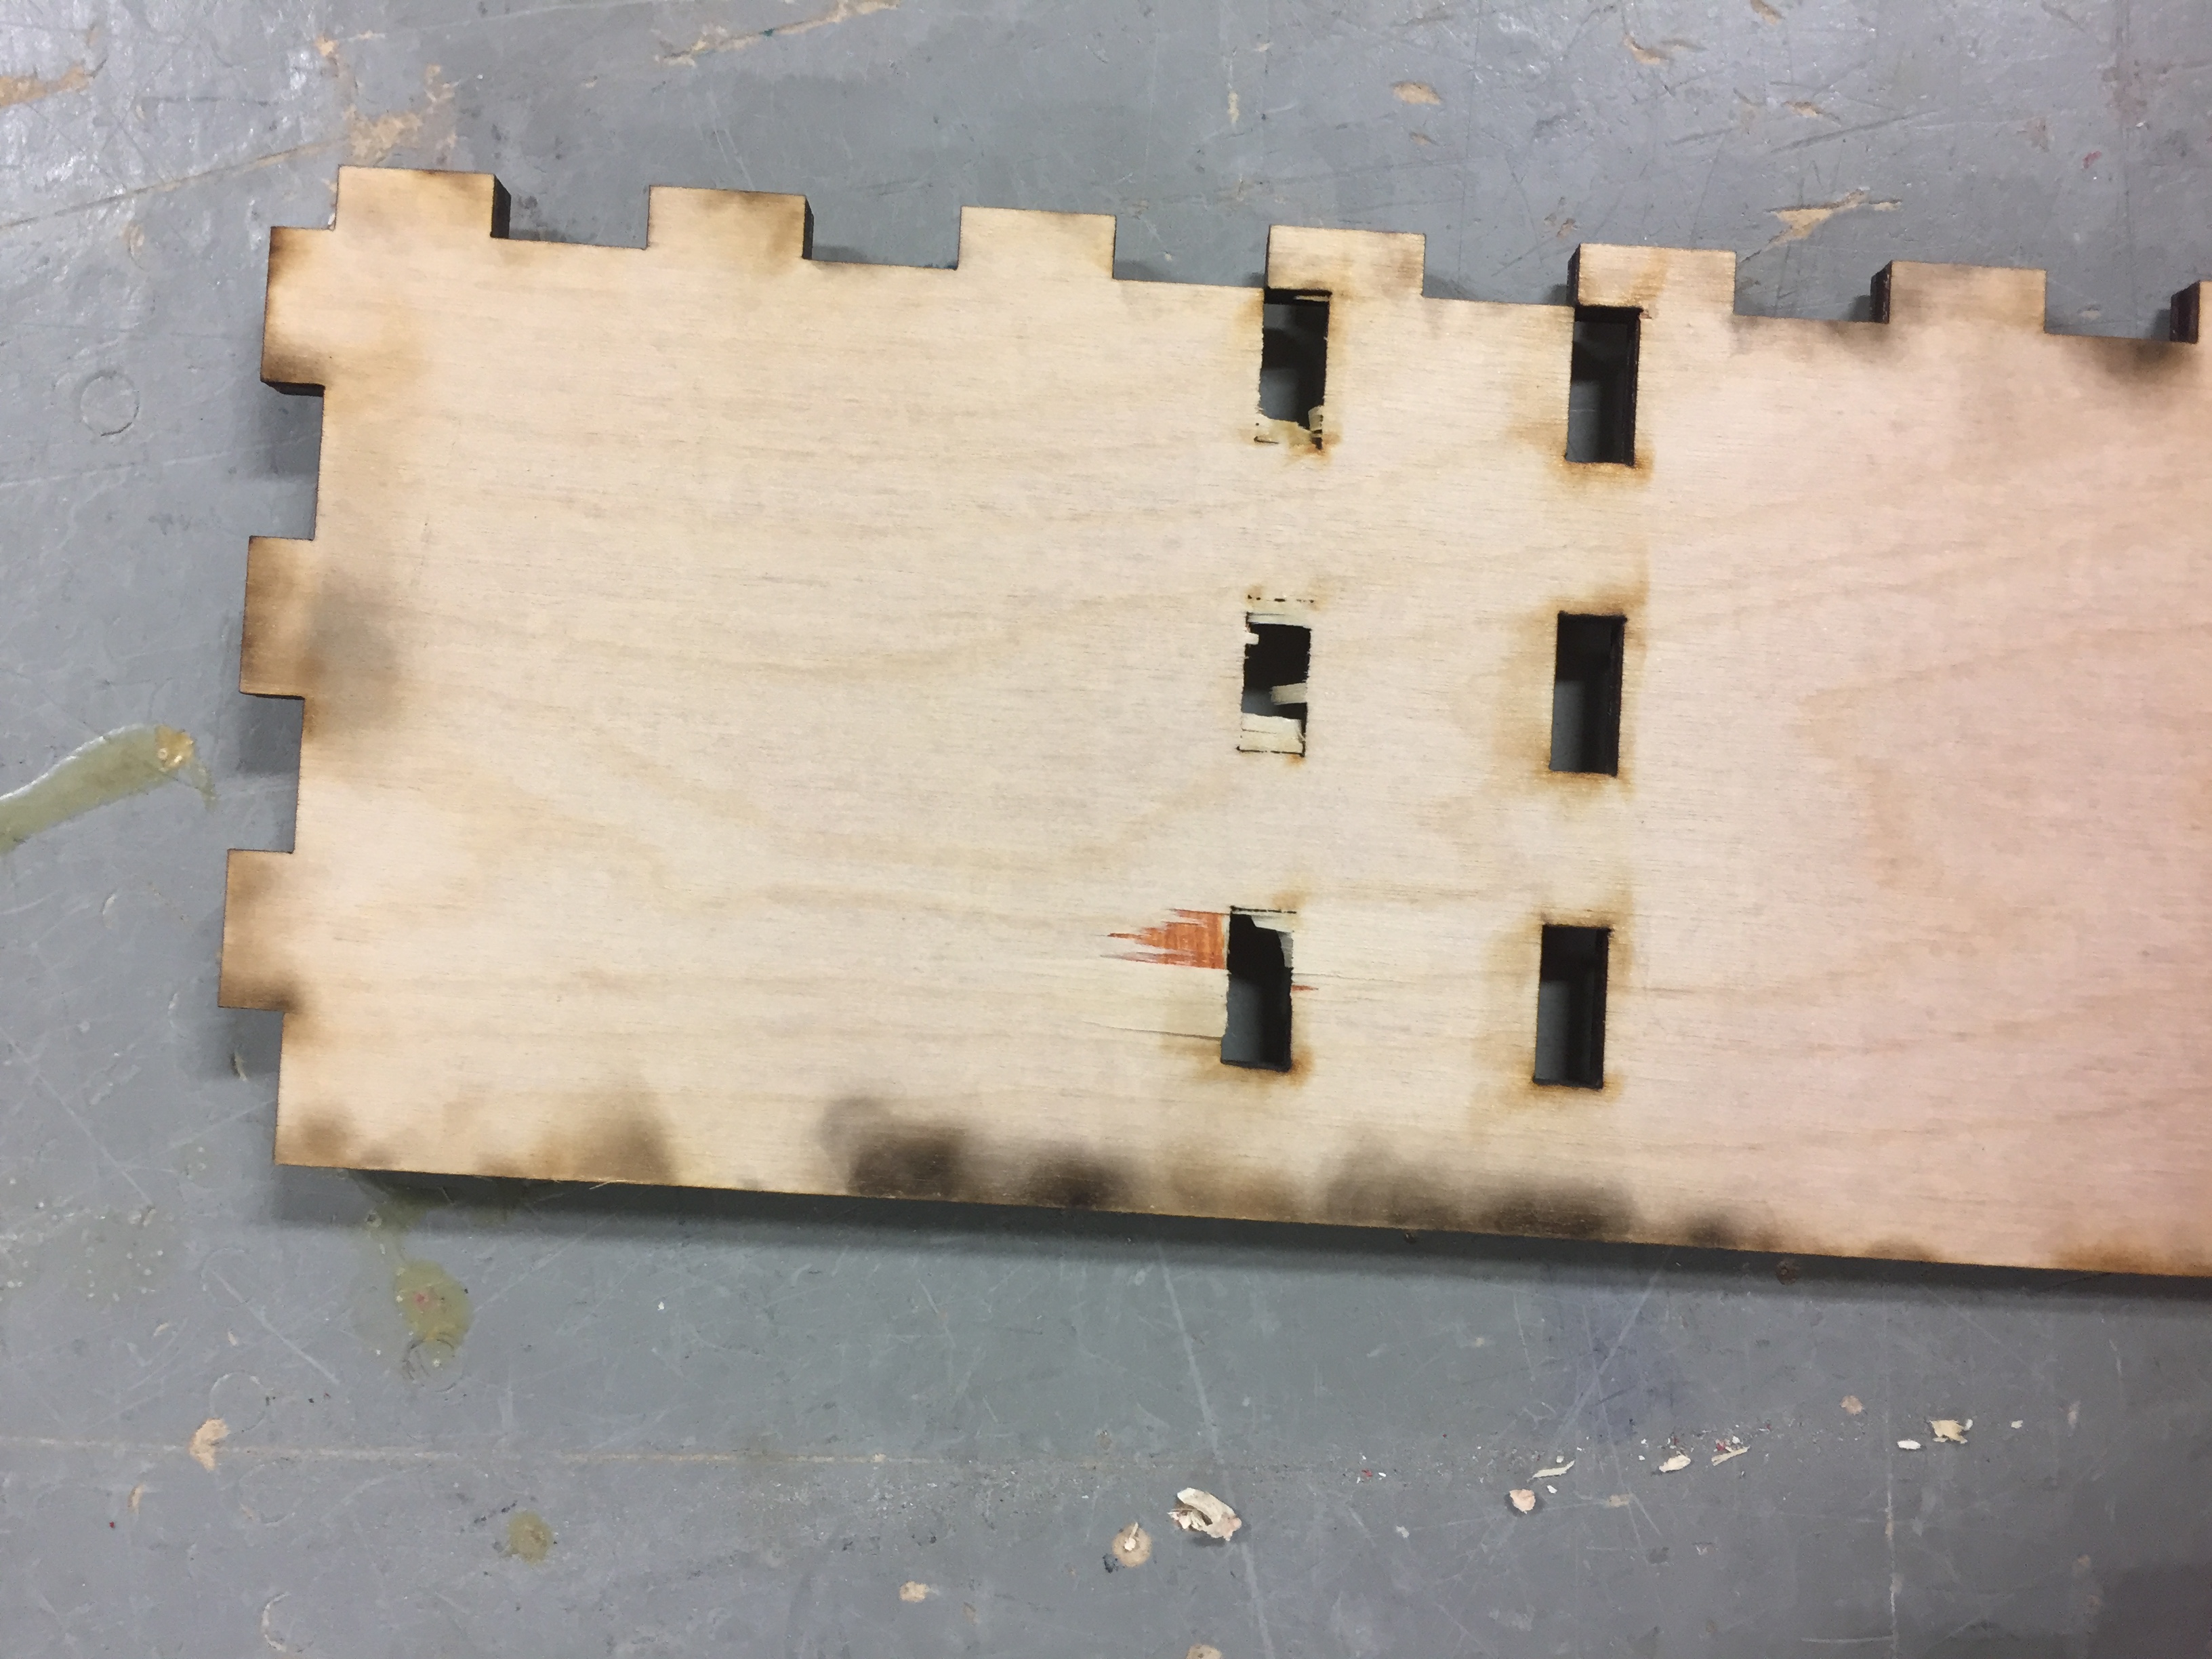
Before sanding. Notice all the scorch marks and the wooden holes that did not come out all the way but other teeth would be pushed through those holes, so I wasn’t too worried.)
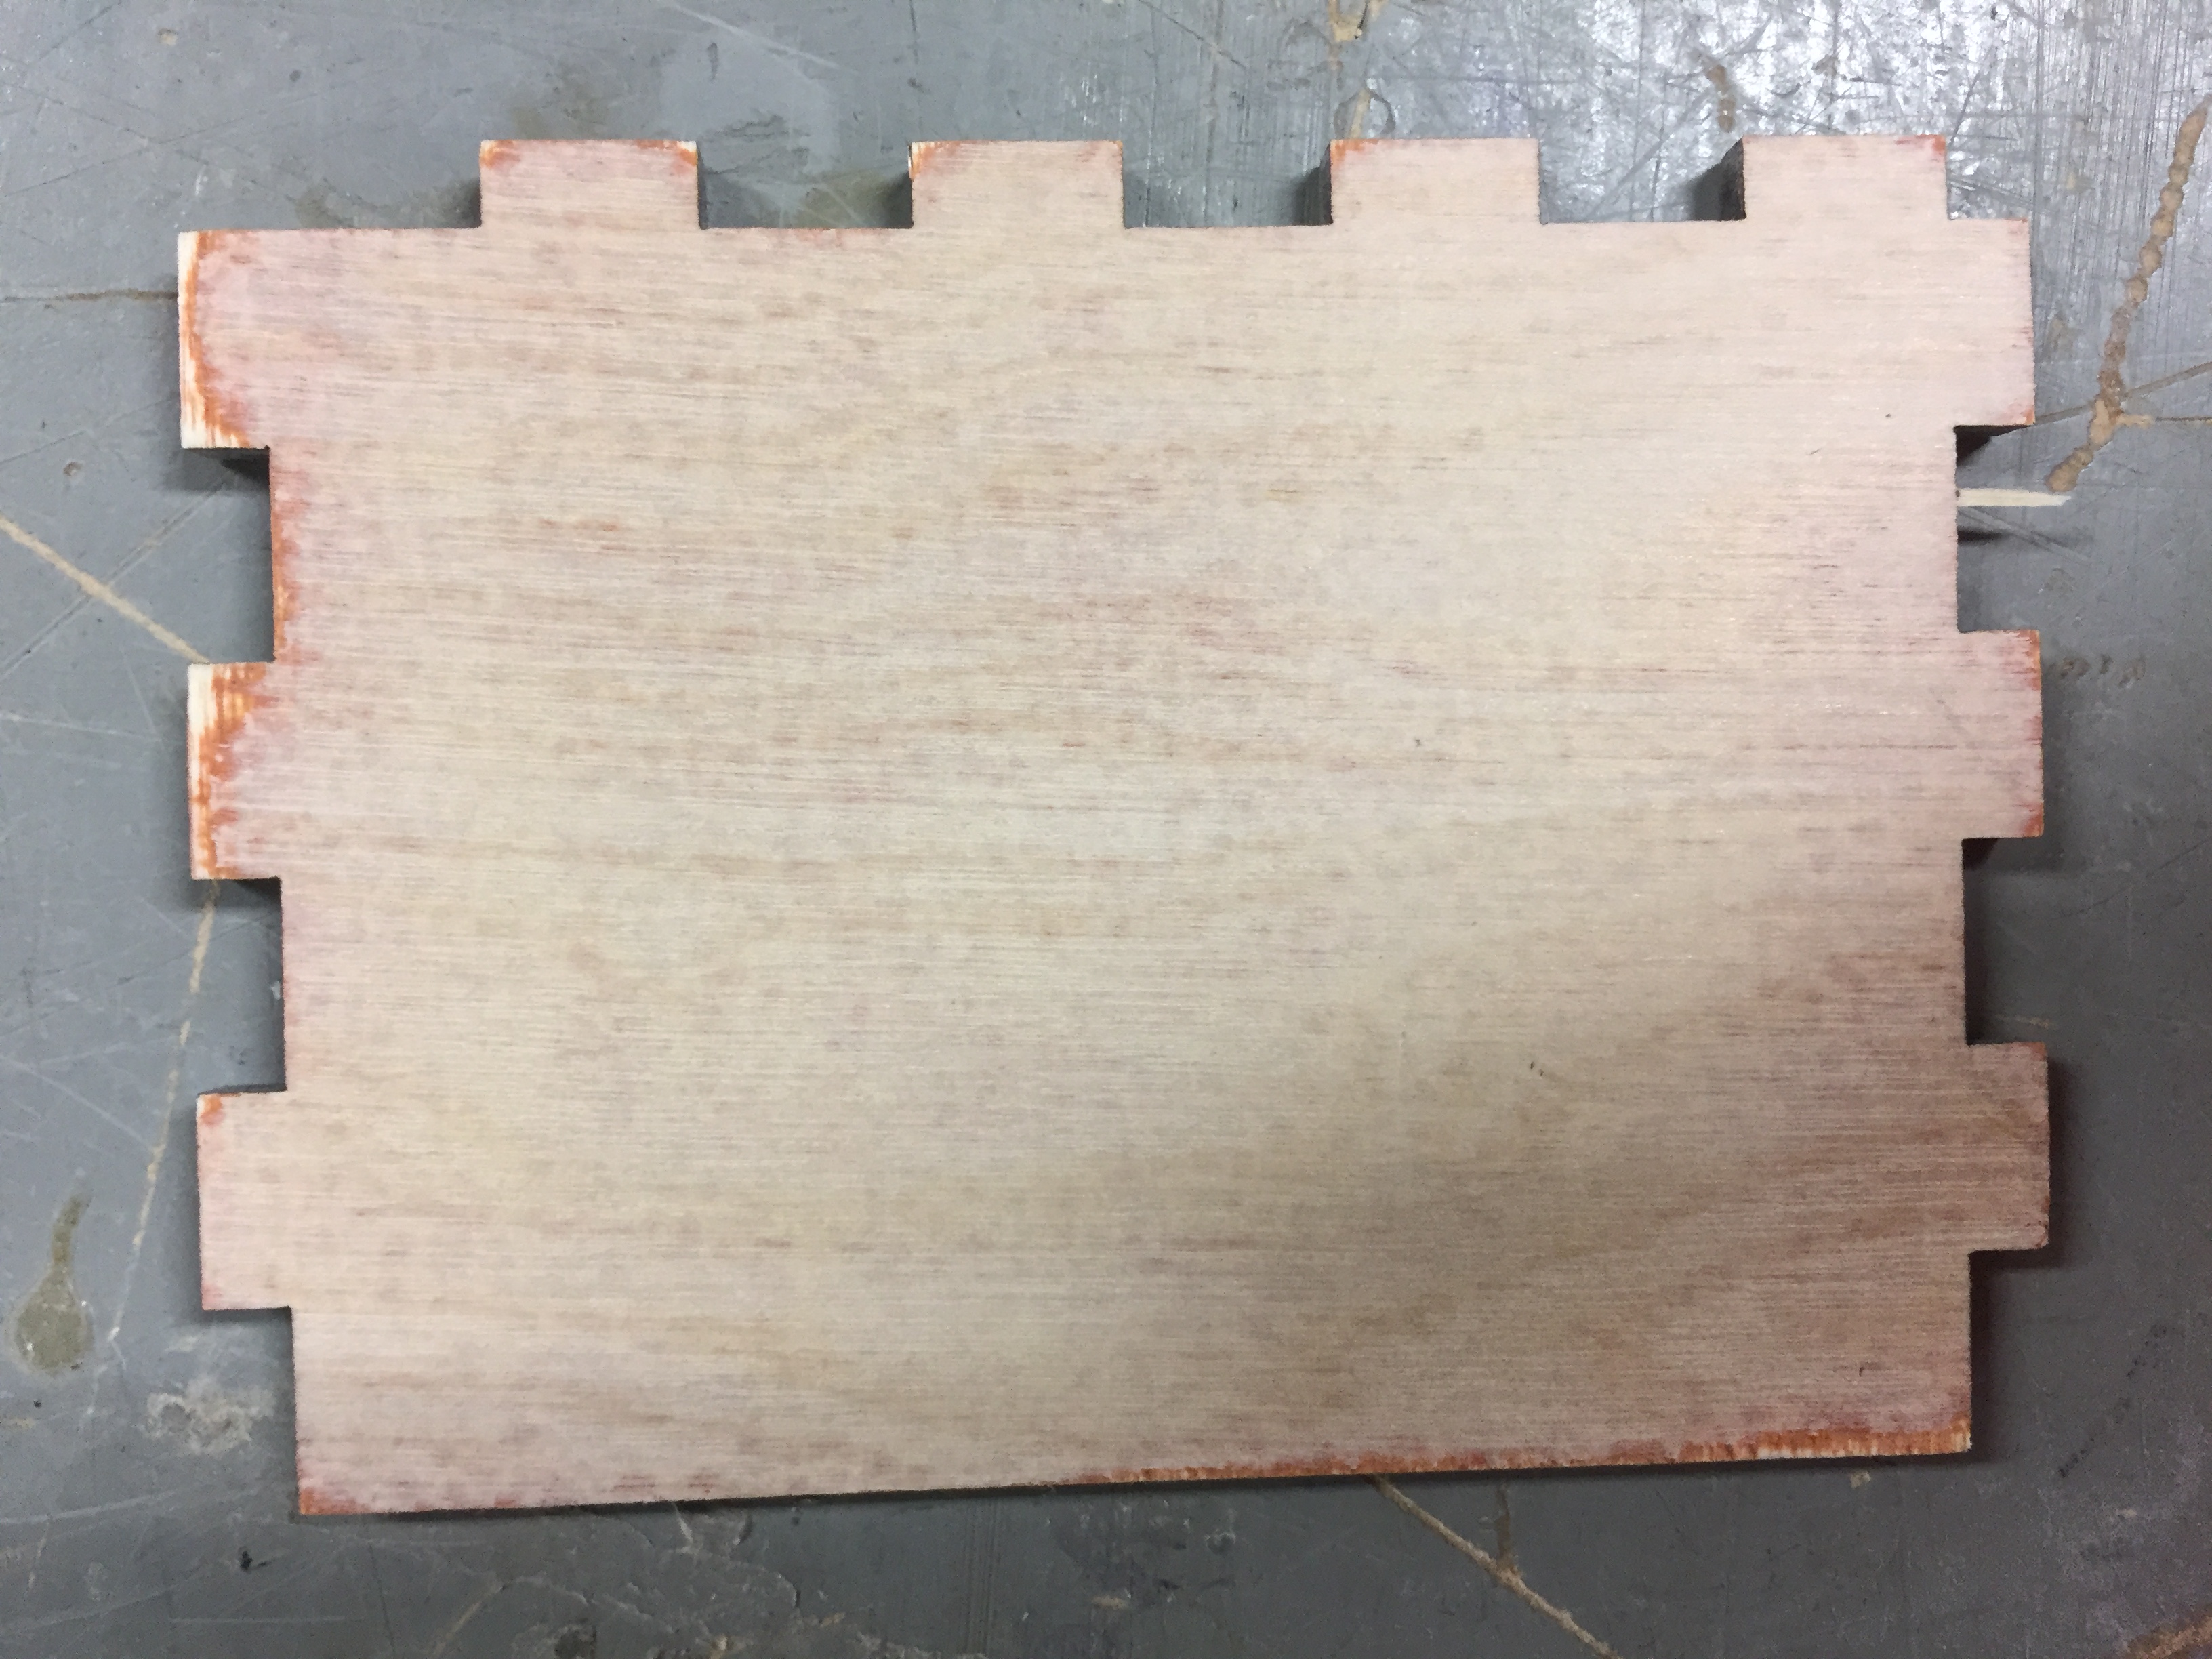
Post-sanding. Looks way less burnt, doesn’t it? That being said, something is a bit off about this picture…
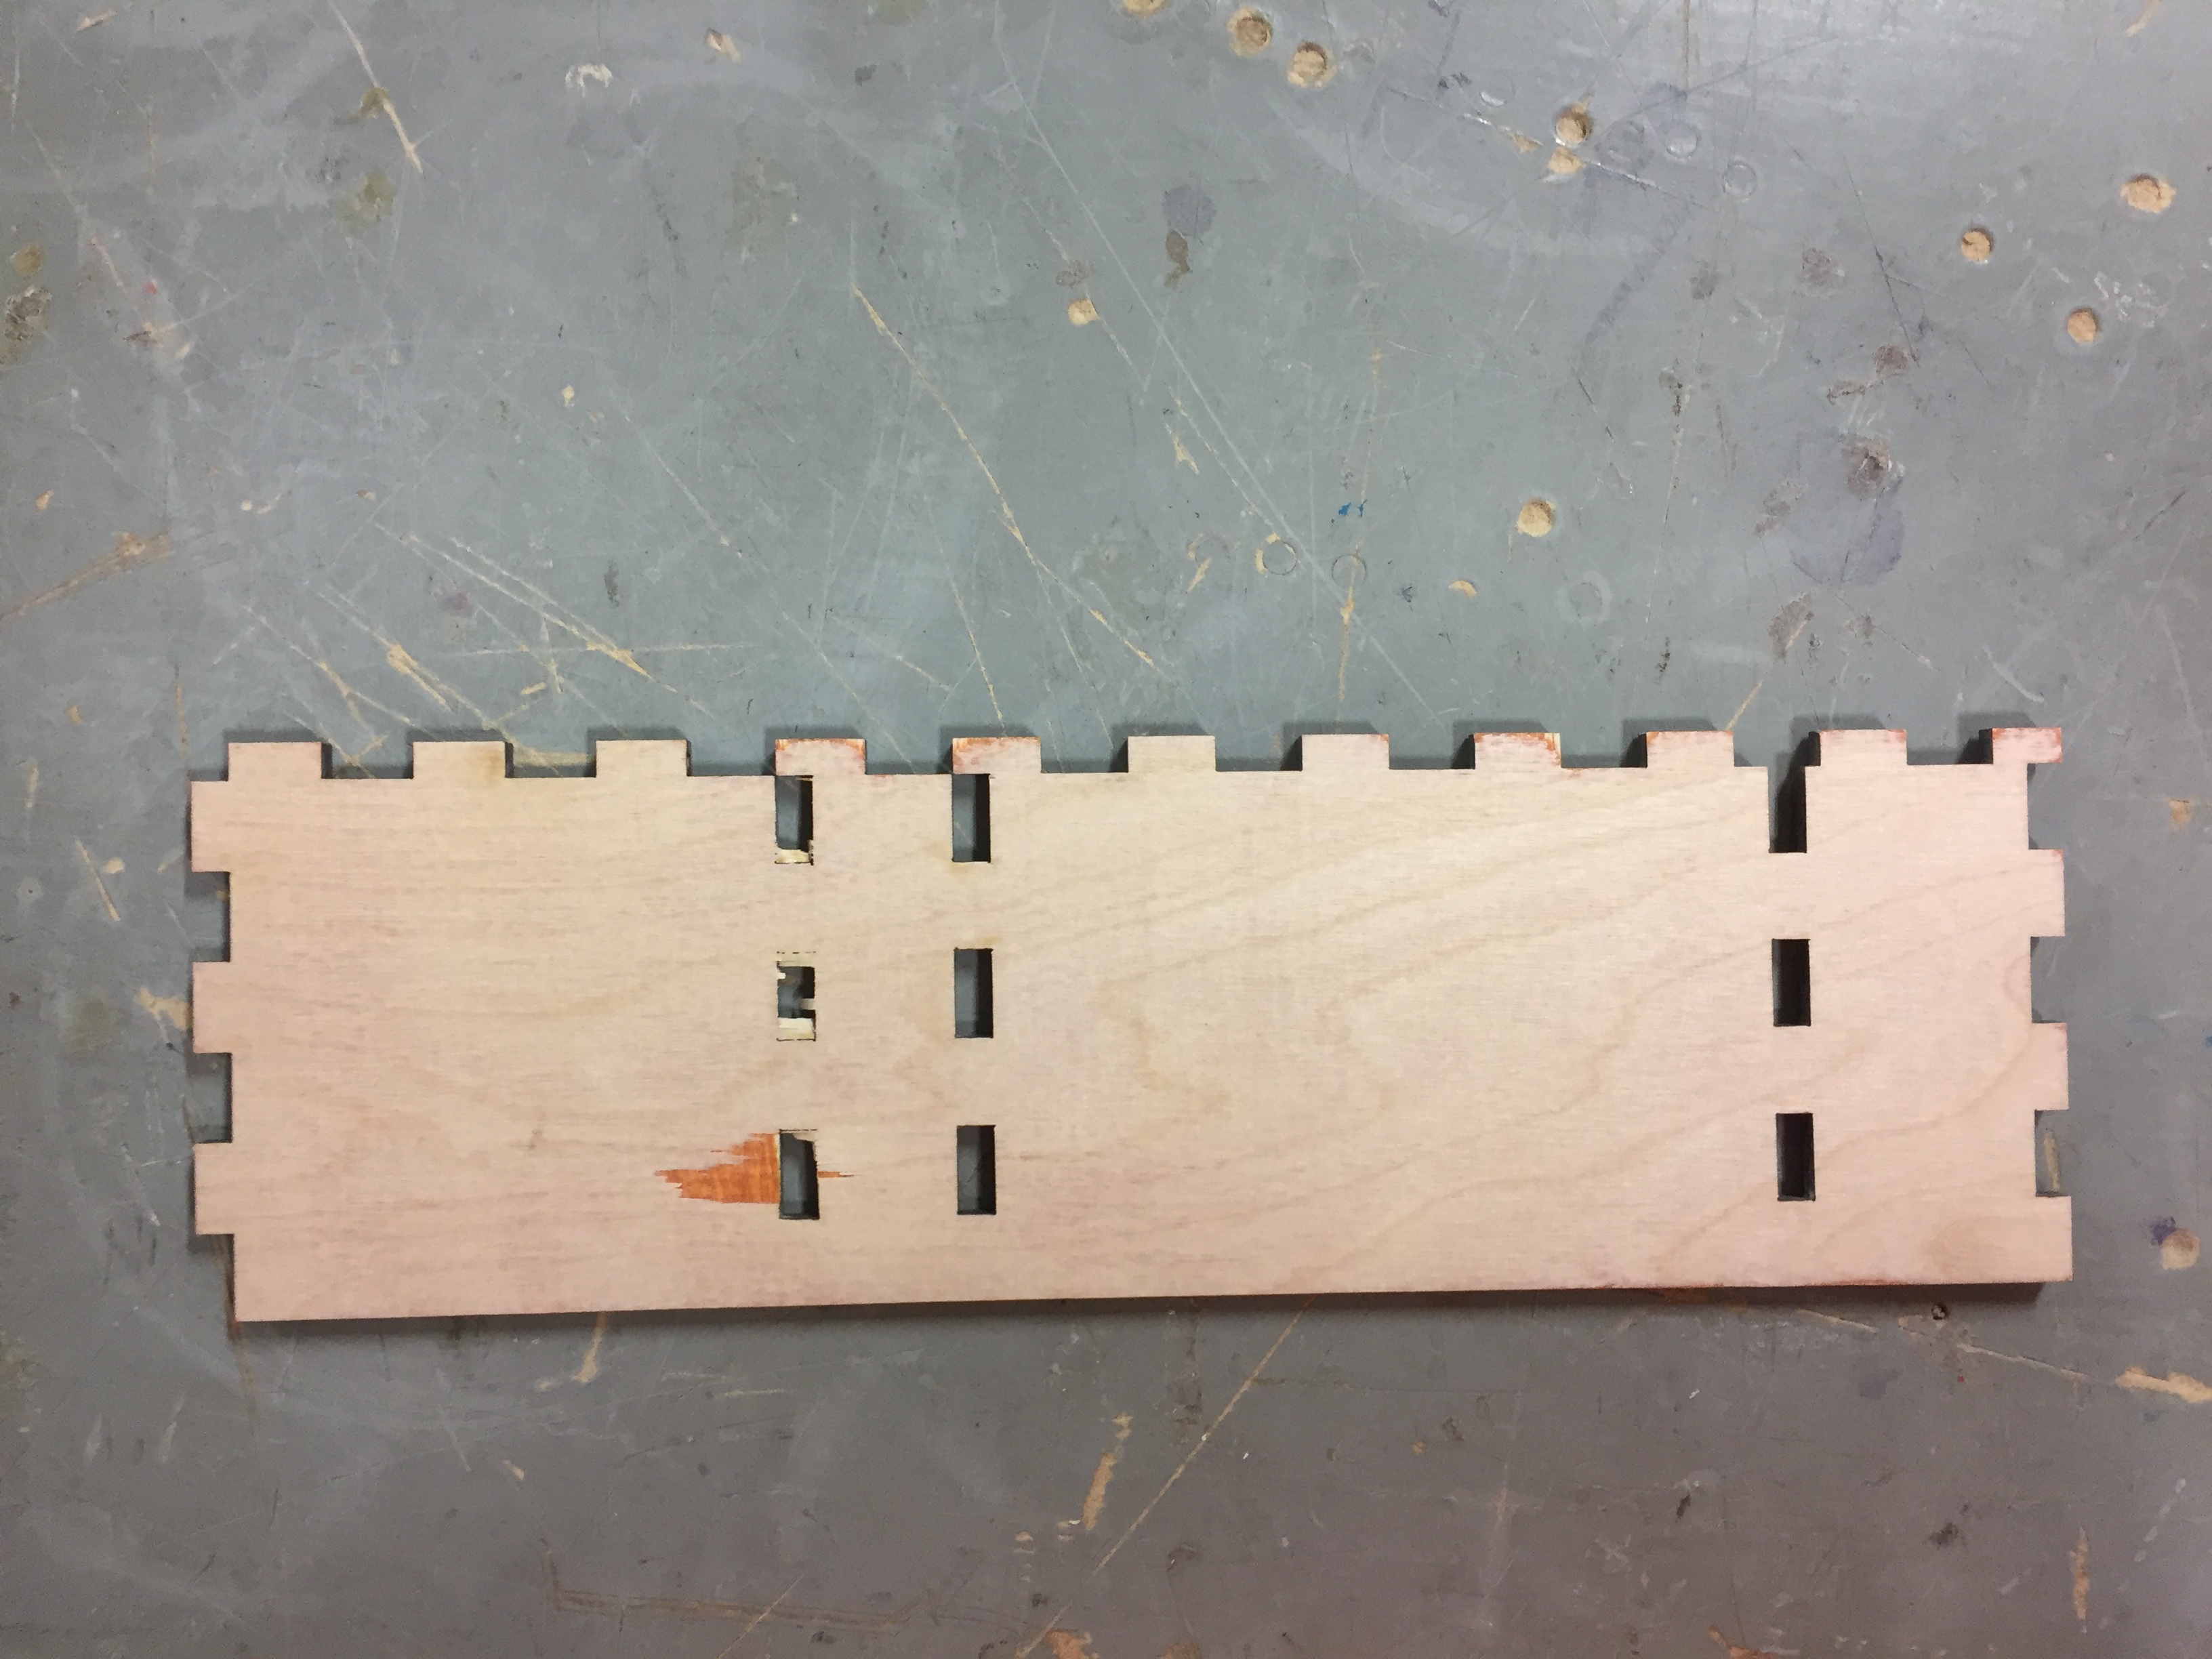
Here’s another hint about what’s wrong…
Upon sanding, I realized a problem. Dr. Wettergreen had originally grabbed like 4 sheets of plywood from the downstairs cage for the students to use to prototype their box. This was the wood I was used to, with more of a golden color, less strange layers, and a depth of exactly 5 mm.
However, upon walking into the OEDK on Thursday morning to work on my box, I realized that 4 sheets of wood was not nearly enough for 12 students to laser cut boxes. There wasn’t any usable wood left, and at least three of us still hadn’t built our boxes, so I went down to the cage to grab more wood. And apparently the OEDK changed their wood supplier within the past week? Because the wood I grabbed (and trust me, I double checked that I had grabbed the only laser-cuttable wood in that cage) was not the wood I was used to. This stuff was lighter in color, significantly thinner, and it had a layer of red material under the surface. I had never seen this wood before. Trust me, I would have noticed that red underlayer.
If you haven’t figured it out yet, that’s what was wrong with the previous post-processed pictures: Upon sanding away the top layer (or when accidentally removing it when trying to take apart a cut), the next red layer was revealed, making my mess-ups really obvious. I honestly don’t think there was anything I could have done to prevent this problem because it was a problem with the material available to me and not my skill level, but it still irritated me.
Again, I was back to questioning most of my life decisions and everything that had led me to this point.
But I didn’t really have any other options, so I proceeded.
And then I quickly realized that I had no idea how any of my pieces fit together. They were all unmarked and slightly different sizes, and from just looking at them, it was going to take a lot of trial and error to put them together. So I went to the computer lab, pulled up Solidworks, and used my digital model as a guide for putting my box together. However, I quickly realized that the computer lab wasn’t the best place for construction, so I moved outside to the lab tech table because A) It is the only table with a computer that I have access to, B) It is actually located in a prototyping area, and C) I was on shift at the time.
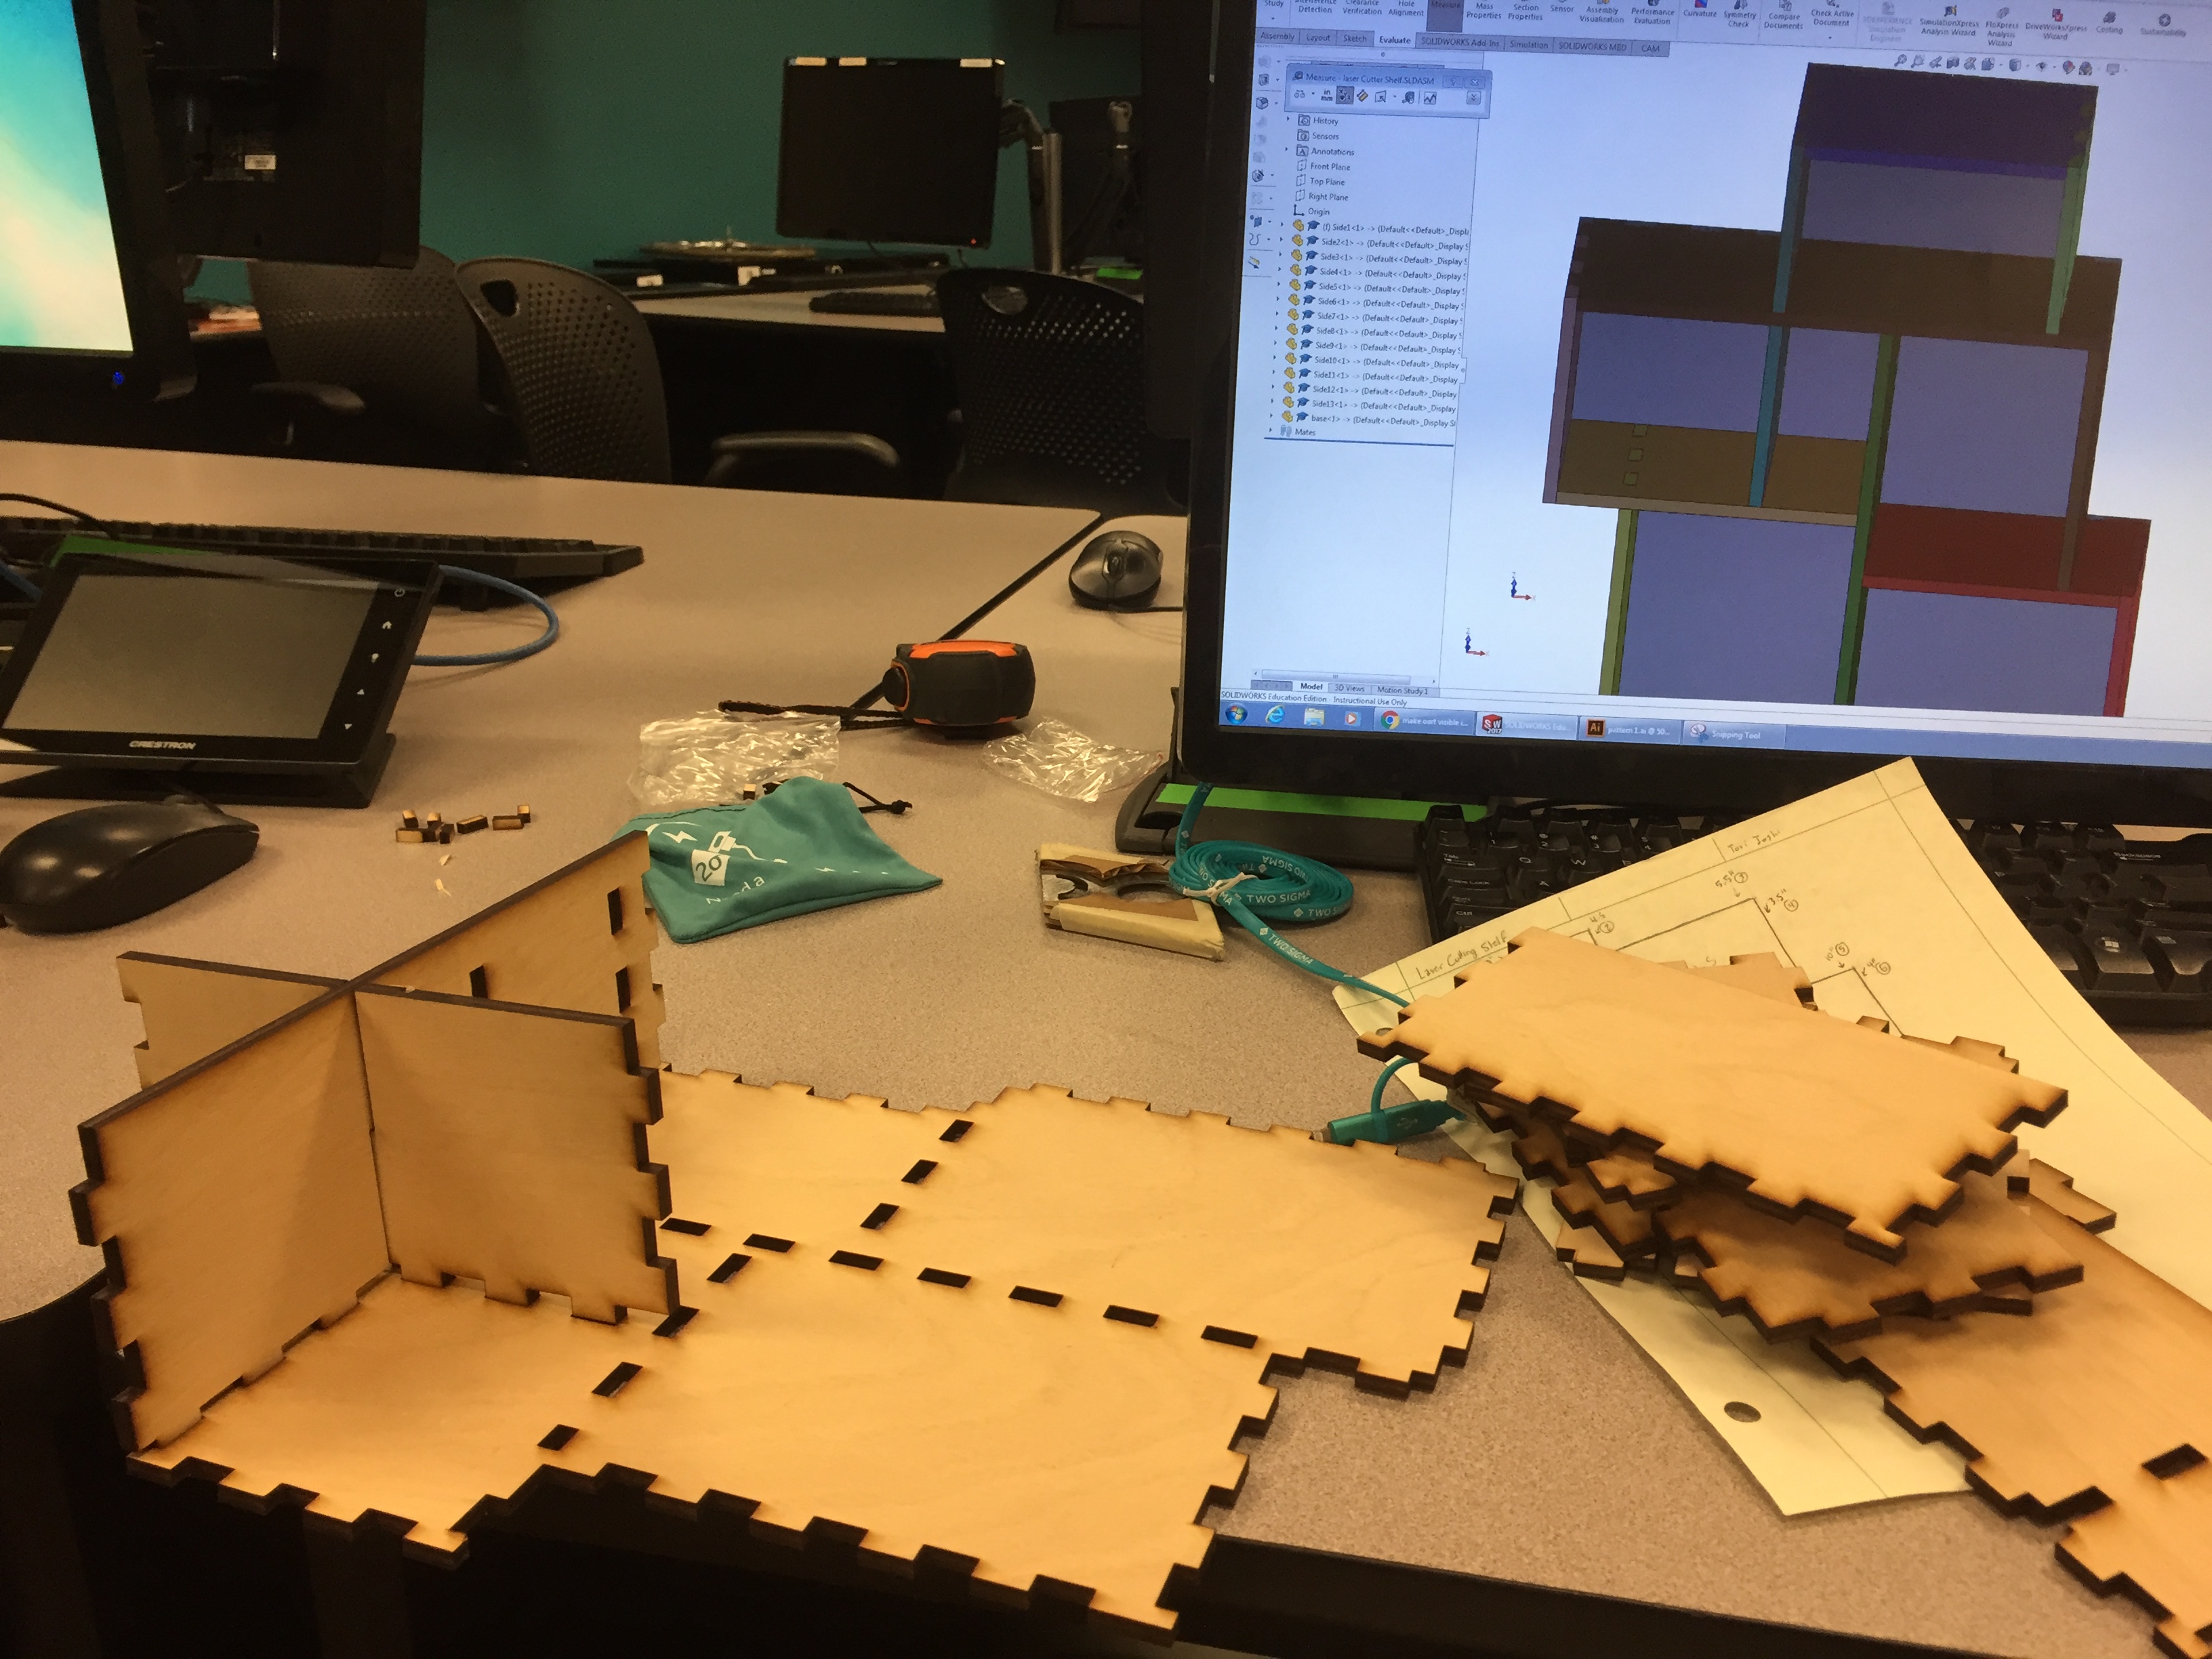
Attempting to build my box in the computer lab. I didn’t get very far.
Attempting to build my box, but this time on shift.
So apparently Cole’s advice worked a bit too well, and there was too much overlap between the tabs and the holes because putting the box proved almost impossible because none of the tabs actually fit into each other. So I grabbed the tiny files from the Machine Shop and tried to file down the tabs so they would actually fit into the holes.
That was taking forever (and I wasn’t convinced that the files were really doing that much on each individual tab), so I grabbed a rubber mallet to brute force my pieces together because they were so close to fitting, but were off by maybe hundredths of an inch.
And through some combination of filing, hammering, and cross-referencing with Solidworks (but no adhesives!), I was able to put the walls of my box together. If nothing else, that box is absolutely not coming apart.
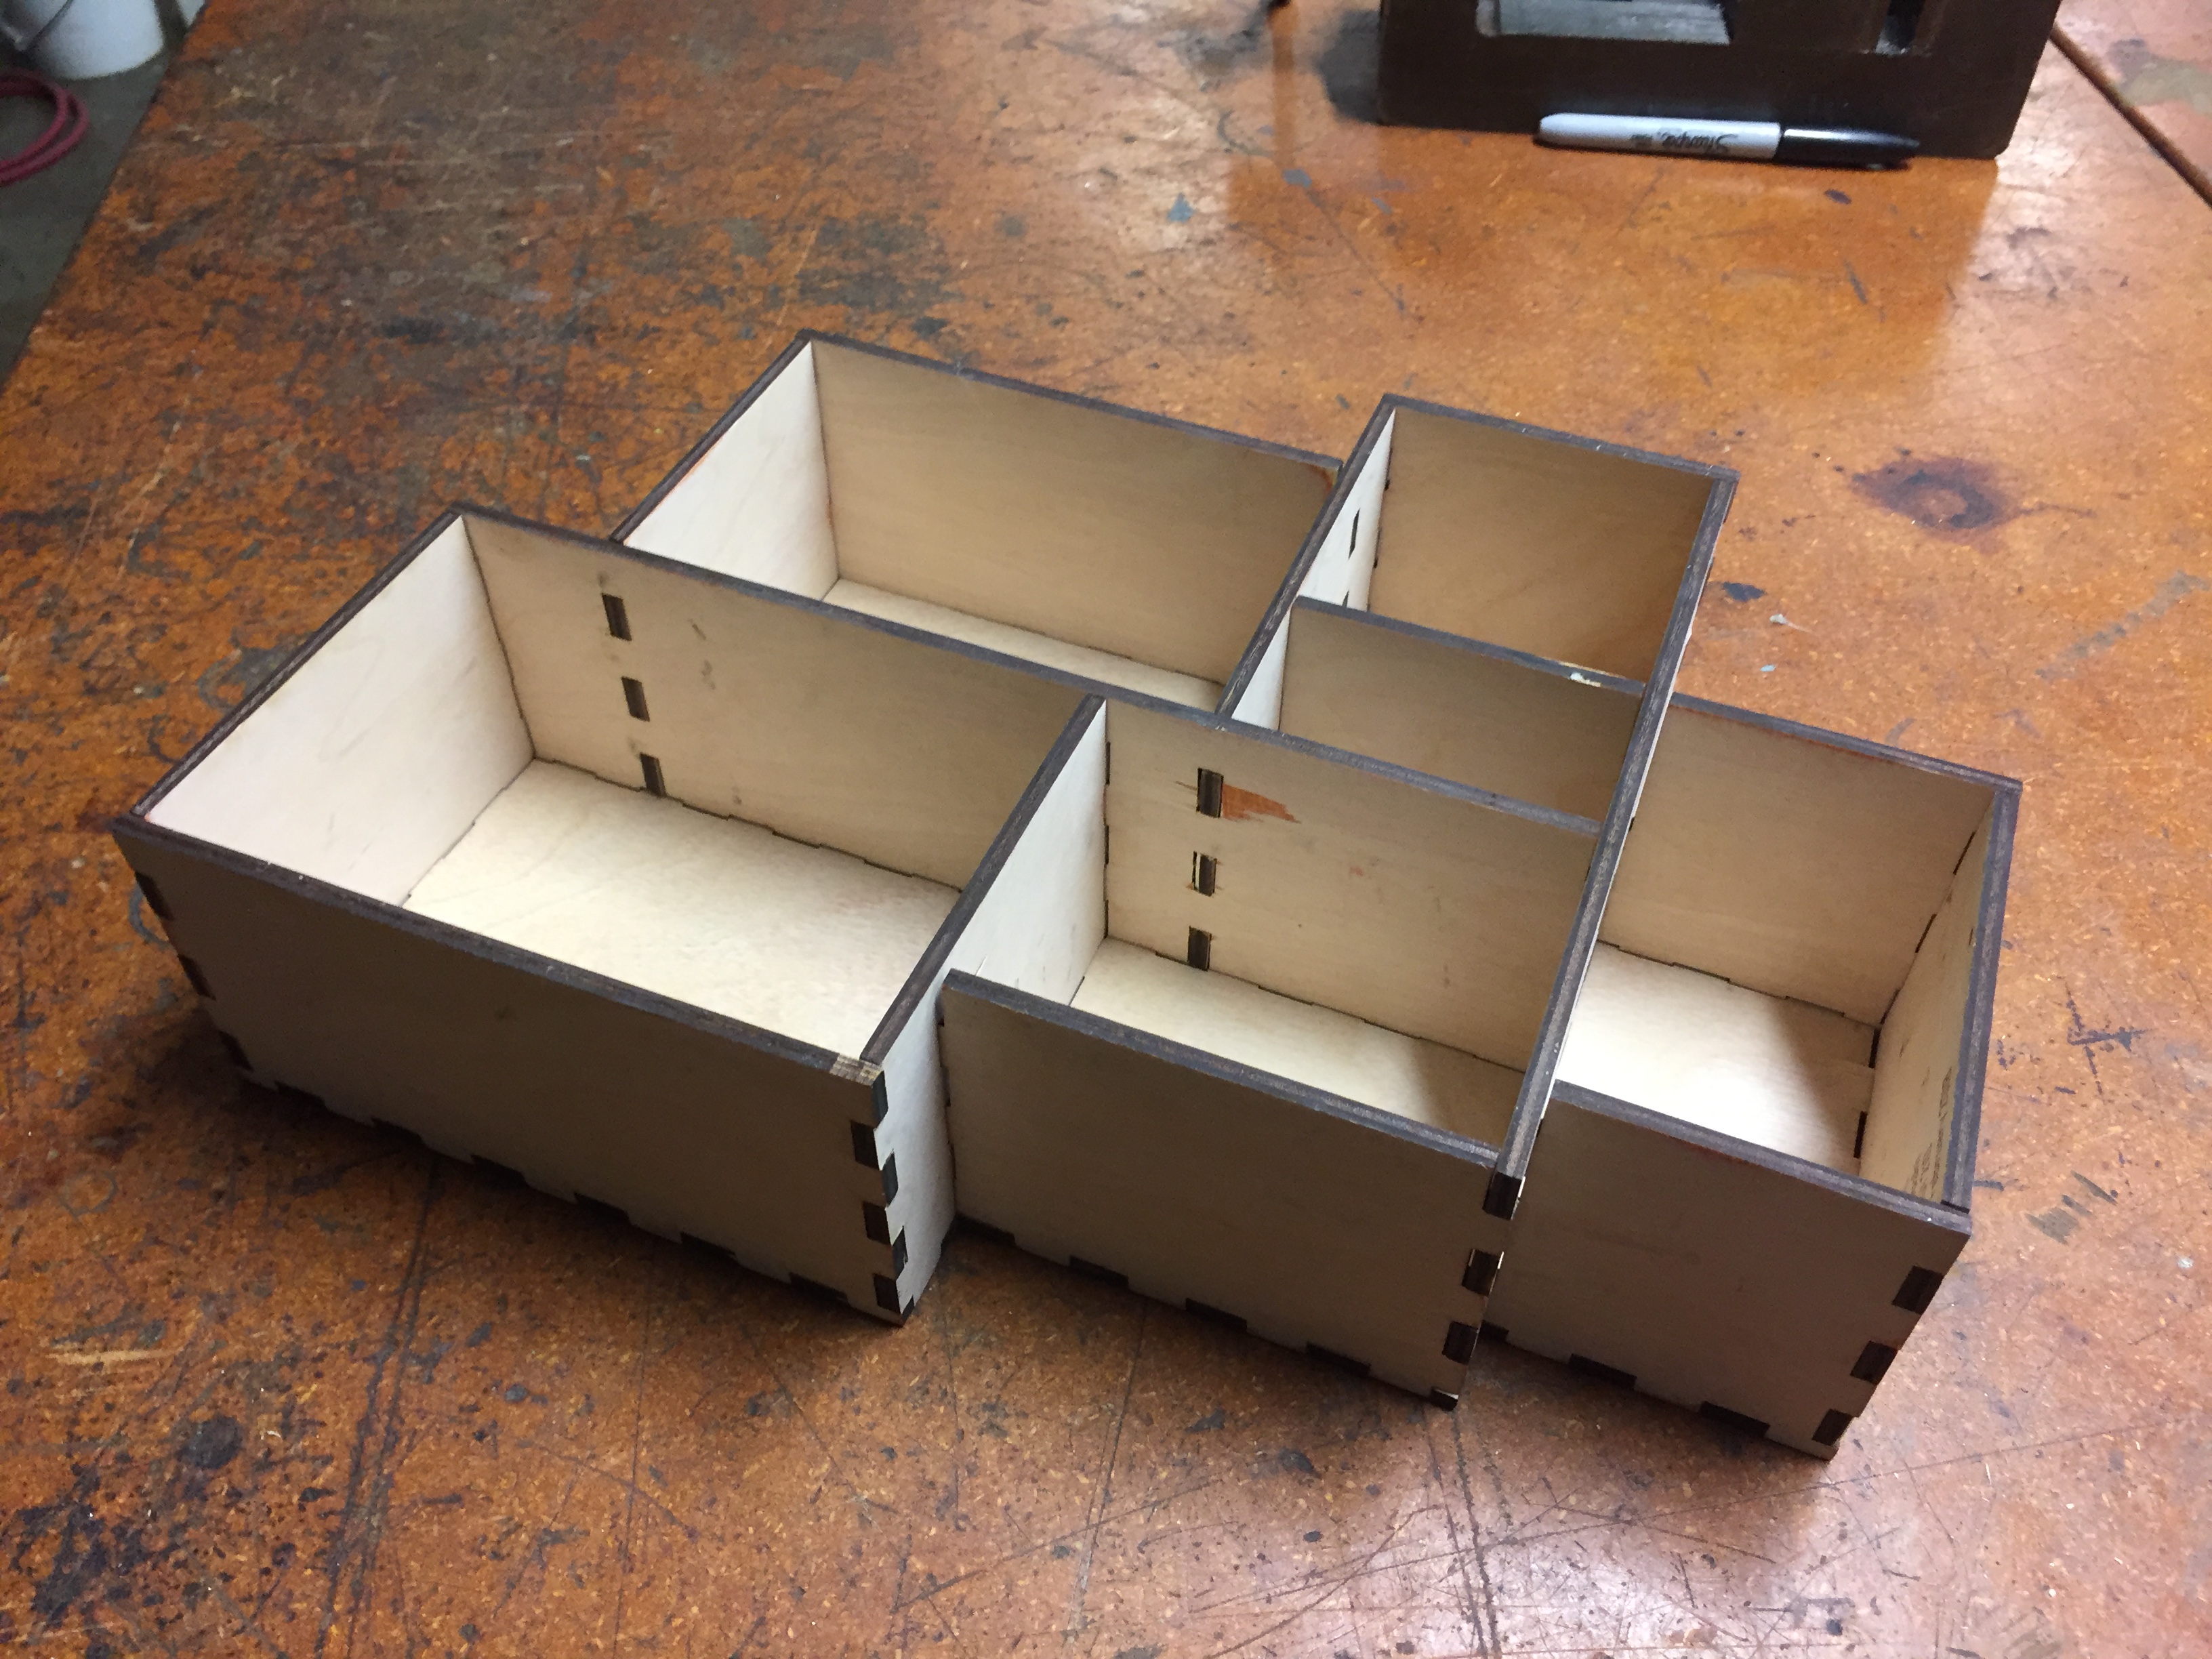
The completed walled structure of the box
Now I had to work on getting the bottom to fit. That was going to be more complicated because although the base was flat, all of the walls I had built were going to have to work together to fit into the pre-cut base. So I aligned the base and tried to hammer it in when I realized that there was an entire side where all the tabs were overhanging the base on the same side so that they would never fit together. There was no way to remove the half-installed base without destroying the whole thing, so had to squeeze sandpaper around the tabs to try to sand them down in order to fit. It worked kind of well, or at least well enough that I could somewhat successfully finish hammering the base into the walls of my box.
I need you to understand that it was midnight on a Friday during midterm recess and I was frantically brute force hammering together a project I was already somewhat angry with in a somewhat-abandoned OEDK.
In other words, at that moment, I hated just about everything.
So although the project came together, I didn’t like the final product. So I sent a picture to Christina.
This led to the following exchange:
Me: “It’s put together, but at what cost?”
Christina, ever supporting and amazing: “It’s beautiful!! Did you end up having to use glue?”
Me: “thanks I hate it”
Somewhat finished product? Ugh. It’s in one piece at least.
I looked at it again, but I could not see a piece of beauty. My perfectionism and anger combined so all I could see were its flaws that Dr. Wettergreen would inevitably count off for: The awkward gaps in the construction from using wood thinner than I had accounted for and the red marks from the surface layer that had chipped off.
The awkward gaps between the wood pieces because I didn’t adequately account for the height of the wood
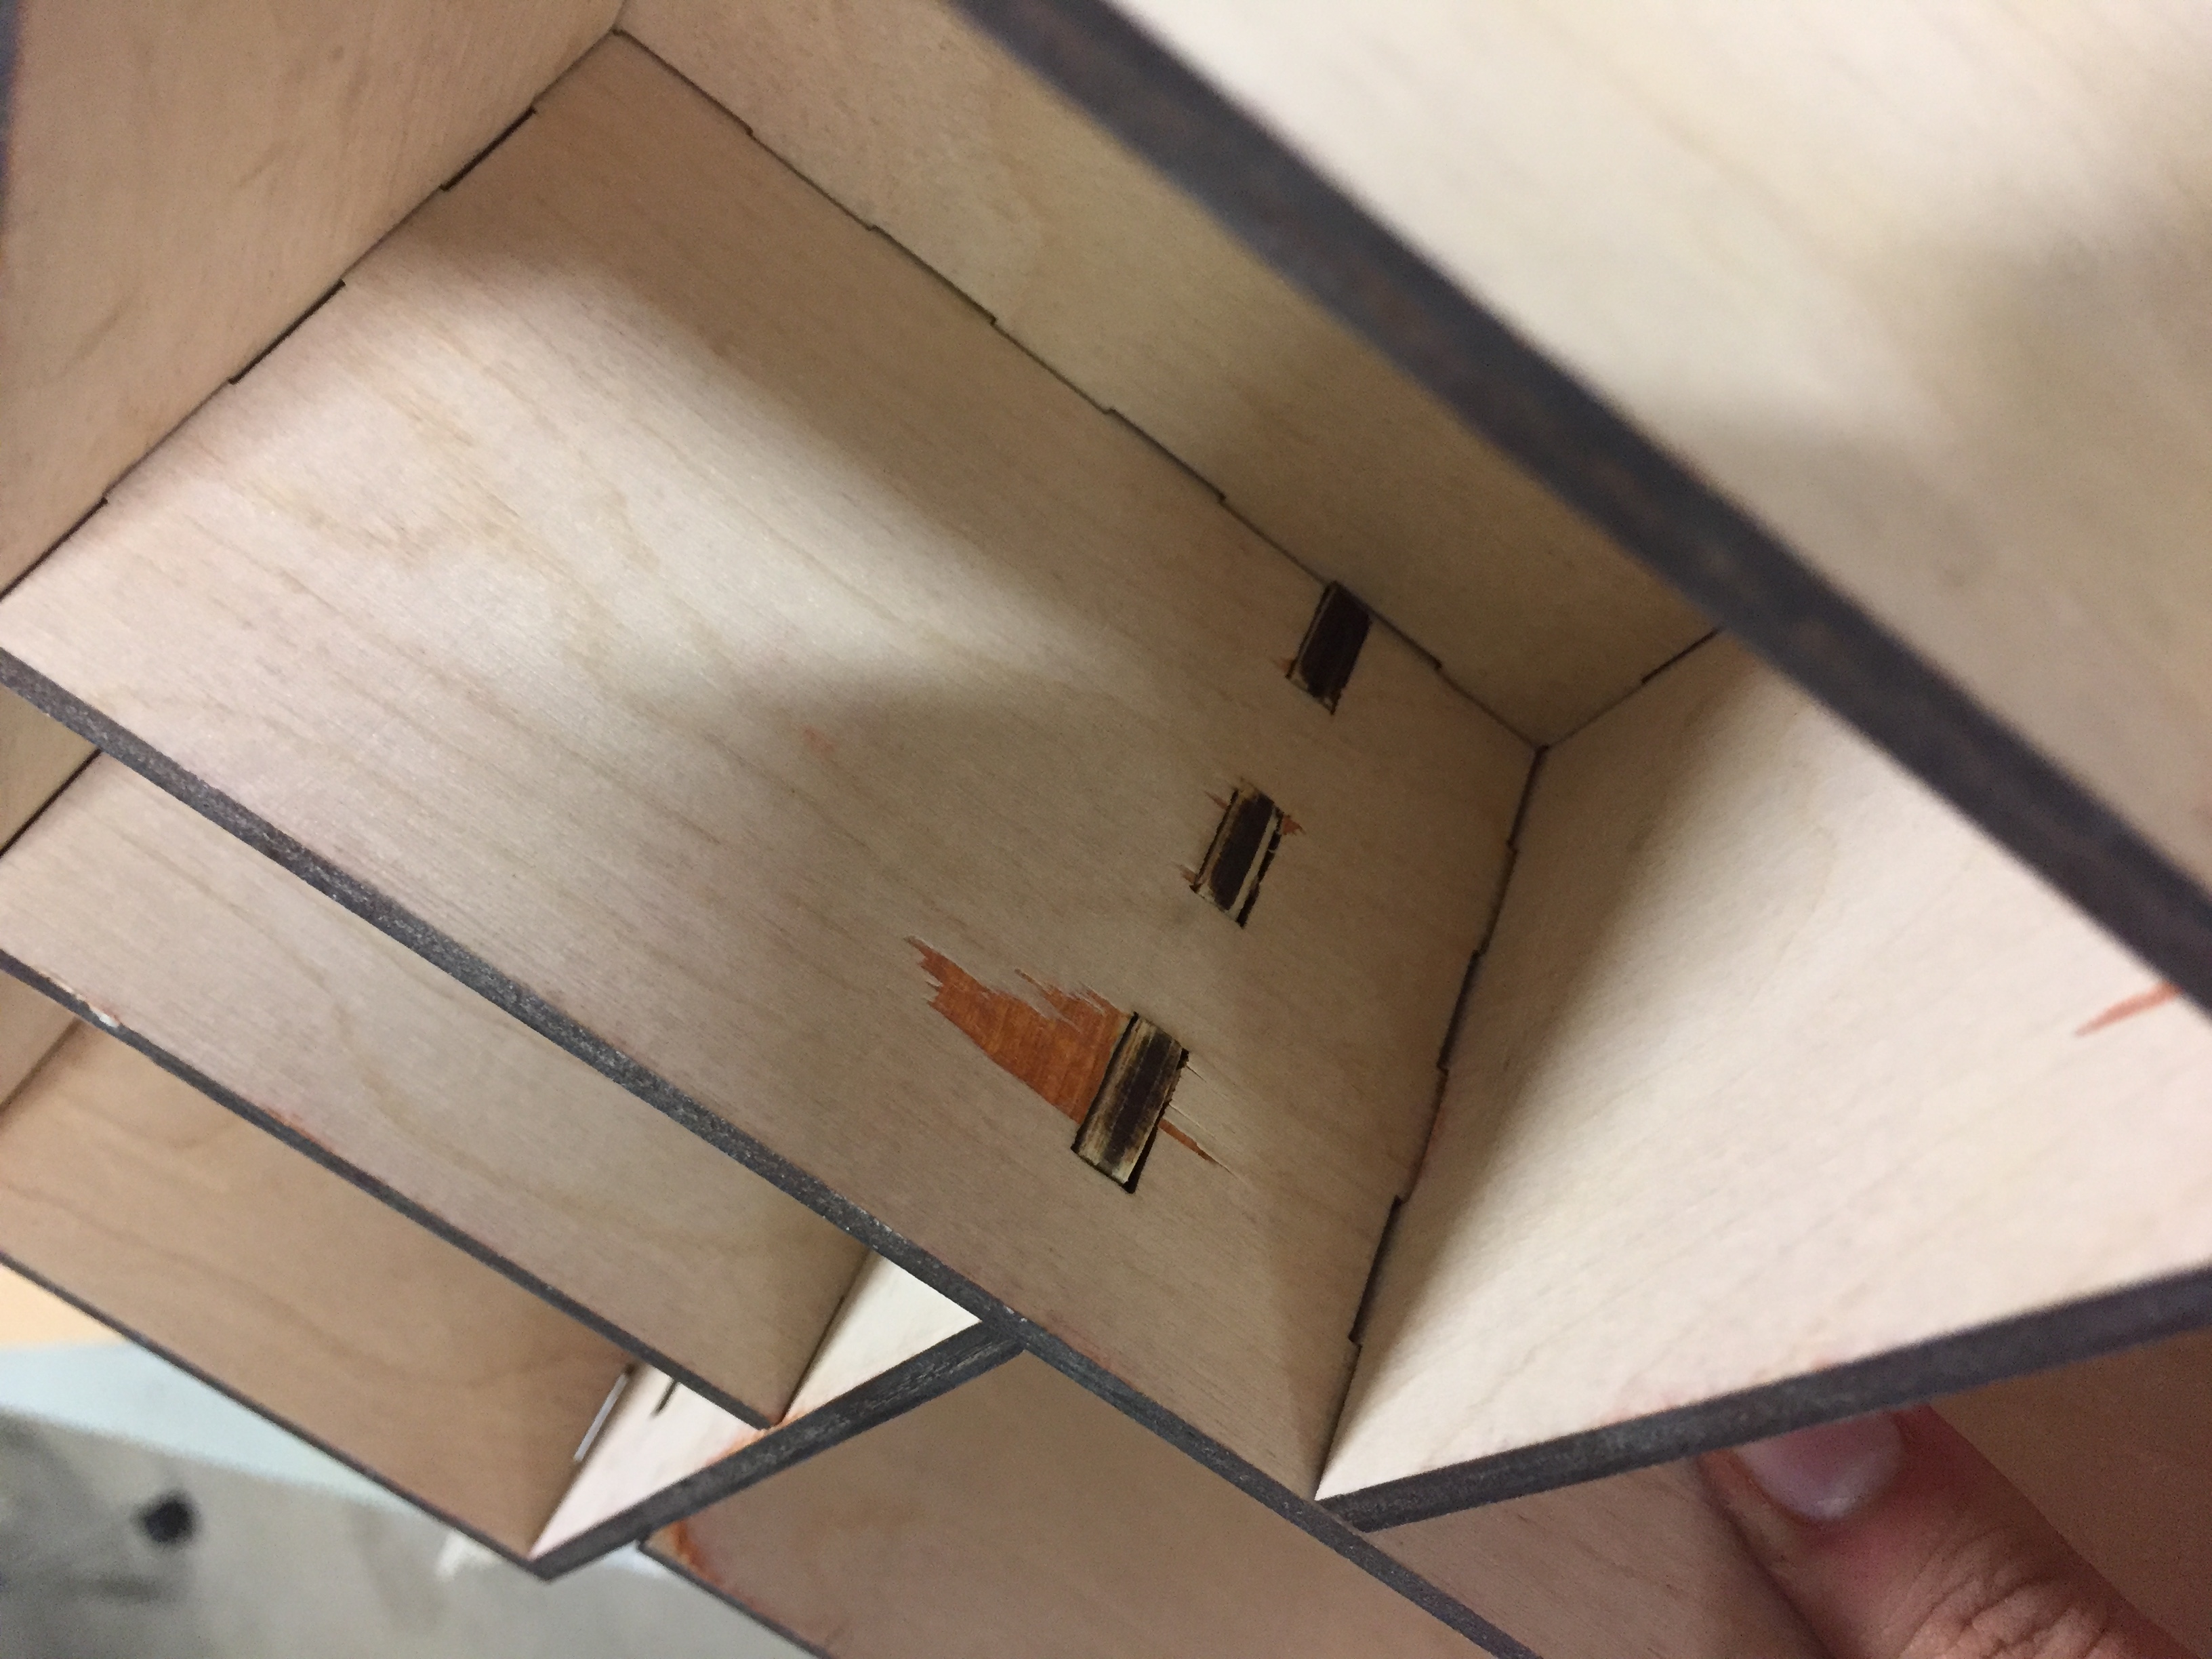
Red undertones draw direct attention to my incompetence
So I took my box out to show Katie. Why?
A) She’s already taken this class before.
B) She’s a lab apprentice, so her opinion has some value.
C) She was literally the only other person in the entire building
D) She’s not me, meaning she hasn’t been staring at this project for two days.
E) All of the Above
If you guessed E, you would be correct. There was no reason for me to not ask for a second opinion.
Katie looked at the box, listened to my concerns, and told me to stain the box. I was thinking something along the same lines because I was pretty sure that changing the color was going to be the only way to salvage it. Hopefully, it would serve the same purpose as throwing a Distract spell at Dr. Wettergreen so he would be so impressed by the stain job that he wouldn’t notice all of the box’s flaws while grading it. I also hoped that the stain would fill the cracks and mitigate the stark contrast between the tan wood and the red undertones.
So I grabbed some rags, some cherry stain (mainly because it was the only liquid stain and I don’t trust the gel stuff), and got to work. Using my fingers and some rags to apply a thin layer of stain worked really well for the exterior of the box, but I had to grab a foam brush for the inside to get the stain into the corners. I then wiped that stain up with my rag-covered fingers. Overall, the cherry color was a good color because it blended in well with the red and also made the box just look way better.
At the end of the day, I think I’m proud of my efforts. I wasn’t completely confident that I could pull off such an ambitious design, but using Solidworks really helped. I don’t think I could have done this via Illustrator. I wish I had gotten started early enough to use the other wood so I wouldn’t have had to deal with the thin red wood that I did. I feel like that would have solved a lot of problems because I’m very familiar with the original wood, but I also really couldn’t have gotten started earlier than I did because this week was so hectic. So that’s a sacrifice I have to make, I guess. I’m glad I used the overhang because it definitely made my box completely press-fit, but I wish I had been more careful when designing the drawing. And I’m definitely glad I stained my box. It looks so much better and finished now.
Ultimately, I think I learned that I don’t know everything about the laser cutter. Although most of my troubles came with designing and building the box, I’m not perfect with the machine. There were probably ways I could have mitigated some of my troubles, but I don’t know what they are.
I guess I’ll just have to find out.
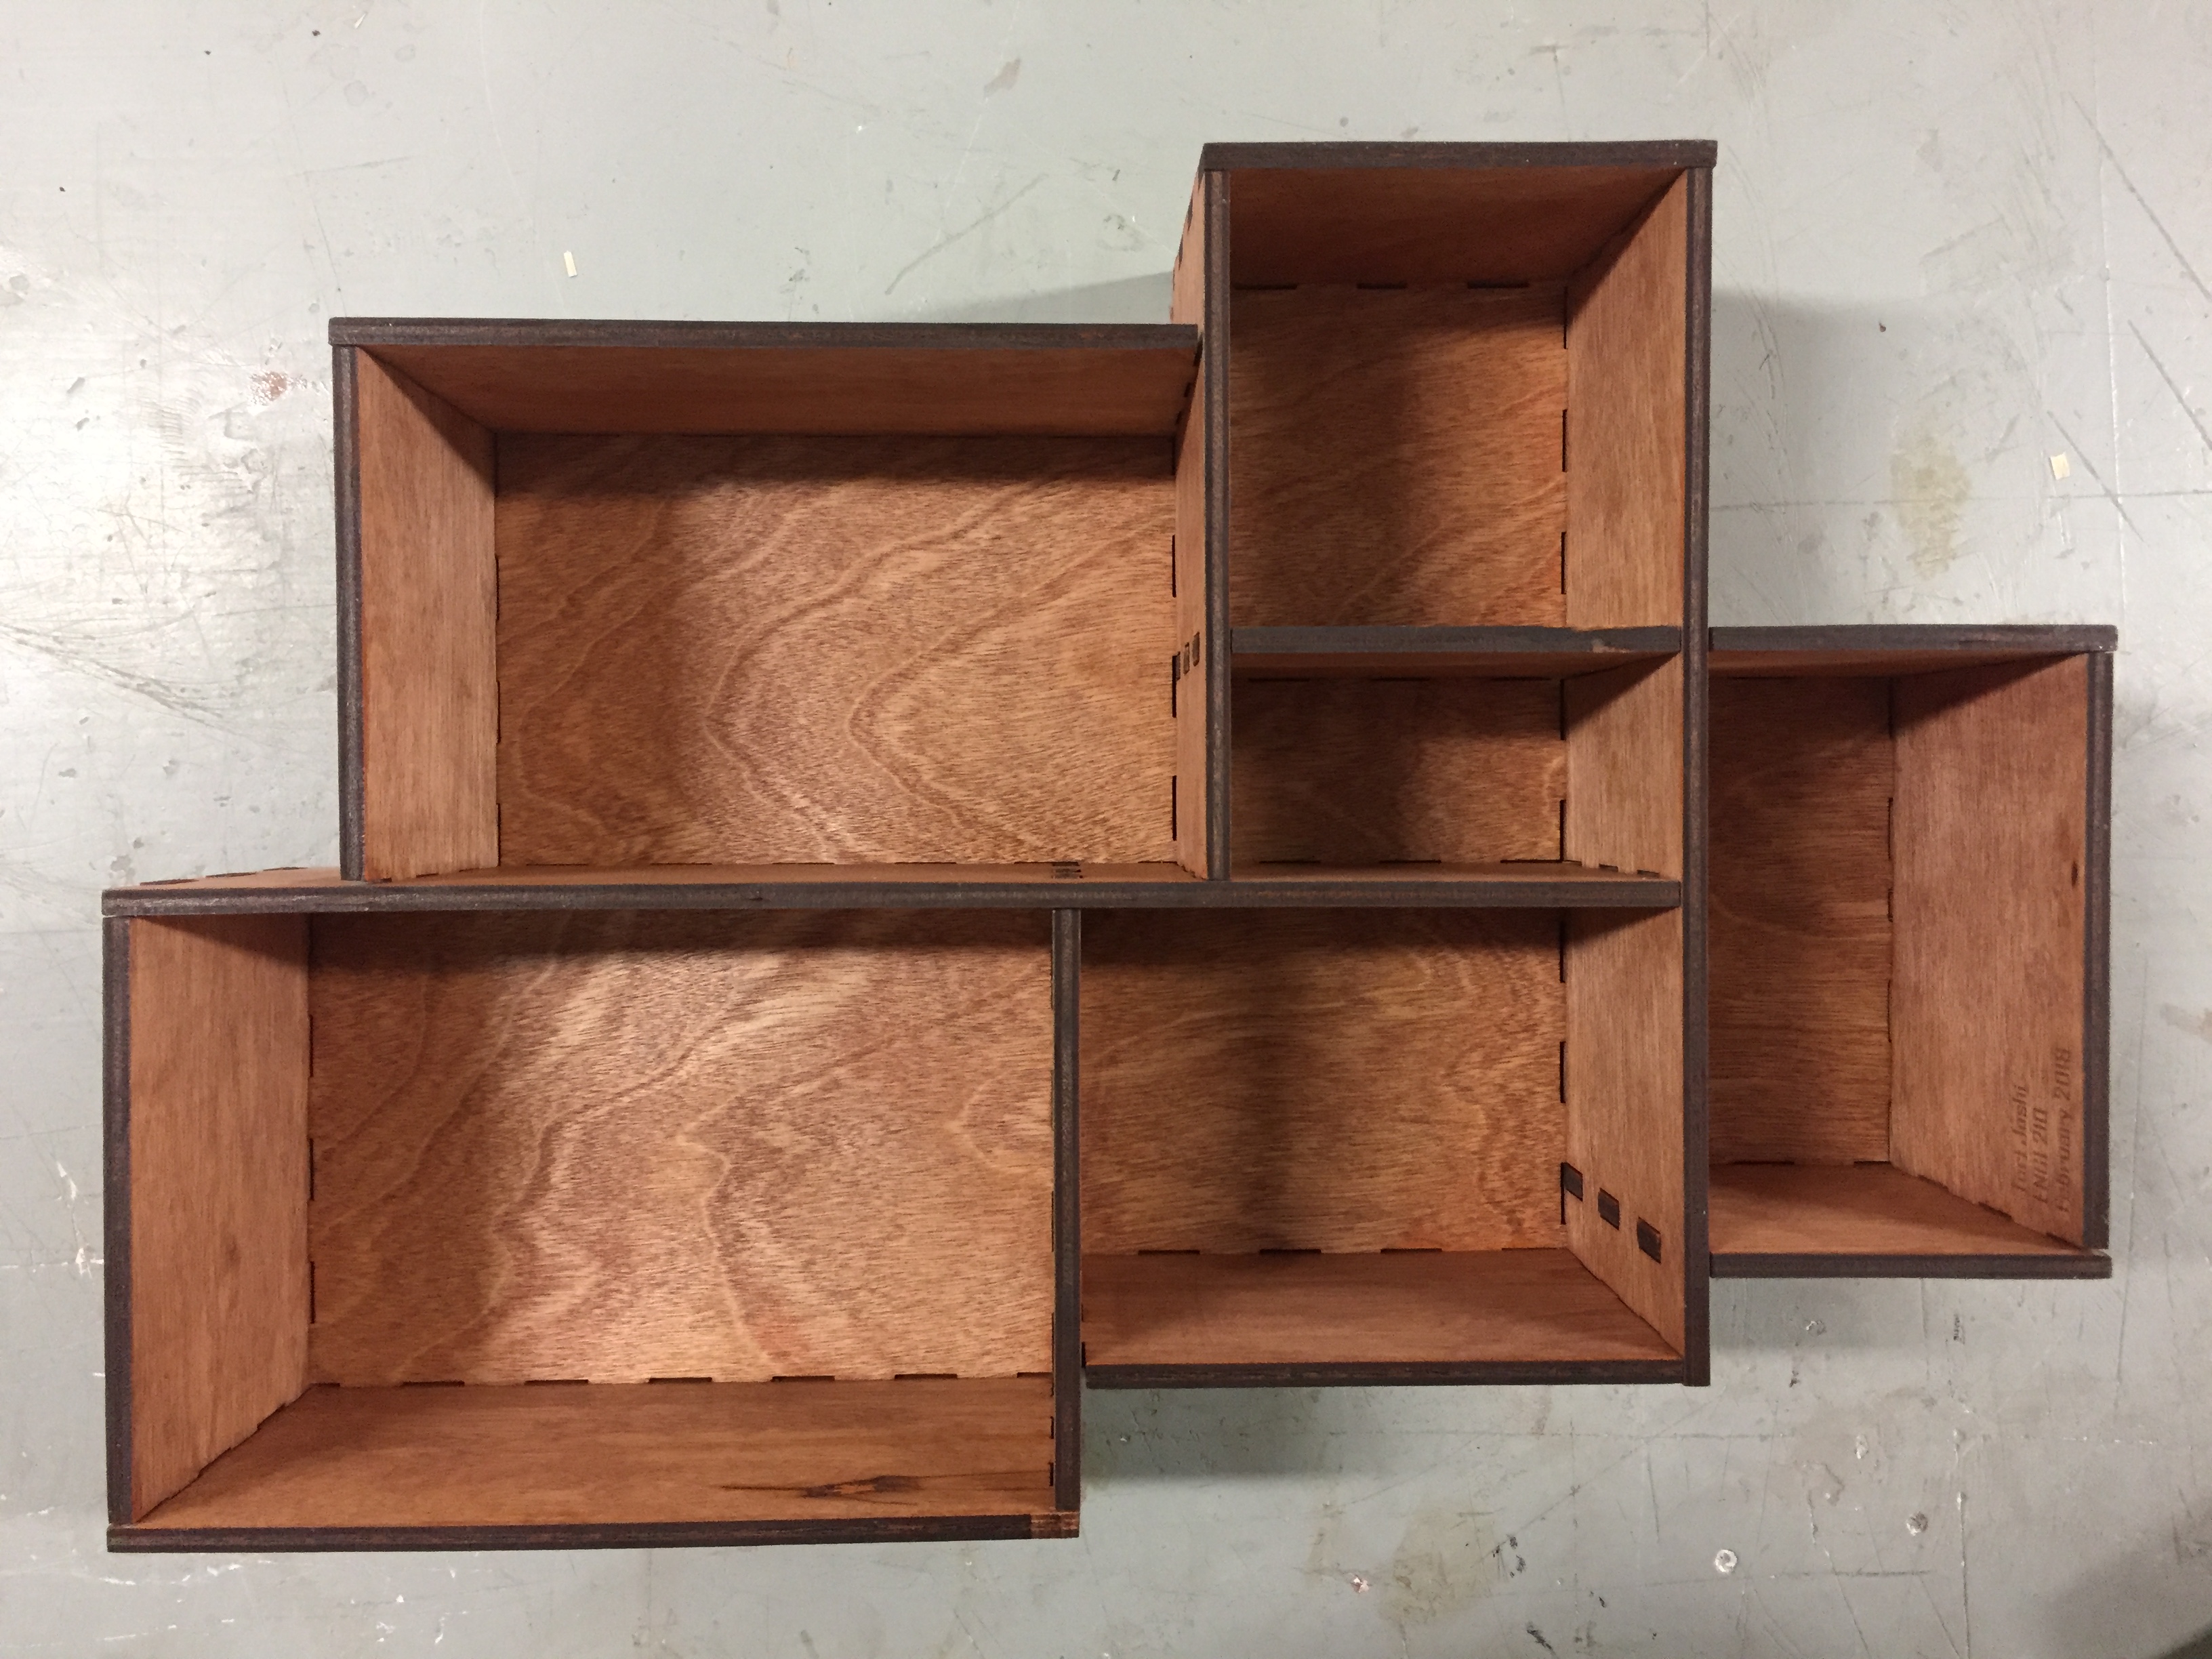
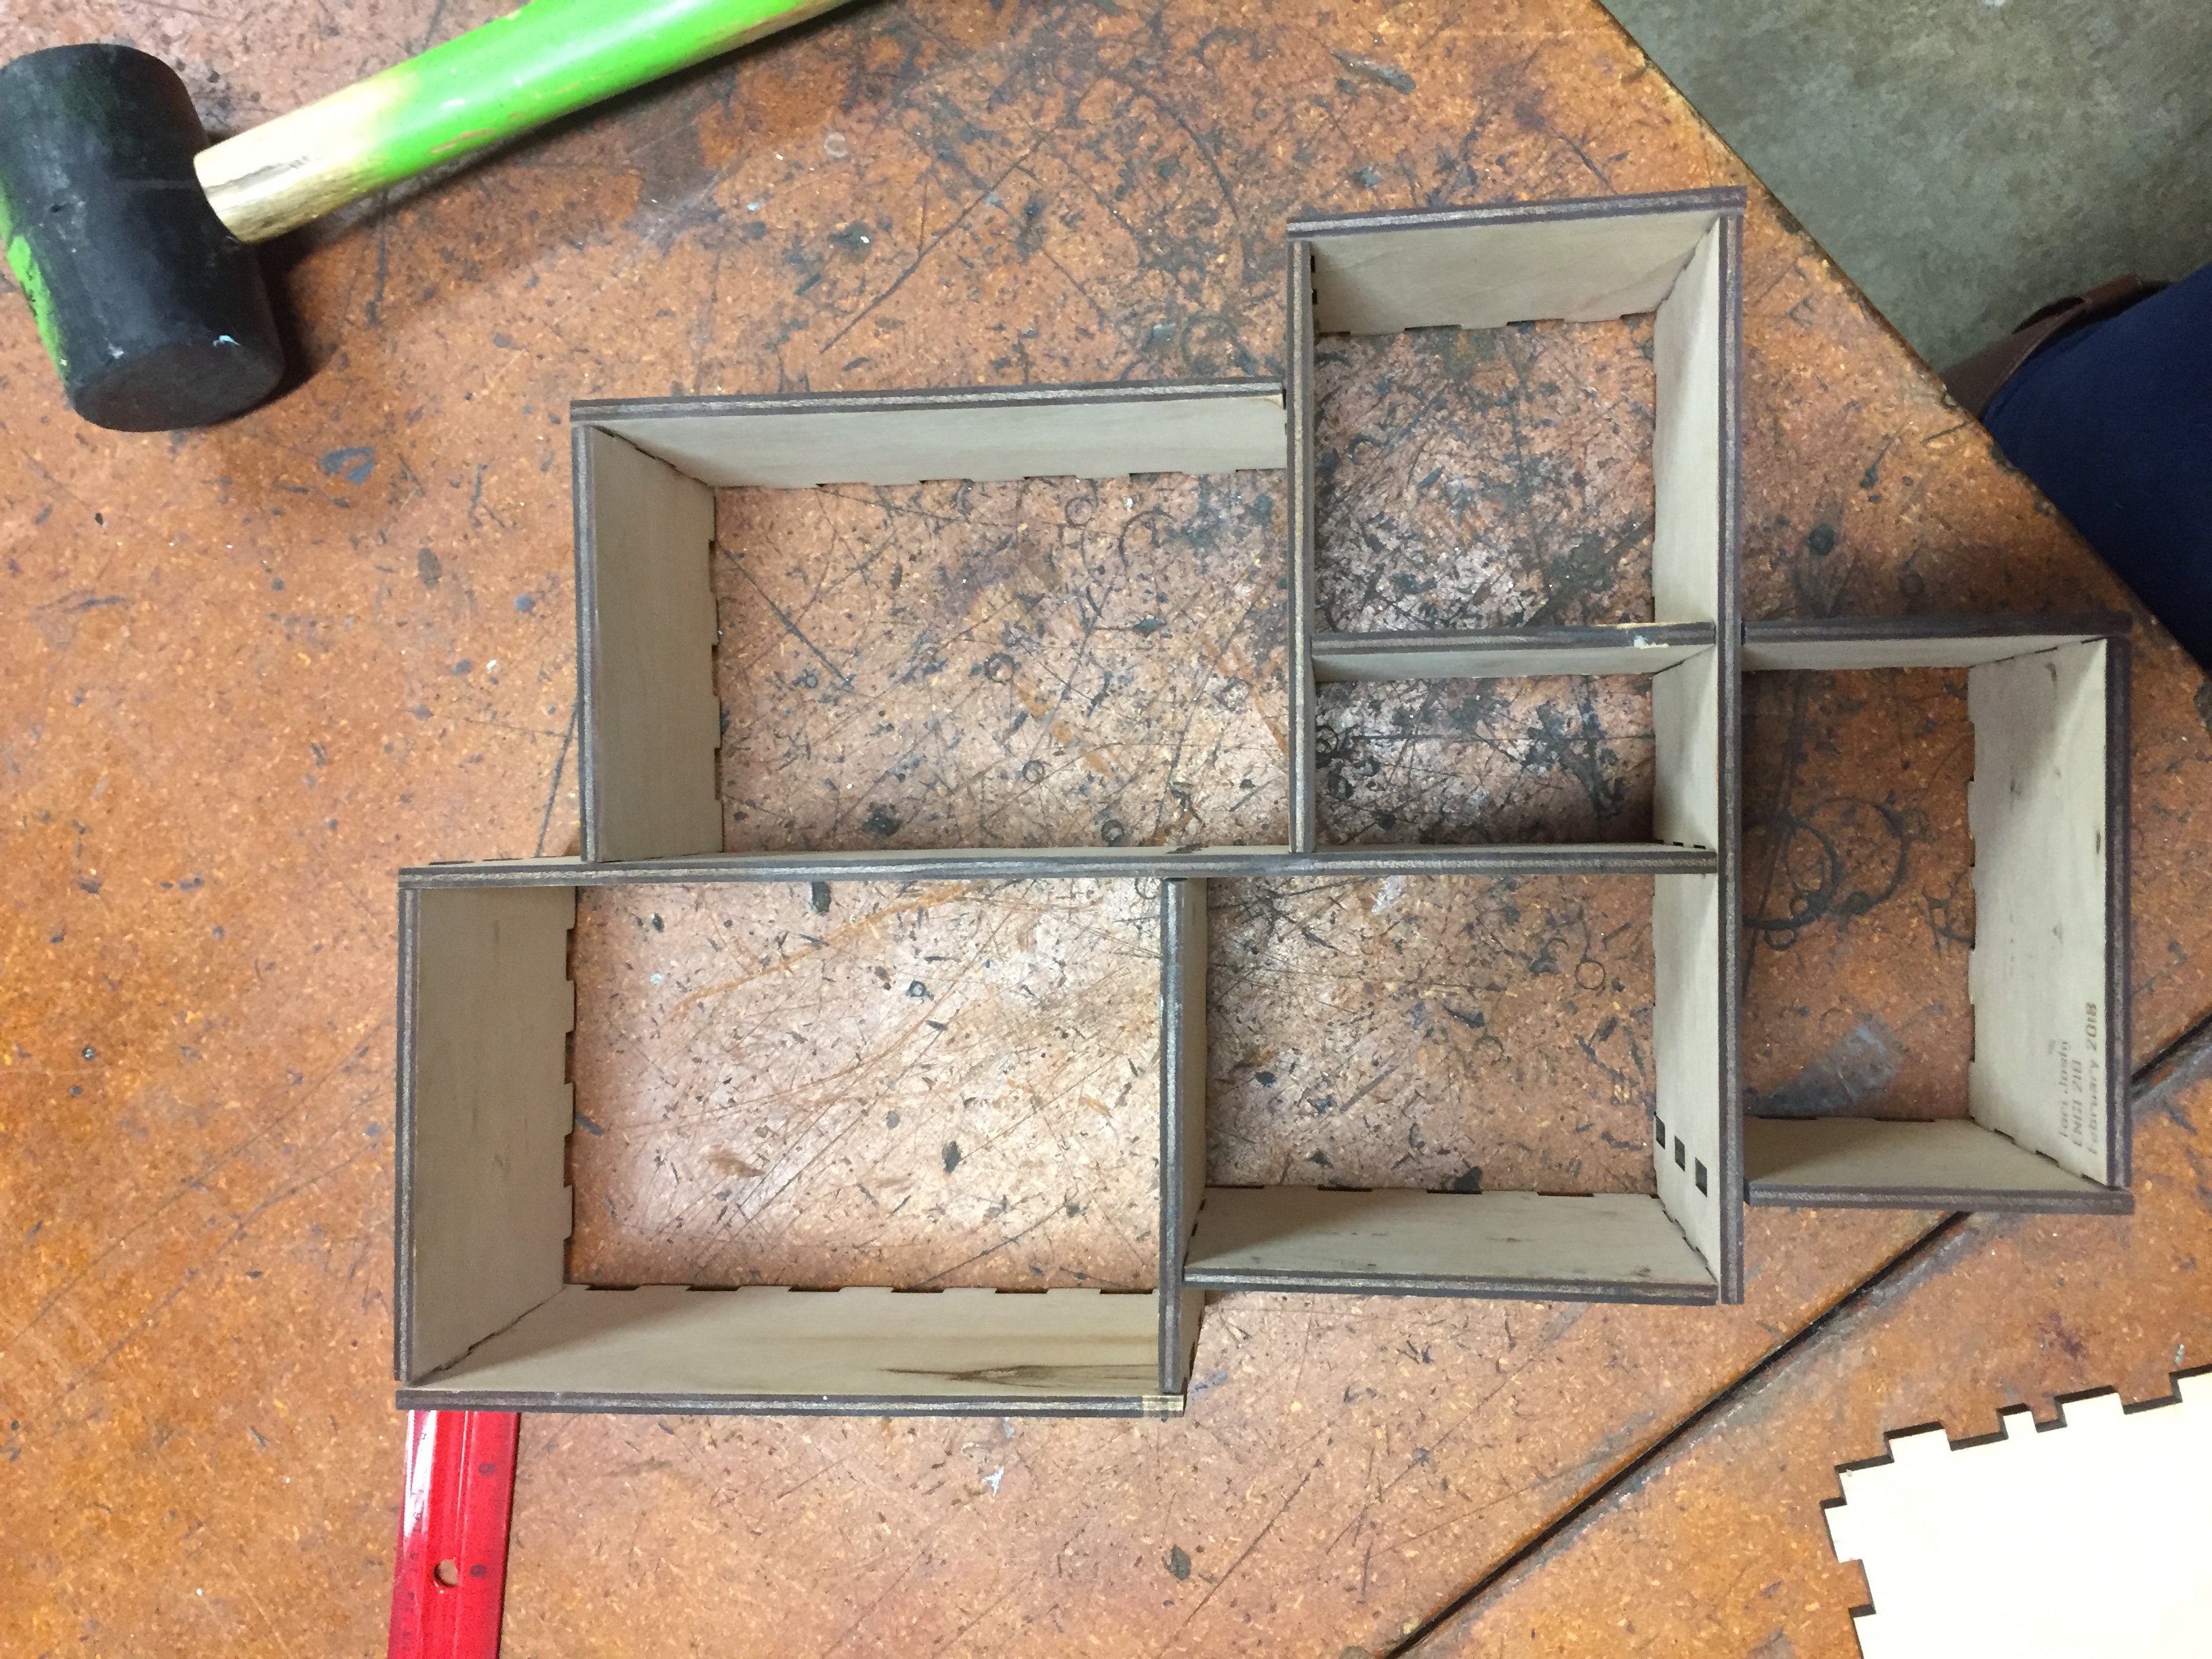
Top Down View of the Finished Box
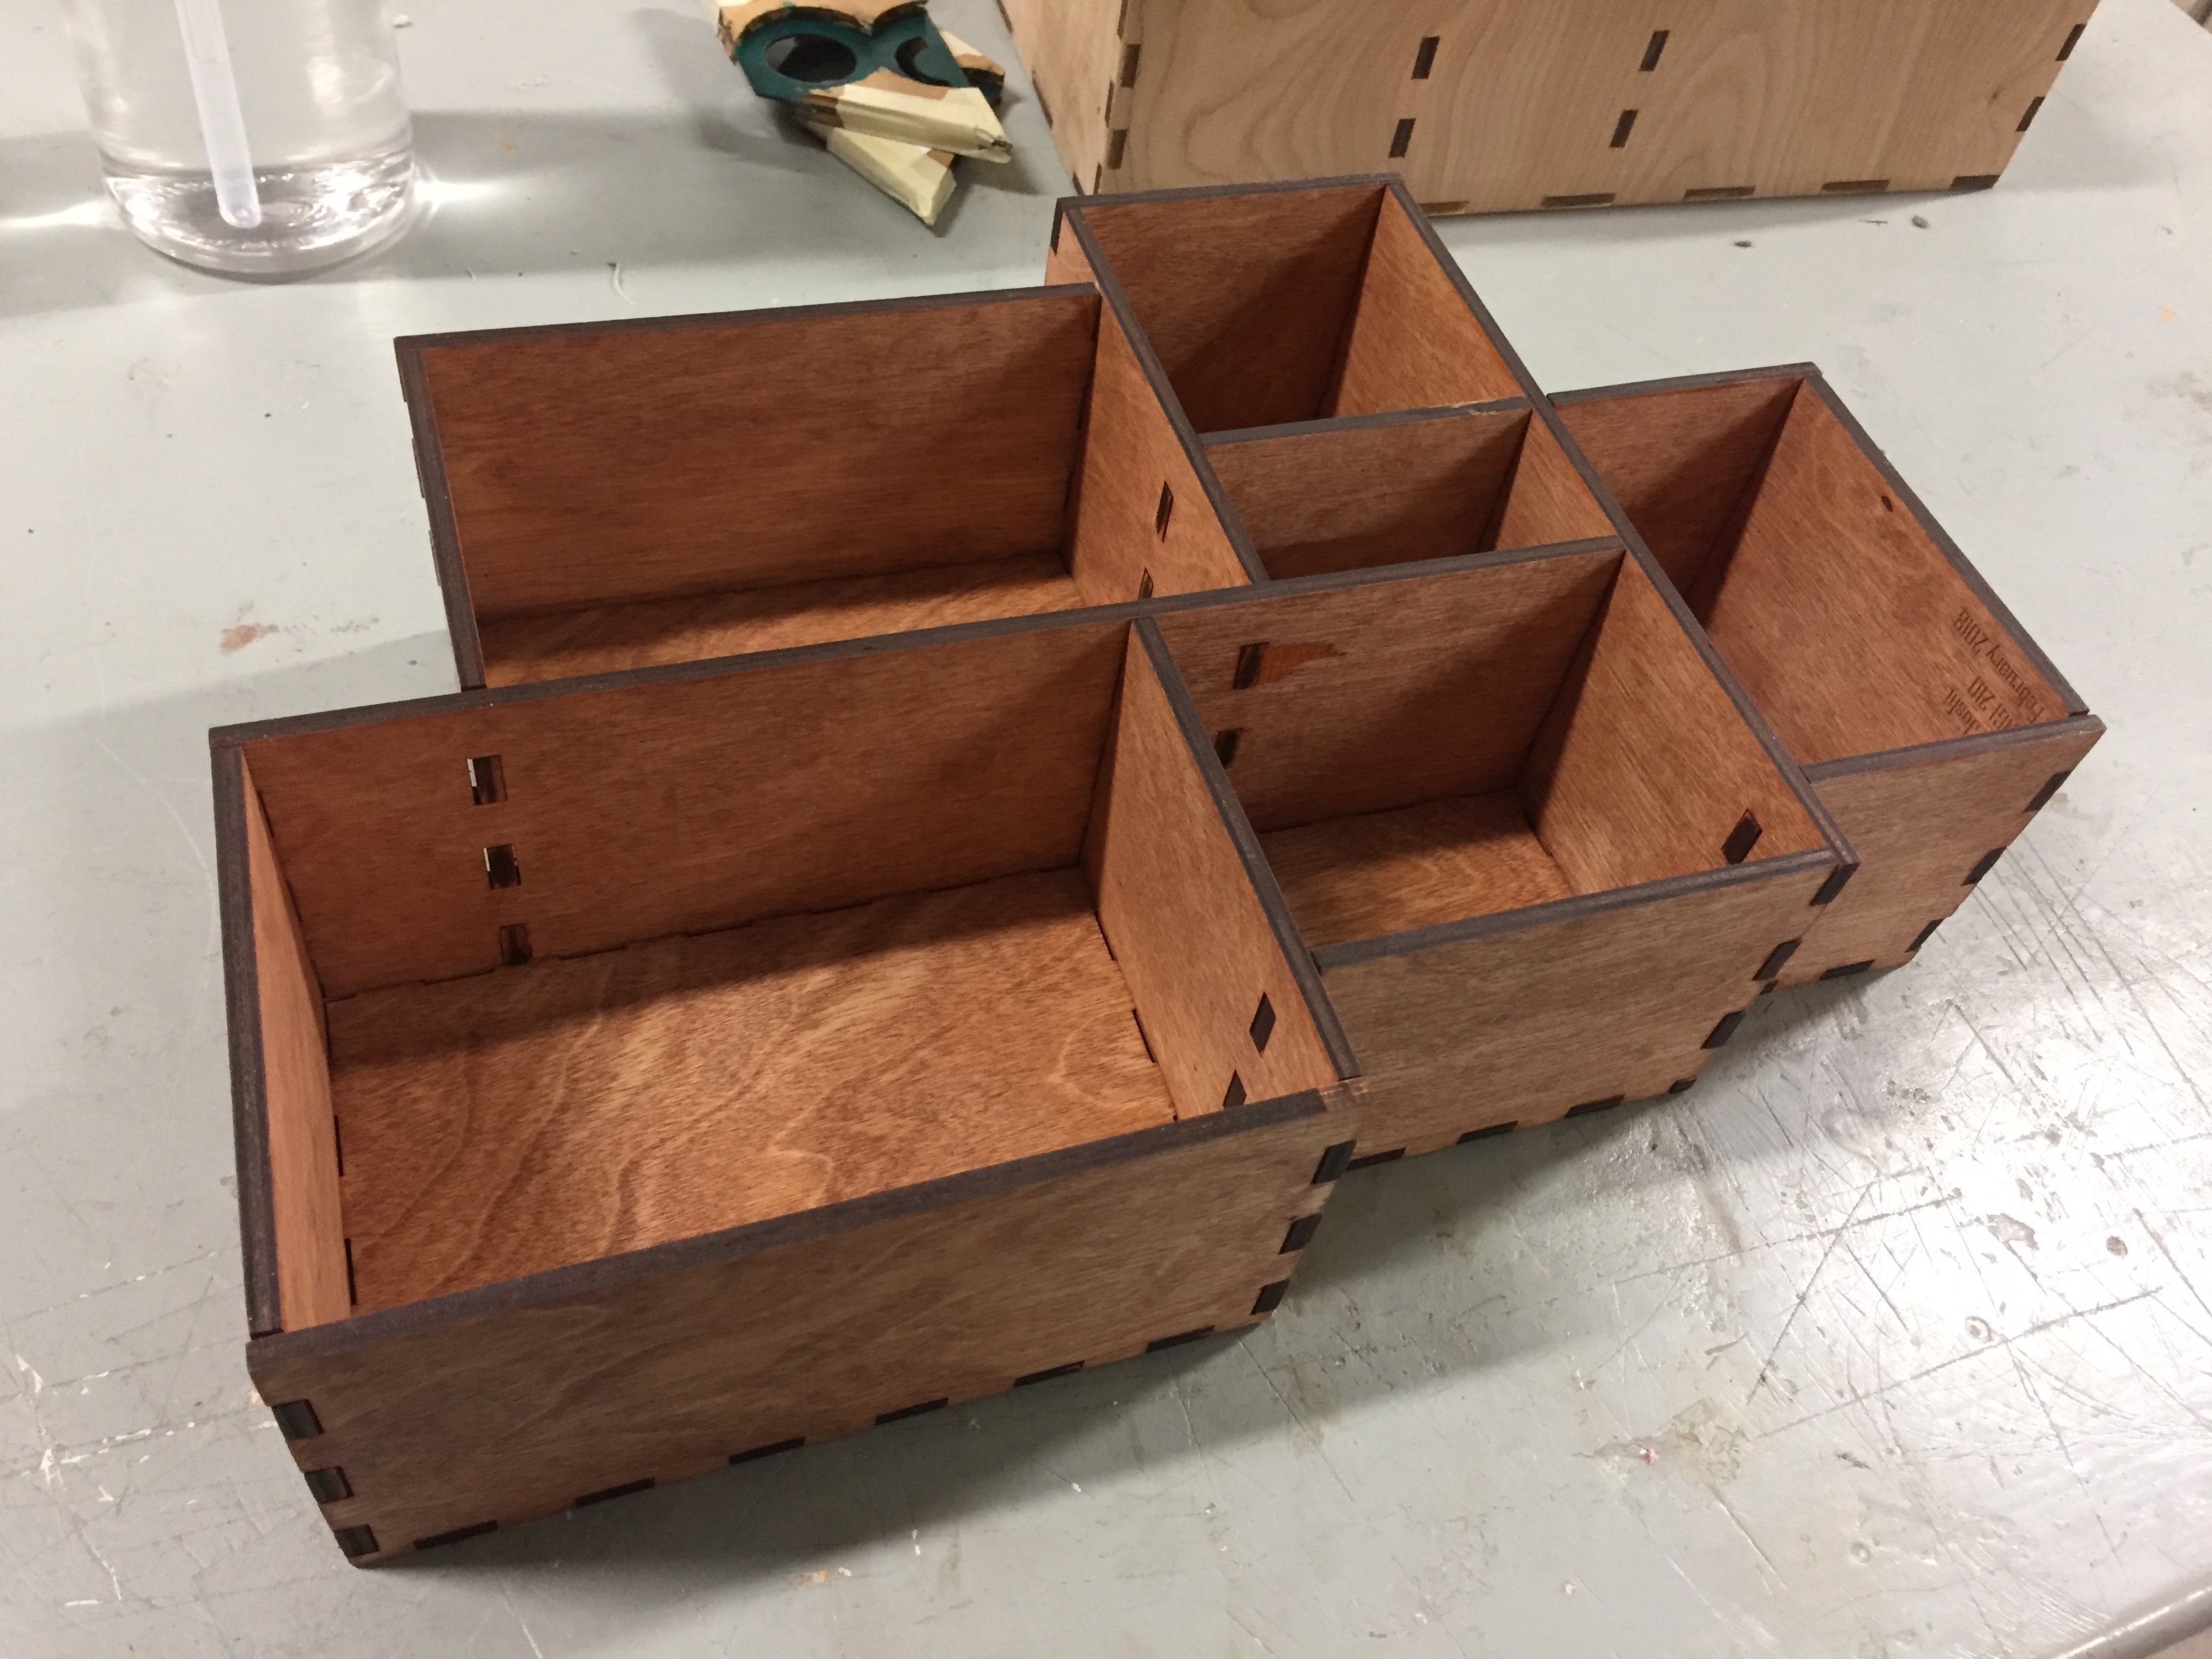
Isometric View of the Finished Box
