In what has been the worst trade deal in the history of trade deals, maybe ever, I managed to turn not one, but two diamonds into dead leaves.
Okay, not diamonds, as in the valuable chunk of shiny carbon out of the ground. It was a couple of these diamonds:

*Rhombuses
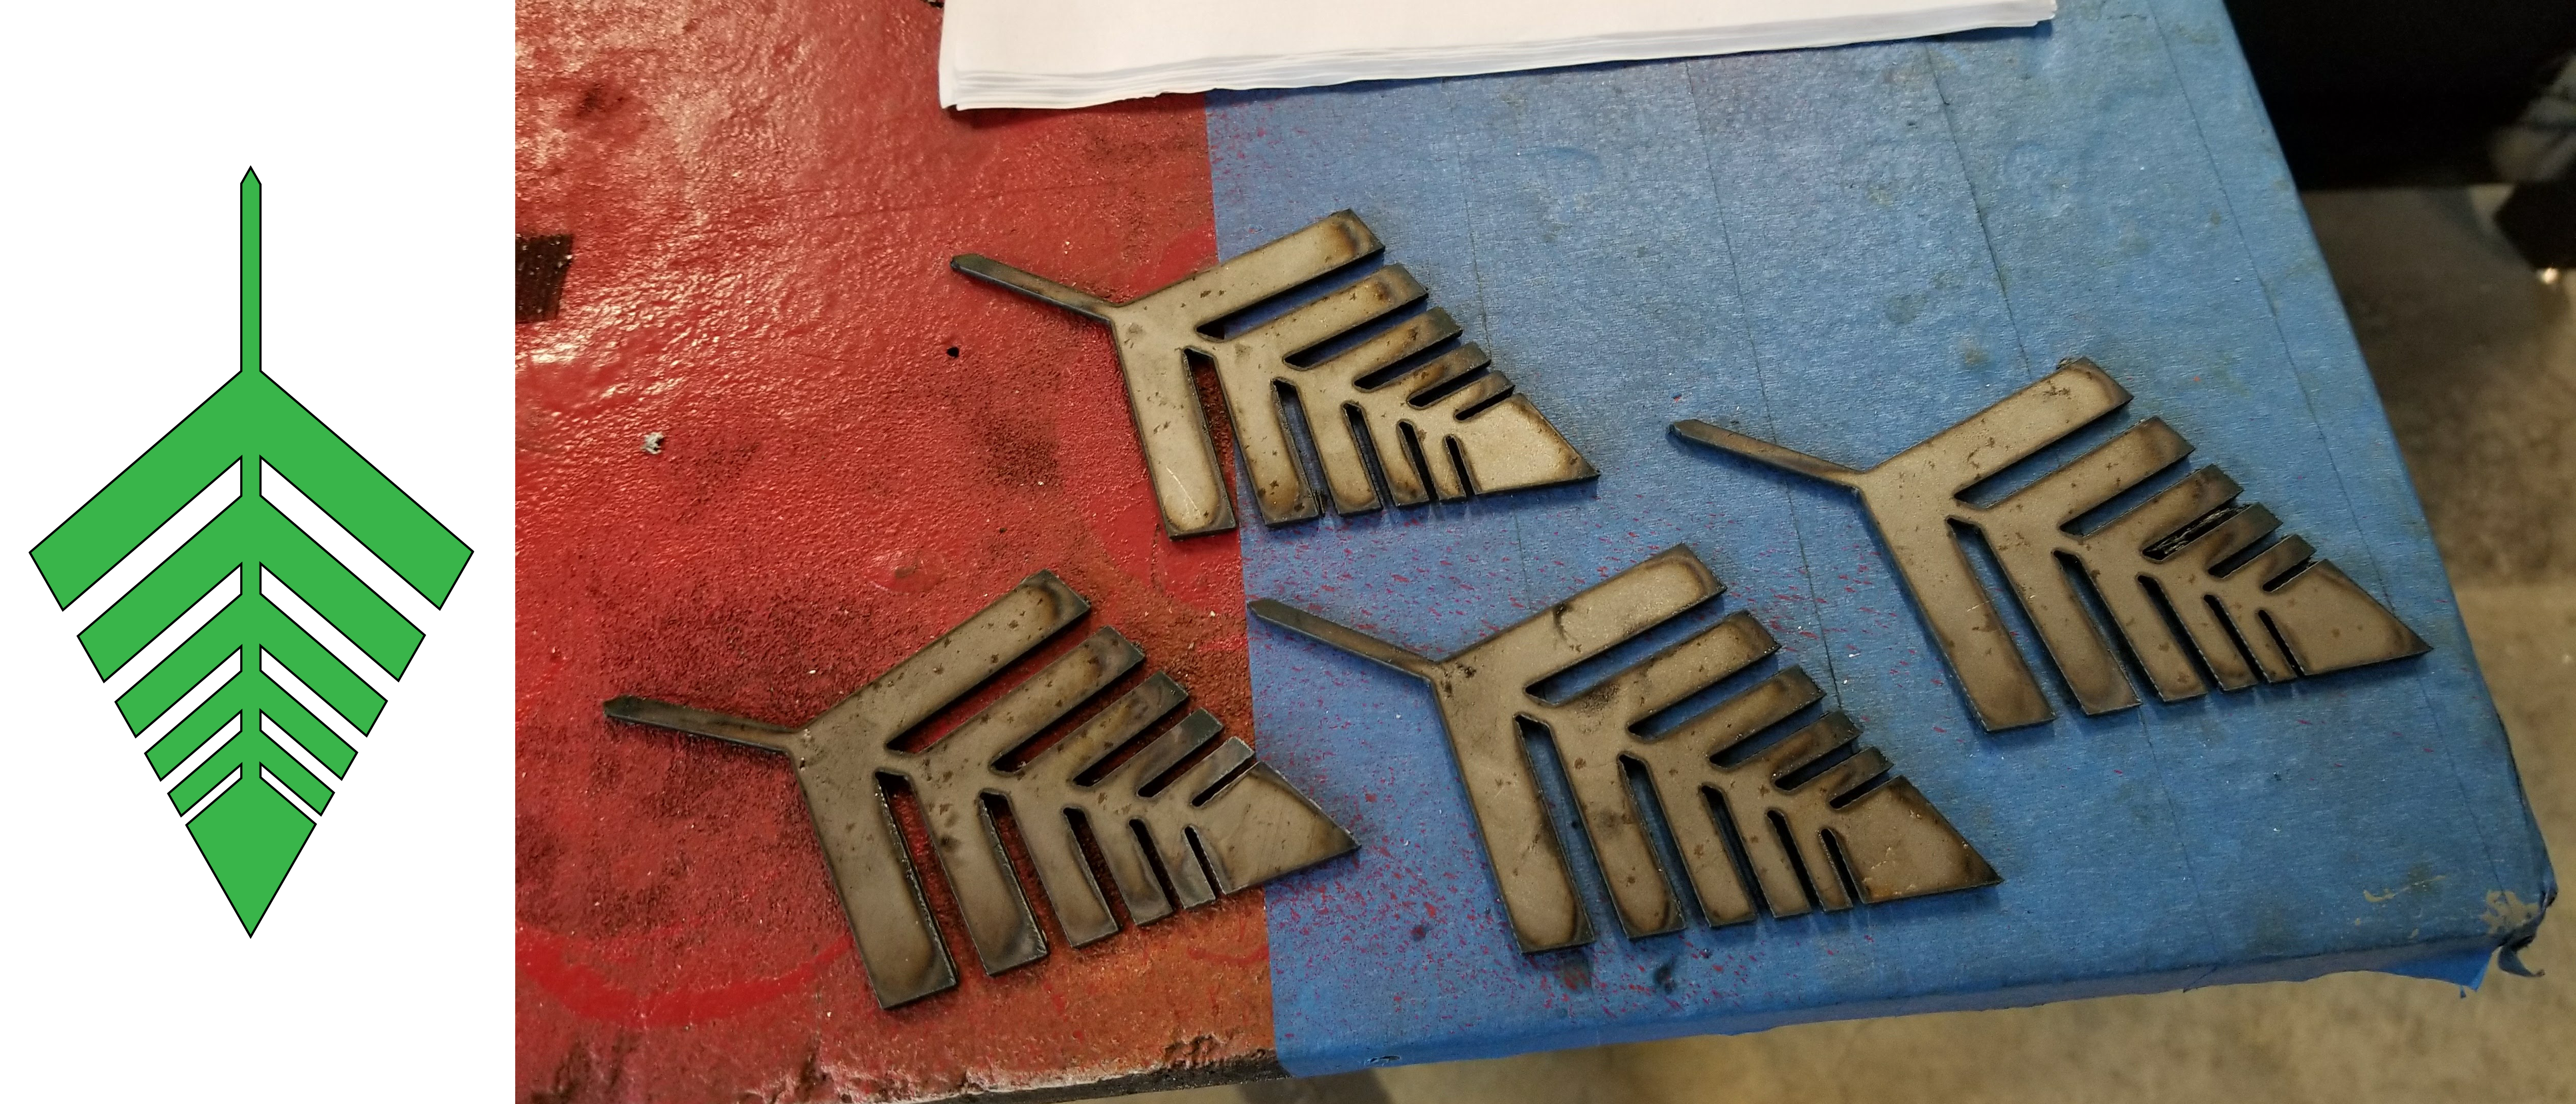
Why I decided to make a leaf, I don’t know. What I do know is that it is hard to make the leaflets than I thought. I tried scaling a chevron, but they didn’t line up too well and tended to close up with successive scalings. Rectangles were too unwieldy to make parallel and even. What ended up working is scaling the leaf body shape, the kite shape and lining them up with the bottom point. Then, the subtractive pathfinder tool made quick work of leaving just the leaflets.
The plasma cutter made quick work of cutting out the shape. Without it, making the deep grooves between the leaflets would have been a long day with a hacksaw and files. Instead, four leaves took 5 minutes of cutting and a different kind of file:
The file and the results!
The angle grinder wasn’t too nice to me. A couple times it caught the piece instead of removing the slag. This would bend the leaflets and occasionally send the whole leaf flying. That’s why you angle grind with the part spinning away from you! It also left deep scratches that never fully came out of the leaves, even after sandblasting. I was probably pressing down too hard. Regardless, it did its job and knocked all the slag off. I took a bit of sandpaper afterwards, cleaned each side up a bit more, and gave a couple passes over the edges.

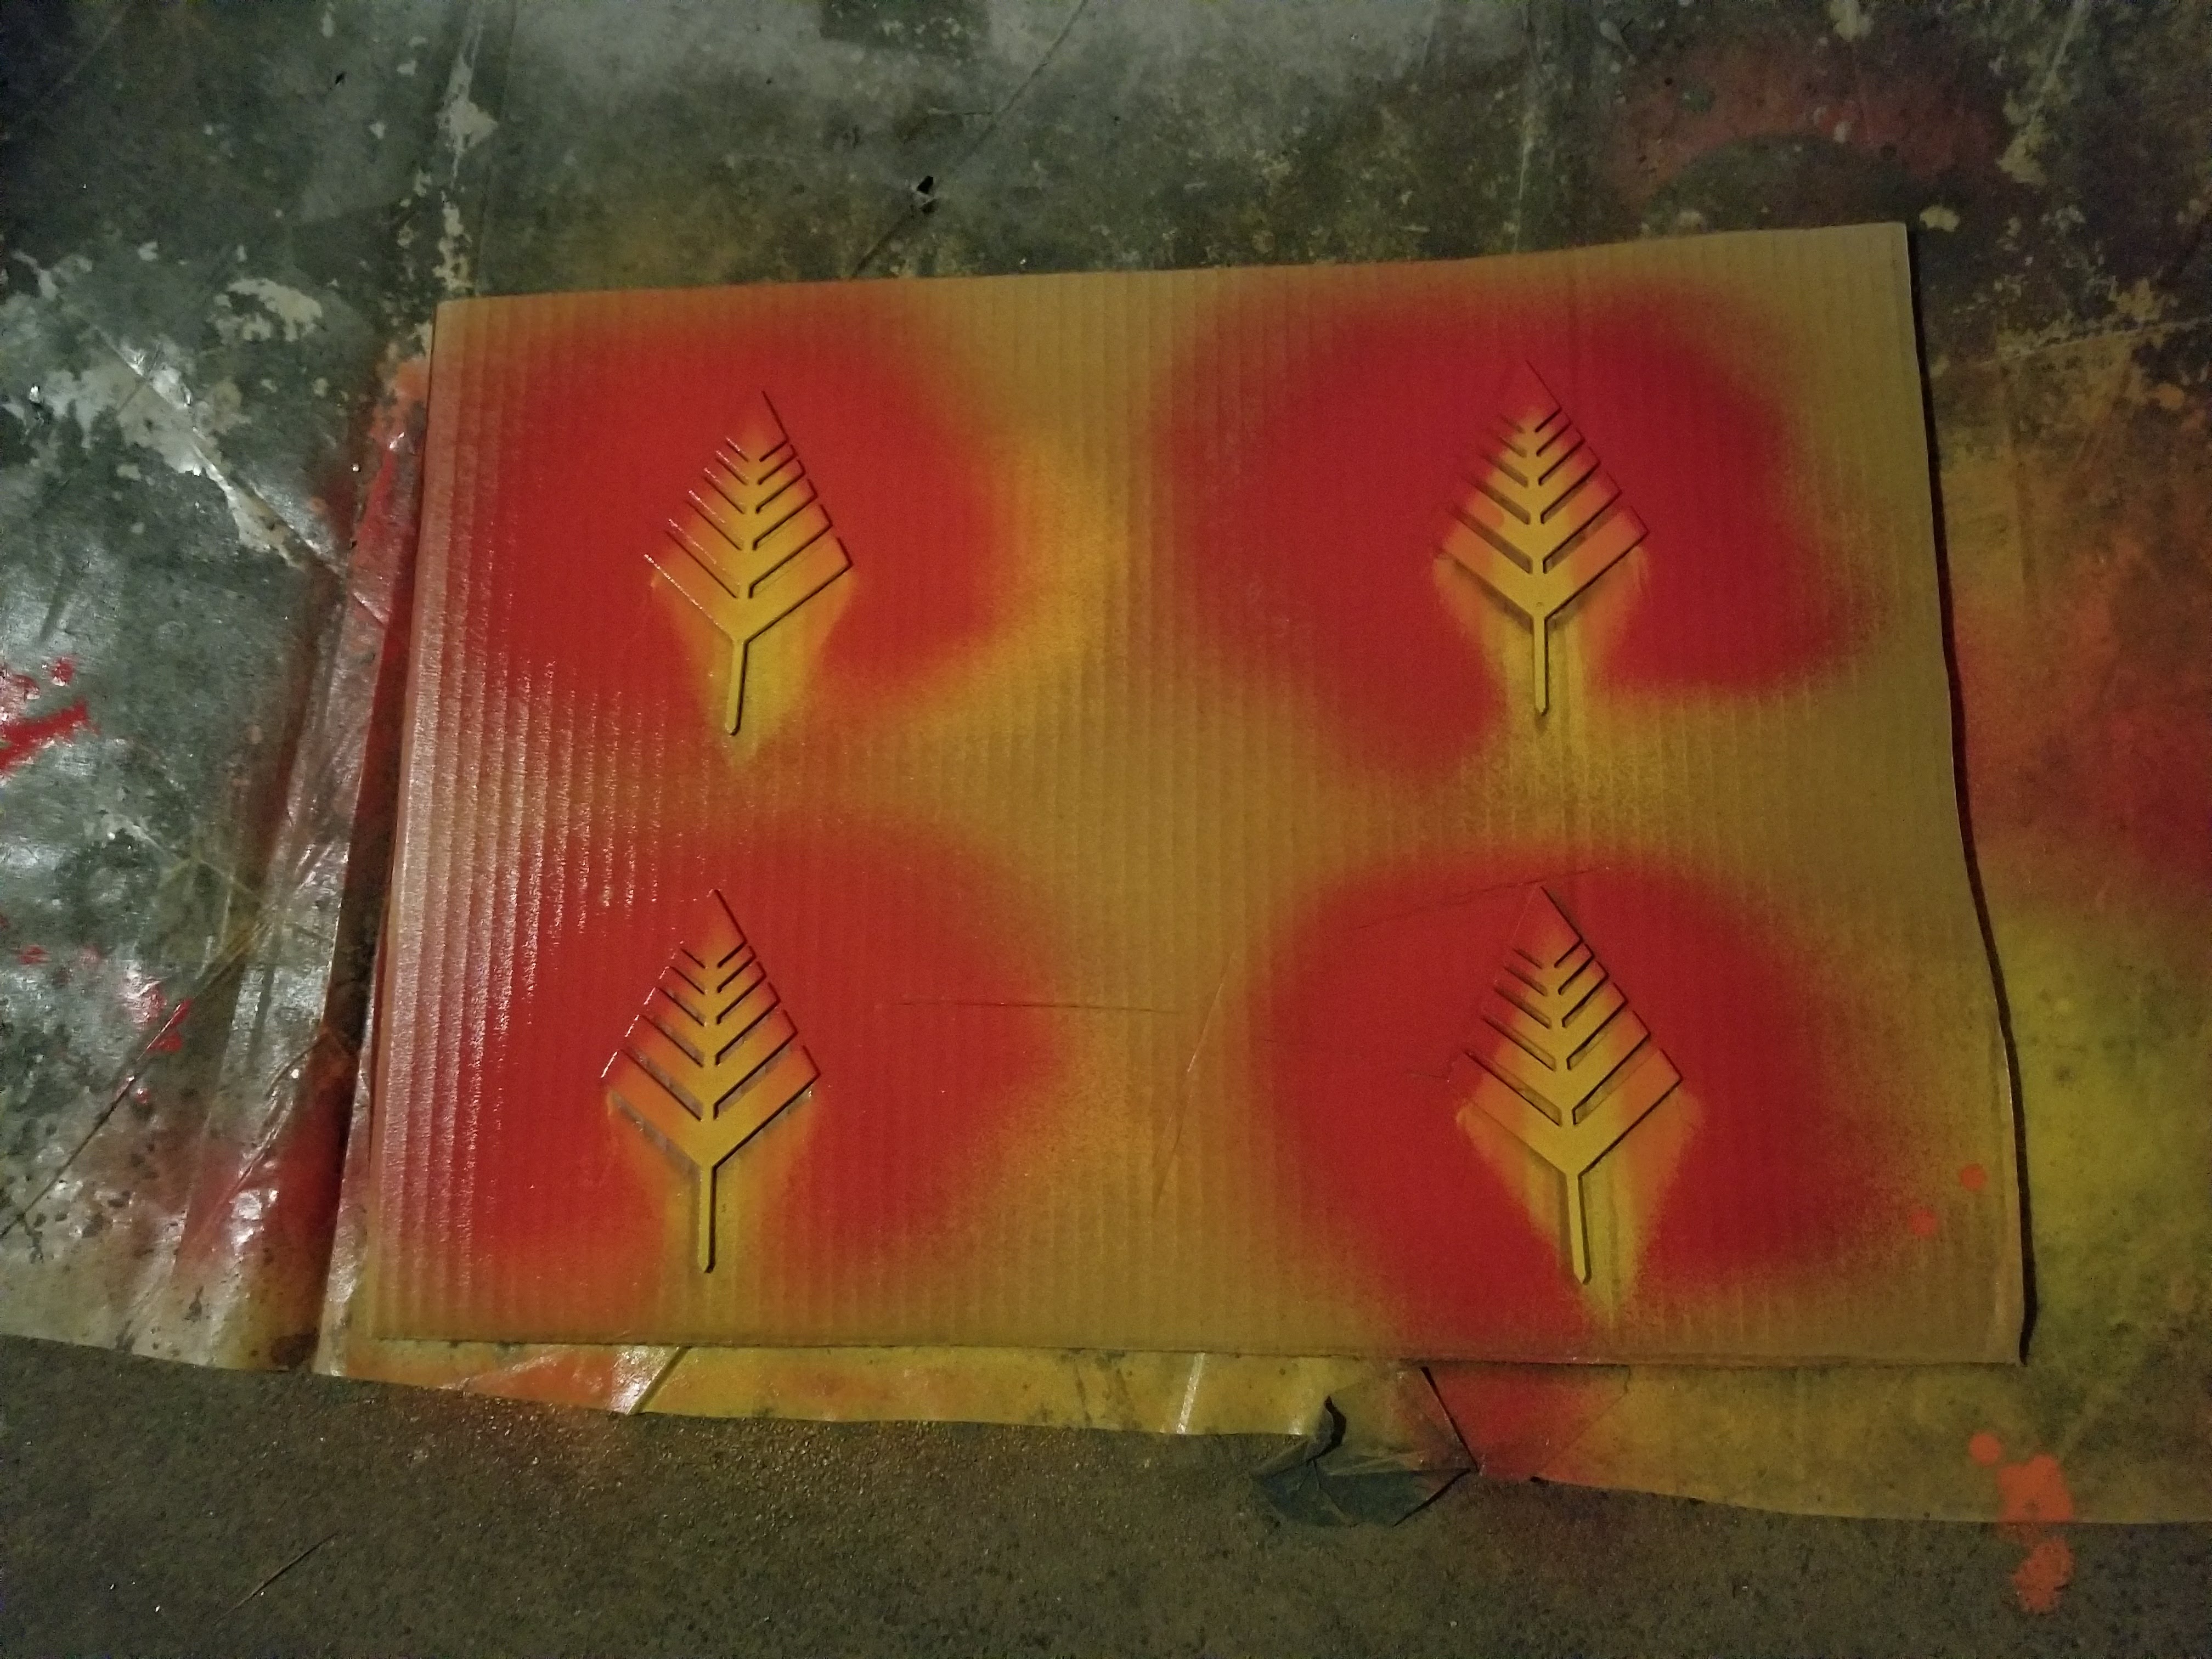
Sandblasting was a quick job, once I figured out where to place the sand hose. It was frustrating trying to deal with moving the hose without putting a nick in it and making sure it has enough sand to run. I found a sweet spot in a bottom corner and ran my sandstorm simulation:
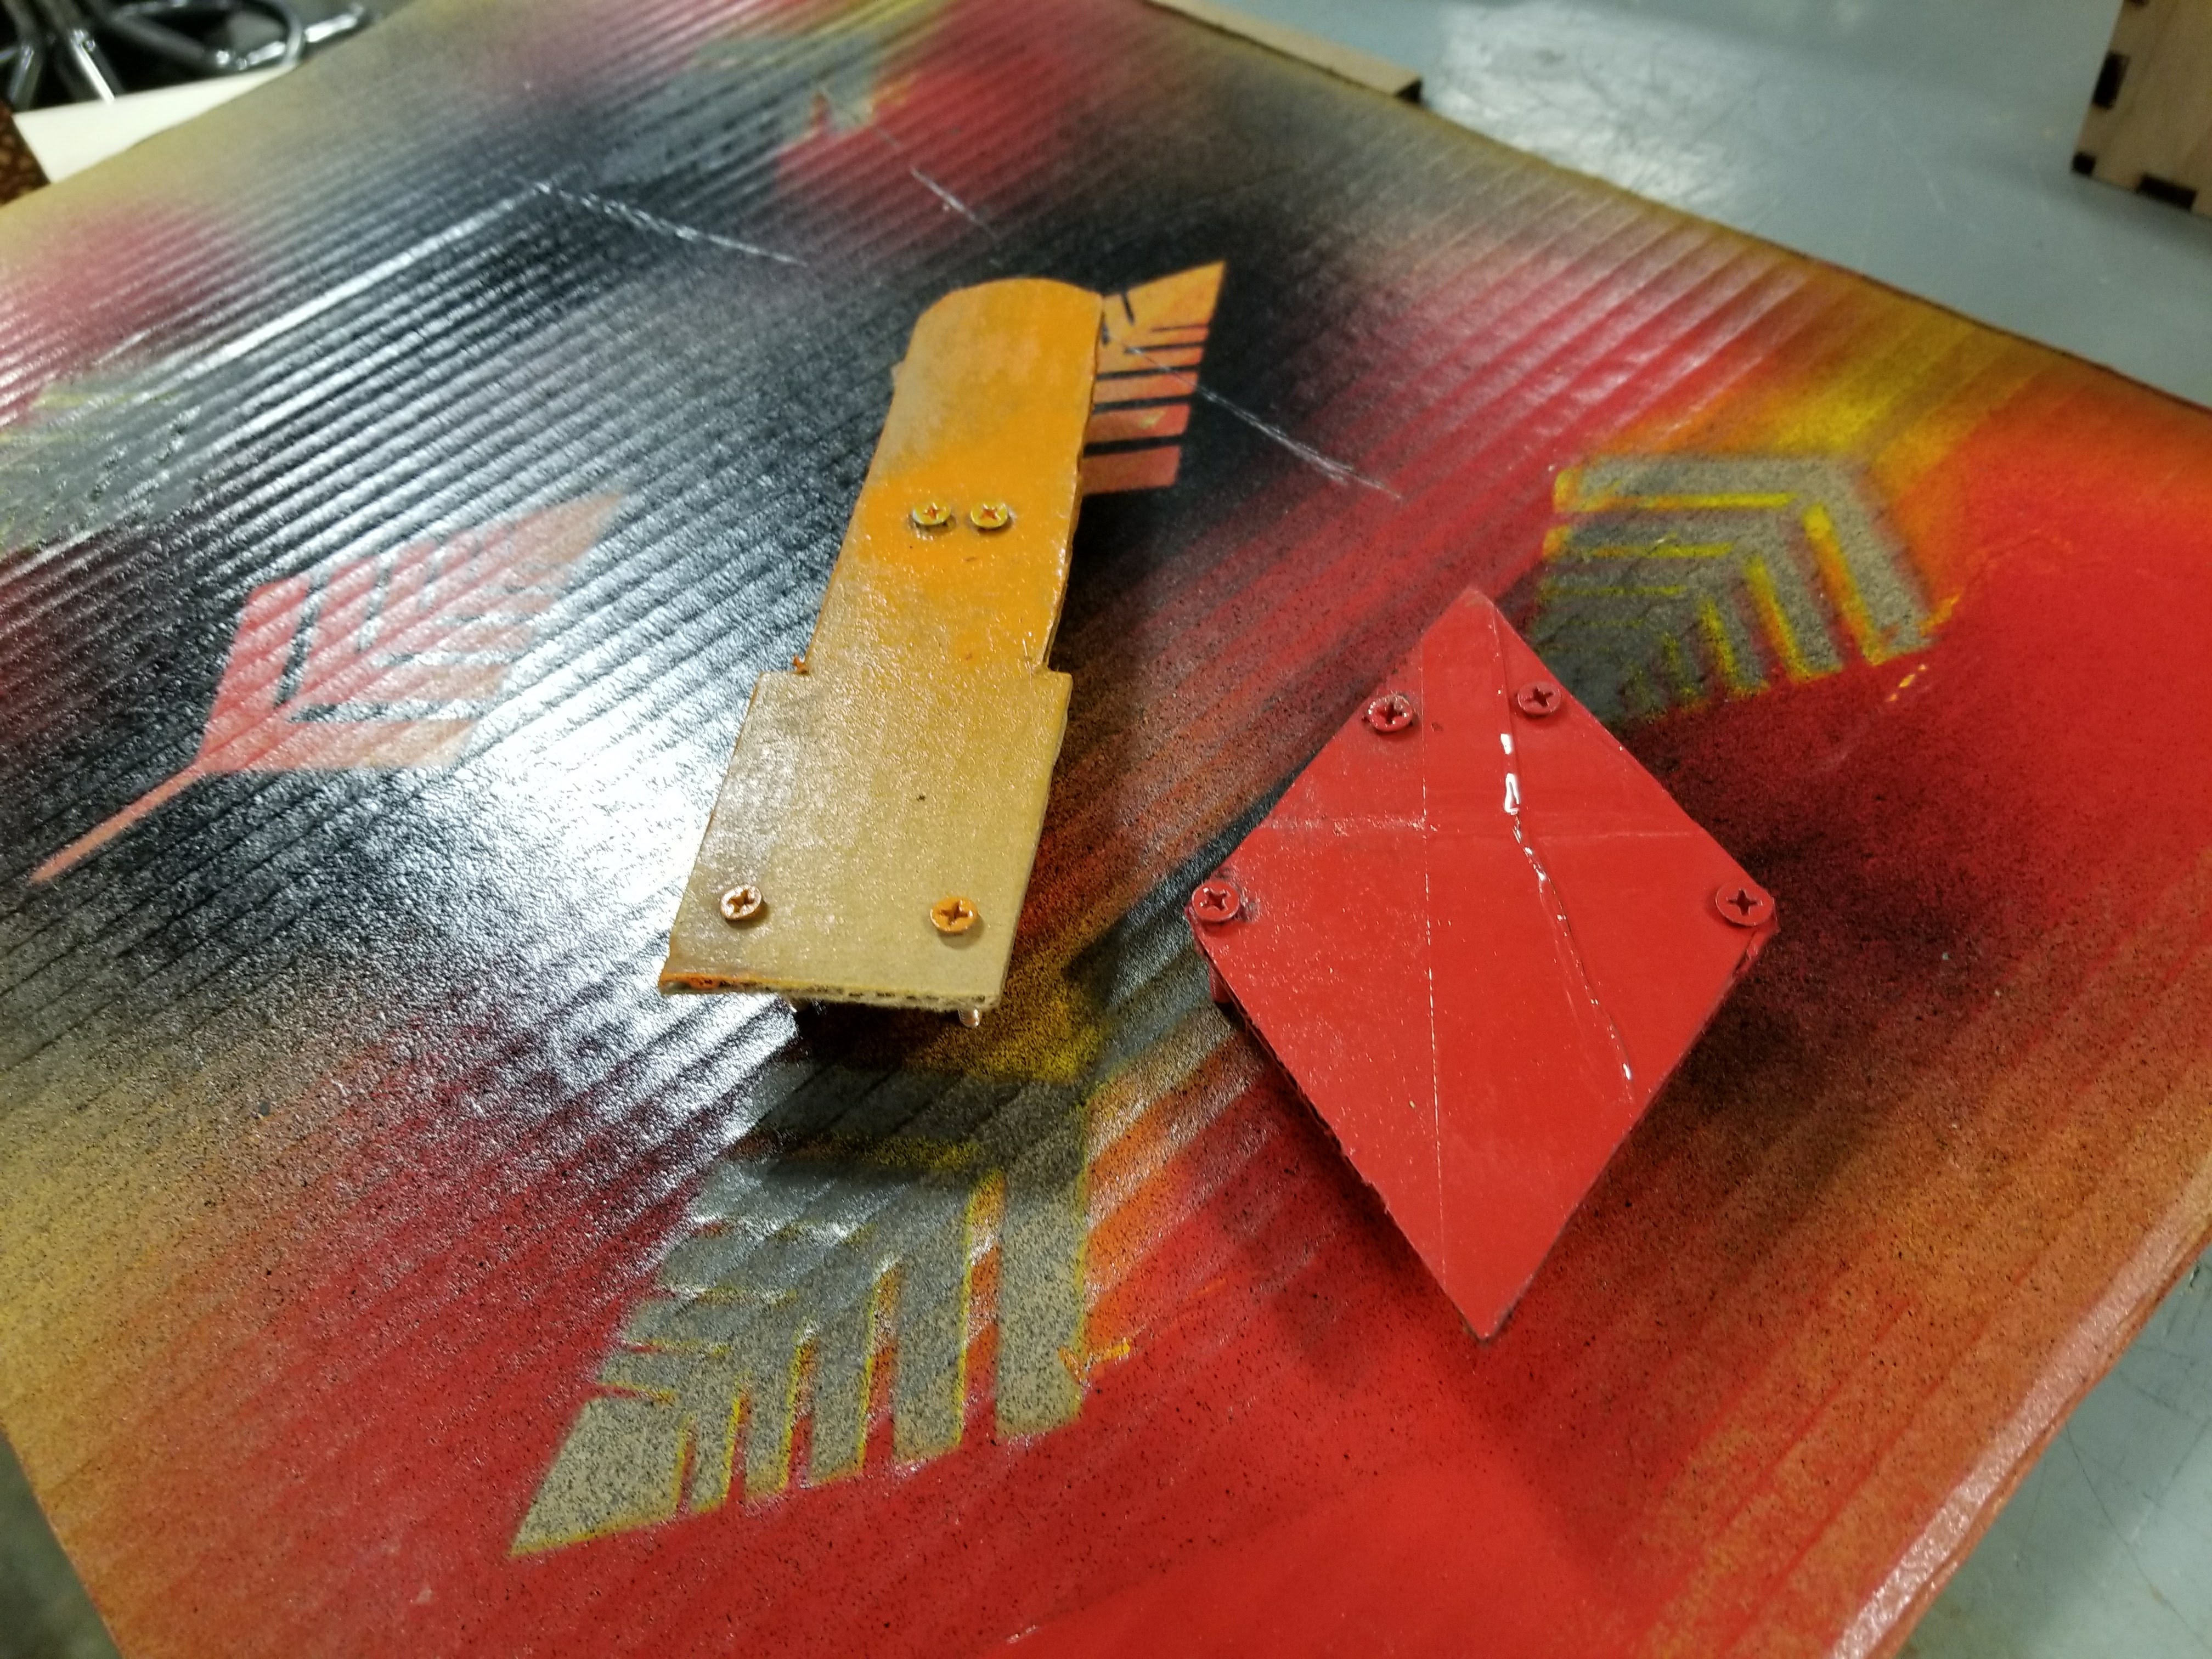
Now this is where the fun begins! I had to make a decision to do a boring green color or go crazy and try to make an autumn gradient across the leaf. I don’t like taking the easy way out. I looked up videos on how guitar makers do the sunburst finish and tried to replicate that. I cut out a couple jigs from cardboard and placed the screws in a way fit into certain spots on the leaves. This ensured consistent results across each leaf.
After thorough use.
This is also the first part where I had a mess-up. Because I used the same jigs for all four leaves, they built up a lot of paint on them. On the last leaf, the pool of orange paint that was building on the top dripped down and left a nice big orange spot, ruining the fade into yellow.
And then there were three. That’s okay, I only need two; I cut four in anticipation of mistakes. Still on track!
The next morning, after the paint had dried, I picked up the piece and looked at the back. Some paint had got on there from the pieces moving around while I was trying to fit the jig. Though the original plan was to leave the back as bare metal, it wasn’t much trouble to put some paint on there. But, something blew in while the paint was drying outside and left little flakes in the coat. I panicked a bit and hastily added a second coat. The spots are still visible, but the real damage was to the front. I had left the pieces face-down for several hours, and when I went to remove them, they stuck slightly. Though it’s not really visible in pictures, there’s a couple patchy points around the edges where the cardboard took some paint. I thought letting the paint dry overnight was enough, but apparently not in Houston. The cold February weather combined with 100% humidity made pretty much the exact opposite of ideal spray paint conditions. Oh well, they still came out okay.
This next part was not okay.

I tried every method I could think of to get the text on the back. That poor leaf with a drip on it went through hell and back until it transmogrified into the abomination above. I tried, in no particular order:
- Paper spray paint stencil
- Weighted paper spray paint stencil
- Paper spray paint stencil, bold font
- Laser etching, about four times
- Wooden spray paint stencil
- Liquid paint
- Stenciled sharpie
- Writing with sharpie
- Recoating the back to retry slight variations
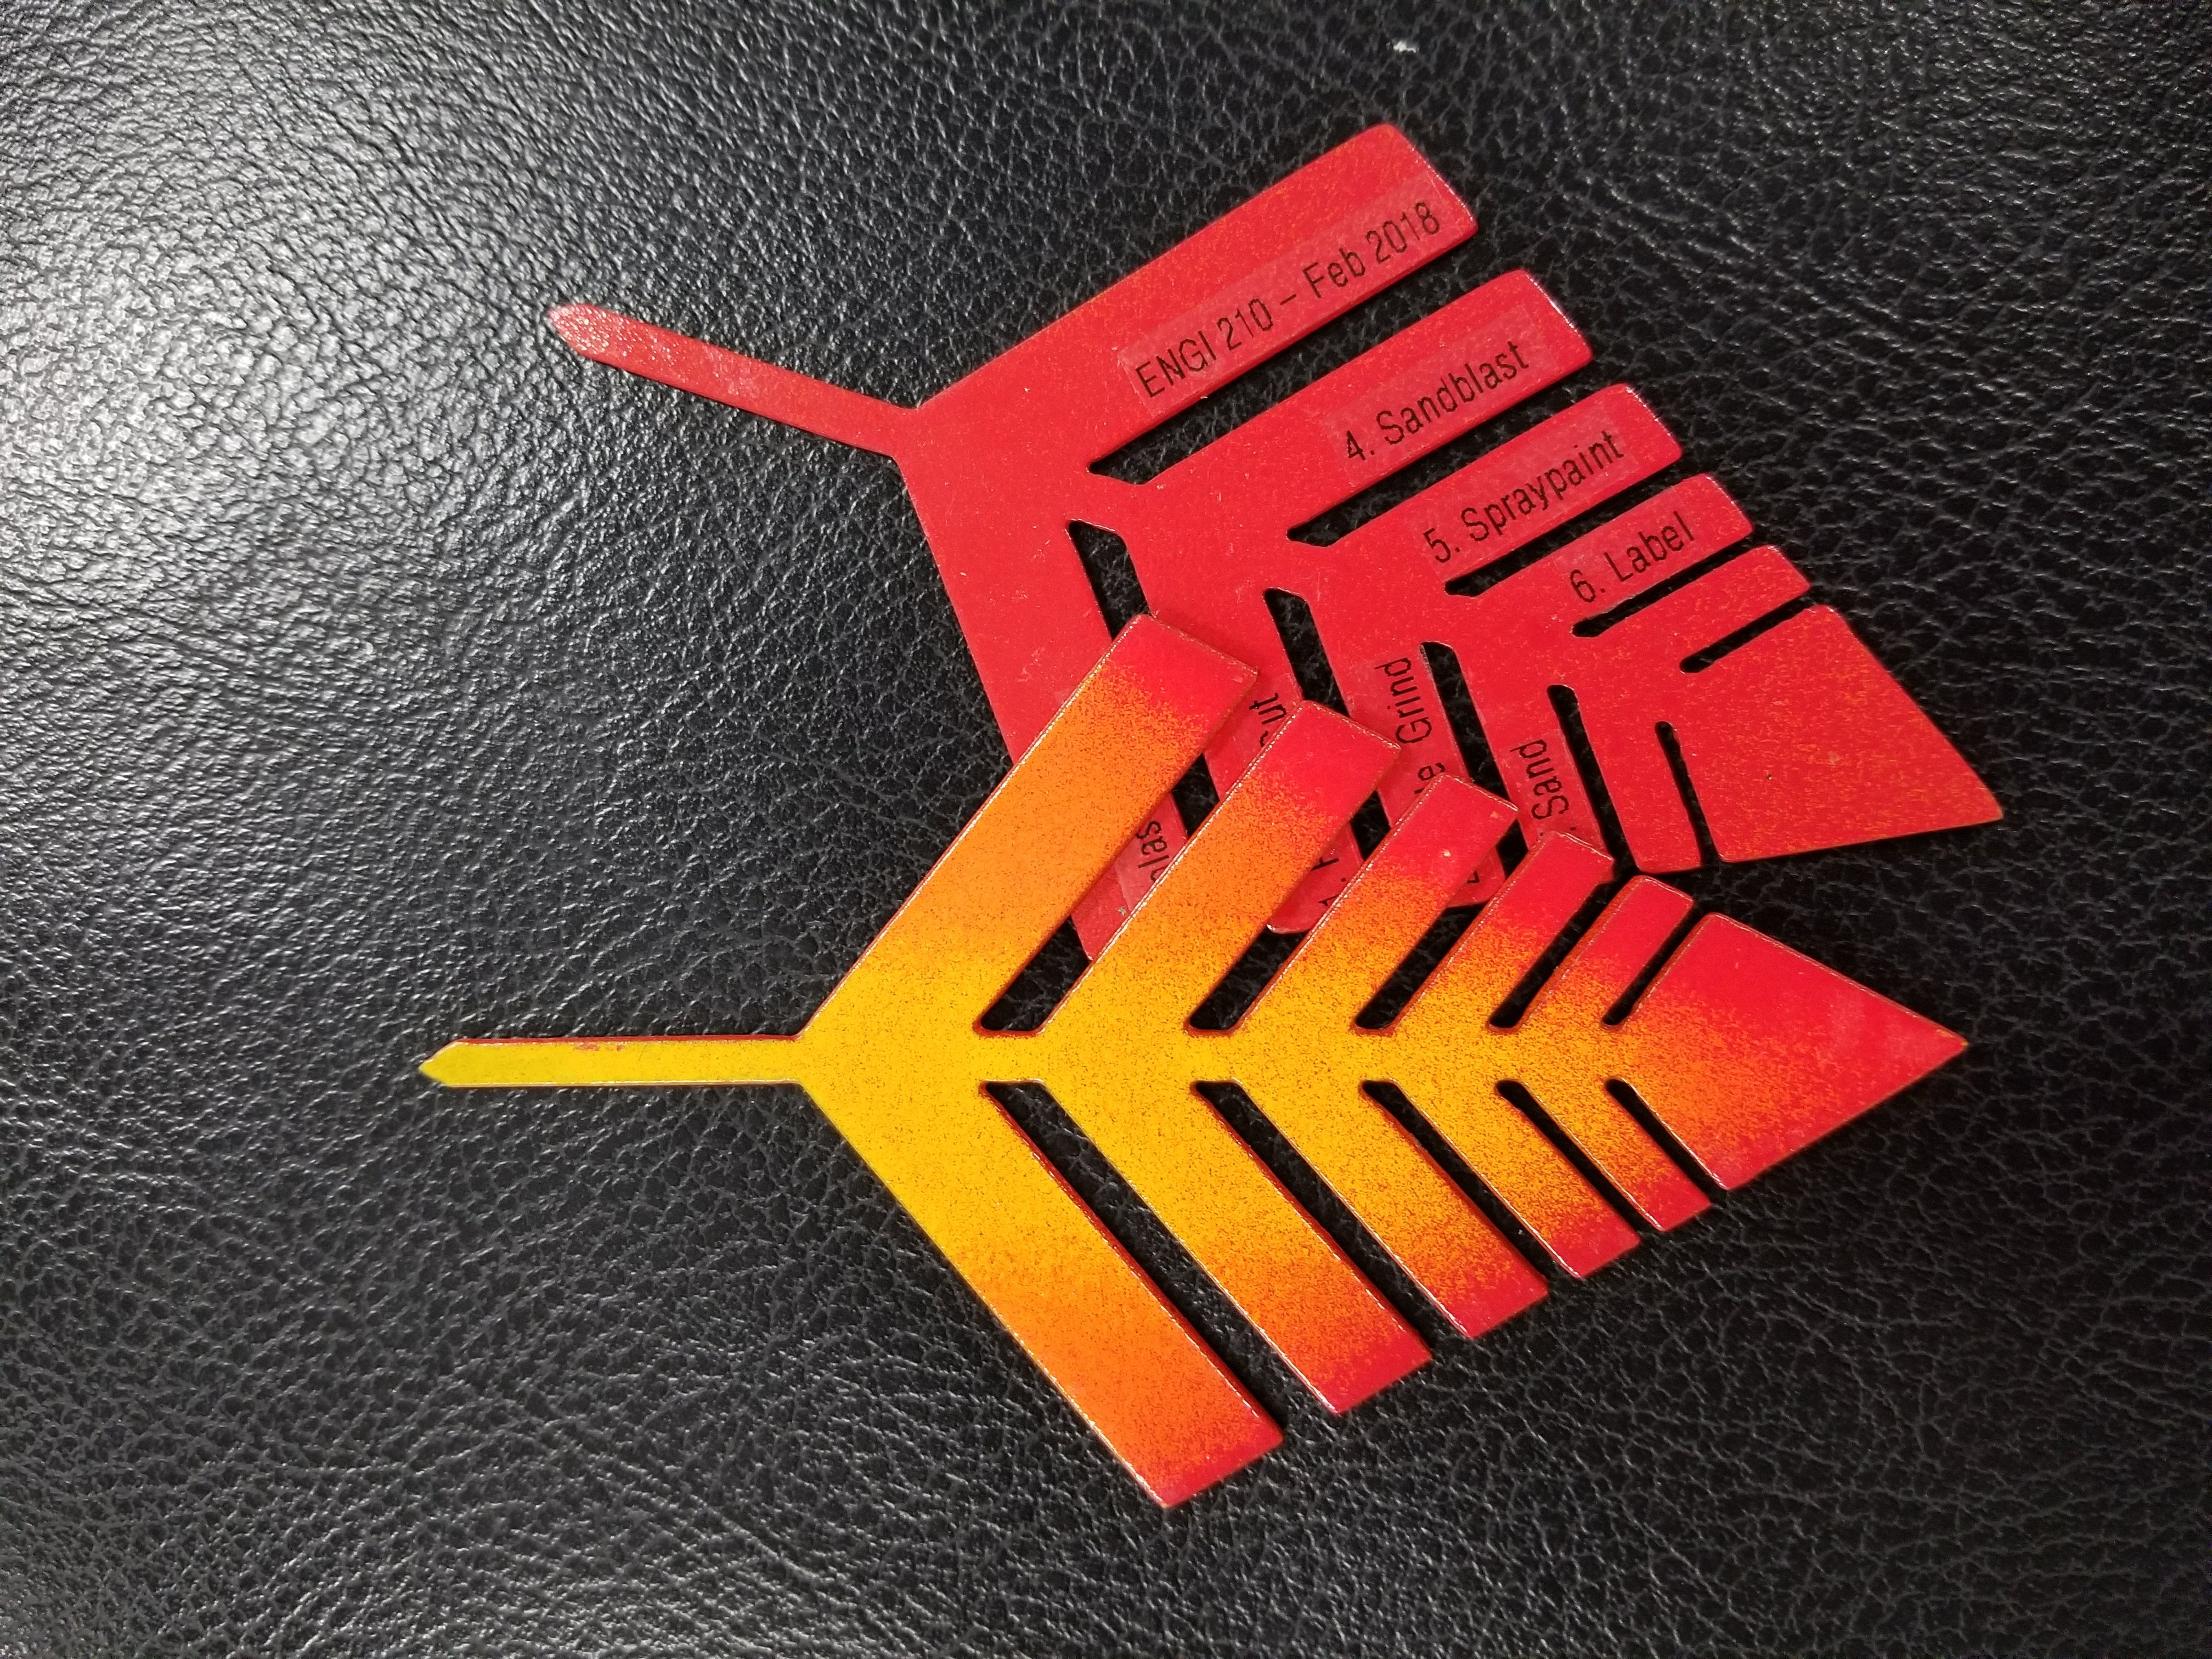
This was about half the project for me. Because of the slight differences between the leaves and the file after processing, the laser didn’t line up quite right. Stencils didn’t produce as sharp of lines as I wanted as consistent as I hoped. Liquid paint got smudgy and sharpie destroyed the delicate stencil. By the end, I was going mad. Every single attempt to make the text look nice yielded worse and worse results. I even lost another leaf to a rash stencil decision that I was sure would work. I eventually gave up trying to make the text look nice. I went to the label printer and made the sixteen lines of text I needed. I spent the next fifteen minutes cutting and putting them on. And you know what? It looks pretty alright:
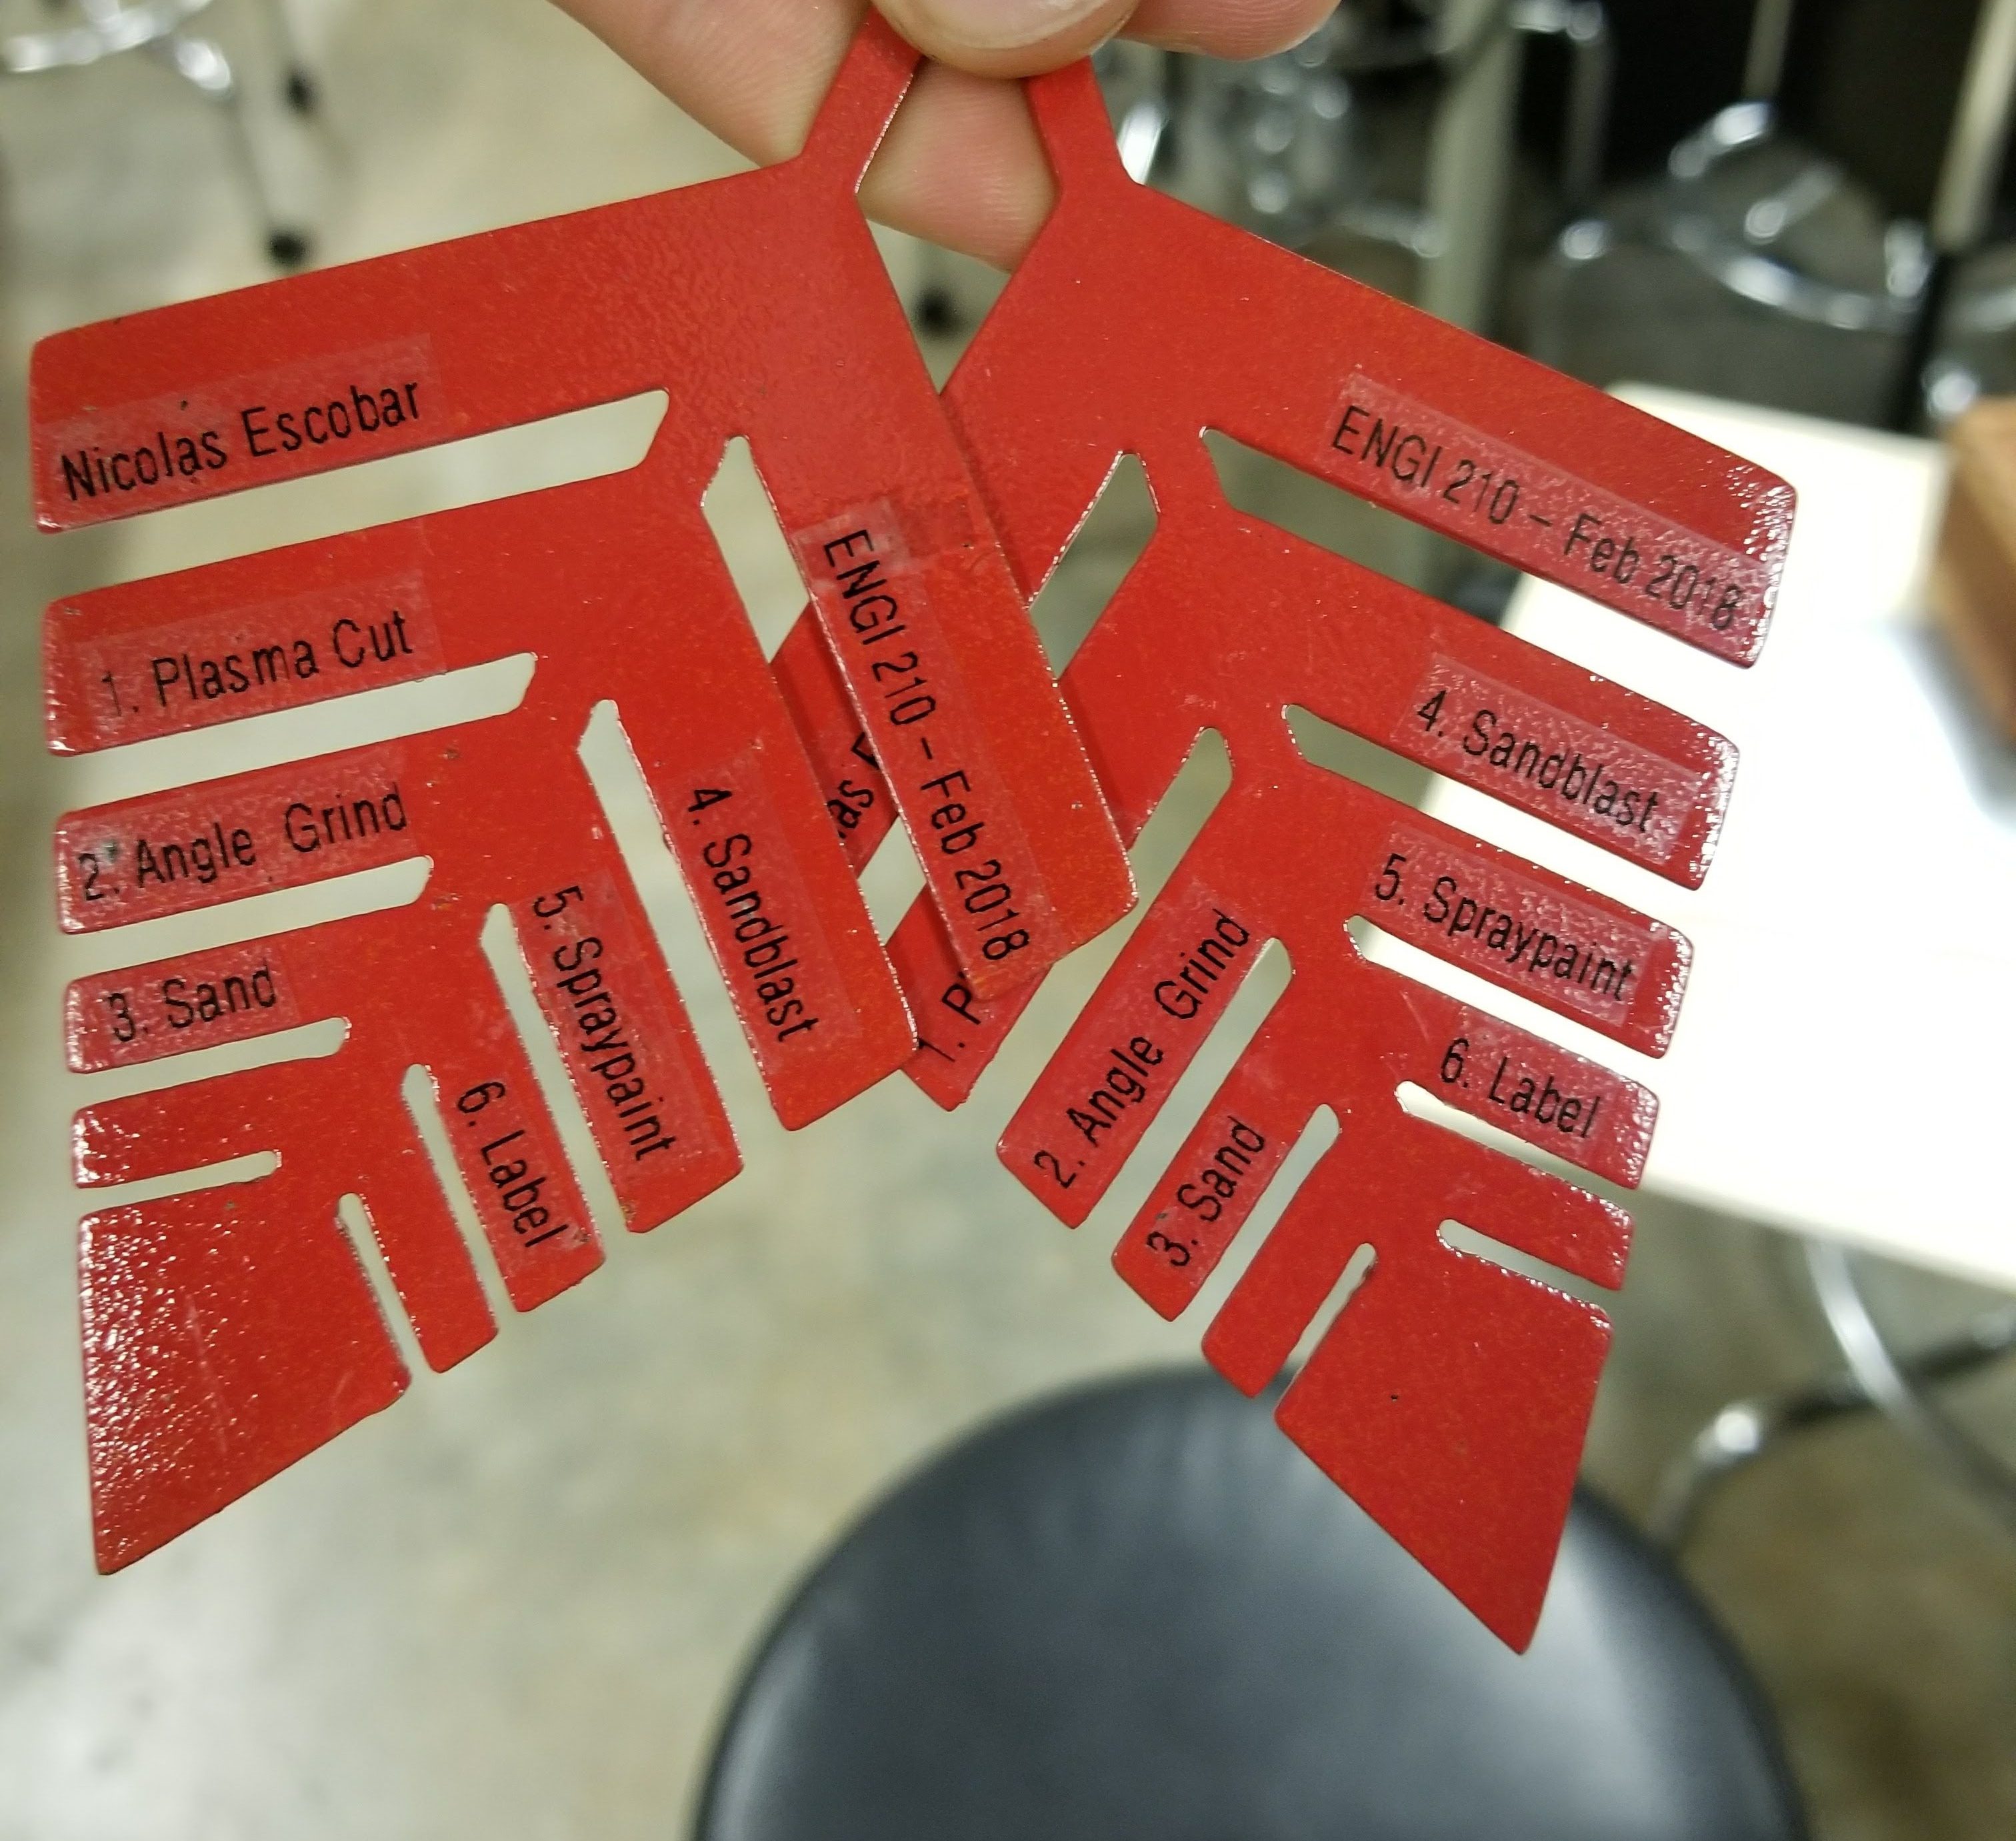
Clean and simple.
I spent so much time trying to come up with an elaborate solution for somewhat small gains. The text was on the backside and by no means the focus of the piece. It did not deserve the attention I gave it. Sometimes it’s best to just take the simplest answer.