Ah yes, the dreaded final project. All I knew about it was Pedro coming to a MSNE study session last semester claiming that Noah was at the OEDK watching over the Carvey as it completed a 6-hour cut. And I felt like that was all I really needed to know about the project to know that it was going to be a nightmare when I did it.
For once when it comes to these things, I wasn’t completely right.
Dr. Wettergreen started this project about a week and a half before classes ended, but that essentially meant throwing us into the computer lab, telling us to use a completely new CAM program, and giving us a three-page poorly-written student-written tutorial while telling us “Good luck!” during the last and busiest week of the year.
So Christina (my partner for this project and generally most of my OEDK mischief) and I didn’t get super far on this project before classes ended. Sure, Dr. Wettergreen was walking around trying to help, but that didn’t really help us when no one realized that we didn’t actually convert our mesh to Brep for a solid 30 minutes. (For reference, that’s about step three of the tutorial.)
So the assignment was to create a chess piece using a three-step method that *just so happened to follow* the additive manufacturing methods we had been learning over the past three weeks: Find a STL on Thingiverse, carve the positive version it on the Carvey, mold a negative version so that you can then make a positive cast of the part.
Christina and I chose to make a rook, partially because they look cool and partially because I’m an idiot and didn’t realize that the rook was the castle-shaped piece and thus was characterized by its turreted top, which would create overhangs that the CNC mill could not work around. This made searching for an interesting (or even usable) rook very difficult.
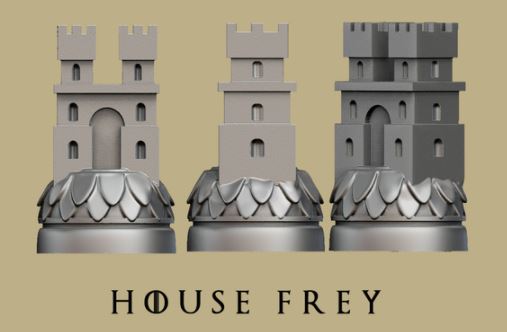
Christina originally found a Game of Thrones-themed rook (despite the fact that neither of us have never actually seen Game of Thrones) that looked more castle-y like a traditional rook and also had a really cool leaf pattern on the base.
Original Rook Design
However, there were several problems with this design: It had a bunch of curved edges along the bottom, which made it very difficult for Fusion360 to work with, and it wasn’t symmetric, which would make molding it super awkward.
After fighting with trying to reduce the triangle count for the file so Fusion360 could actually process it for way longer than we should have, I finally came to my senses that we should pick a different design and sat in the corner at the KTRU outdoor show digging through Thingiverse until I found a different file to work with. This one had a lot more flat sides, so it wouldn’t require as many triangles to make a mesh, and it didn’t have any overhangs that couldn’t be carved by the Carvey. It was also symmetric, which meant that we could create both molds off of one wooden piece.
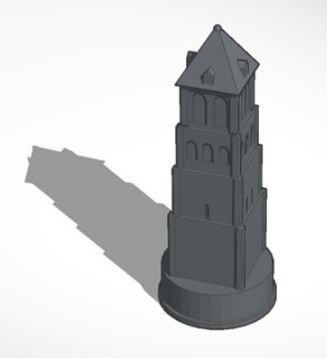
New mold design!
So now that we had a design to work off of, it was time to write the G-code for it. I spent the majority of one dinner reading old blog posts from last semester so I could know what to do and what to avoid, and I learned a lot of great tips from reading words of wisdom from Caz, Noah, and Andre. (Something something standing on shoulders of giants…)
I felt bad that I hadn’t been super helpful to Christina when she was trying to learn Fusion360 in class, and also Fusion360 is a good idea to learn because it is free and cloud-based, unlike Solidworks, which is not. Also, I thought we were behind because we hadn’t made much progress in class and we basically decided to start over with a new design. So I decided to work on setting up the G-Code to catch us up to speed. How long would it take, really?
Although I had originally decided to give myself Saturday off because I worked really hard this semester and deserved a break, wouldn’t you know it, Saturday came, and despite a busy day of sleeping through speeches by astronauts, struggling to sightread through Marianas Trench’s “Who Do You Love” on guitar, and frantically finishing code to project at the KTRU Indoor Outdoor Show, I decided to go to the OEDK at 11 o’clock at night because ya girls’ gotta learn Fusion 360.
Because what else am I going to do on a Saturday night, am I right?
I knew from Noah’s blog that it was going to be a lot easier to set up the lock keys, pour hole, and air tunnel in CAD than trying to physically measure out and glue in wood pieces before making the silicon mold, so I was planning on trying to do that in Fusion. But then I ran into Jeremy at the OEDK, and he told me to just design the part modifications in Solidworks instead of Fusion360 (because that’s actually a CAD program I know how to use and it’s a lot more user-friendly) and then import it into Fusion to set up the CAM. Jeremy is usually right about these things, and using Solidworks seemed a lot more manageable, so I did that.
Another thing I learned from Noah is that the only way to set up matching key holes in the CAD part is to lie the piece on a solid plane and then form the holes from there. This should be obvious, but it wasn’t until I read that. I guess there’s a reason we write these blogs after all.
Once I had a SOLIDworks model prepared, I loaded it into Fusion360 to set up the actual G-code for the Carvey. I had Fusion open in one tab and the tutorial open in the other, but it still took about two hours to accomplish what Dr. Wettergreen said should take about 10 minutes. That being said, I didn’t even finish setting up the G-code that night. I got stuck trying to figure out how to post-process the code for the Carvey and decided to call it and work on it in the morning when I could talk to someone who had done this before because it was 3AM and I was tired of being told that my name was invalid.
So in the light of day, I called Noah while standing basically right outside of his room. He didn’t answer his phone, so I called Caz, who, fortunately or unfortunately, did answer. This led to the following exchange:
Me: “Hey Caz, can I ask you for some help?”
Caz, sounding like he’s on death’s door: “… Do I have to move?”
Me, needing to physically be in the same room as Caz and a computer that can run Fusion360: “I’m going to go with yes, and I’m going to take that as a you can’t help me.”
Caz: *Just kinds of groans painfully in response*
Luckily, this was the point where Noah called me back, so I kidnapped him and took him to the Martel computer lab to ask for help. Then I realized that the Martel lab computers don’t actually run Fusion360, so he was nice enough to accompany me to the OEDK and help me.
When we arrived at the OEDK, Noah was able to help me download the G-Code for the Carvey (it wasn’t working because I didn’t realize that I actually needed to name the post-processing file because I didn’t know that the post-processing dialog box was trying to download code to my computer). I was also planning to cross-hatch the smooth pass with swipes in both directions, so after some brief exploration, we discovered that it is actually super easy to add perpendicular passes to the smooth cut by hitting the “add perpendicular passes” button in the G-Code settings box. This was a piece of advice I had originally gotten from Noah’s blog because it makes the resolution of the cut super fine and accurate in both directions, and I fully intended to utilize that knowledge.
Now that I had the G-code downloaded and then uploaded to Easel, it was time to carve!
Luckily Josh and Nick were gracious enough to give me a ton of advice on how to set the Carvey up to run (you know, basic stuff like how to upload the code to Easel, suggestions that fine cuts should be completed with smaller drill bits, comments that you can’t edit G-code in Easel, warnings that it sometimes wouldn’t restart properly after being paused, etc.) and letting me butt in front of them because they had an Eclipse dinner to attend. Actually, let me give a shout out to Nick and Josh for being super helpful and fantastic human beings all around.
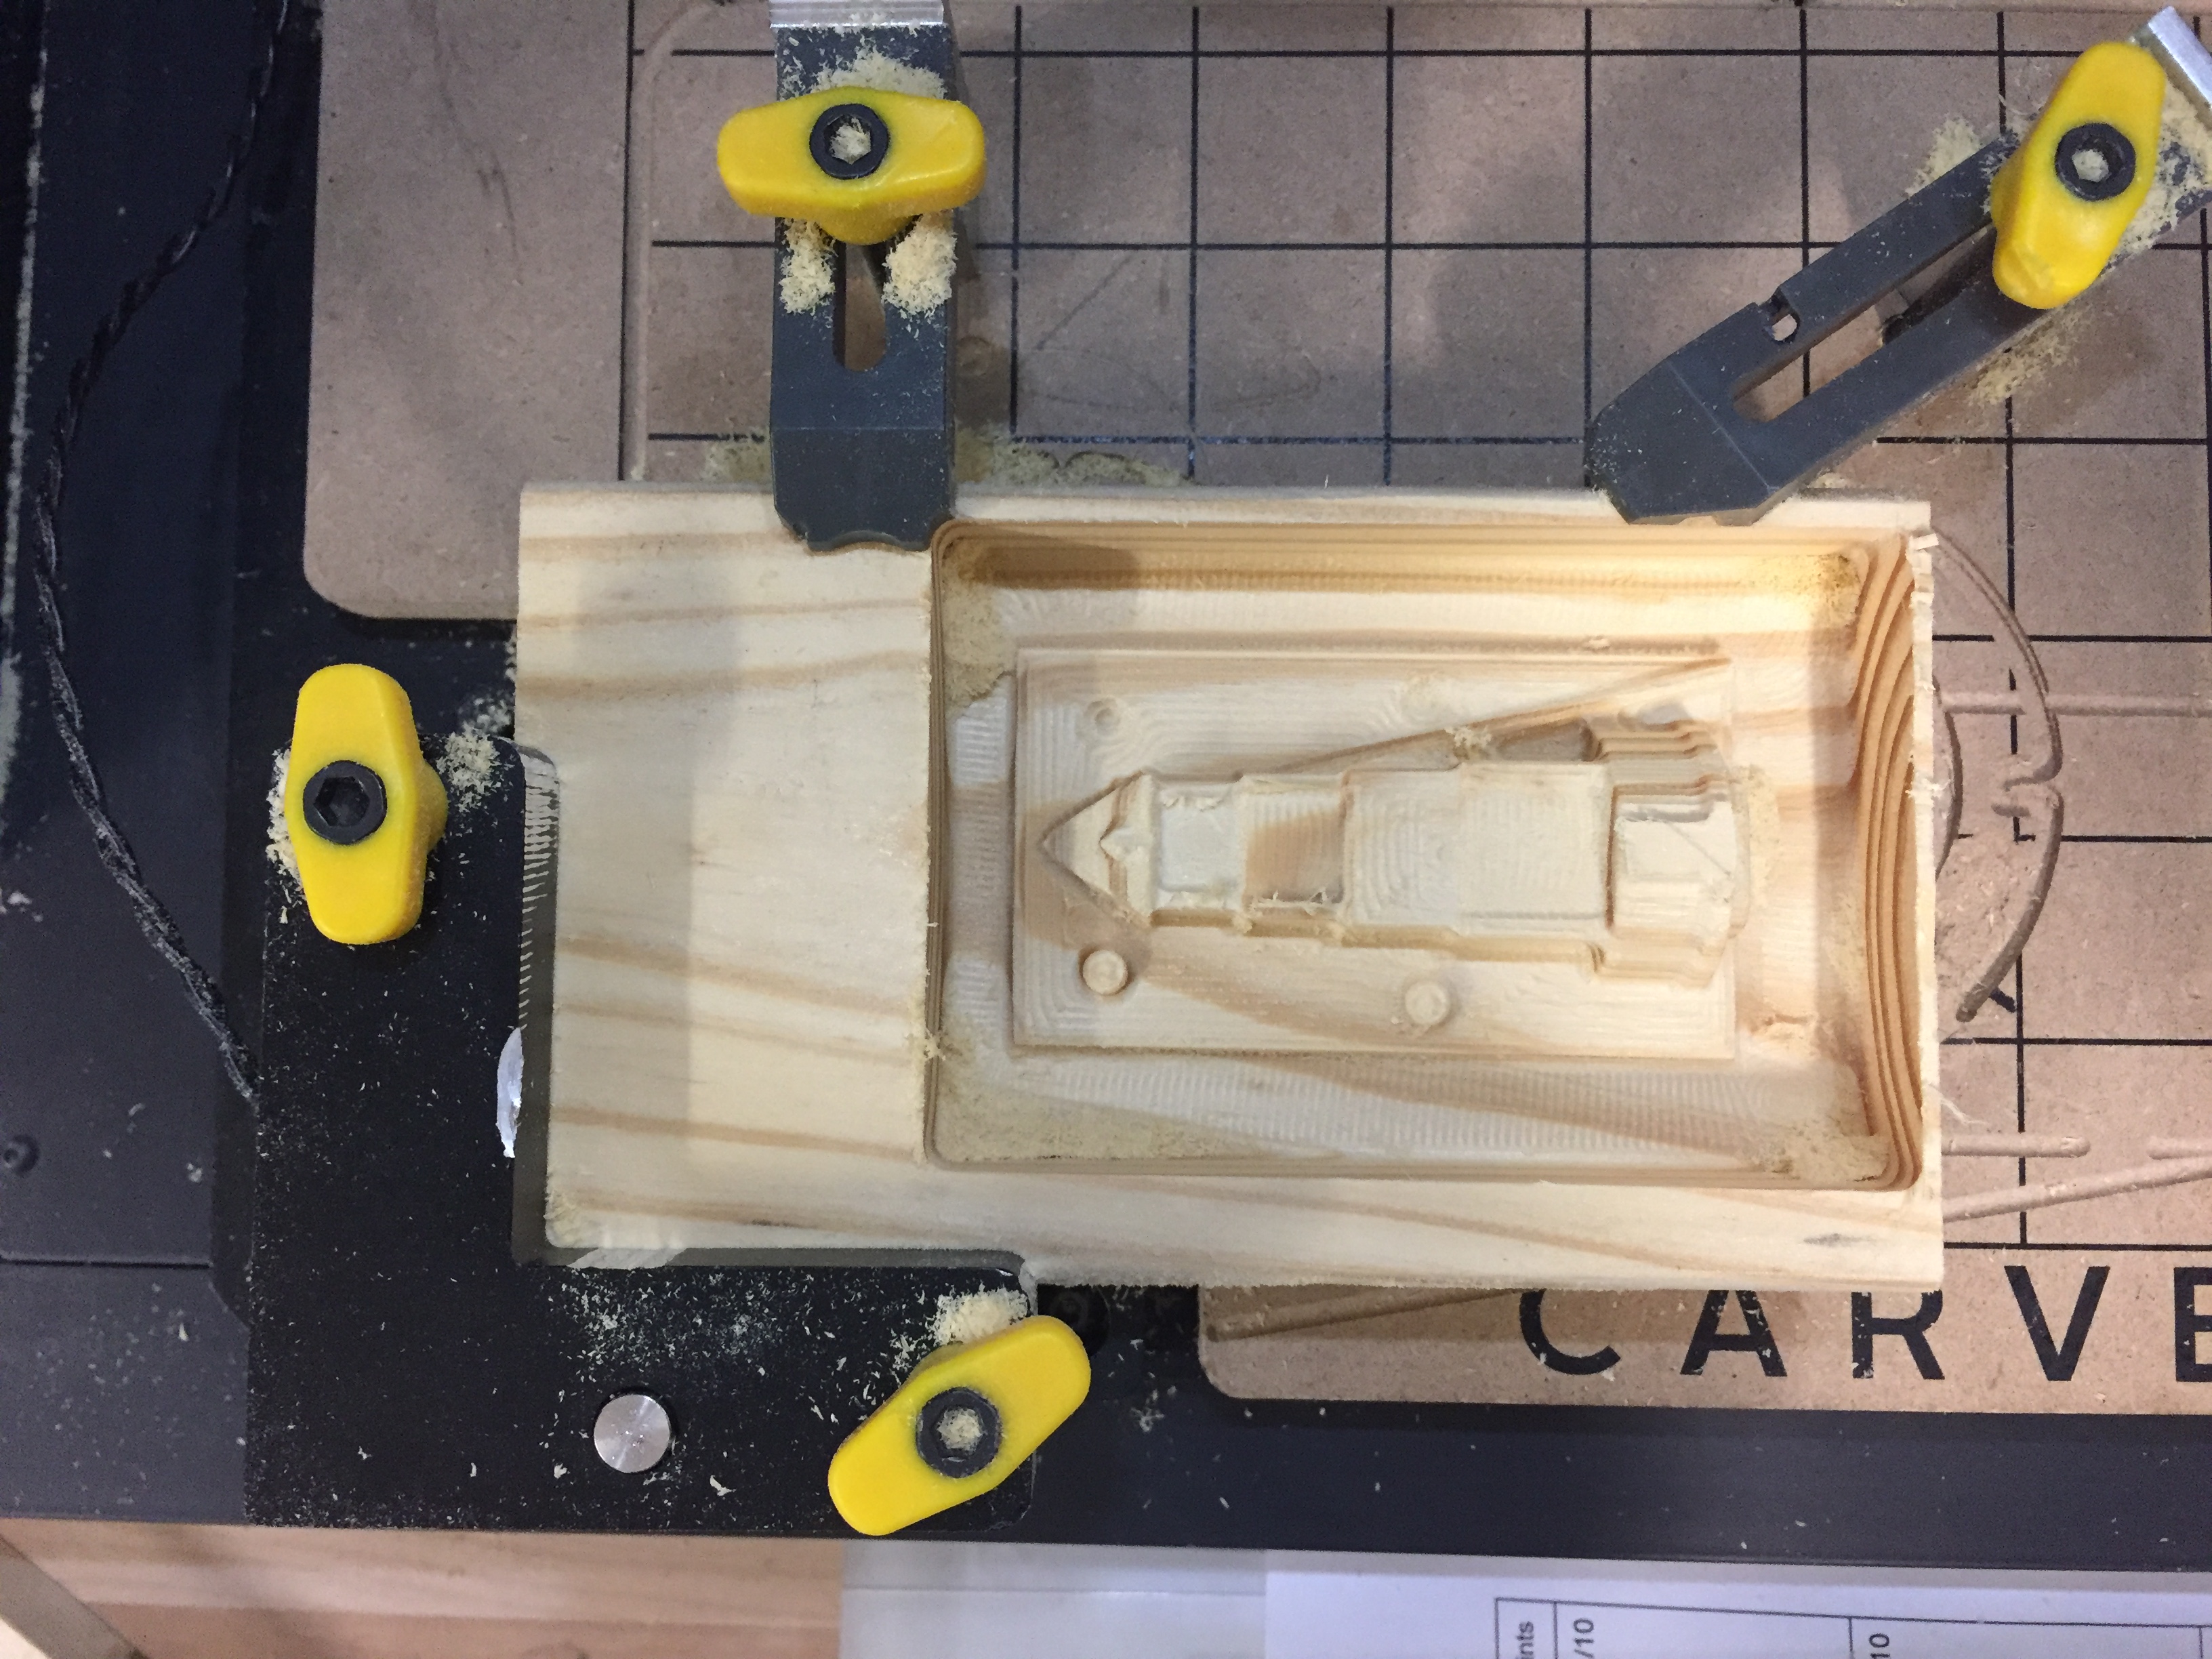
So because I felt fairly comfortable using the Carvey and there was no other way out than to just go ahead and carve it, I set it up to go.
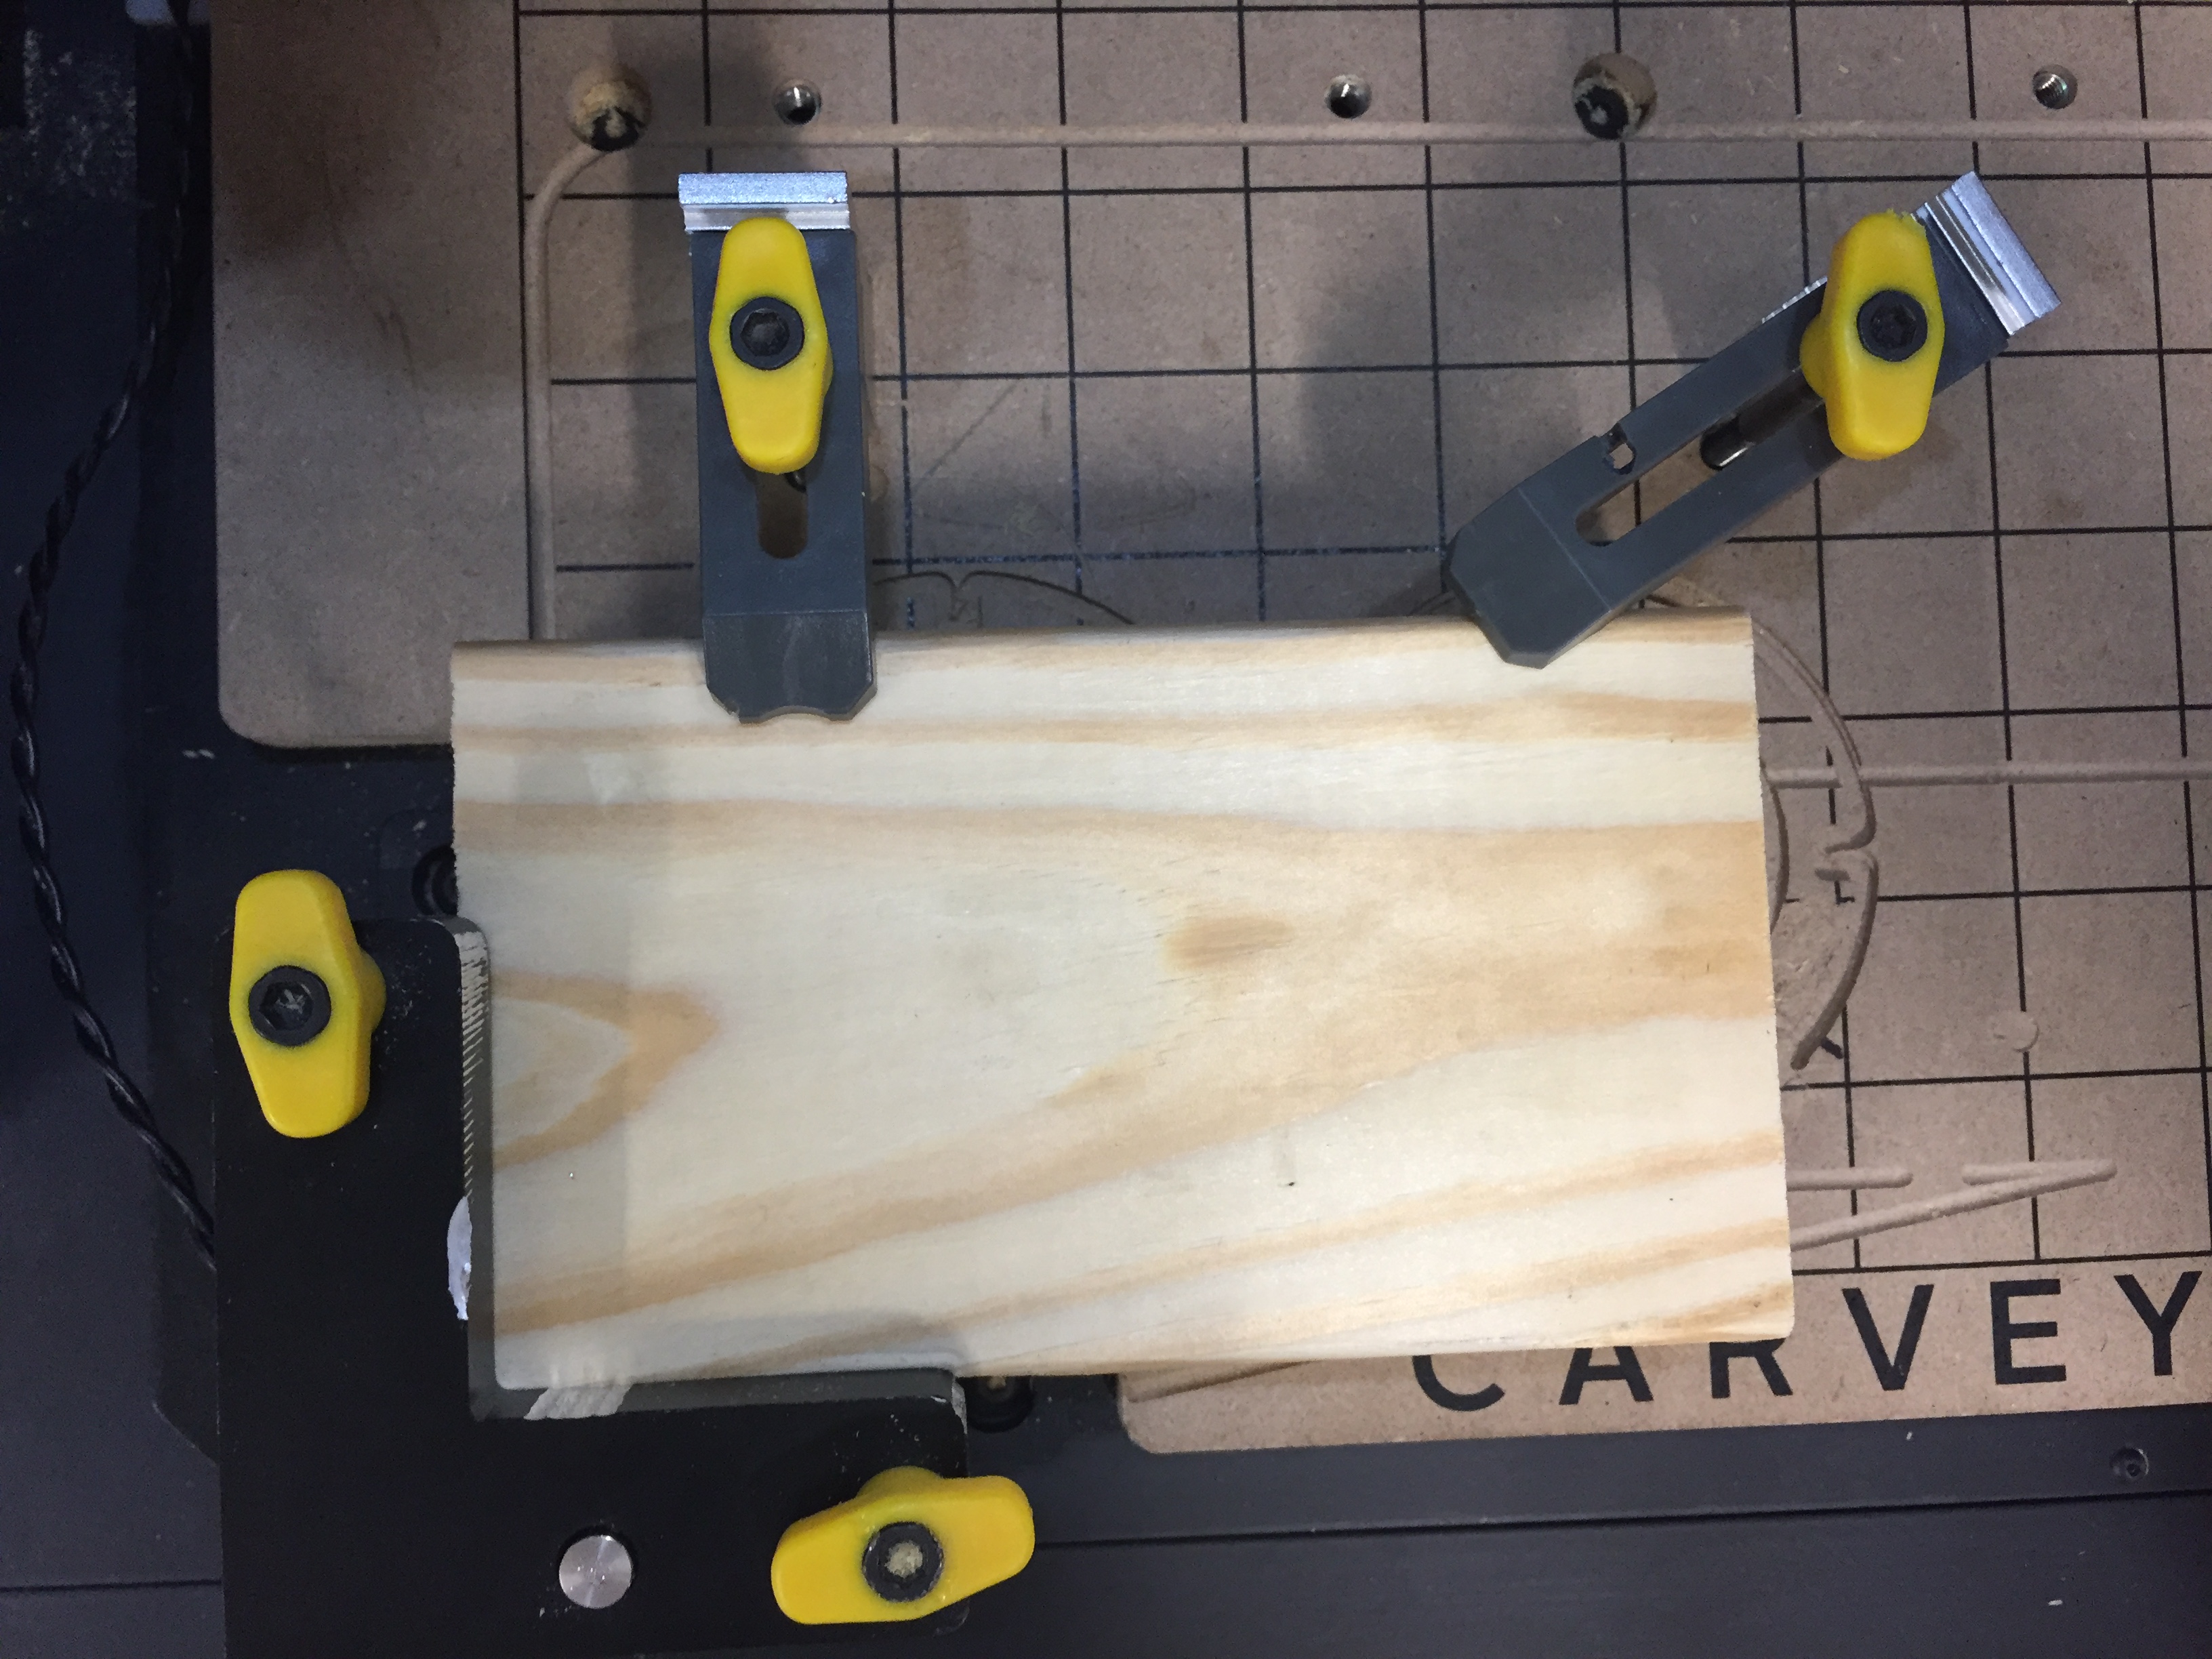
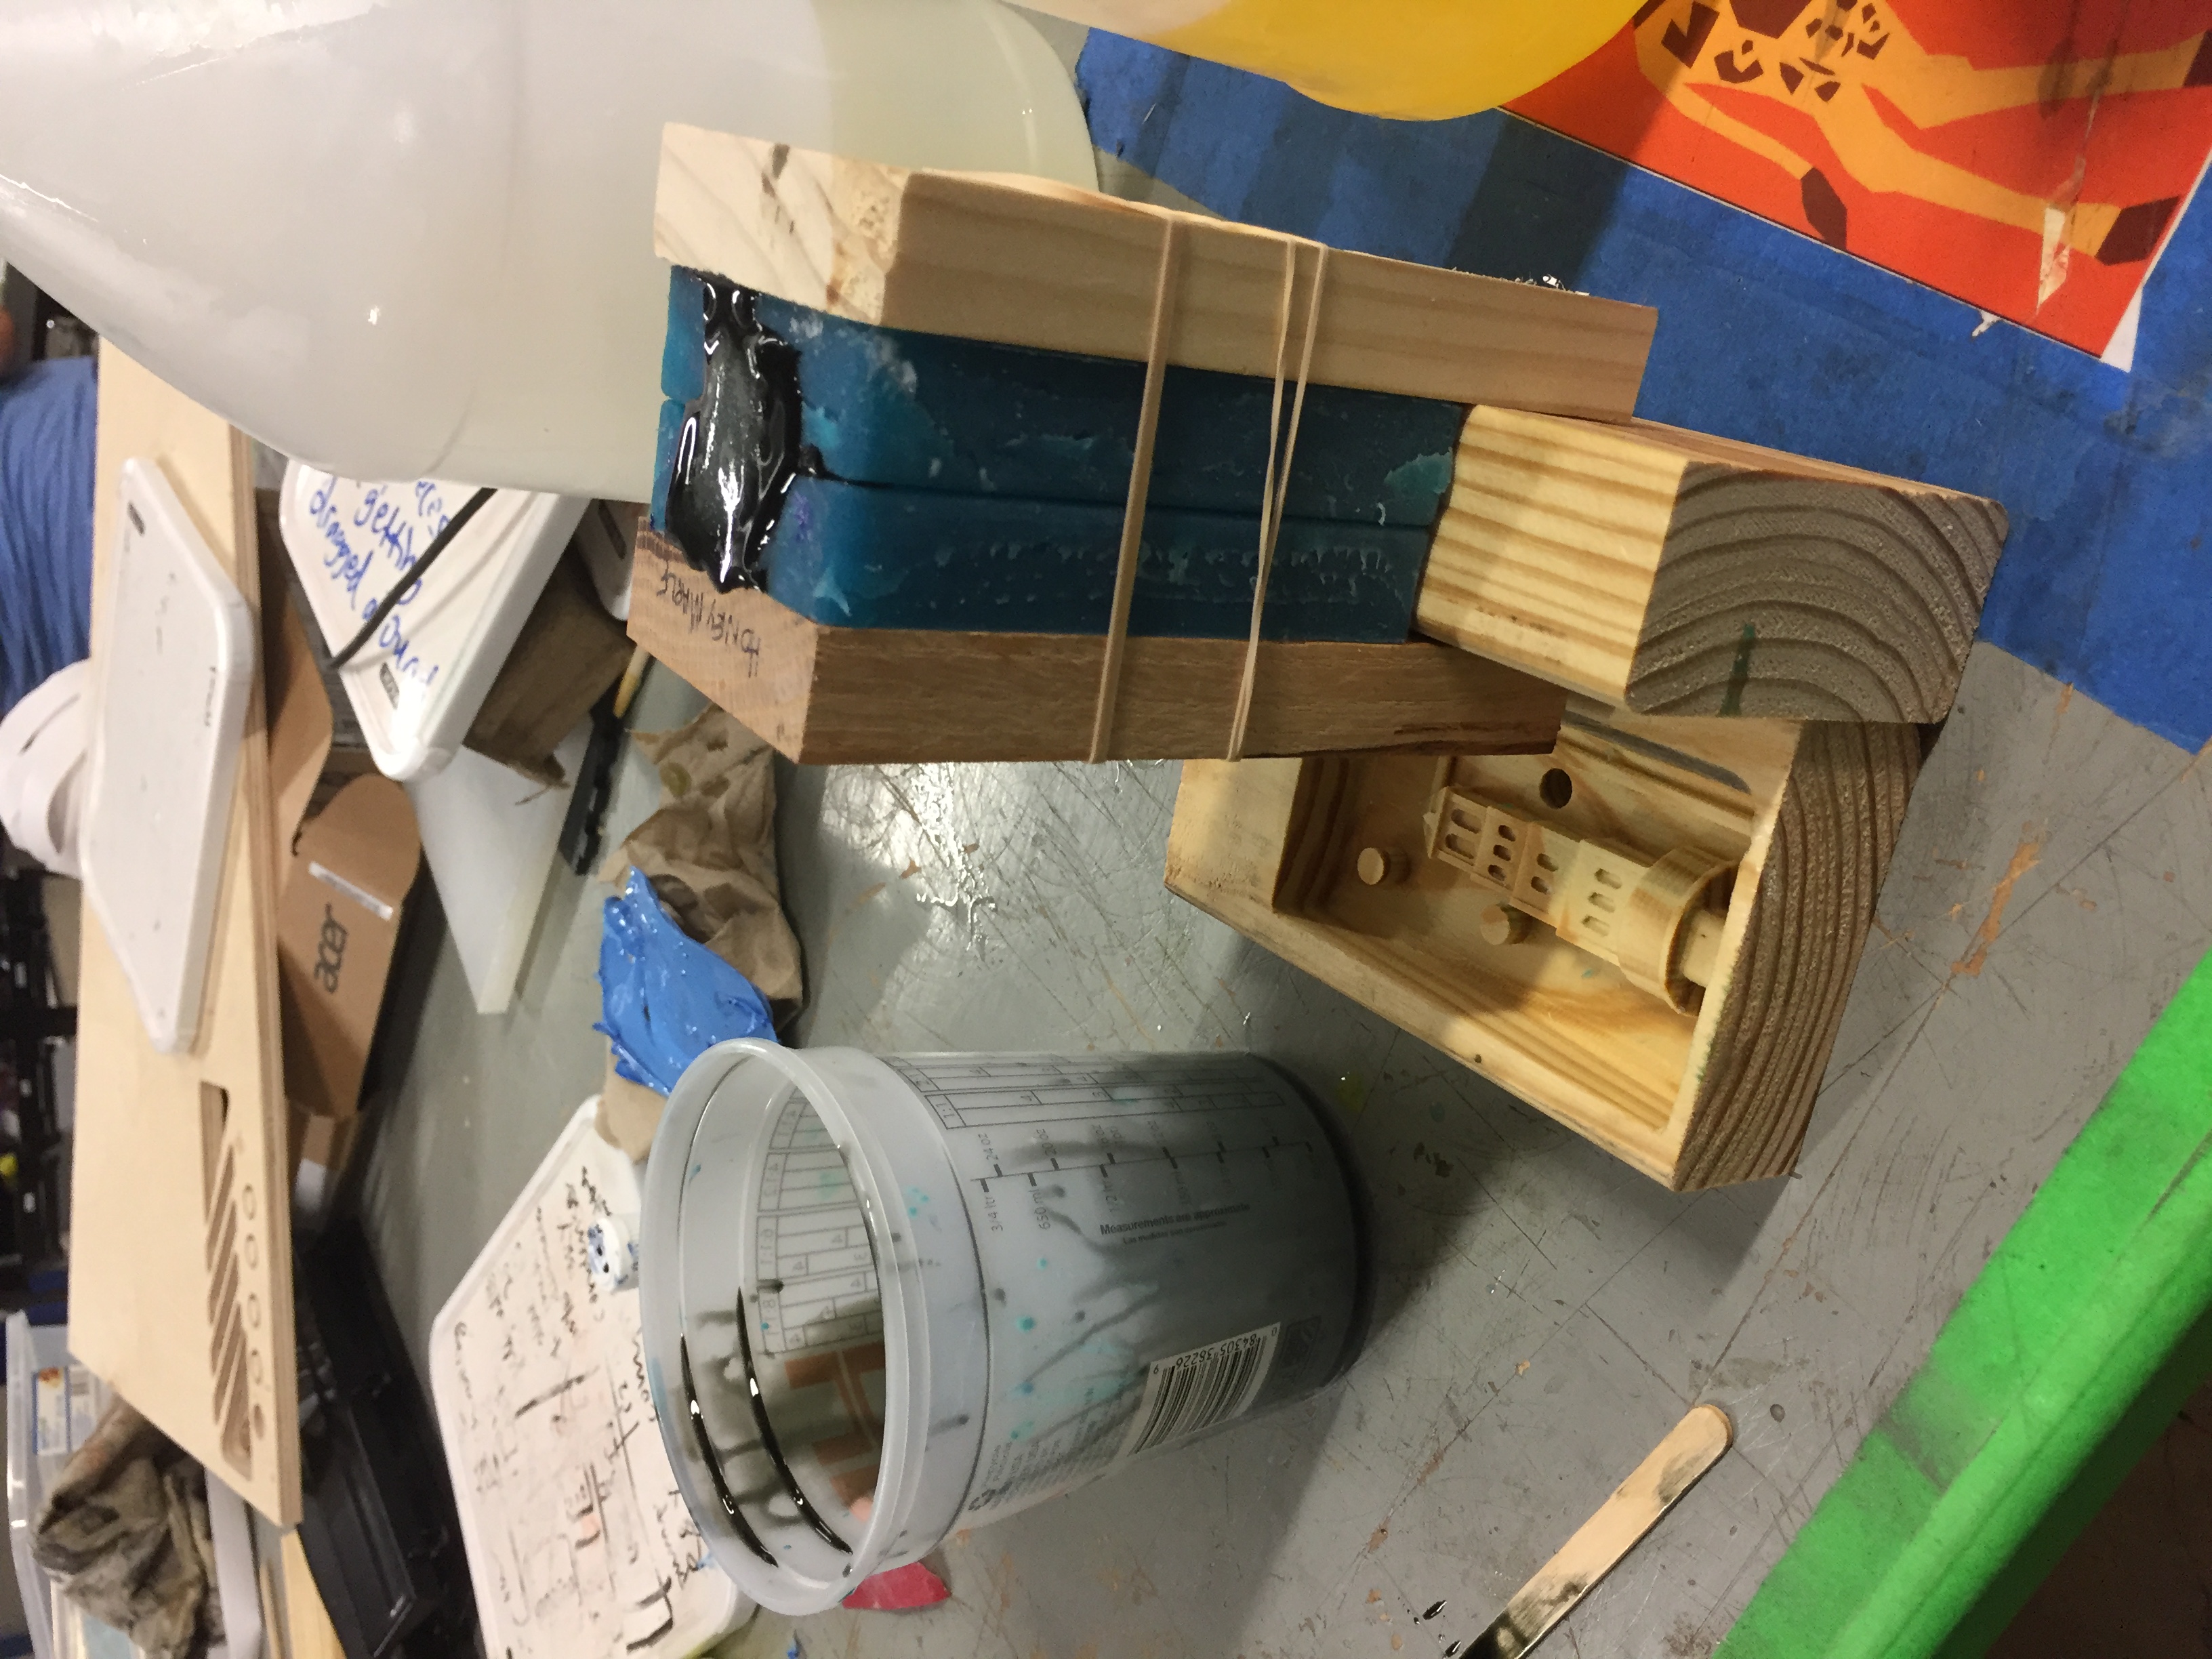
Firmly clamped and ready to go!
And it immediately sounded like it was dying.
This caused Andre to come running to me from the other side of the OEDK asking me what the hell my plunge depth per pass was. I just kind of gestured helplessly at the machine – which wasn’t breaking but was just sounding awful – because I didn’t know and kept it at the default. This is when I found out that the default plunge rate on Fusion360 is 10mm/pass. No wonder it sounded like it was dying! It was trying to cut through way too much wood!
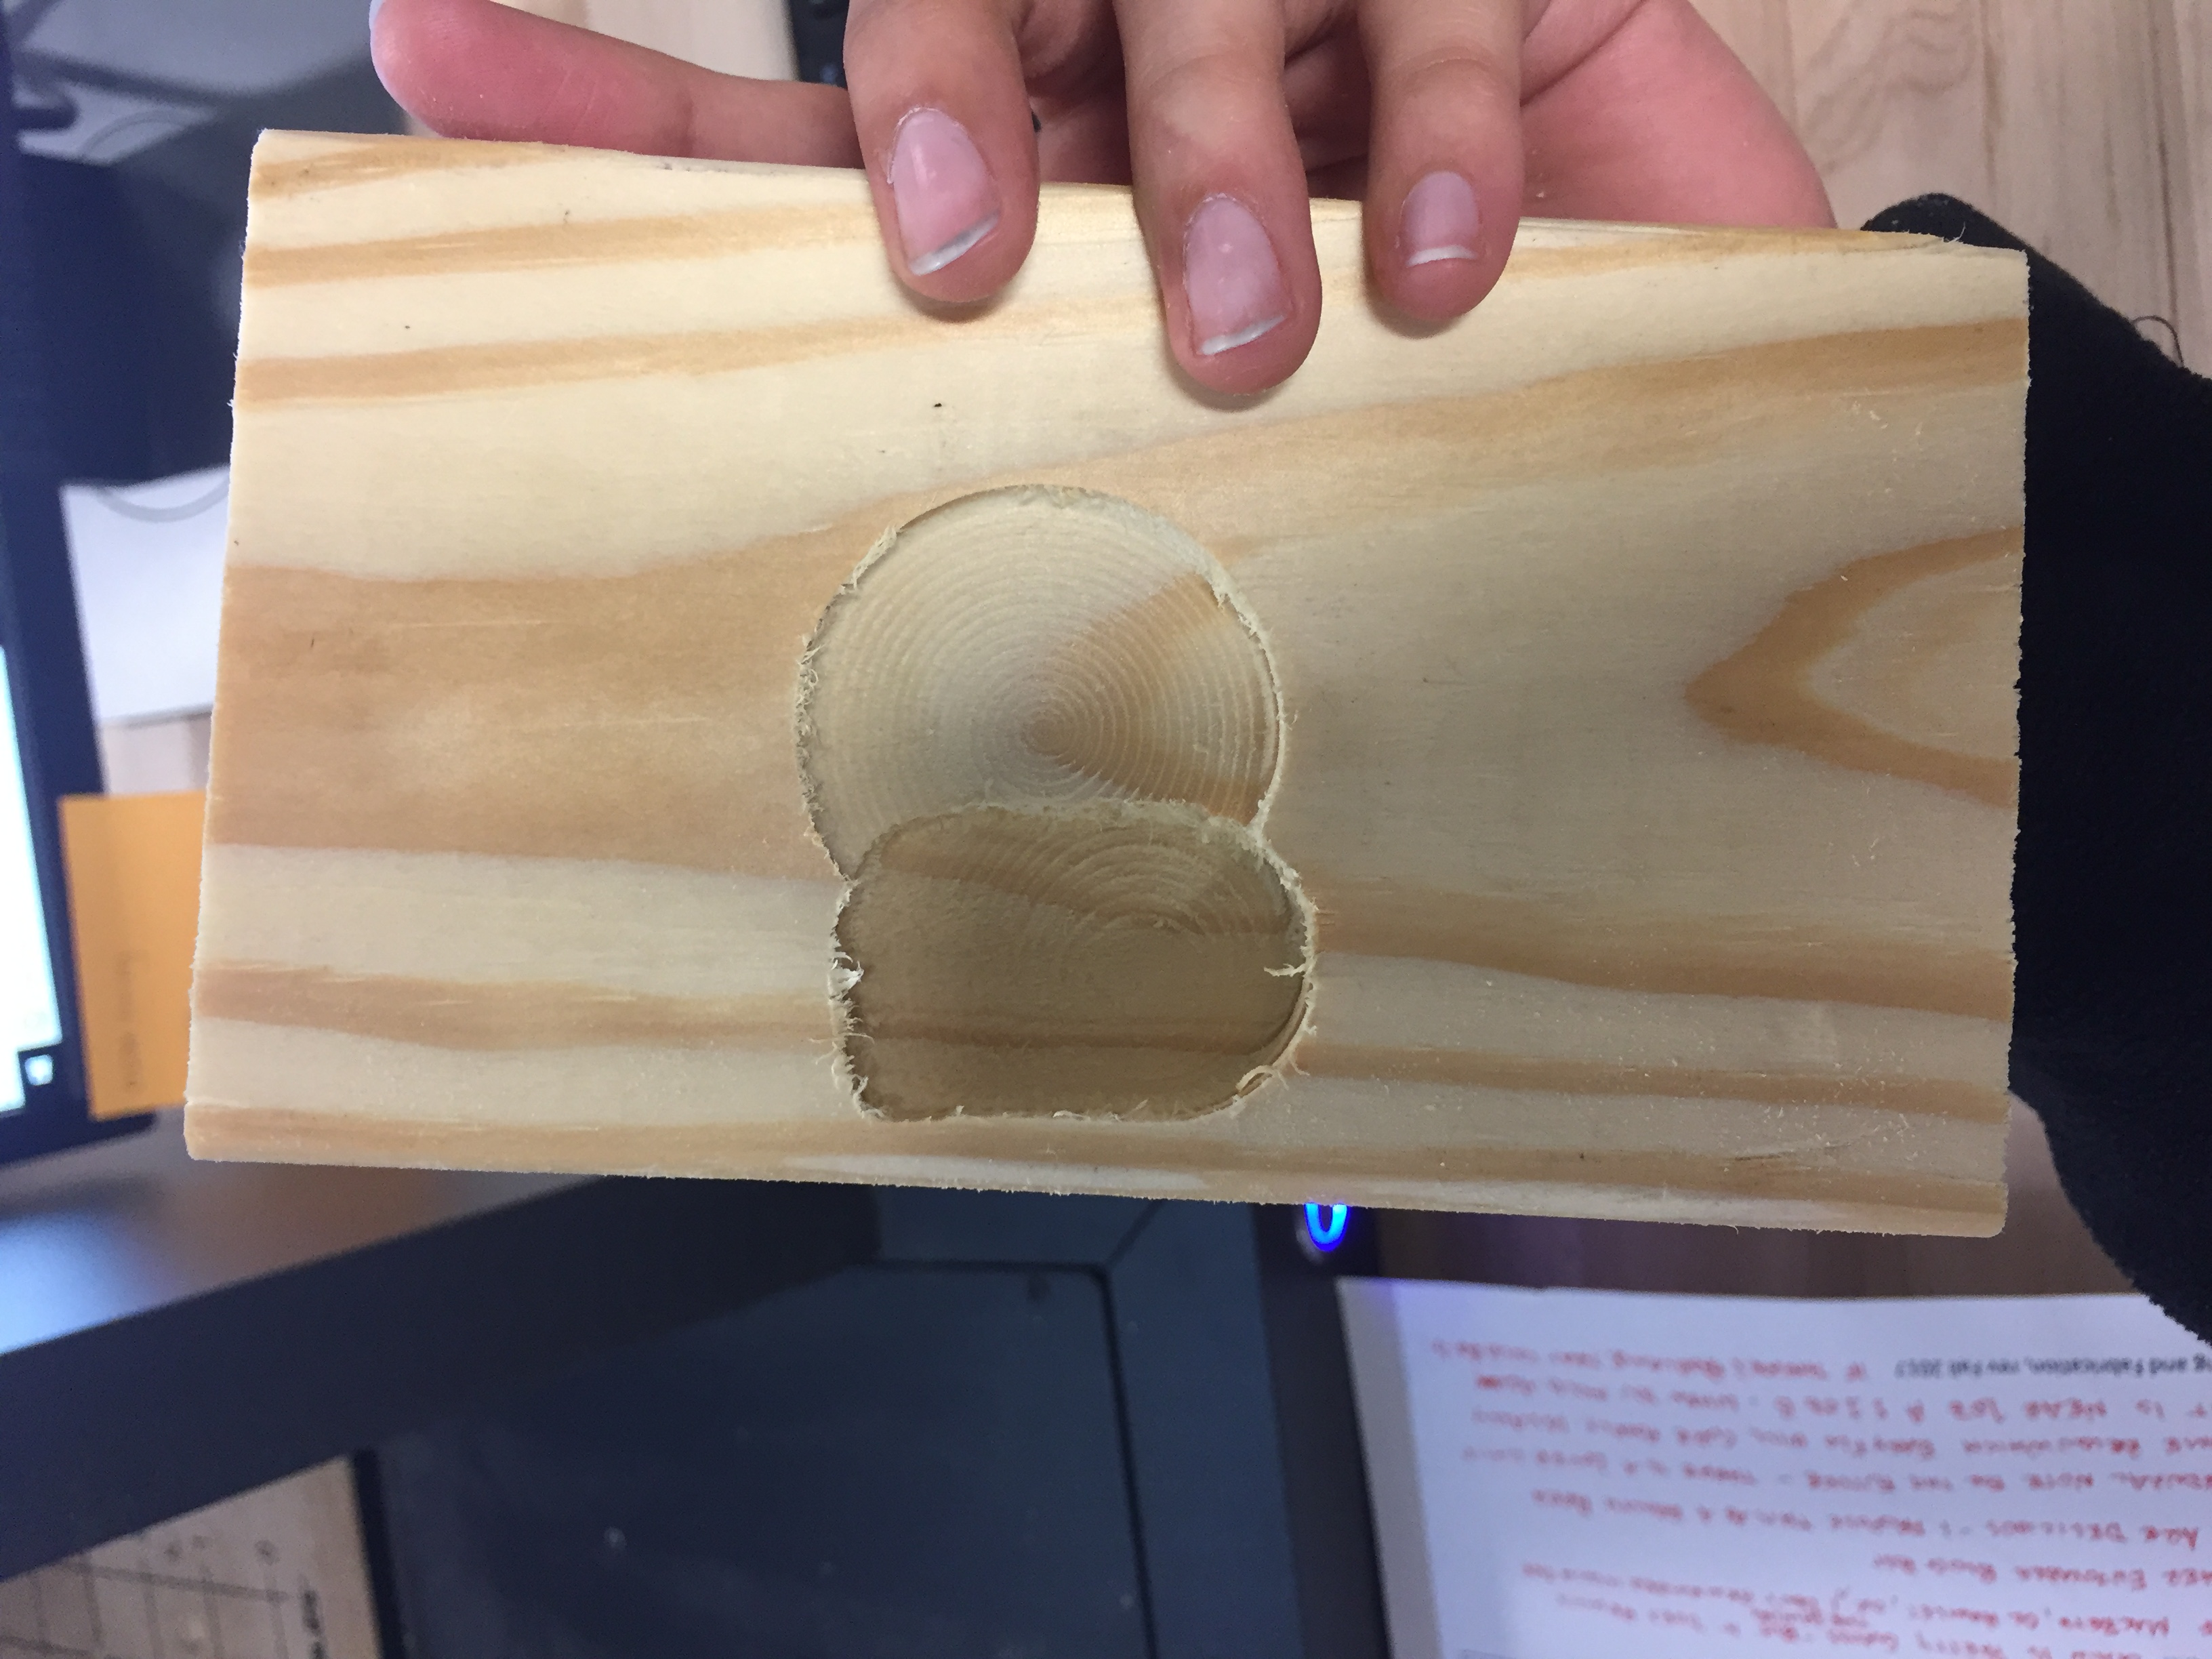
Original cut, complete with a scarily large plunge depth
So I ran back into the computer lab, edited the plunge depth with Josh’s help, and set it up to go again.
This run went a lot smoother, with far fewer dying sounds from the Carvey. I babysat the Carvey for a few hours, trading off with Christina for a bit so I could run and grab dinner. I ran both the rough cut (which took around 1 hour, 40 minutes) and the smooth cut (which took around 40 minutes) while heavily editing the Fusion360 Tutorial. Maybe I’m an idiot, but I really should not have struggled that hard to learn a new program when I was supposedly given a tutorial telling me what exactly I need to do.
Someone suggested that I should just leave it and let the future students suffer like we did, but I like to think I’m a nicer person than that.

Running the rough cut. The amount of sawdust reminded me of one of those games at Dave and Buster’s where you put in a coin and hope that pushes all of the other coins off the shelf to win massive amounts tickets, but with more vacuuming and less rewards at the end.
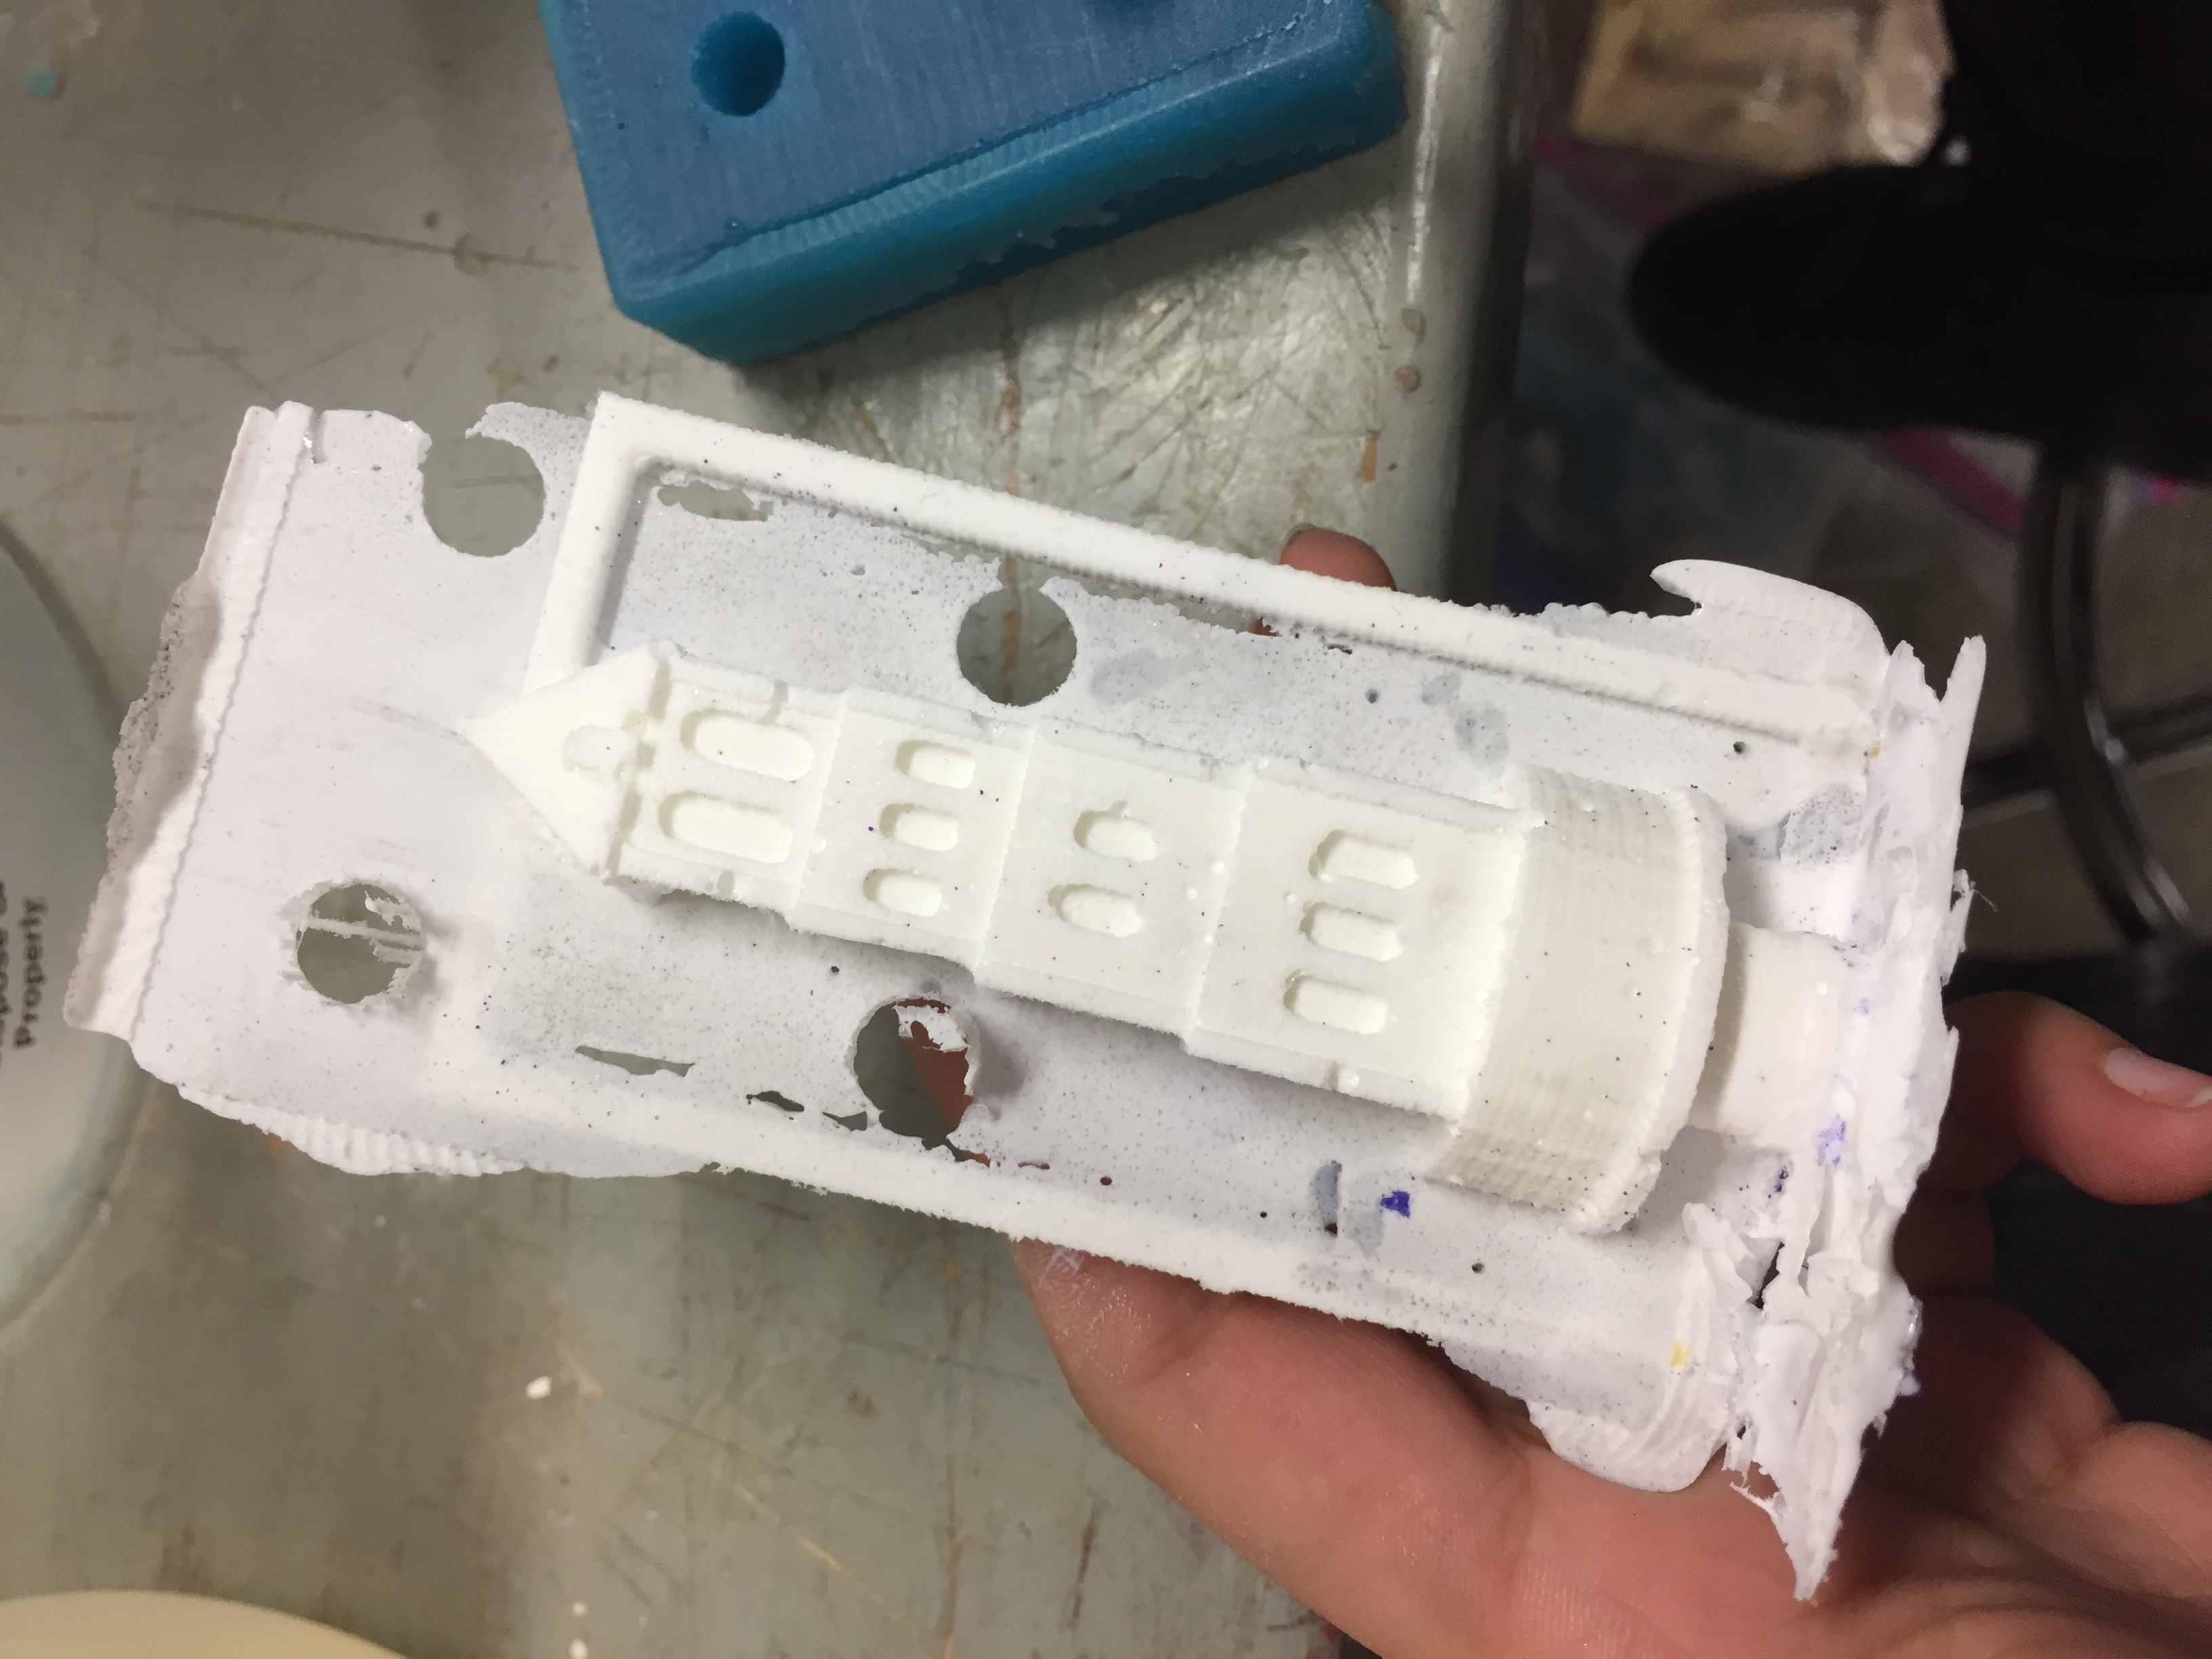
Competed rough cut! It’s a very rough cut with no details, so it is time to run the smooth cut.

Running the perpendicular smooth cut! There’s so much less sawdust! (This makes sense because it’s only shaving off the top, not carving out a huge chunk of wood.
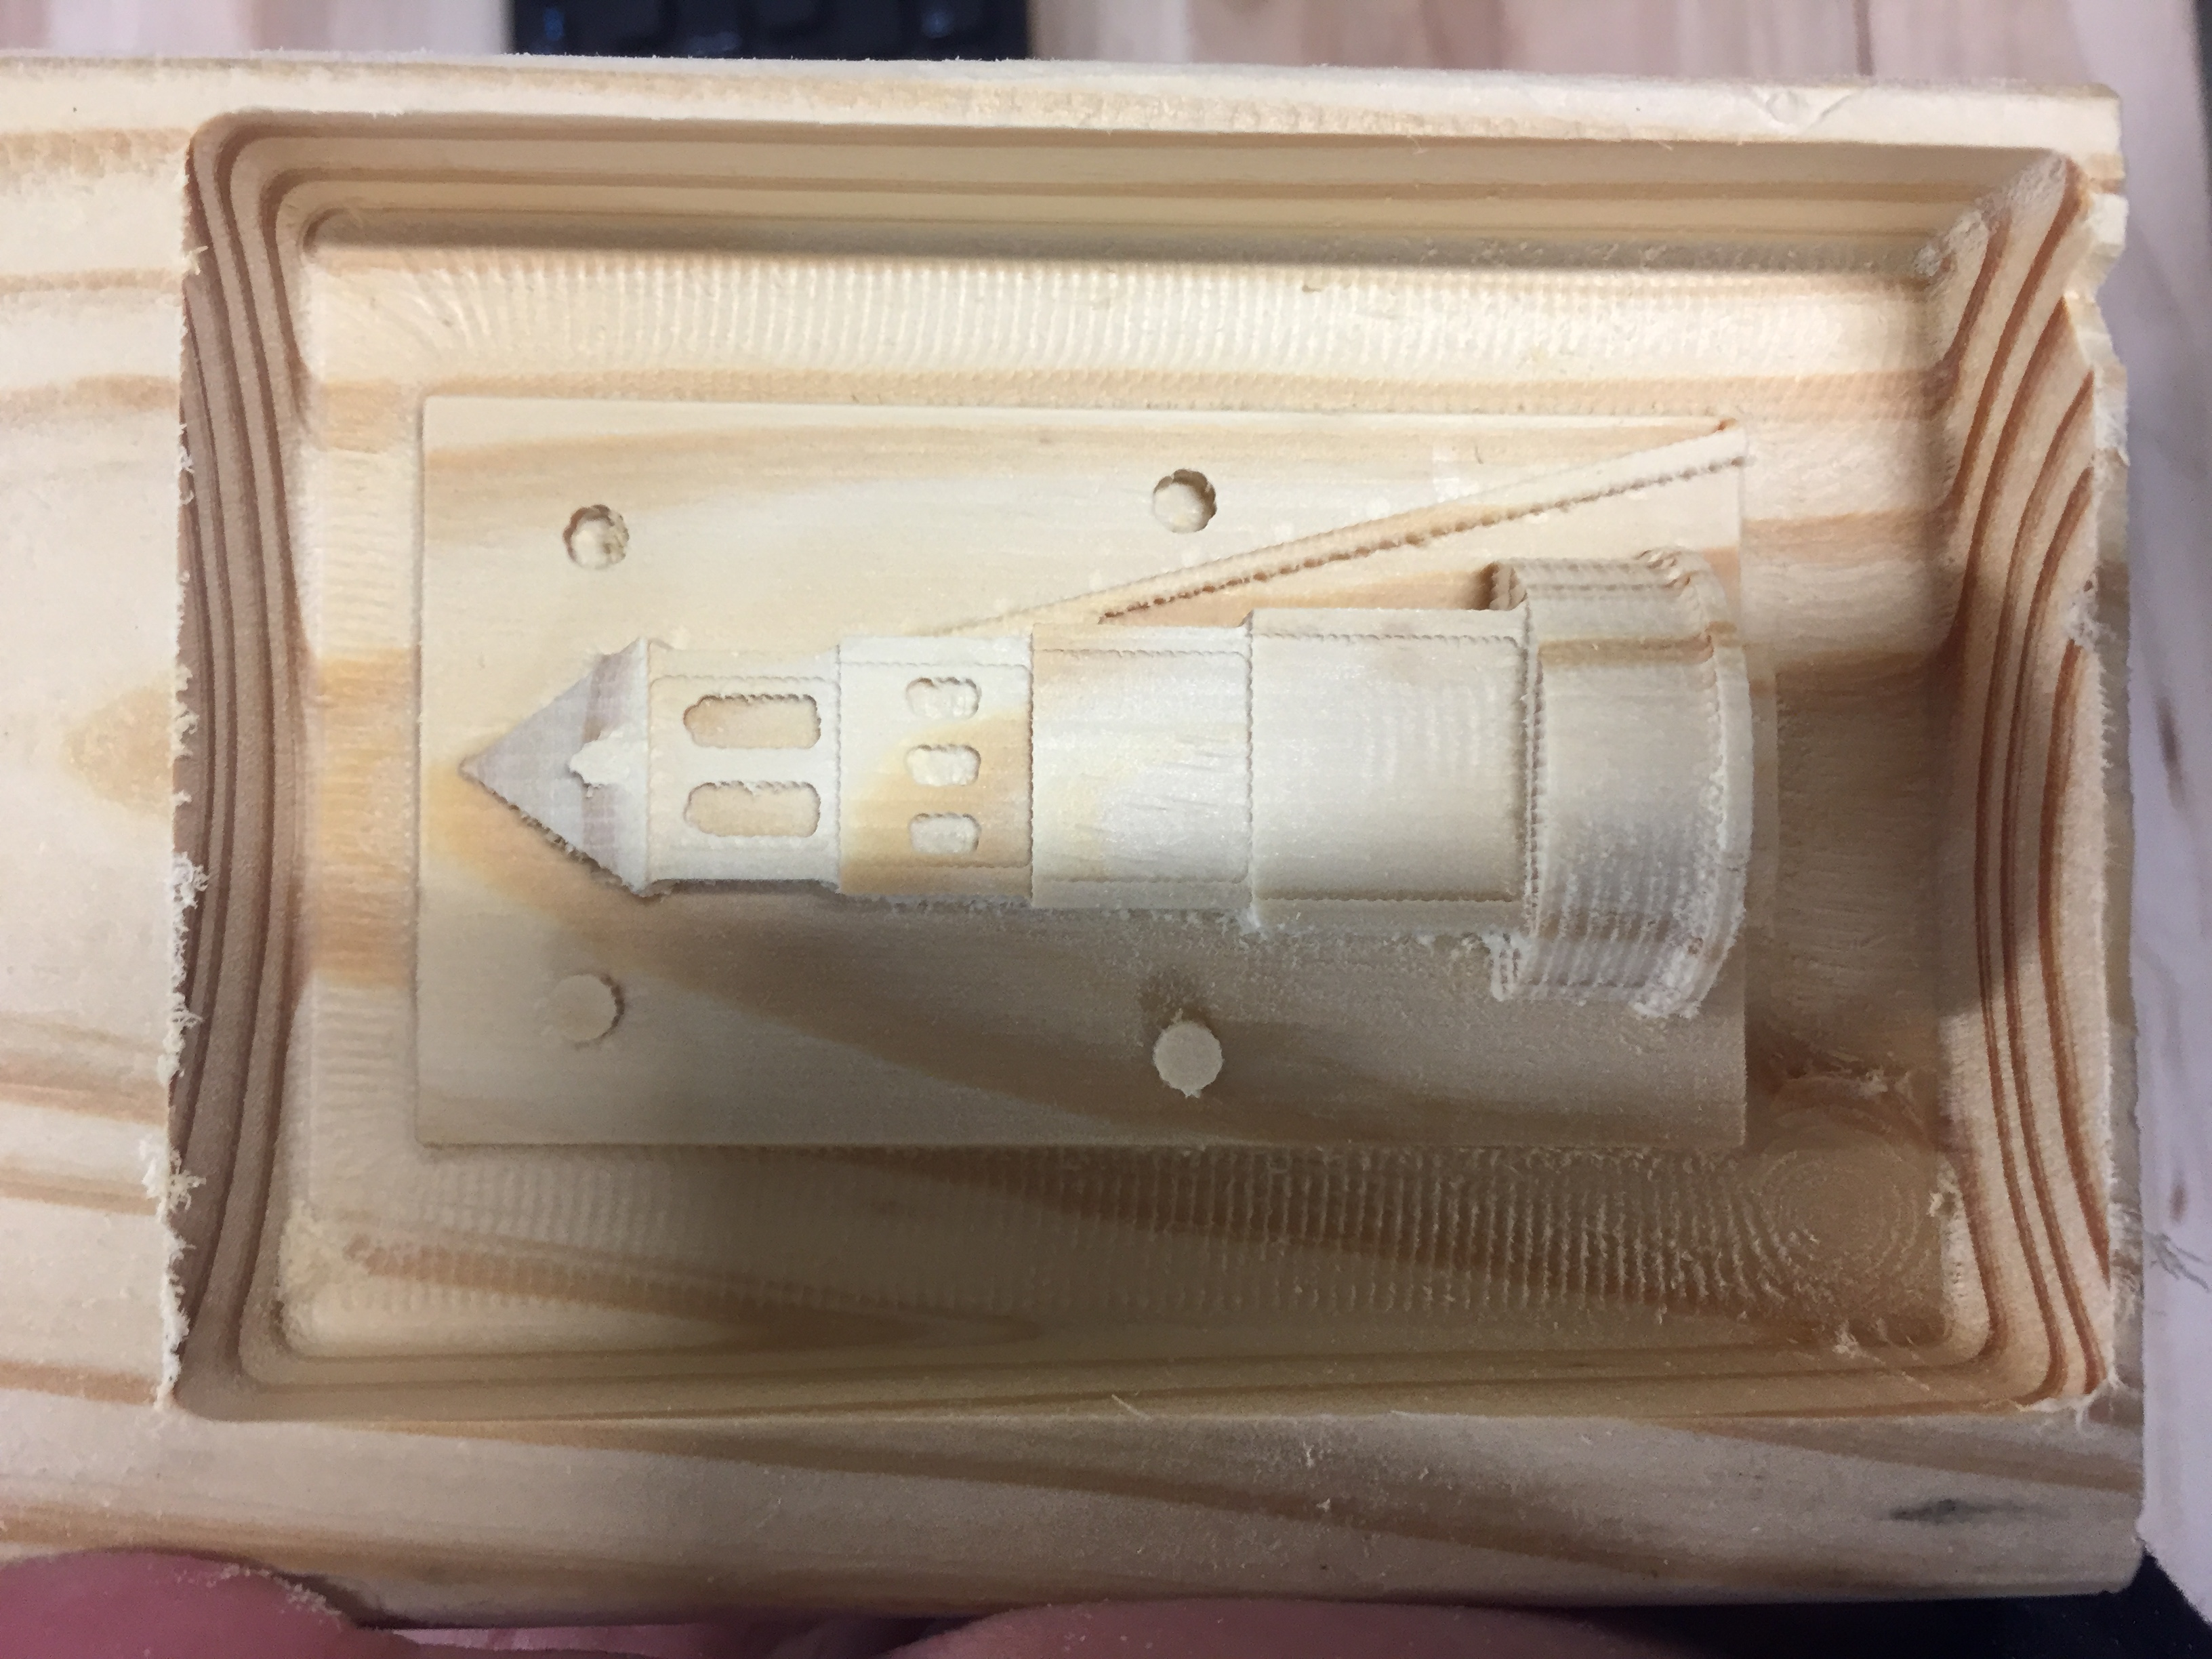
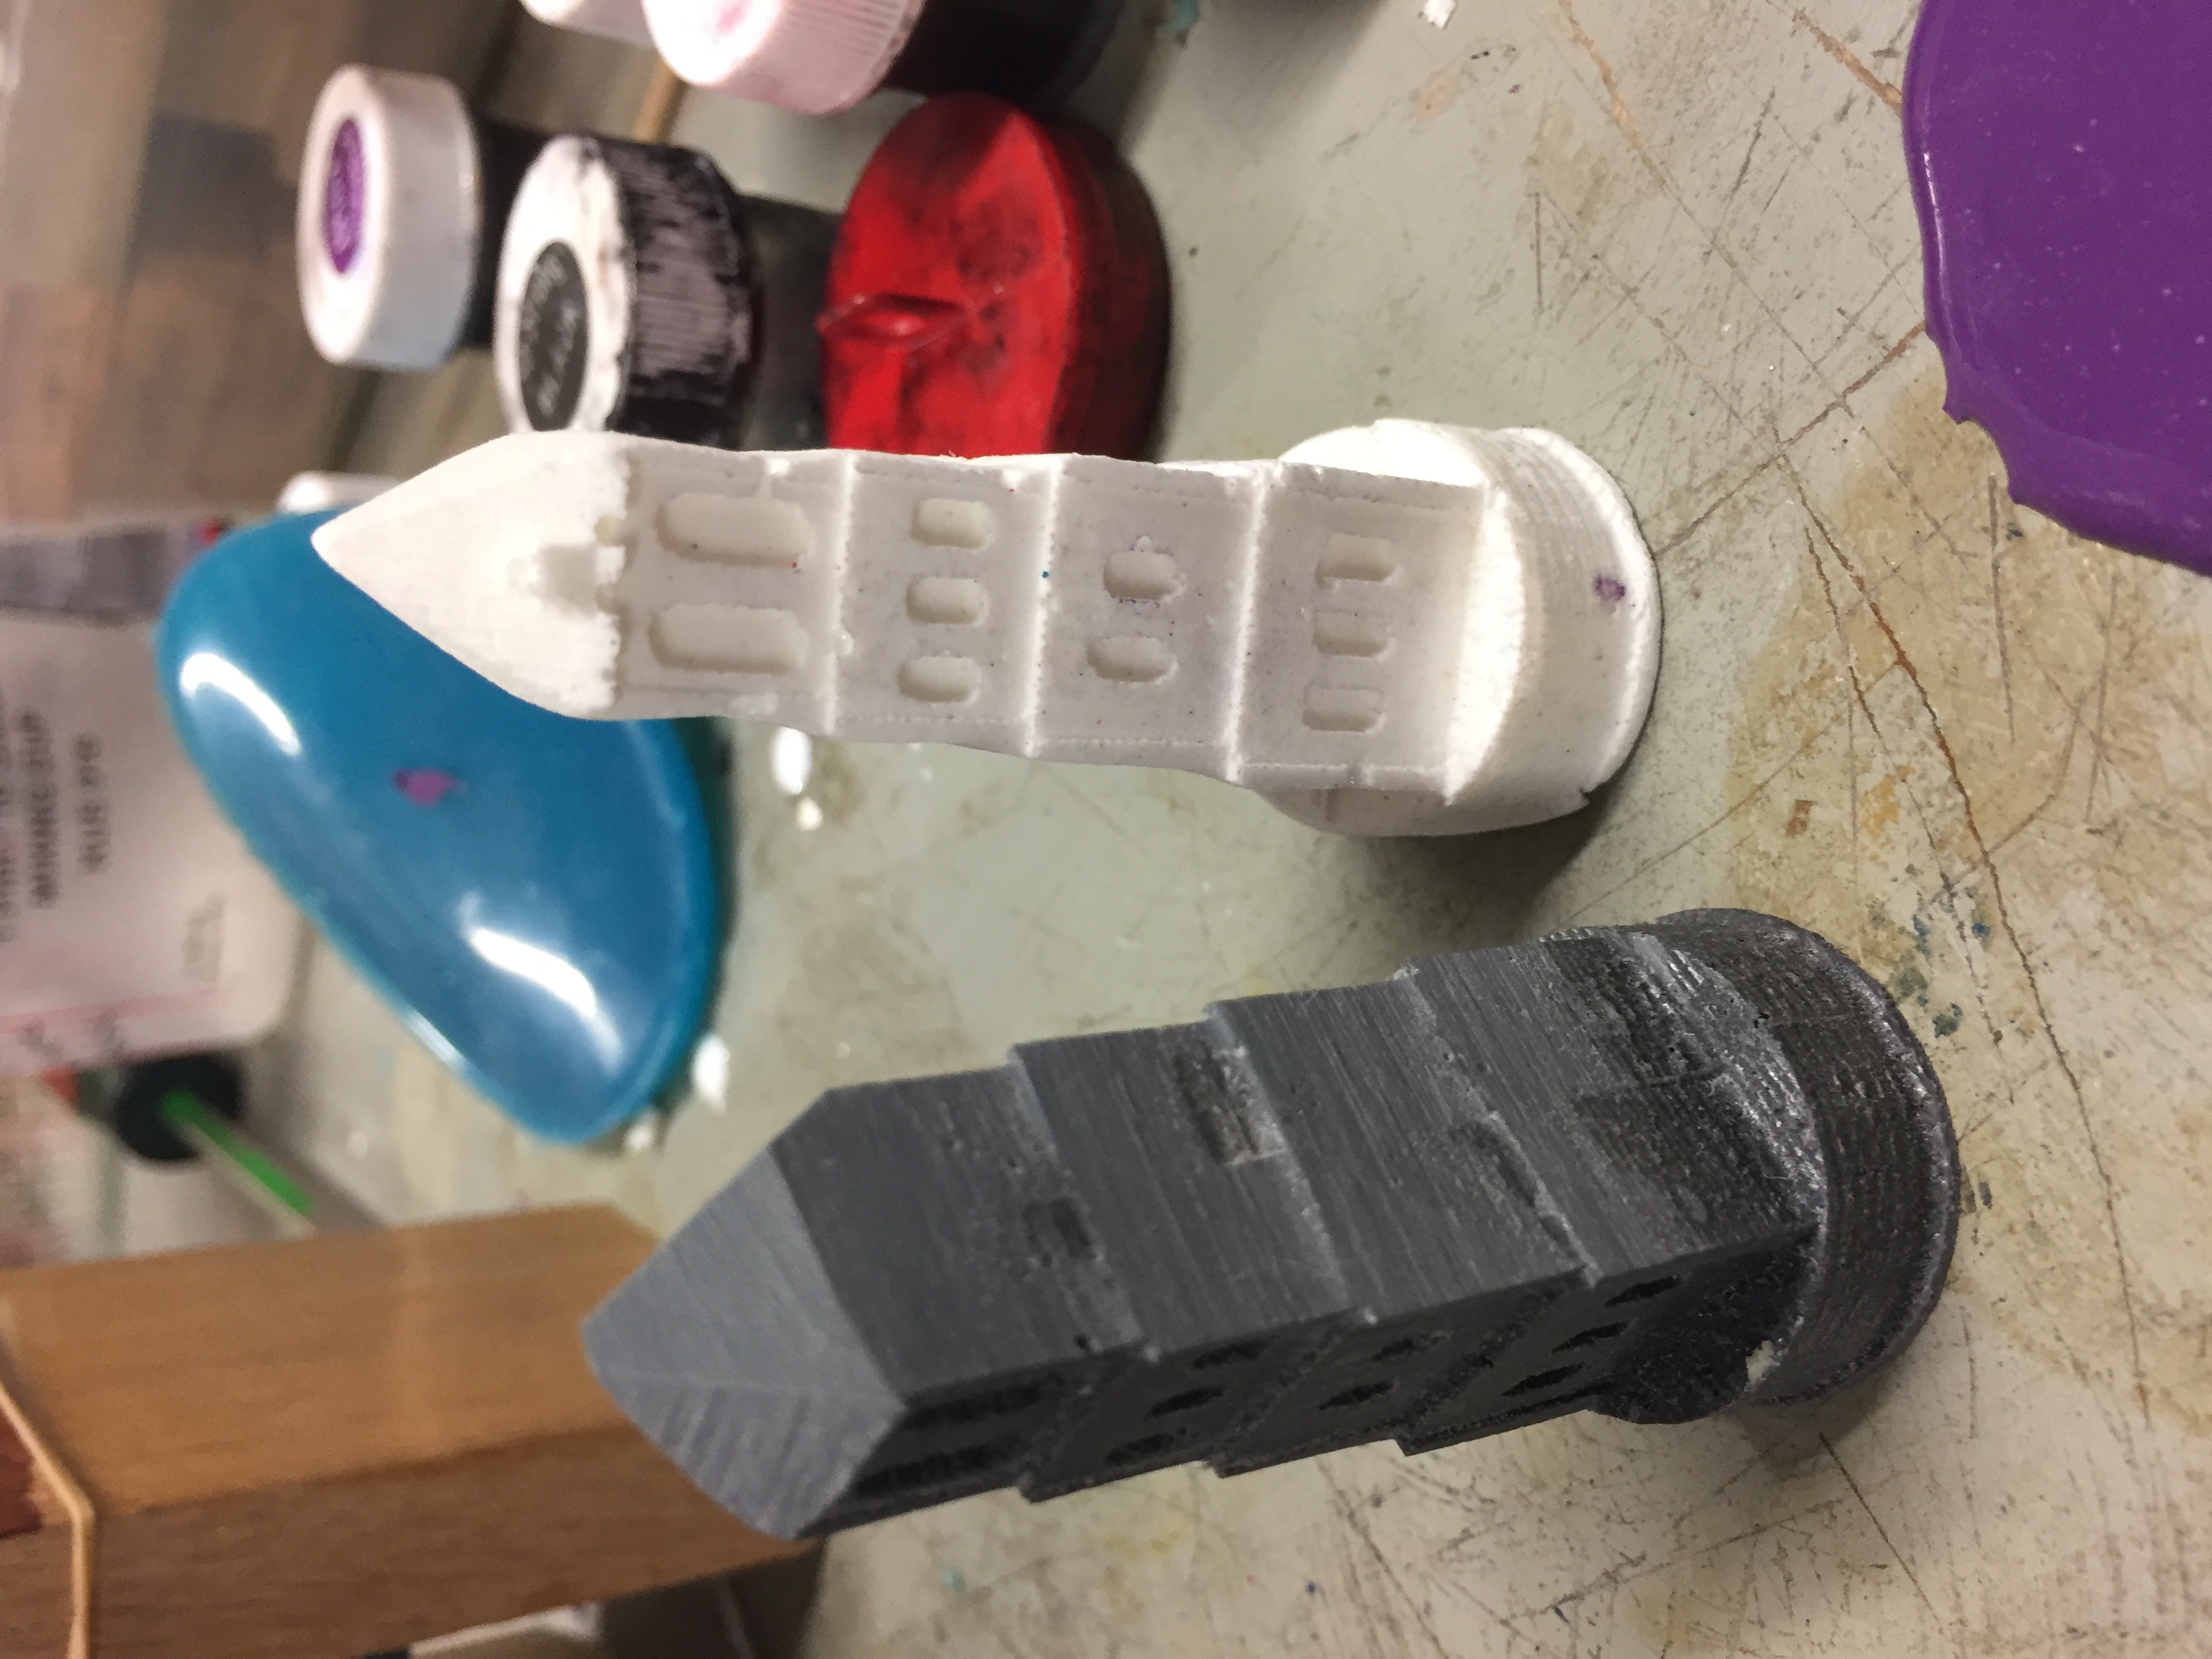
Completed fine cut!
After looking at a successful fine cut (which I amazingly got on the first try), it was pretty good, but there was enough wrong with it that I wanted to try again. For one, I had made the bounding box too huge, so it carved around the plate I made for the Solidworks model, making the mold almost unusable. I considered filling the crack with Easyflo, but decided against. I also wanted to add more windows to the tower to make it more visually interesting and sexy (Christina’s word, not mine). I needed to make the lock keys taller and bigger so they would fit together, the air tunnel was in the wrong place, etc. All in all, I felt confident enough in my abilities to use Fusion360 and there were enough small fixes I wanted to do to make our mold perfect that I was willing to take the time to redesign and recut the piece.
So I did.
This really wasn’t that eventful of a process besides me realizing I wasn’t as good with Fusion360 as I thought I was, asking for a ridiculous amount of help from Josh (featuring the question, “If I’m reading this right, Fusion360 is telling me that this base has a 9 inch radius. Is that right?”), agreeing with the other lab techs that Fusion360 sucks, and jamming out to Disney music in the OEDK at midnight on a Sunday.
What I meant was that endeavor wasn’t that eventful in terms of a blog standpoint. It was eventful in terms of, you know, life.
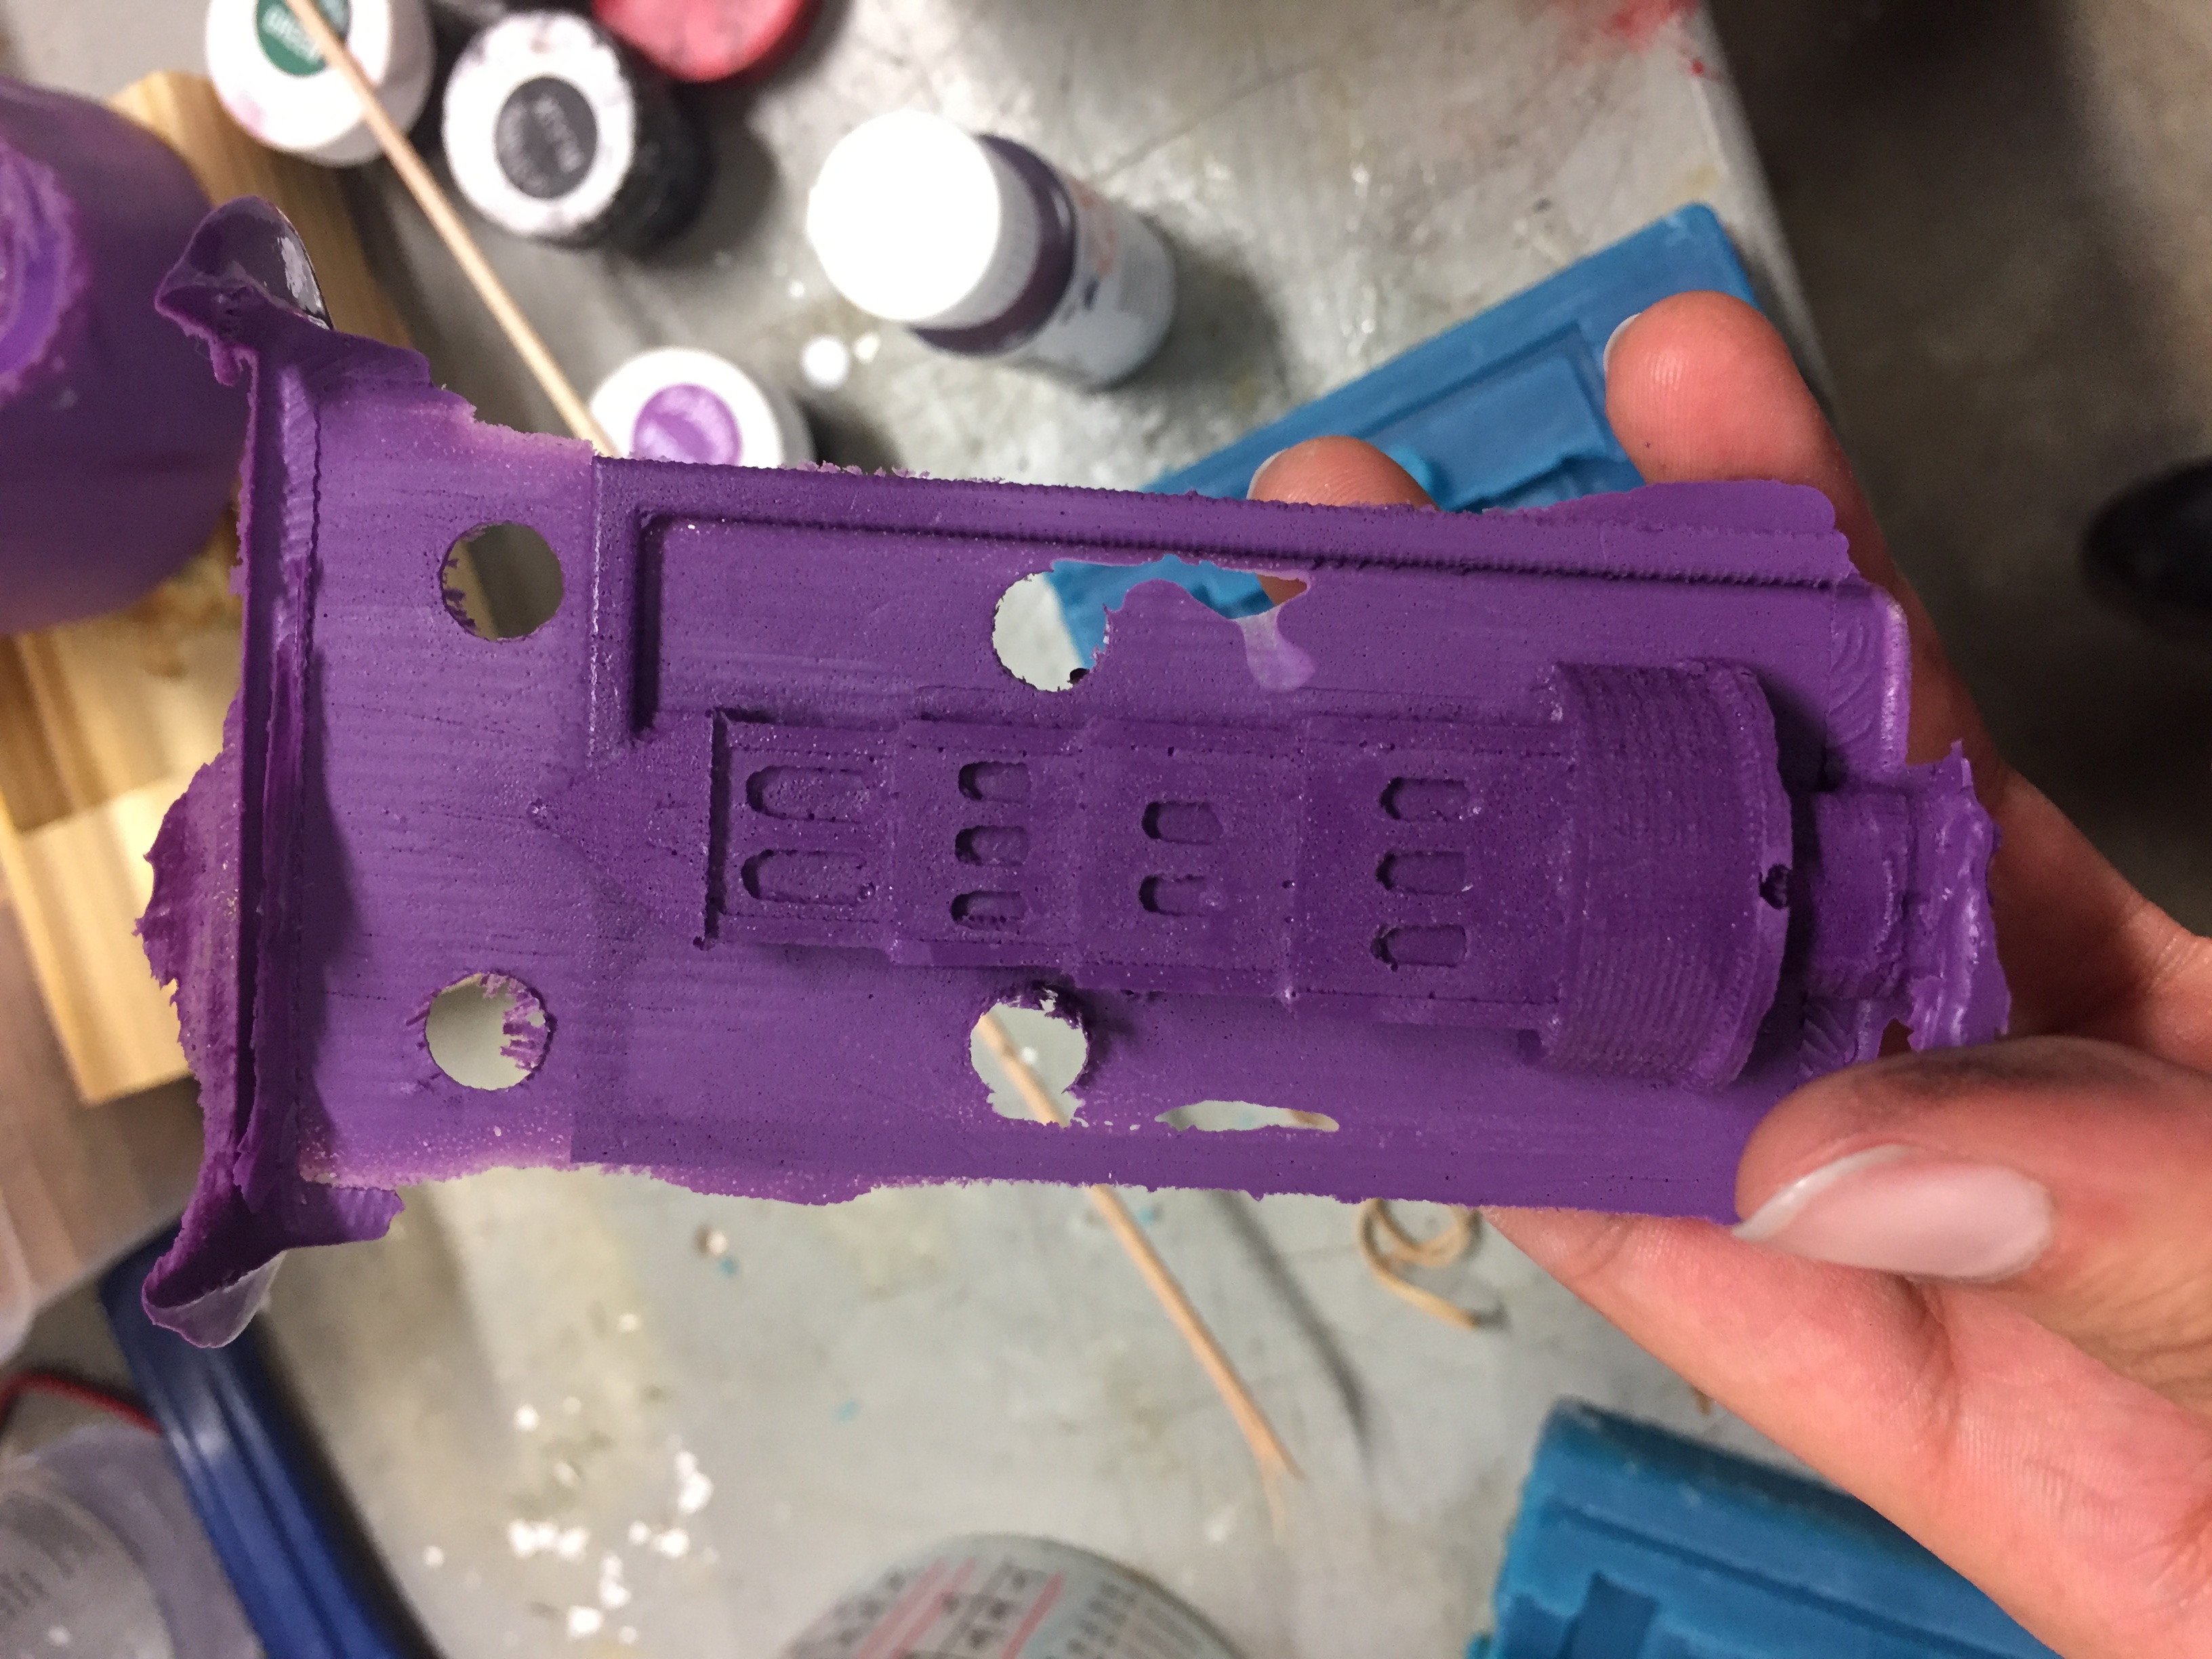
The next day, we recarved the wooden template for the mold, with me starting it and Christina tagging in about 3/4 of the way through so I could go home and take a nap (what? Babysitting is exhausting!)
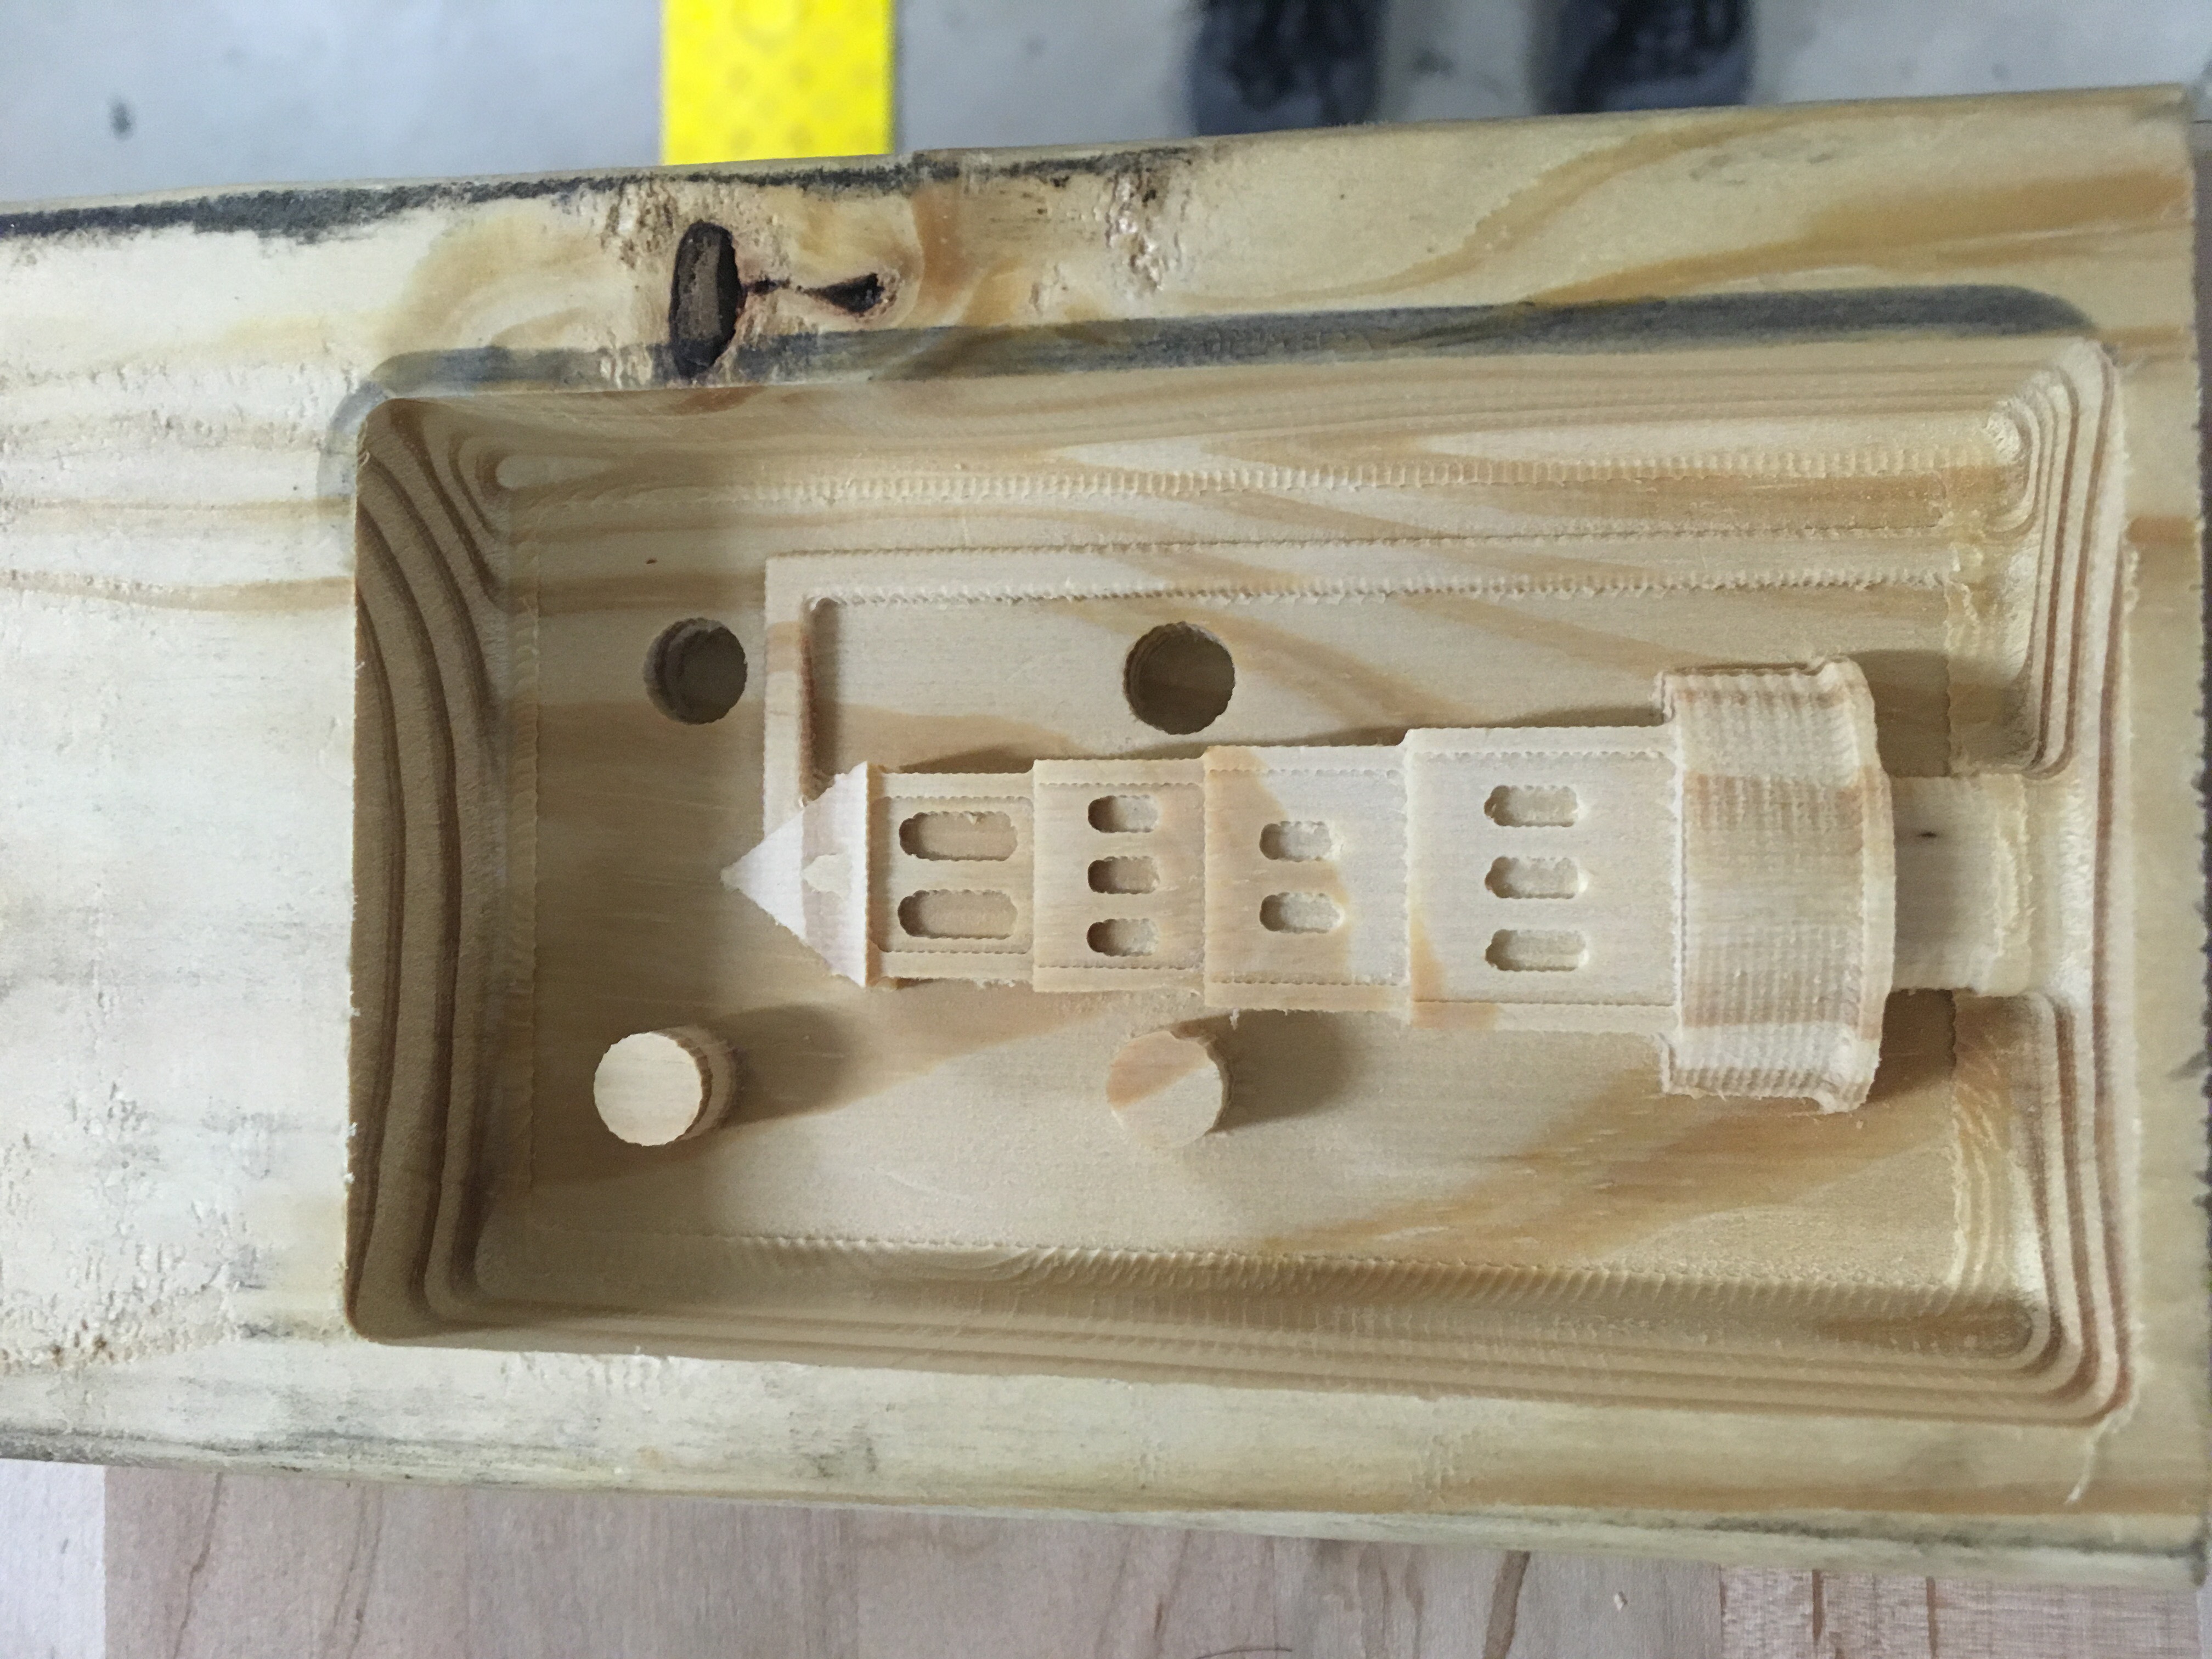
Completed final carve. What a beaut.
Christina then made the silicon molds for the tower. Because we specifically chose a symmetrical rook, we only had to use the one wooden base to make both molds. This was originally seen as an advantage because we wouldn’t have to recarve, but it’s possible that we lost time due to this because the silicon we used for mold material takes like 4 hours to set. Although we did let the mold set overnight, so we really didn’t lose any time at all.

Our rook encased in blue silicon like some submerged city, waiting to be excavated. In other news, I’m taking Intro to Archaeology next semester.
Yes, Christina, yes it is.
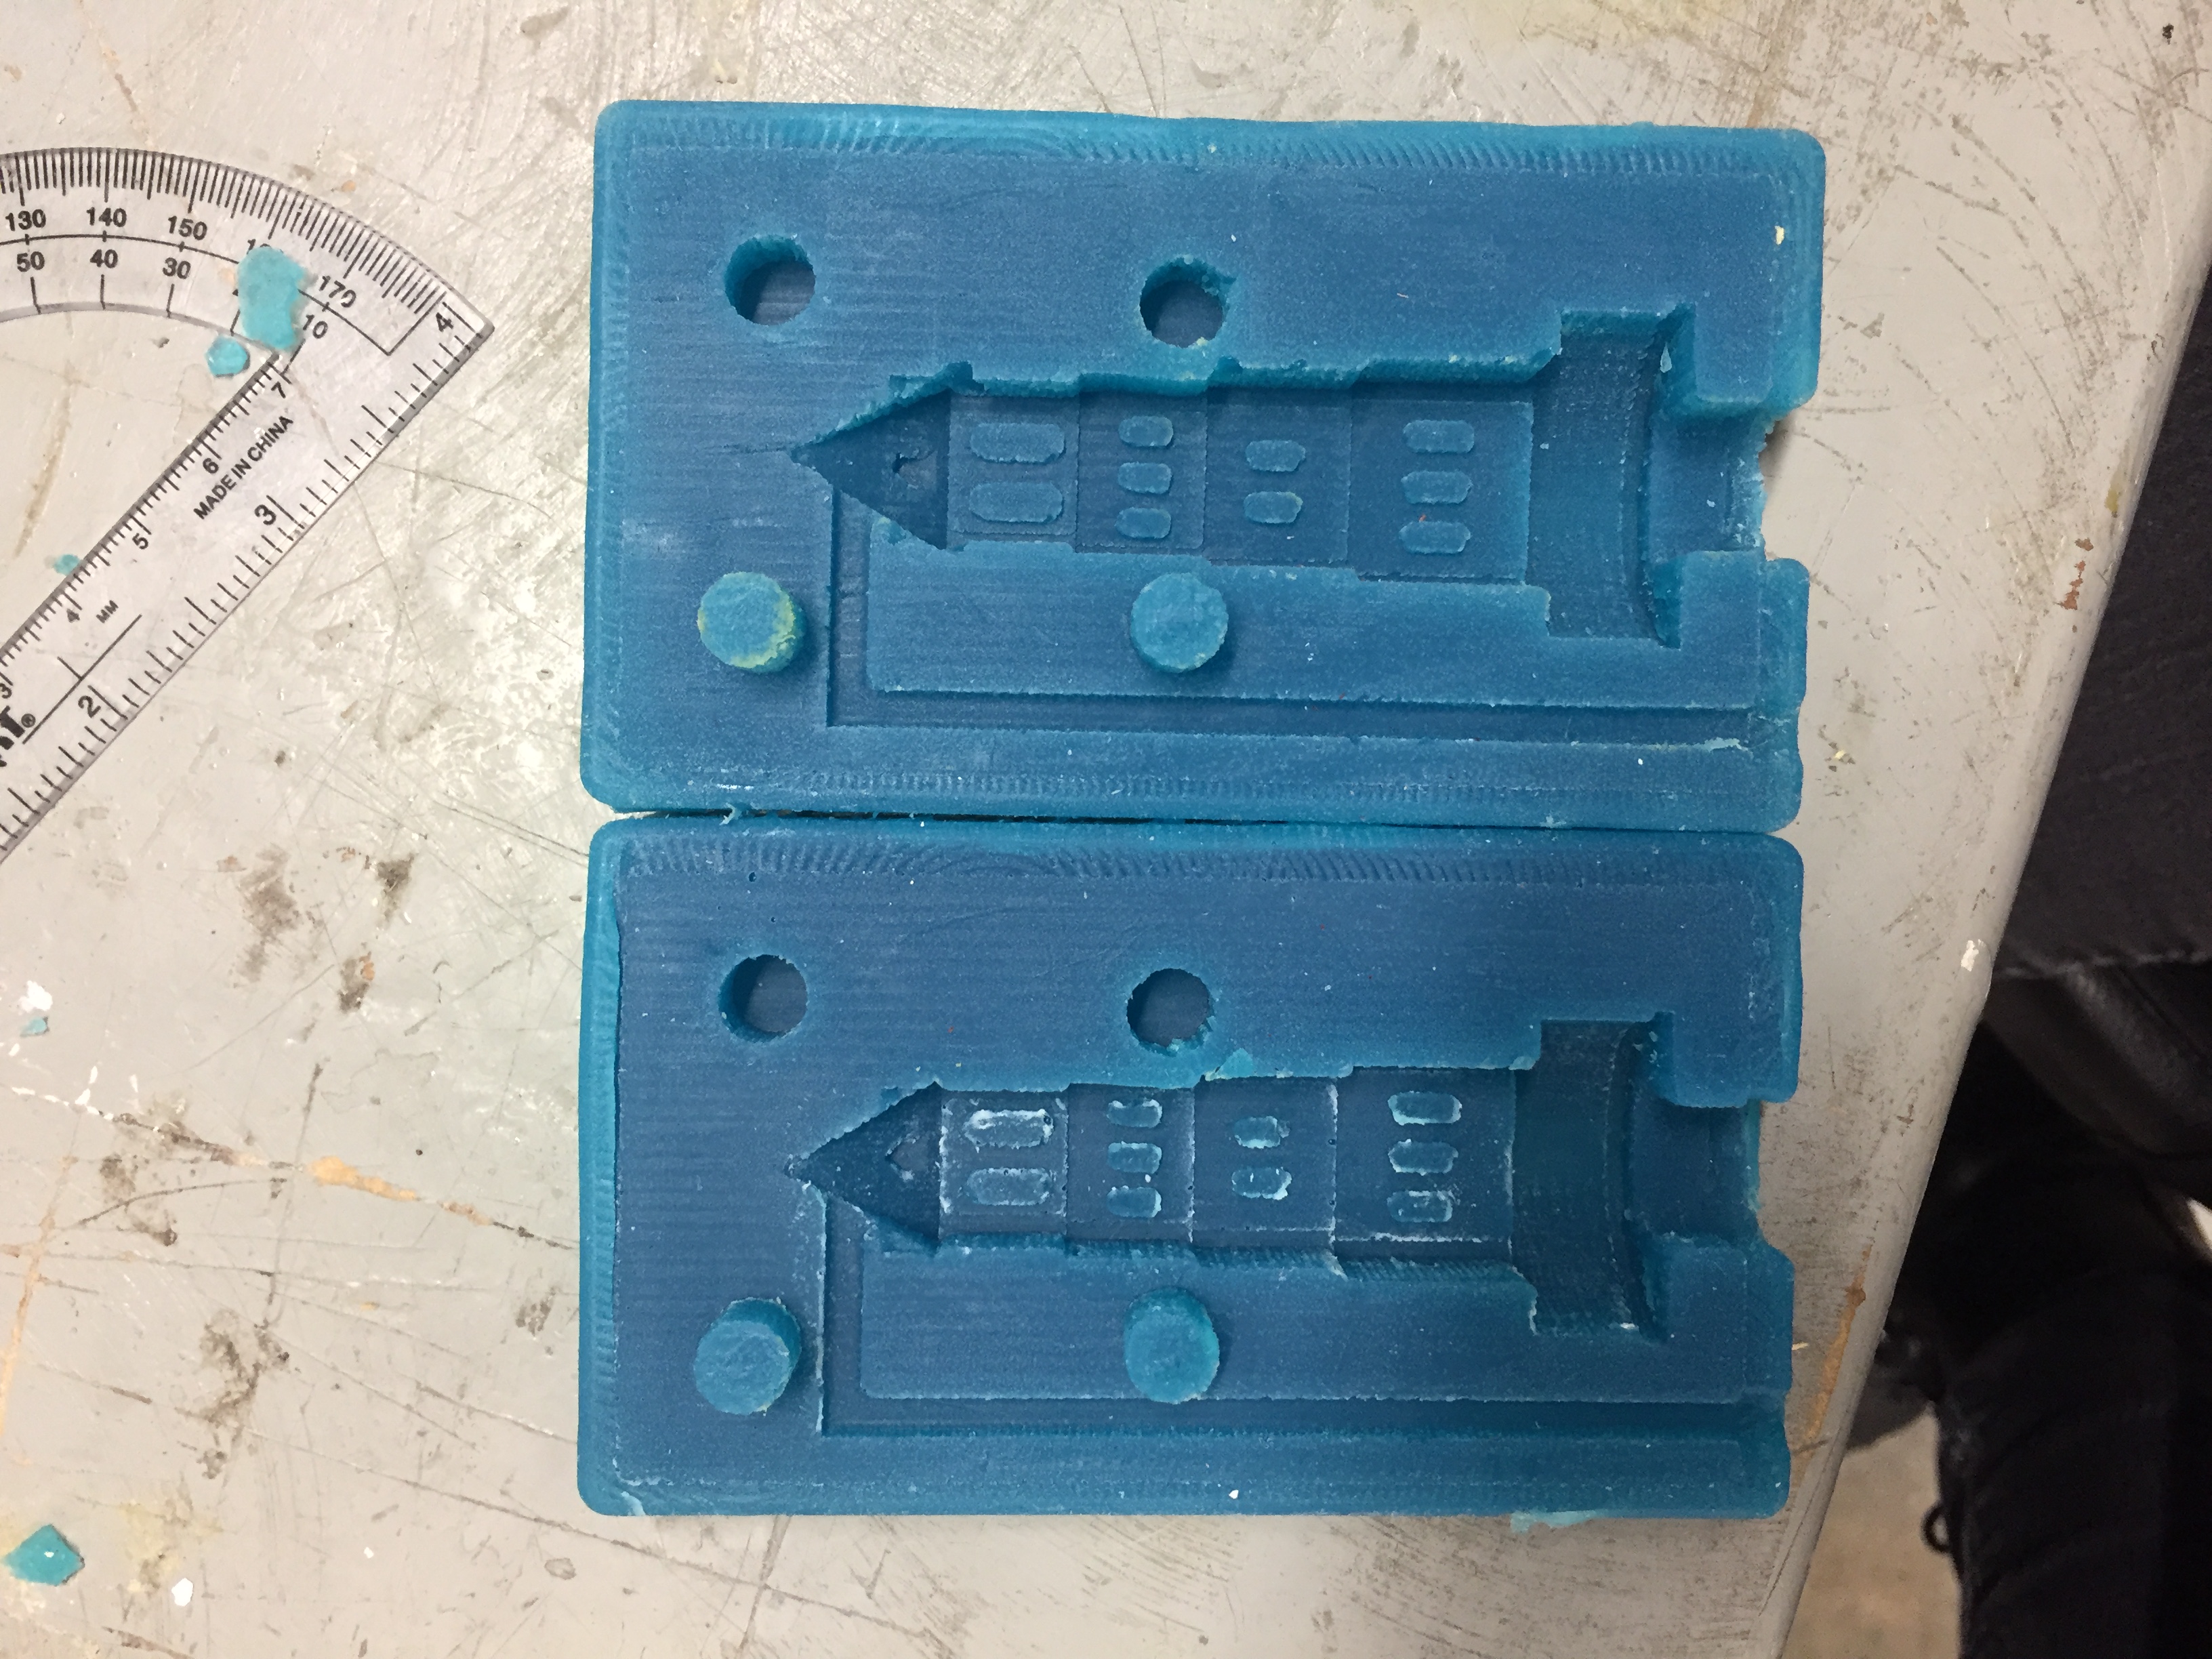
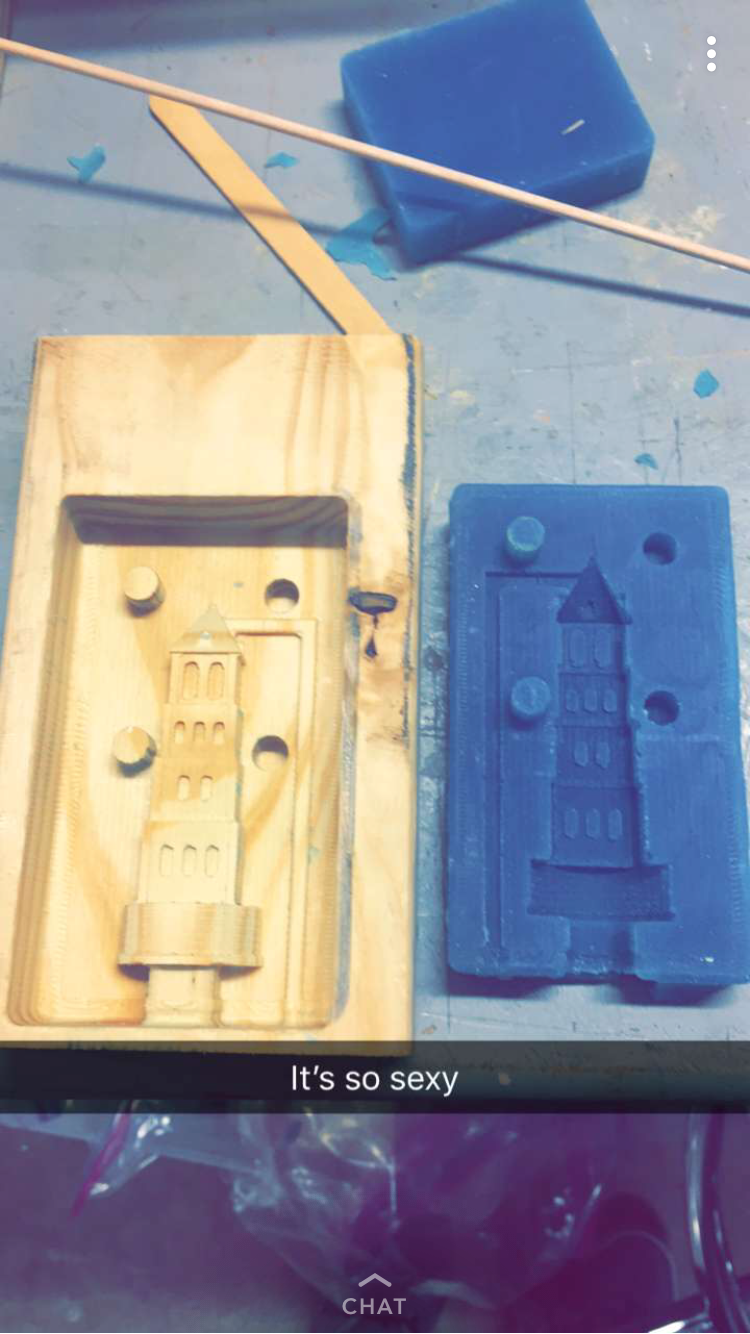
Both finished molds, ready for casting!
We met up the next day to begin casting. The assignment told us that we needed two chess pieces in different colors, so that meant that we needed to dye at least one of our pieces. Christina grabbed the only dye she could find, which were little jars meant for Smooth-On. SO we looked at each other, shrugged, grabbed a yellow and a blue bottle from the rack, and went outside to pour a mold.
And either we grabbed two bottles that actually contained different material, or it was old, or we didn’t shake enough, but the Smooth-On did not work. When mixing and adding the dye to it, it seemed relatively normal, but then we tried to pour it and it started bubbling profusely and expanding out of the mold and in the measuring cup of unpoured material, like some sort of radioactive monster. So Christina and I quietly agreed to put the Smooth-On away and never speak of it again. Except we planned to turn the monstrous scrap material into an art piece and do… something… with it.
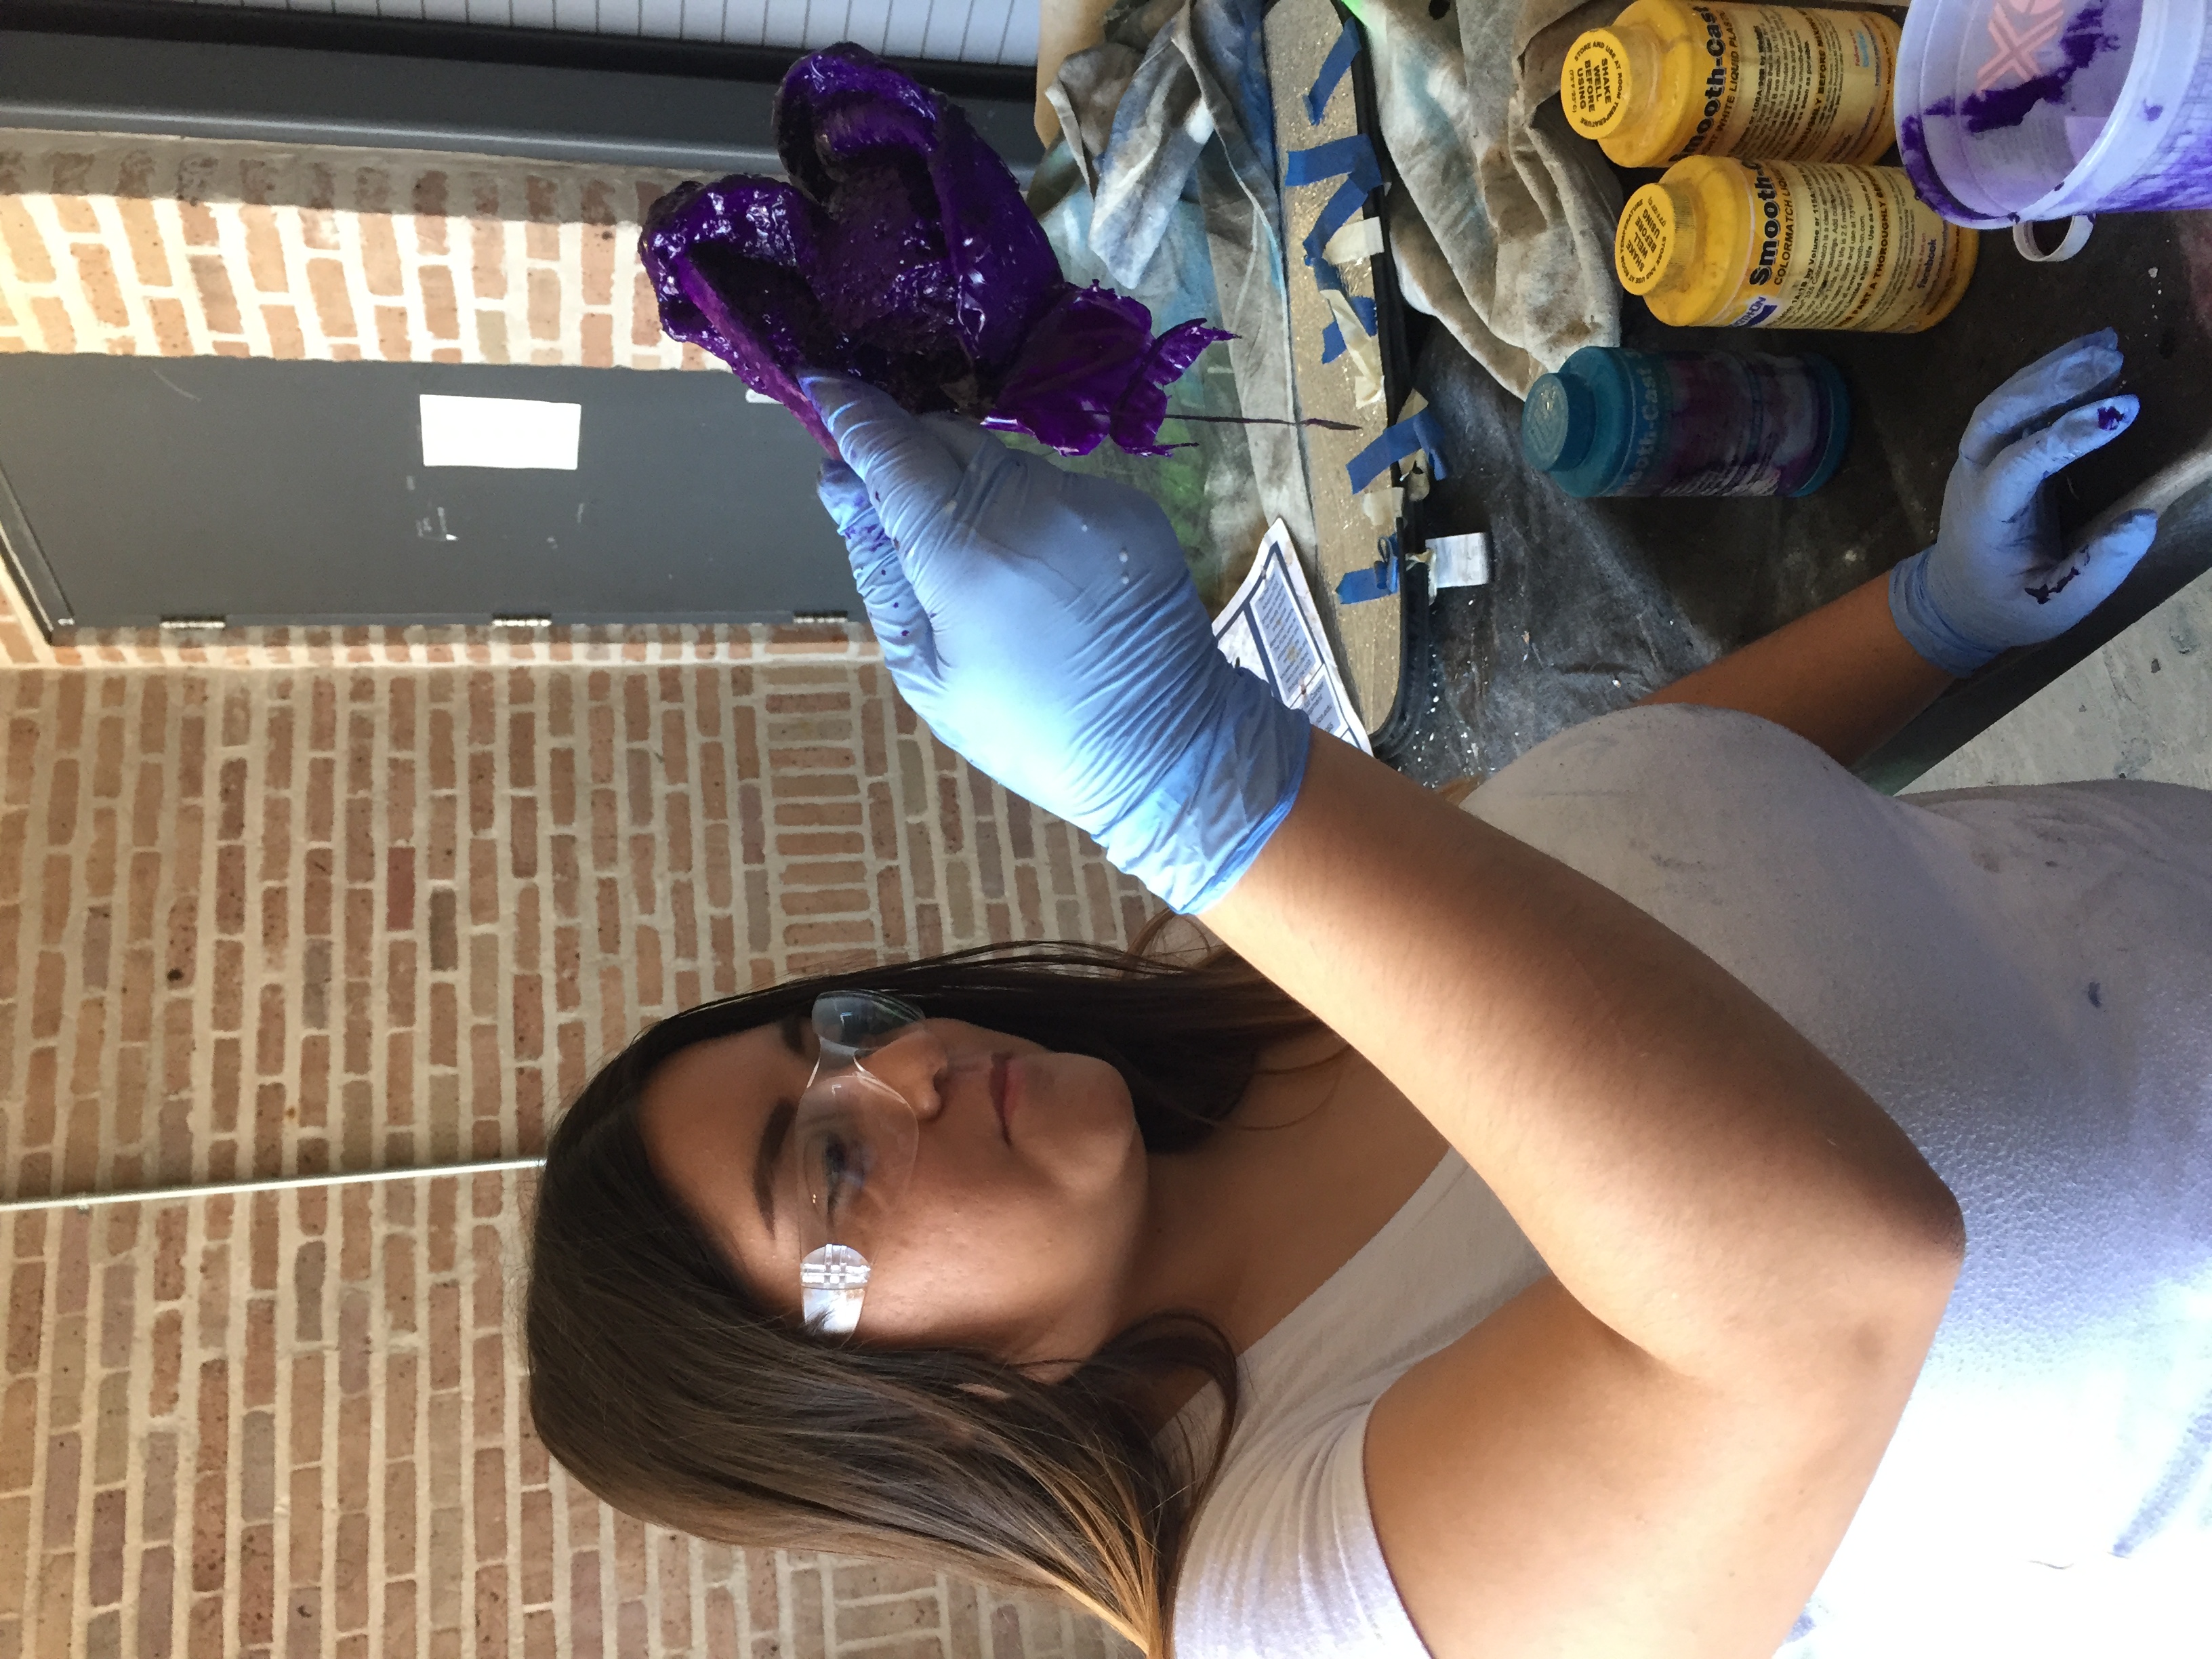
Christina staring dubiously at the monstrous nuclear growth we accidentally created with the Smooth-On. In our defense, we only used about an ounce of each part. Everything else you see expanded to make up look way more wasteful than we actually were.
Our first attempt at casting with the Smooth-On. Somehow it didn’t turn out horrible?
I think it was about this point when we were inside plotting our next move when I looked behind me and saw a familiar fedora making its way to the OEDK basement. I nudged Christina and murmered, “Hey, is there anything we want to ask Dr. Wettergreen because he’s here…?”
She shrugged and shook her head.
“Like maybe about the dye.”
Christina looked at me, considered it, and then pointed to her nose. Nose goes. Fine.
So I went downstairs and knocked on Dr. Wettergreen’s door, which was open, so that was kind of awkward (but less awkward than the time this summer when three people were standing behind me watching as I tapped his door with a single knuckle rap and he gave me a hard time for it.)
He asked me how the the project was going, and I told him that it was going fairly well, and he was so pleased. “You actually sound optimistic! That means it’s going even better than fairly well!”
… Thanks?
He was also pleased that I was asking about dye, so he gave me some bottles of dye that he was keeping hidden in his office and told me to use that with the EasyFlo. This made a lot more sense, but also, what would have happened if I didn’t happen to see his fedora during the five minute span that he was at the OEDK? Would anyone have been able to use the dye, or would it have been hidden for eternity?
I also got to hold his dog and meet his wife, so that was a plus.
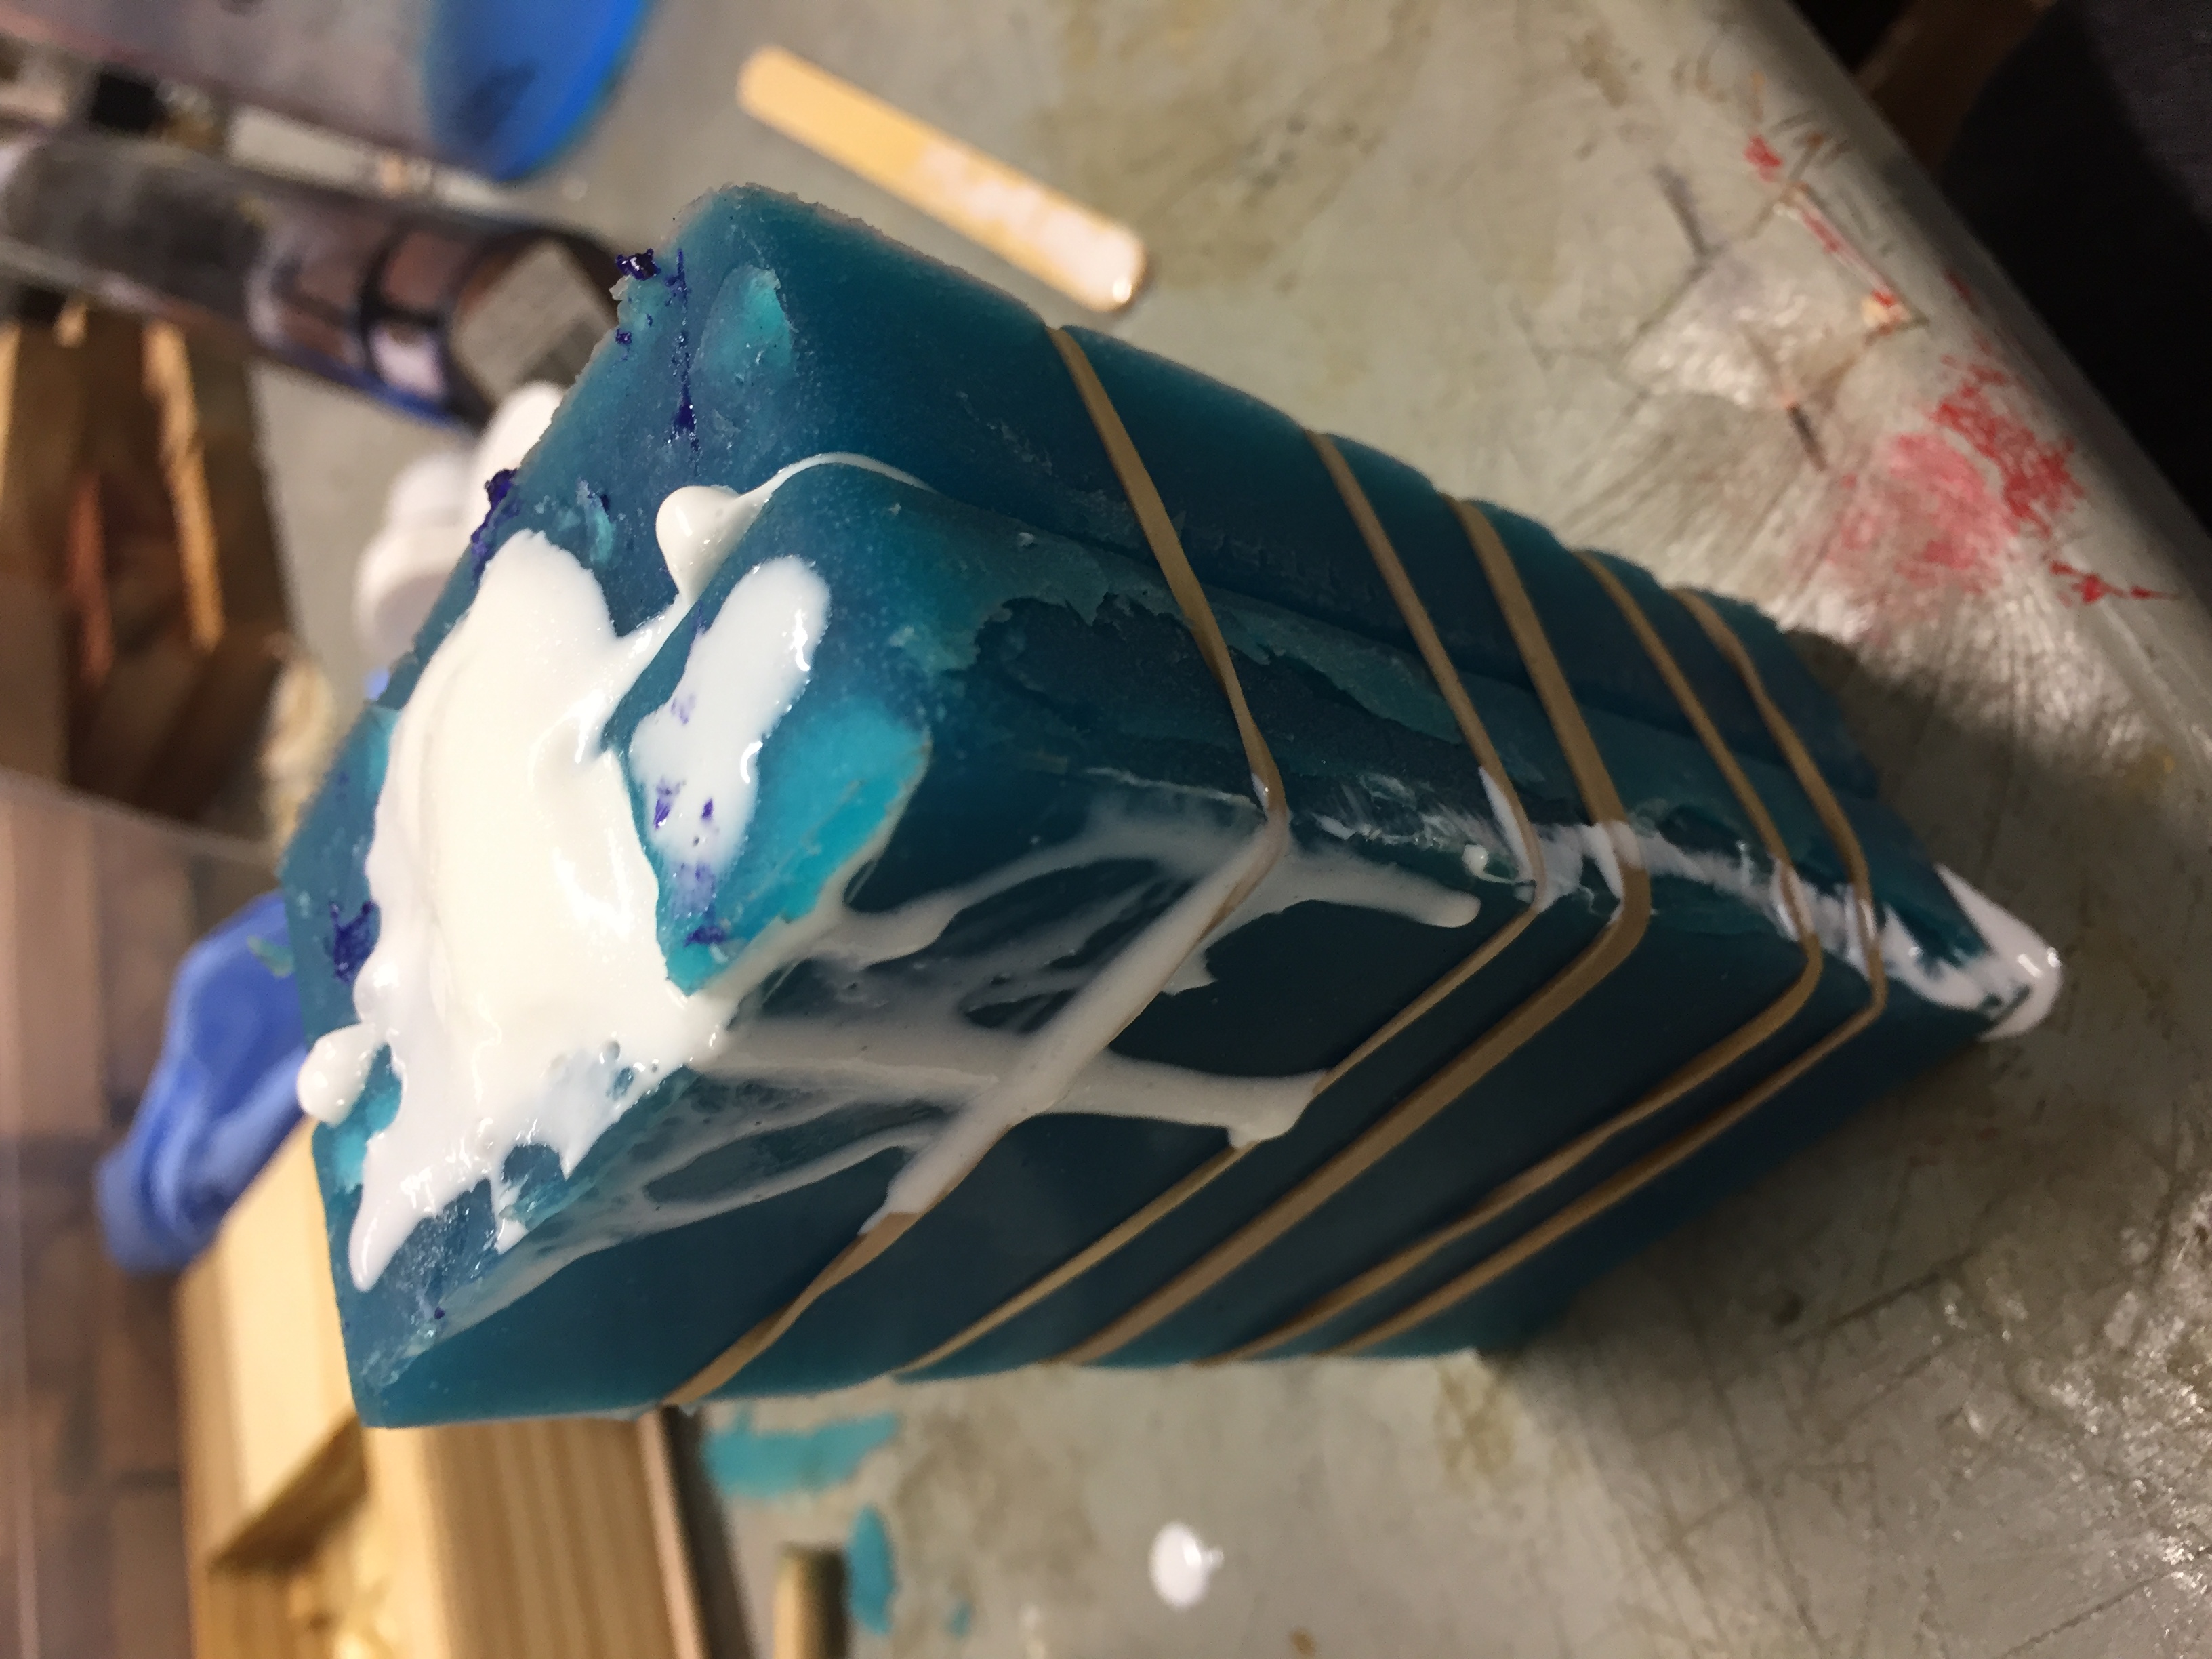
Christina and I then proceeded to recast the rook multiple times. We tried it in white, which was boring and didn’t turn out super well, so we redid it in purple.
Some of the EasyFlo dripped onto my hand as I was holding the mold together. I have not been able to feel my fingertips properly for days.
Complete white cast, with lots of airholes and leakage.
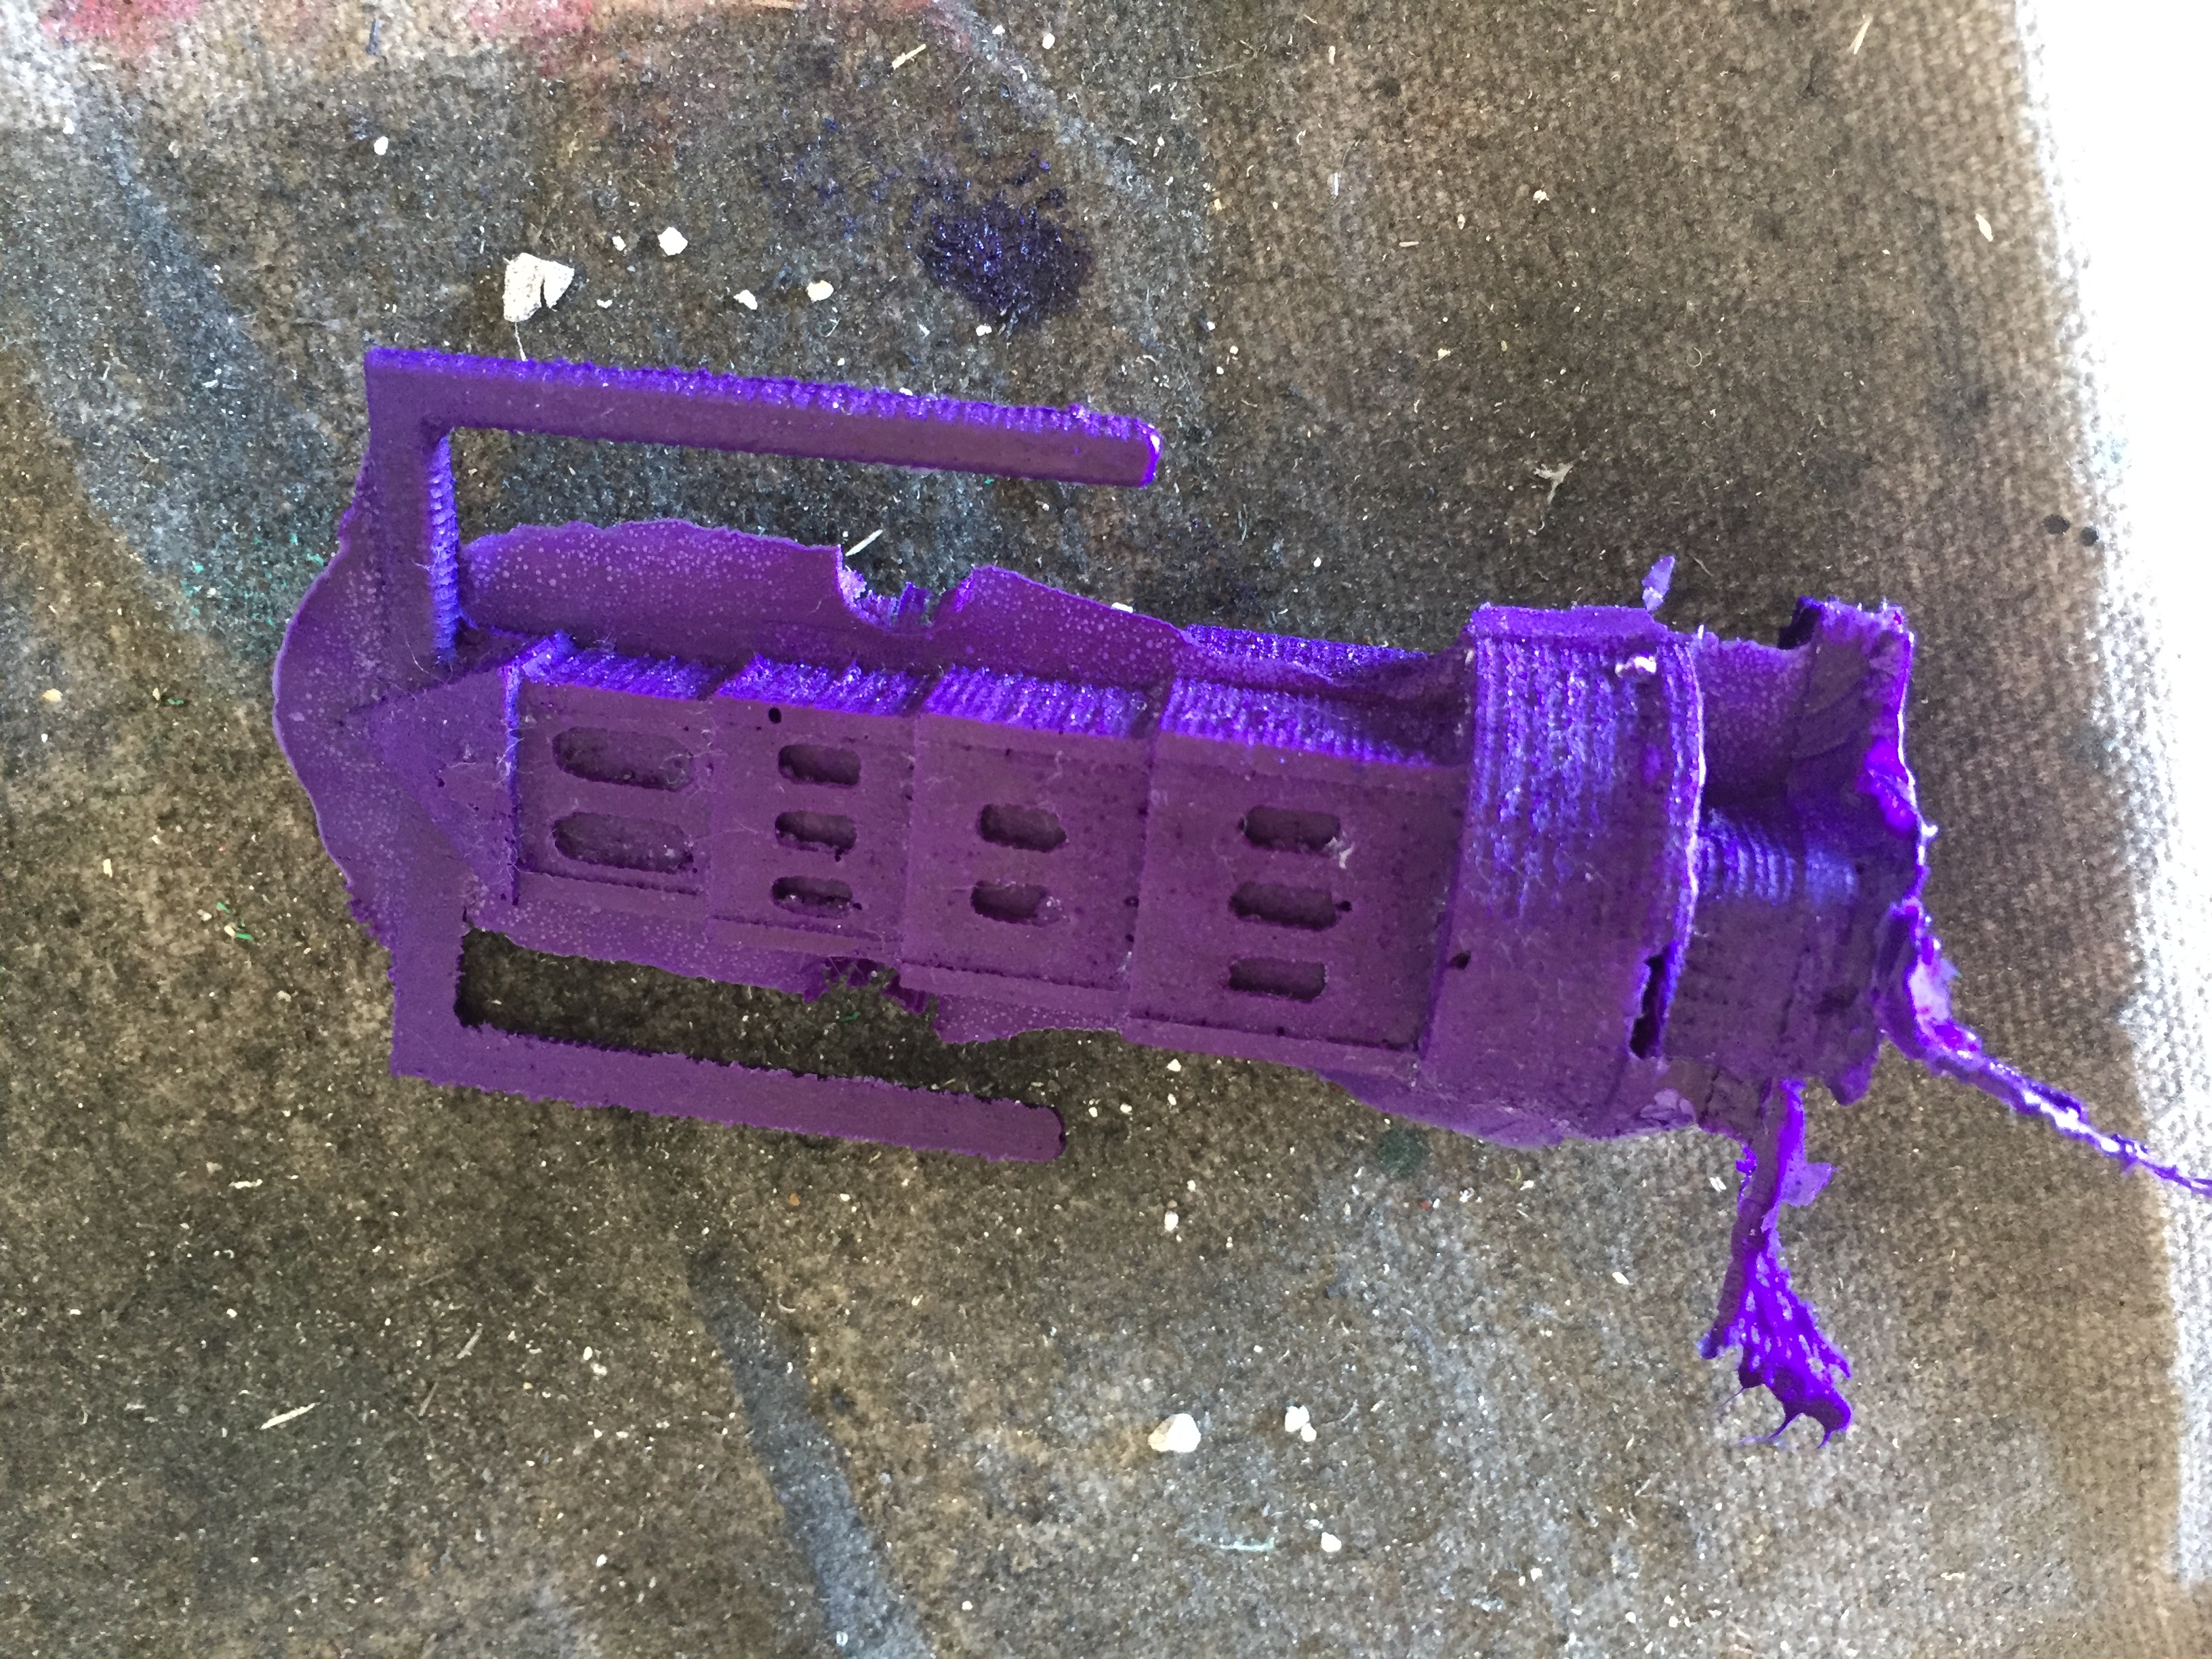
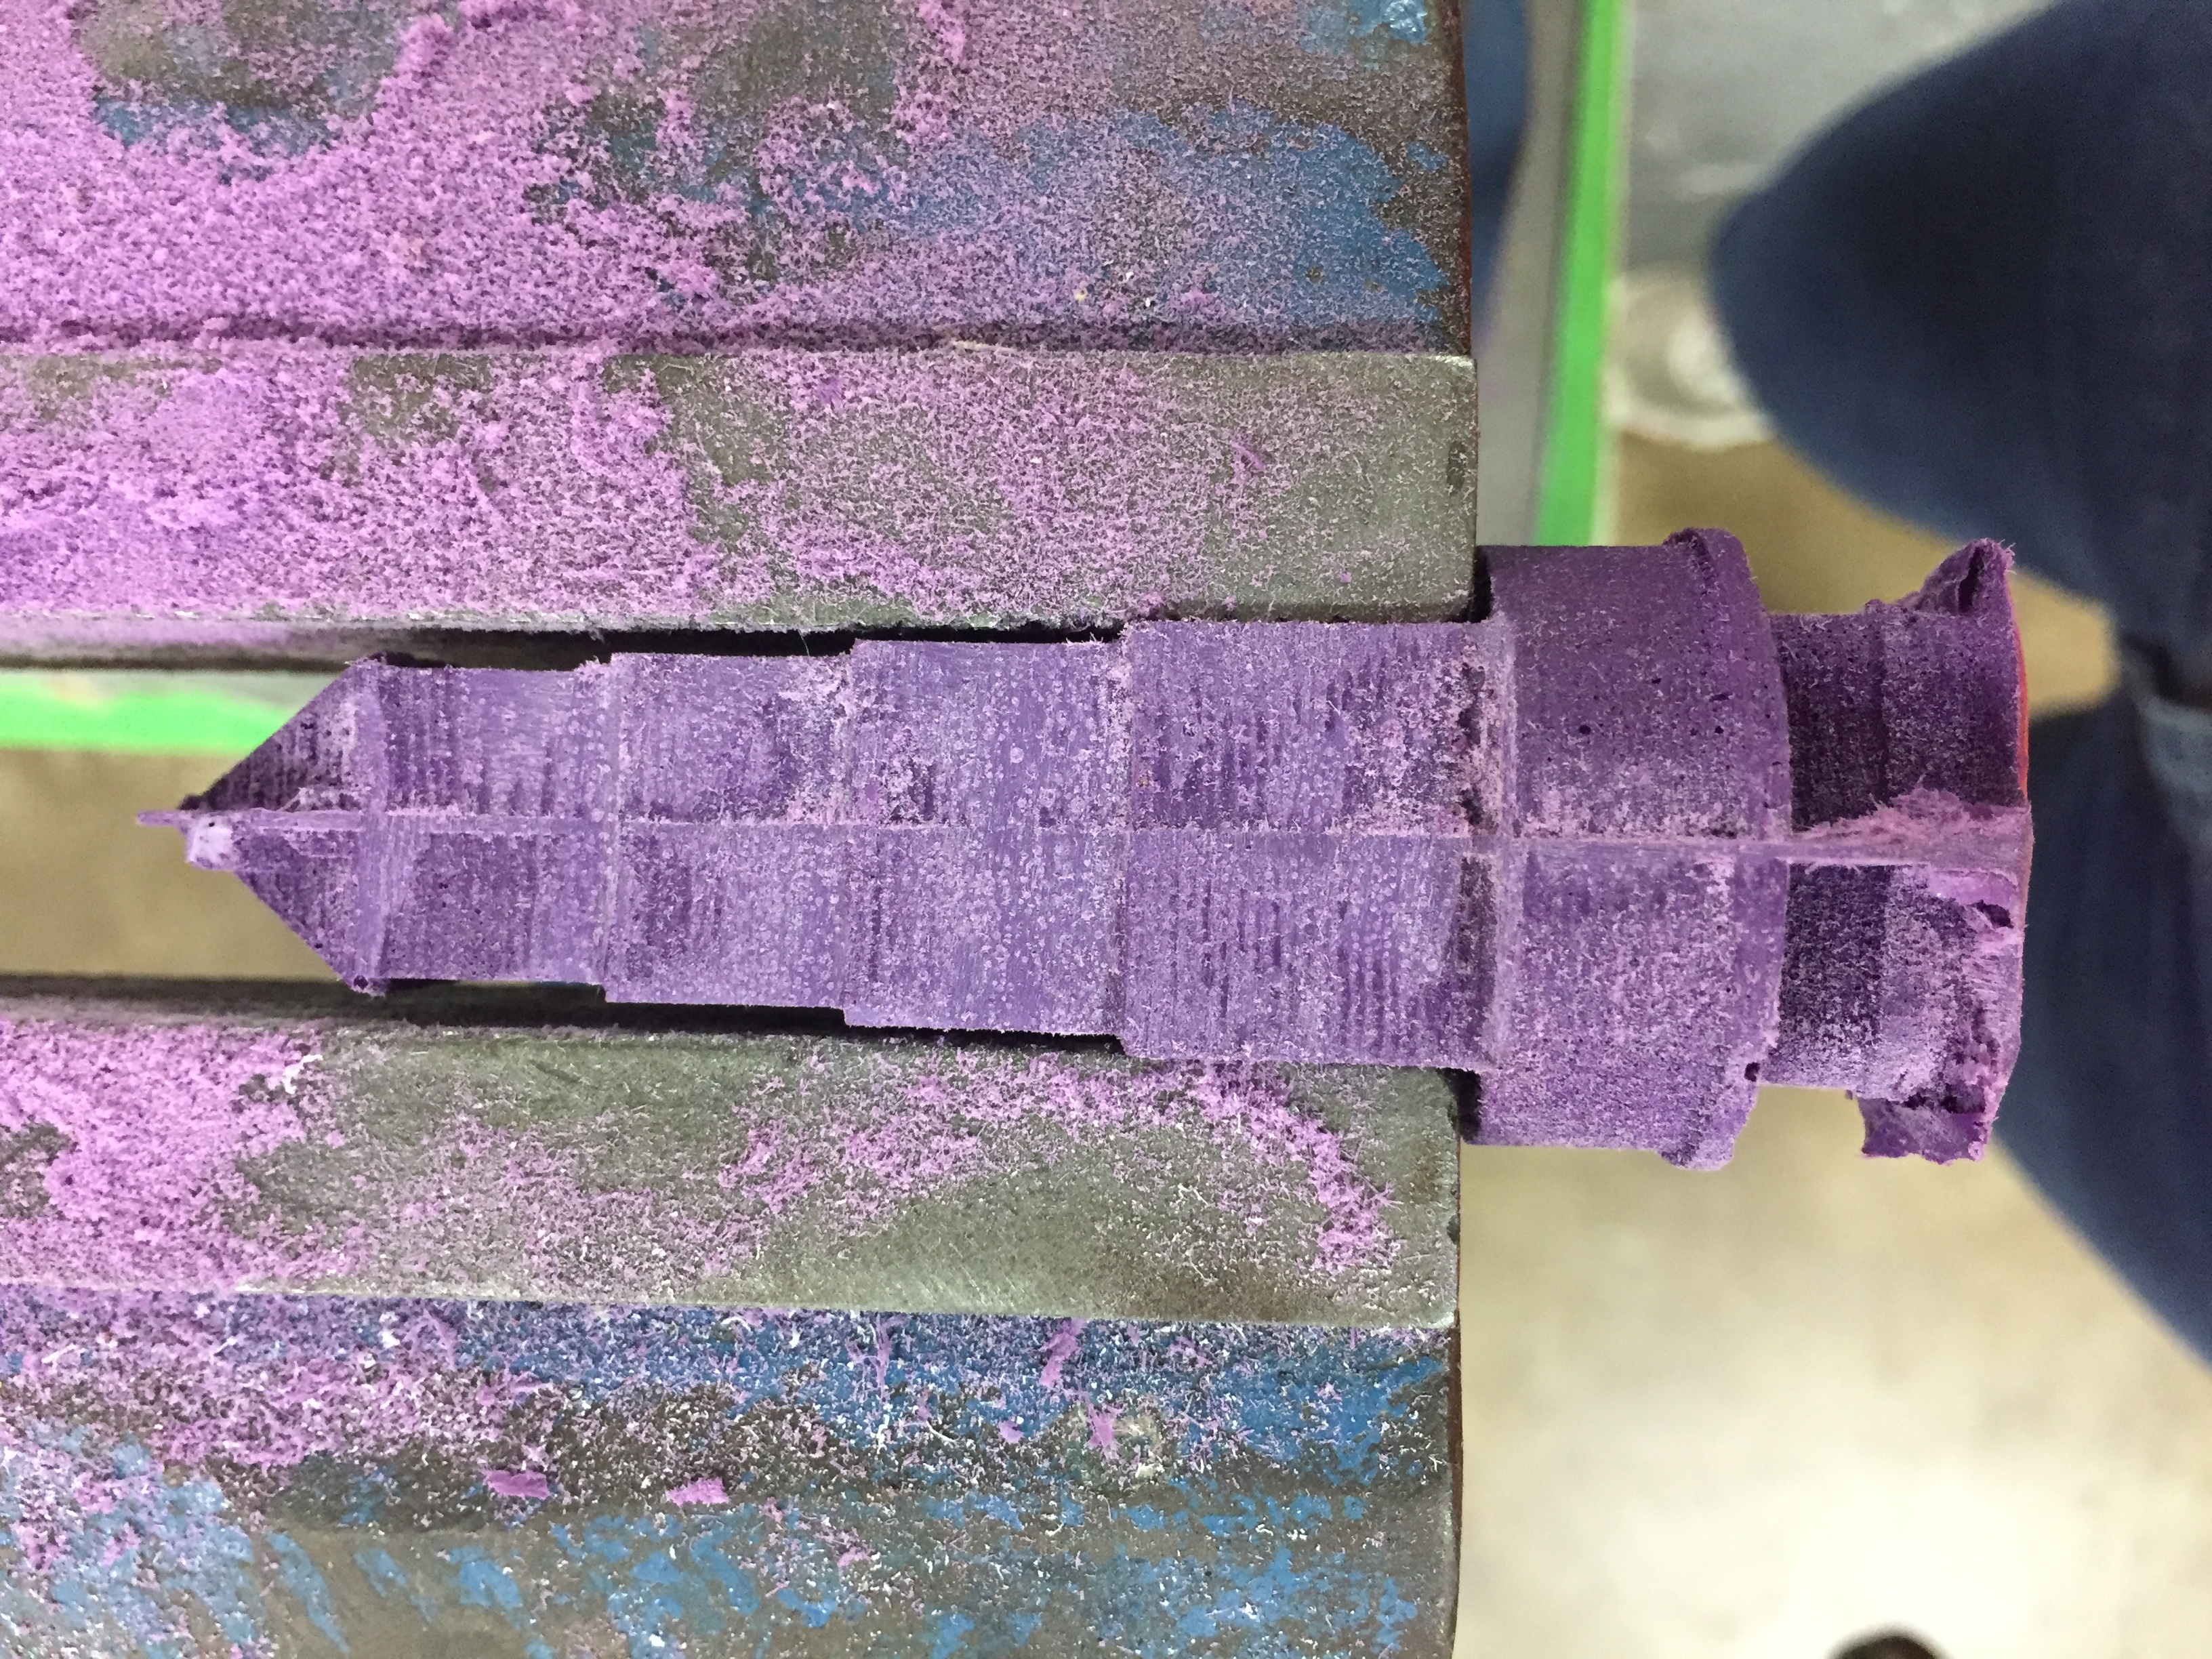
The purple cast looked way better than the first two, so we decided to proceed with post-processing it. We figured we could cut away the leaked material and it would be fine.
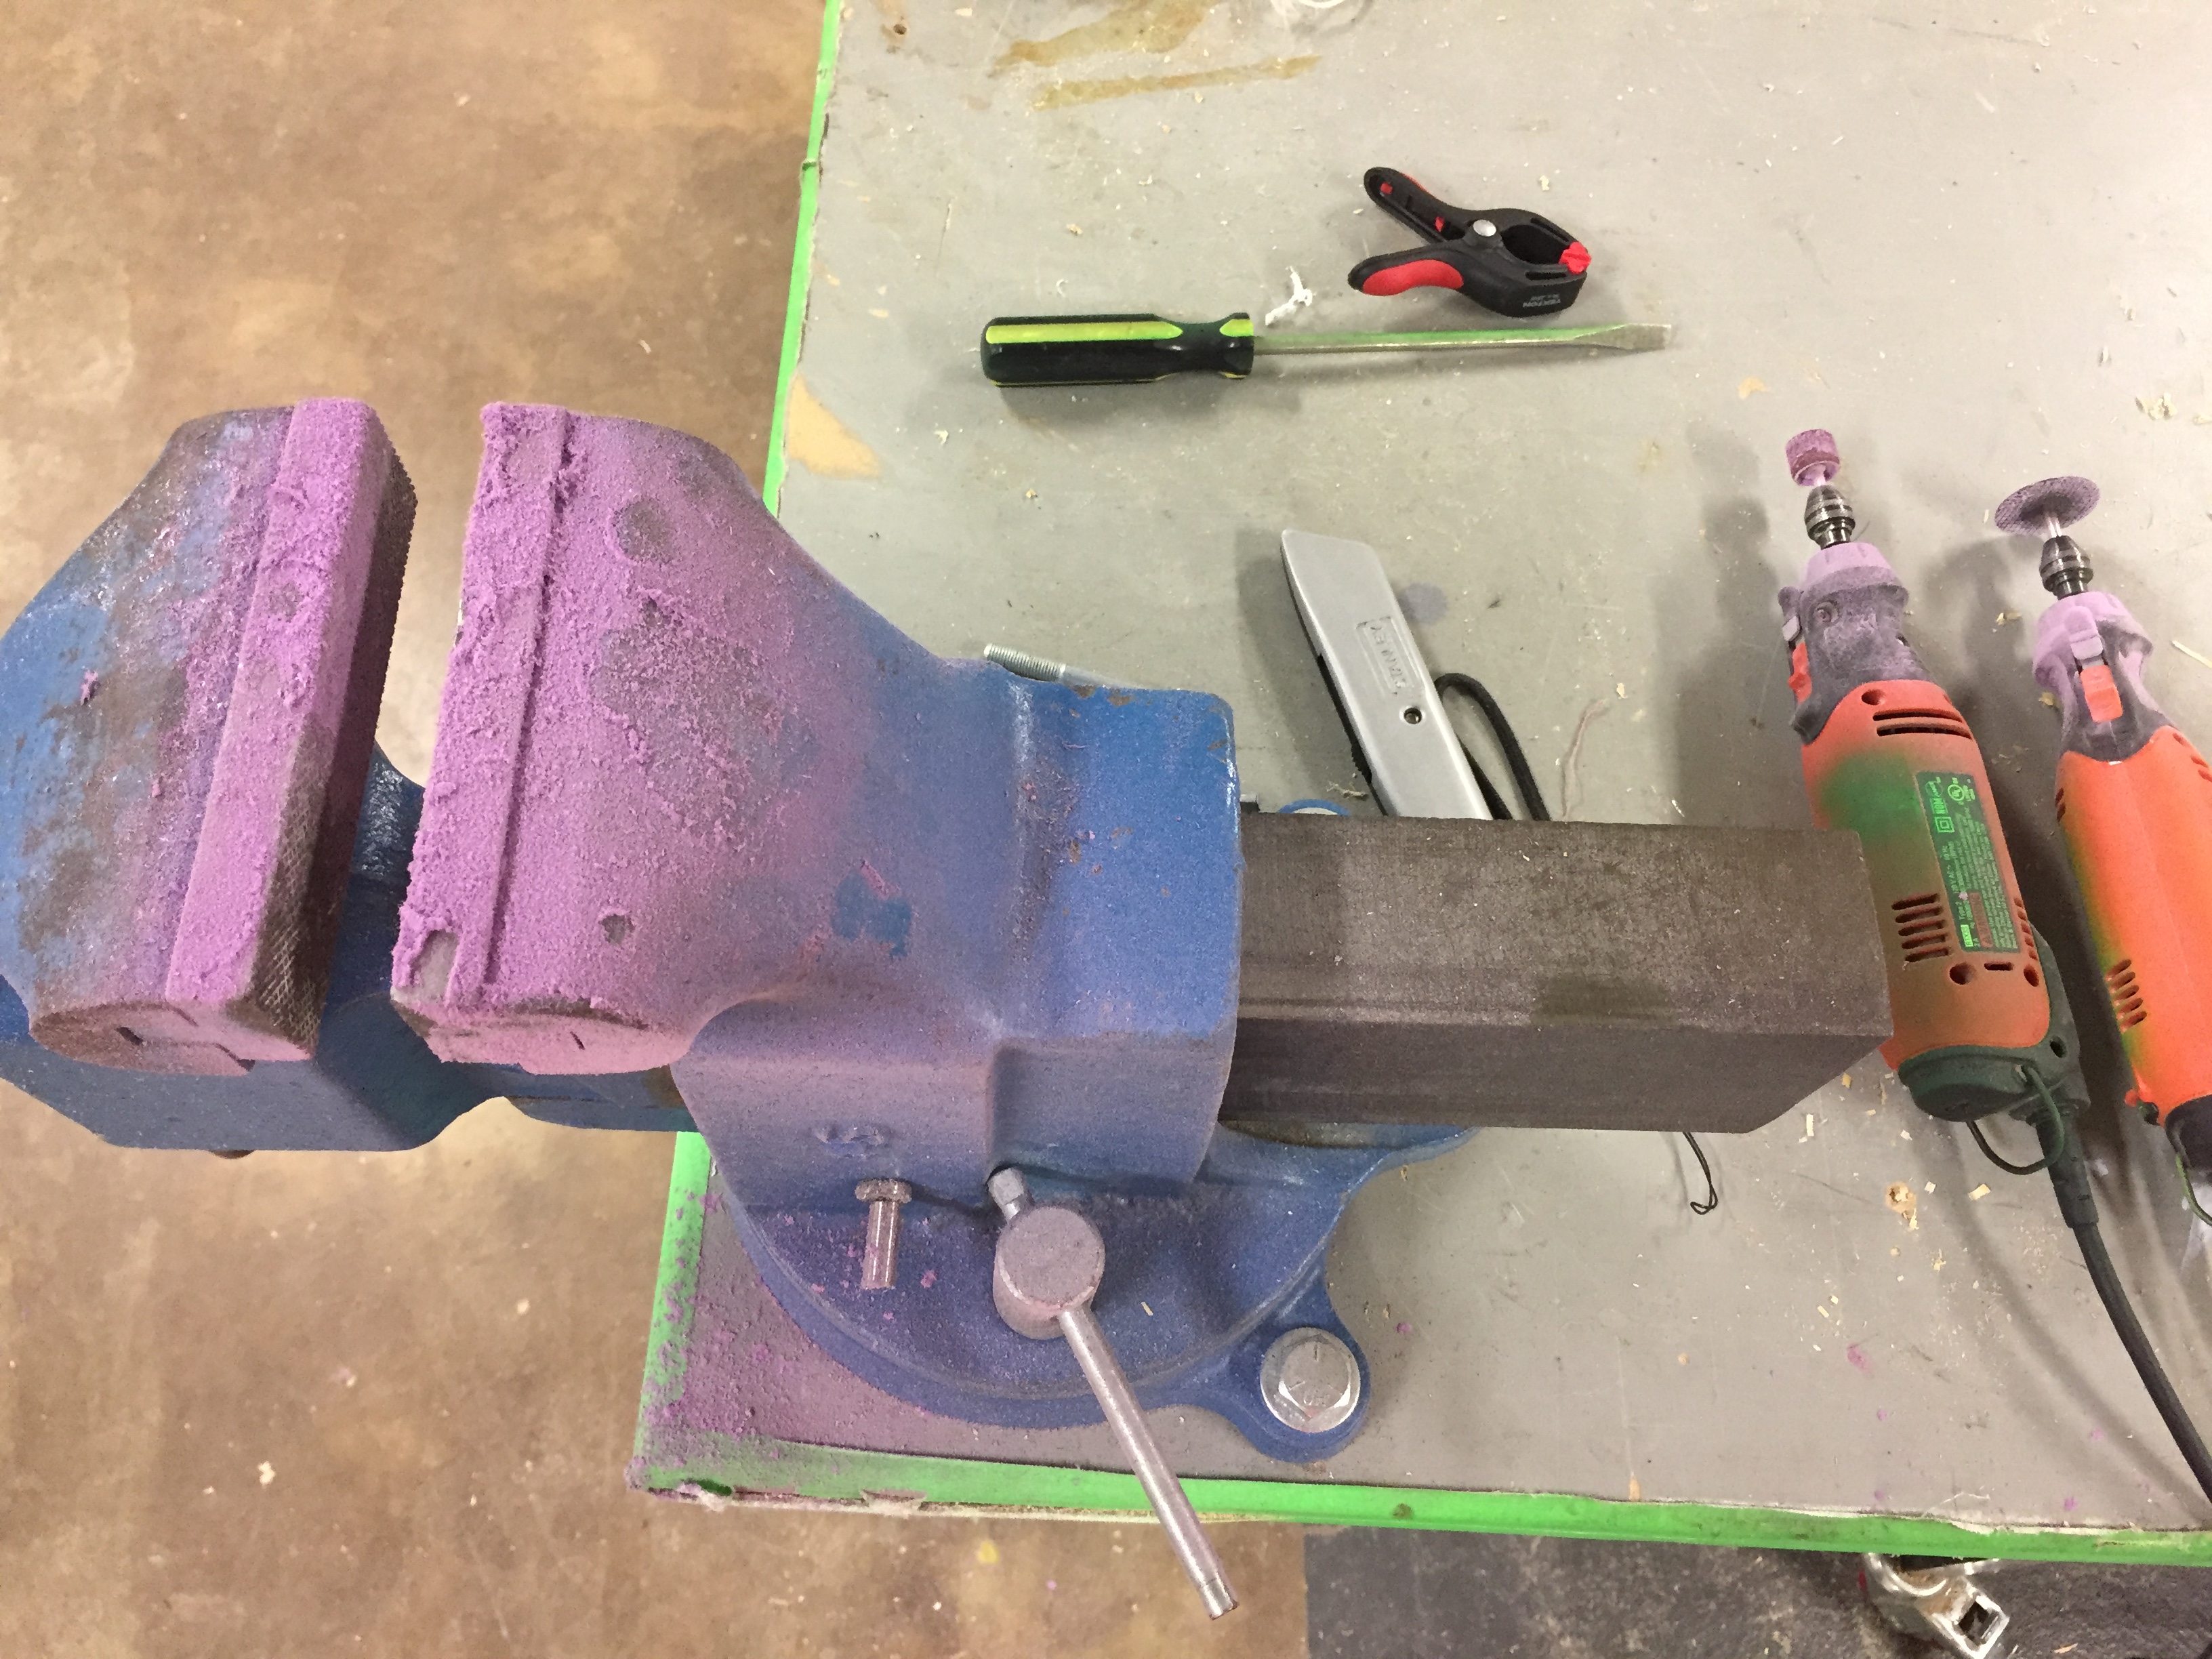
I attempted to post-process the material by taking a scissors and cutting all the leaked parts. I then used a dremel to sand down the remaining sides to try to even them out and cut off the pour hole residue so it could be sanded down. In retrospect, I should have skipped the pour hole altogether and just poured the material through the base so I could have merely belted the excess off, but oh well. This mistake allowed me to use a super-underrated tool – the dremel cutting bit! (We got a shipment of like 100 of them a couple of weeks ago and I was way too excited about them that even Danny was concerned about me.) This involved me grabbing another facemask from Joe to avoid all of the dust that flew out of the part and kept trying to go into my eyes and mouth (although this time, unfortunately, I don’t have a picture to commemorate the experience). I also kind of dipped into the sides a little with the dremel so they weren’t completely flat, but I was relatively satisfied with my handiwork.
Dremeling down the sides of the tower.

Completed post-processed piece
All of the purple dust left over from my adventures. Unfortunately, any leb tech who found it would know it was me. (I’m the lab tech.) (I was the only one on shift).
I rinsed off the piece and showed it to Christina, who was not satisfied with the post-processing job because the sides were still uneven and faded from the sanding. It was evident that someone had gone back and altered it and not done a super good job of it. She also blamed the dremel for being too harsh with such a fragile piece and wanted to go back over it by hand. I figured if she was willing to post-process the pieces. She was more than welcome to it, and I didn’t want to deal with it.
So I went back to recast more pieces because we only had one that could be reasonably turned in. I decided to make this one black because it would contrast nicely with the purple, so I put in a few drops of black dye. I ran into Josh, who was using a wooden brace to make his mold sturdier when casting. Figuring that might help with our leaking problem, I decided to do the same.
New-and-improved casting set-up!
The wood set-up led to a much better piece. Unfortunately, EasyFlo has a nasty habit of lightening up when hardening, so our sexy black piece just kind of turned a dull grey.

But at least it isn’t leaking any more!
I attempted to post-process this piece by using the belt-sander on the roof to smooth it out, but I ended up oversanding some of the sides to make it uneven and thus unusable. I also then attempted to beltsand the sides to make those even because I really didn’t have anything to lose on this particular prototype, and that kind of worked, but not enough to pursue. RIP, grey rook. You were crappy from the start.
Ew. Look at that roof.
That was the point where I decided to just let Christina take over the post-processing portion of the assignment. You can read about her exploits here.
We also realized that Josh and Nick were placing the silicon molds into the vacuum while they were curing to suck out all the air bubbles, and that actually made the molds a lot smoother and nicer, resulting in almost perfect pieces. I was super jealous, but making two new perfect silicon molds would take us an additional nine hours for a small increase in quality, and Christina was already actively making sure I didn’t kill myself on this project, so we decided against doing it. Her argument: Dr. Wettergreen already looked at our molds and casts and said they looked great, which was true. And she got a a nearly perfect grade on her midterm despite it not quite working properly and Scout spending triple the amount of time making elaborately carved intricately designed gear system. This was also true, so we decided to accept our losses and leave it.
Christina also made a teal rook because she wanted a teal rook, but when she was mixing it, it was the exact same color as the silicon we used to make the mold, so that was entertaining to watch everyone’s confused faces while they thought she was mixing the wrong material.
I also originally told Josh that it was impossible to make a black rook because the EasyFlo would lighten up, but he proved me wrong by just putting a large enough amount of dye into the mix that it would counteract it and keep the piece black. I also told Arturo that he couldn’t get a mirror finish on the plasma cut diamonds from sanding it, and I was proven wrong then too. I should probably stop telling people that they can’t do things, but I stand by my decision to tell Scout that he couldn’t mill his chess piece mold out of aluminum because Jeremy actually knows how to use the big CNC mill and you can’t actually carve metal on the Carvey.
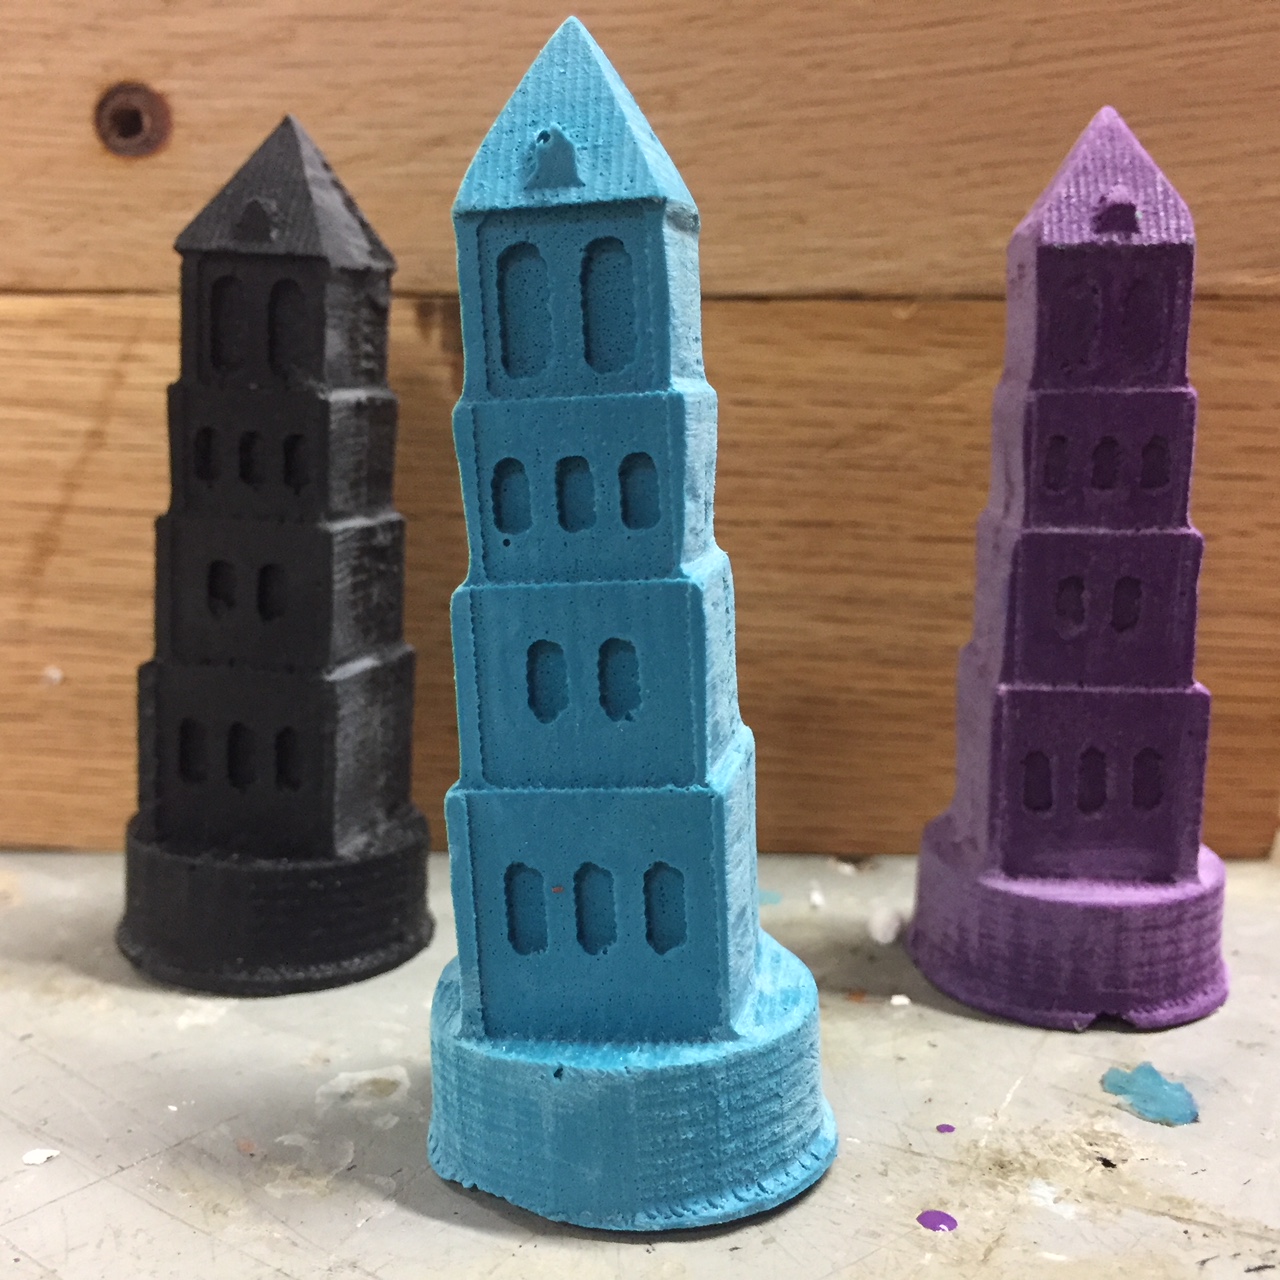
Anyway, because Josh proved it was possible, I also made a black rook. And it looks sick.
Christina finished post-processing the pieces using some sandpaper, a triangular file, and I think a sink. I contributed to the final product by having a photoshoot with the finished pieces. Also a valuable contribution, probably.

Our tiny tity of identical [but weirdly colored] towers
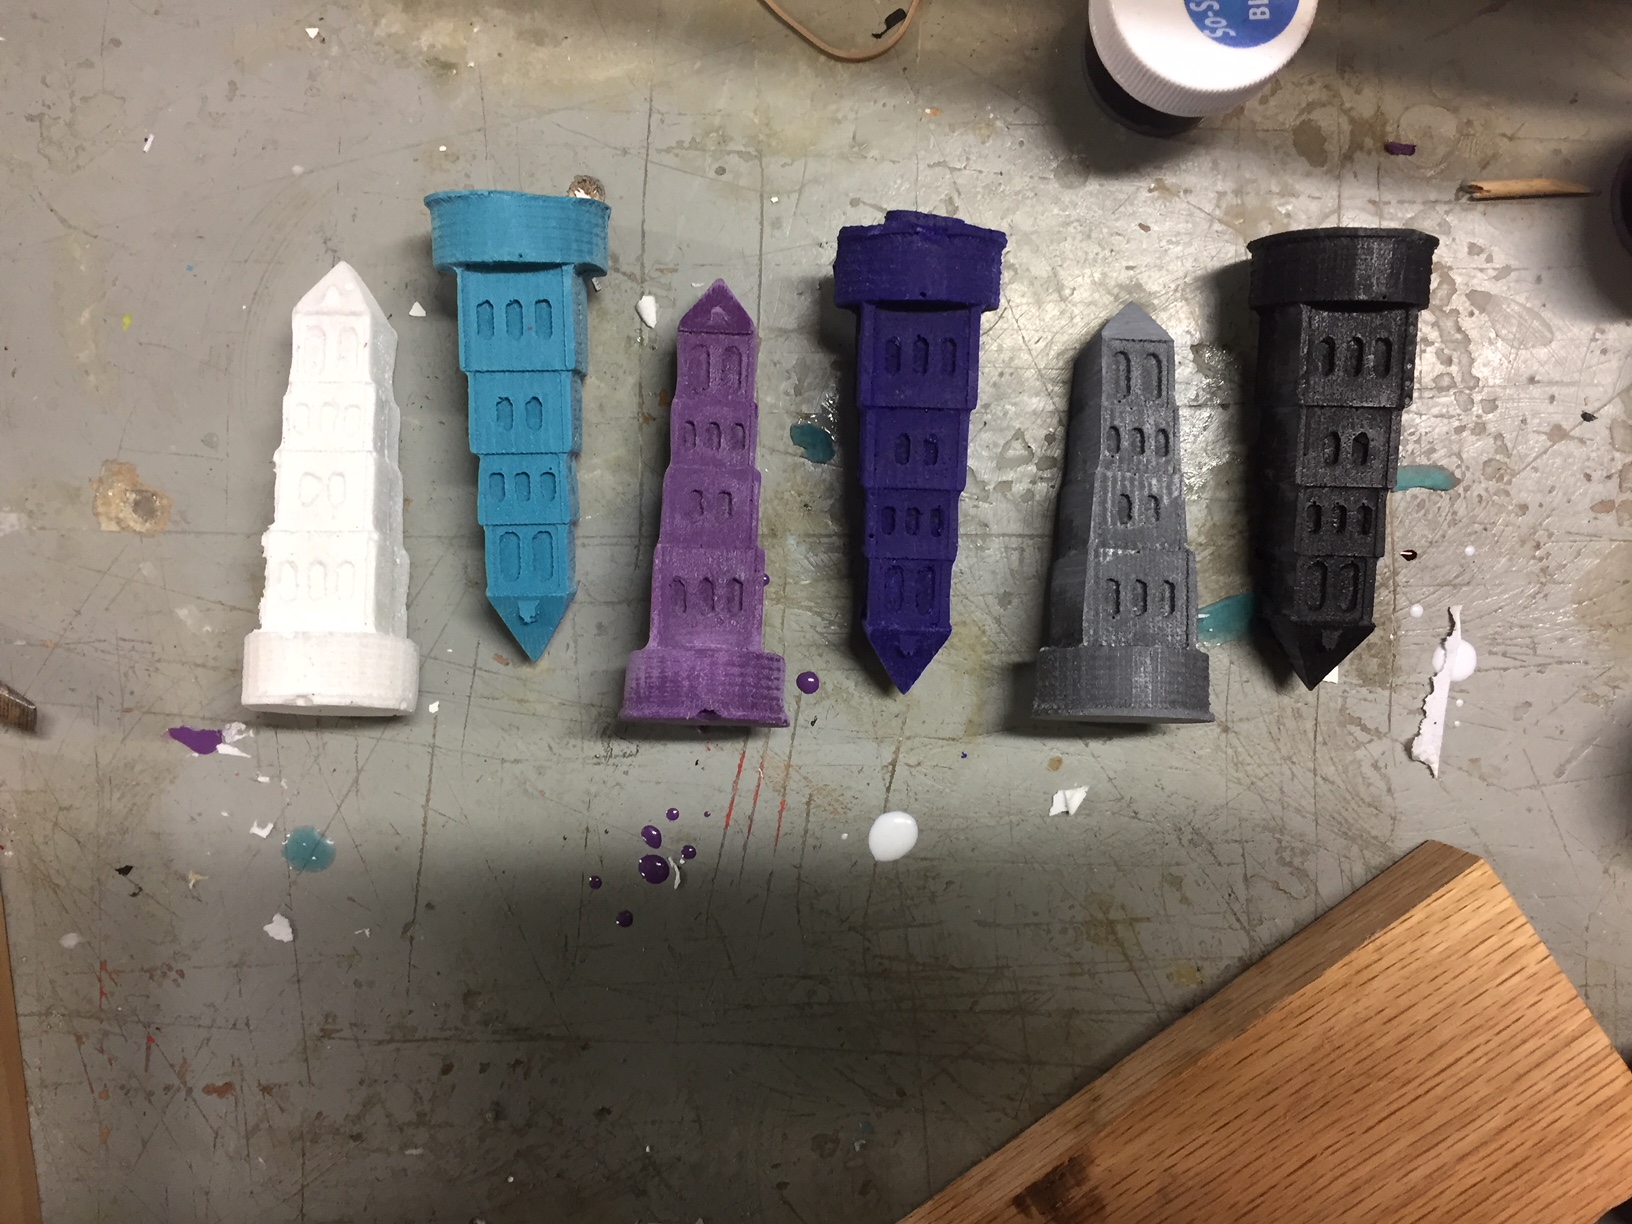
Front facing views of towers of varying quality
This should be the ENGI 210 album cover, featuring hit singles like, “Oh no, the laser cutter is taken!”, “Dr. Wettergreen did what now?” and “I don’t know what I’m doing.”
And that marks the final blog post of ENGI 210. Wow. It’s been kind of an incredible semester, making all sorts of different things and learning so much about the prototyping process. Have I grown as a person? Maybe? Have I grown as an [let’s be real here] artist? Probably.
I also think I’m going to miss having Dr. Wettergreen as a professor. I’ve taken three classes and an internship with him, and the man is still an enigma. What has he done? What hasn’t he done? The world may never know.
I’ve made a bunch of really cool stuff this semester, most of which I was scared of and didn’t think I could do at the start of the project assignments, let alone the semester. So there’s that. I might have complained and stressed about this class all semester and spent way too many late nights at the OEDK for not having a legitimate project, but I’m going to miss not having a hands-on prototyping class next semester. That being said, I am not going to miss the 2AM OEDK runs and aforementioned stress.
So long 210, and thanks for all the fish. It’s been a wild ride.
