For the 6th homework in the course, we were tasked with printing an impossible shape 5 times using two different 3D printing methods. By impossible, I mean that it would be extremely difficult or impossible to create these things without a 3D printer such as interlocking parts, complex surfaces, moving parts, etc.
I interpreted the homework incorrectly and ended up printing 5 different impossible shapes, one of which I printed using Stereolithography (SLA). I will be talking about them in general and make final calculations on price based on a single (average price).
Step 1: Pick The Objects
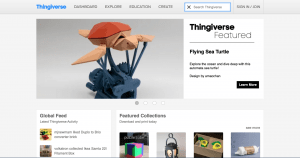
The first thing to do was to select what impossible object to print. In order to do this I went on Thingiverse.com and browed the possibilities until I found 5 that interested me for the homework, these were:

- Air spinner
- Gyro Keychain
- Connected stars
- Three Gear system
- Whistle
-
Step 2. Upload to 3D PrinterOS/ Preform and adjust size
One I downloaded all the necessary files, I uploaded them to 3D PrinterOS and adjusted them to a smaller scale so they would fit in the gum-balls. The only thing that was left to do was actually print.
As for my SLA print, I uploaded the file to Preform on the only computer that has the required software to print using the Form3.
Step 3. Print and Post Process The Parts
Since I took my time looking for objects that wouldn’t suffer from the reduction in size to fit in the gum-ball, I was rewarded with prints that had no issues other than a little stiffness here and there.
The two issue I ran in to during the printing step were:
- I forgot to remove the support that was generated inside my whistle, and had to repeat the print for it to actually work.
- The support for the 3-gear part was very strong and it took a lot of effort to remove it, and still, the print was not perfect as it gets stuck frequently.
The SLA printed part had a lot of support to remove and a lot of it was also inside the object itself, making it nearly impossible to remove. However, the support also makes the object stronger and makes it even more impossible that it would be without the support, so it ended up being a win rather that a fail.
The post processing for SLA is more complicated as I had to place the printed piece in a Isopropyl Alcohol bath for about 20min and then cure it in a UV chamber for an extra 25min. After that all that is required is to remove the support.
Cost Estimation:
Calculations are estimated under the assumption that person printing is, like me, a student at Rice with access to 3D Printers.
Material:
- Filament and Resin: $2 (Based on estimations given by 3D PrinterOS)
Machines:
- $0 (No cost for us Rice Students)
Labor:
- Designing: $0 (Objects were downloaded for free from Thingiverse)
- Printing: $10 (at around $10/hr and mostly consisting of removing support)
Total Cost: $12


