3D printing is extremely powerful in that it can jump through the difficult and tedious crafting processes like molding and carving, and print out directly the final 3-D shape, however complicated it may be. To test this idea, I choose to print for my homework a “hypercube” I have found form “thingiverse”. (http://www.thingiverse.com/thing:1014649) This hypercube is unique in that it has a highly complicated inner structure, which makes it really hard (if not impossible) to be made by traditional craft methods.
(Rendered picture of hypercube http://thingiverse-production-new.s3.amazonaws.com/renders/07/14/02/8c/ec/HypercubeTruncations1_preview_featured.jpg)
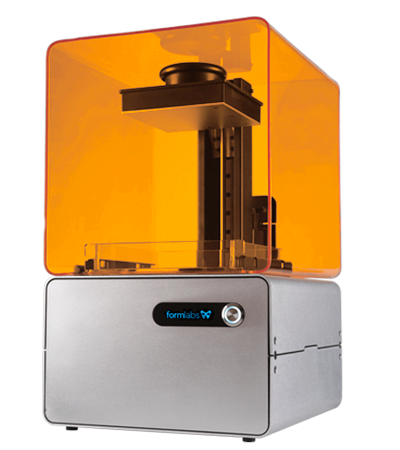
After talking with Dr Wettergreen, I decided to print my hypercube on the printer “Formlabs Form1+”. This seems to be the best fit as Form1+ uses laser to solidify each layer and thus has advantage in printing shapes that has complicated geometry. Moreover, the Form1+ printing is relatively inexpensive as its material is cheaper than other that of other printers.
(Form1+ http://oedk.rice.edu/Resources/Pictures/form1.png )
On Thursday night last week, launched my print. However, interestingly, when I visited the wetter lab next day morning. I find my printing “missing”, as I could neither find it in the printer, nor could I find it in the containers around. So I launched the printer again, but the same weird thing took place. To demystify the disappearance of my print, I turned to the lab assistant, Grant. After searching the whole wet lab, we finally find that the print is actually lying in the form printer. However, since it was only a thin layer (which is so different from my expectation), it was buried in the liquid material and was thus not found.
Grant told me the problem was caused by the fact that the top of the print was not stuck to the rising plate of the printer. As a result, everything was printed on a single layer, as if the hypercube was crushed.
To solve the problem, I added more support to the printing and launched two more trials (Actually Grant launched the second trial for me). However, both of the trials failed. For the first time, the print fractured in the middle during the process and all I got was a cluster of support branches. For the second time, the material is again not attached to the rising top plate.
(Failed trial)
After discussing with Carlos on Monday morning, I decided to try another printer, the “dimension”, for my print. The dimension has its disadvantage for printing hollow objects as it will use a lot of support material to fill the hollow part. (Carlos actually reemphasized it for three times, “Gee! It’s going to be a lot of support material!”)

(Dimension SST 768 http://oedk.rice.edu/Resources/Pictures/dimensionSST.jpg )
However, the result turns out to be pretty good. After printing it with dimension and washing off the support material in the caustic liquid, I got my super cool hypercube!
(Hypercube after the “bath”)
The print is not a perfect one. Some of the fibers broke during the printing process and some of the fibers is not printed in a smooth way. The situation can be improved if I choose to scale the hypercube larger. However, the object will become way more expensive (A 2 inch cube already costs more than 20 bucks and the cost will times eight if the scale is doubled) and take a much longer time to print. Fortunately, the fracture is symmetrical. So, it actually adds a beautiful shape to the hypercube!
(This pictures shows some of the fractures)
Also, I can use the hypercube to create really cool shadows!
I am actually thinking of adding an led light in the middle, so my hypercube can be a piece of art craft, just as the Anila-agha show in Rice Gallery !

(“Intersection” http://www.ricegallery.org/anila-agha )


