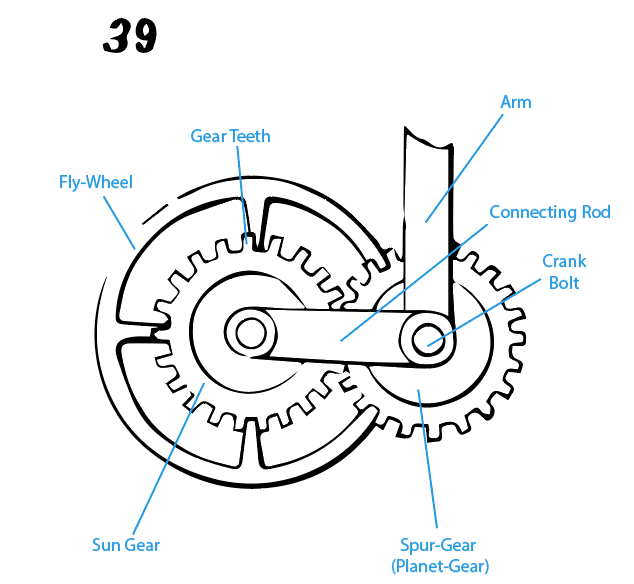
For this assignment, I recreated the sun-and-planet motion (Movement #39) in Adobe Illustrator CC (Figure 1). At first, I used the original drawing of the movement and traced it. However, I realized that the original drawing itself was not drawn precisely. It was more like a sketch rather than a blueprint for the movement, so when I traced it, the trace looked similar to the drawing, but it would not be able to be used to recreate the actual sun-and-planet motion (Figure 2).
After realizing that using the original image would make it more difficult to recreate the movement image, I decided that it’d be best to use the animated image as my basis instead of the original (Figure 3). The animated image is more precise with its shapes and shows all of the components of the sun-and-planet motion unlike the original image, which hid some components behind others.
I started the drawing with the simplest parts: the circles for the gears, the connecting rod, and the arm. I also put each component of the movement in its own individual layer. That way, they’d be organized by parts.
Afterwards, I worked on the teeth of the gears. However, I just couldn’t seem to figure out how to make a gear. I kept trying to use the curve tool to draw the teeth, but it was so difficult that I ended up making each little gear tooth by erasing parts of a rectangle and attaching it to the circle. That attempt wasn’t even close to what it was supposed to look like, so I just kept messing around with the different tools on the left-hand side of the screen. I didn’t really get anywhere with the gear-making, but I did learn about lots of other tools available like the shape builder and the curvature tools. After half an hour of struggling to make gears, I finally realized that Google was a thing, and I searched up how to create a gear. It took me only a few minutes to learn how to make a gear using a Youtube tutorial, and now, I look back on it and wonder why I spent so long trying and not getting anywhere. I did learn a lot about Adobe Illustrator itself though, so that’s a plus.
I also learned about a website that creates gears for you, which is super convenient because making it by hand takes quite a while. In the end though, I made mine by hand so that I could get the spacing of the teeth to align perfectly with the outline.
On a side note, I noticed that the movement was made up of several different components, so I separated them into parts which are: the arm, the connector rod, the fly-wheel, the sun gear, and the spur-gear (planet-gear) (Figure 4). I’m not entirely sure how they come together to actual make the movement happen, but I’m hoping that this would be a good template to laser cut.

Figure 4: Separated Components of Movement #39
In the end, after lots of struggling and getting lost in all of the buttons that Adobe Illustrator has, I finally finished my 2D drawing (Figure 5). It was a good experience though because I learned a lot about how to use Adobe Illustrator, and I really like how it’s a vector-based program so that there’s no pixelation to worry about. I’m pretty sure I’ll use this program in the future because of how comfortable I’ve gotten with it, and I’m glad I got to learn it by making this cool drawing! Click here if you want to download it from Google Drive (You’ll need to use your Rice email to view it).


