For this project, I chose to do the intermediate level so that I could practice modifying premade shapefiles. After exploring Thingiverse, I decided to print a flexi rex with interlocking links that allows its body and tail to move.

thingiverse
Before I began to modify the t-rex file, I used calipers to measure the dimensions of the gumball capsule. These dimensions were a diameter of approximately 1.85 in and a height of 2 in, which are 46.99mm and 50.8mm respectively.
The first 3D printing method that I used was FDM printing. To do this, I imported my t-rex file from Thingiverse into Bambu Studio slicer on the OEDK Maker Bar computer. Using the scale tool, I initially adjusted the size of my t-rex to be 50mm across its longest length. I then set the layer height to 0.15mm and the infill density to 15%. Though I did not notice this when I chose the print, my t-rex did not need supports, so I deselected the supports tab.
After making all of the adjustments, I sliced the piece. I was surprised to see that the print would only take about 30 minutes and cost $0.11. I then selected print plate, chose white PLA as my filament, and sent my print to the printer.

Bambu popup with FDM cost and time
My first print came out great, but was a little small compared to the gumball container. I decided to scale it up to 60mm for its longest length, this time knowing that the links would allow it to bend and still fit in the gumball. I kept all other settings the same. This new size just barely fit into the gumball container. I printed two more of the same size also using white PLA.

50mm vs 60mm t-rex
To familiarize myself with different filaments, I then decided to make a 4th FDM print using a different type of filament. My first try with the ABS filament was unsuccessful, with strings of filament in a tangled mess. After making sure to clean all the filament off of the plate. I tried the print a second time. This print was much more successful.

failed FDM print with ABS filament

3 PLA and 1 ABS t-rex
The second 3D printing method that I used was SLA printing with resin. To do this, I imported my t-rex file into PreForm slicer on the OEDK computer. I heard from classmates that it was difficult to make pieces that can bend or move using SLA, as joints and link often fuse together. To ensure that my t-rex would still fit into the gum ball capsule with little to no bending, I decided to scale down this print to 40mm. I also decided to make two prints in case I messed up the post processing for one of them. Although I didn’t need supports for FDM printing, I added supports to the SLA print using auto generate. I chose to use Tough 1500 resin and, after checking the resin tank, I sent my print to the correct printer.
After the print finished, I removed the plate from the printer and removed the parts. Then I washed the resin for the recommended time of 20 minutes. Once the washed pieces were dry, I cured it at 70 degrees for 60 minutes. After removing the supports, I had two successful SLA prints. As anticipated, however, these pieces could not bend, but the smaller size still allowed them to fit in the capsules. Since these prints were smaller, I decided to place both into a single gumball.

resin pieces after being washed

resin pieces after curing

finished resin pieces
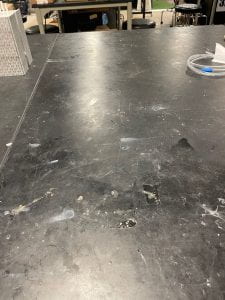
After putting all of my prints into gumballs and writing the thingiverse user info on slips of paper, I cleaned up my workspace.

5 gumballs with prints

clean workspace
Overall, this was a relatively easy and short assignment. This was my first time 3D printing and I am so excited to have finally learned how to use the printers. I look forward to 3d printing many more things in the future.
Cost Analysis:
- FDM 3d printing costs: 0.11(small) + 4*0.17(big) = $0.79
- About 9mL of tough 1500 resin, costing $199/L = $1.80
- Free 3D printer use at Harris County Public Library
- 3 hours of labor, costing $20/hr = $60
Total Cost: $62.59
