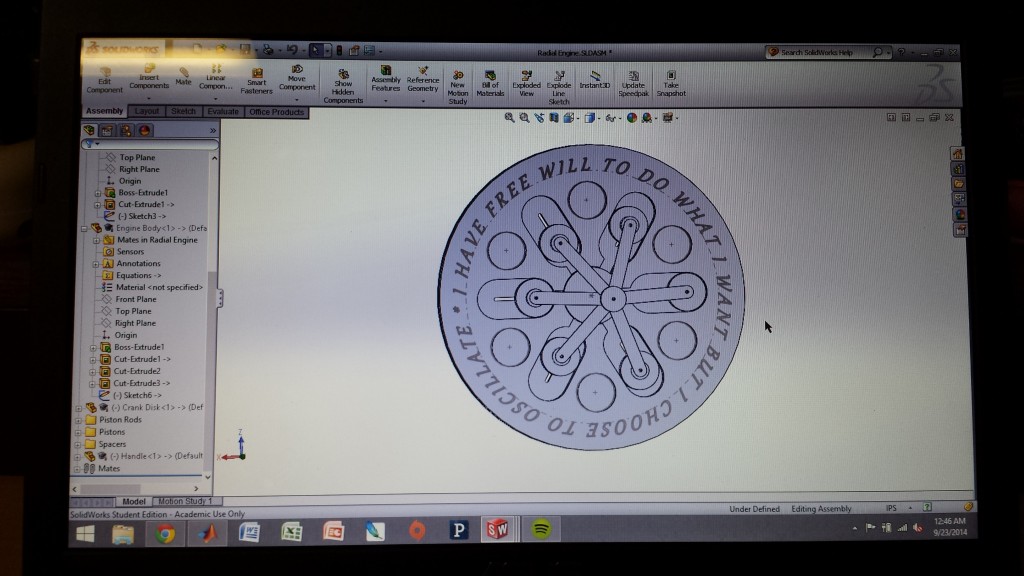
I took an idea from Dr. Wettergreen’s book on wooden mechanisms and decided to design and build a radial engine model based off of the radial engine model in the book.
Step 1: Design
I first created a working model of the engine in SolidWorks. This let me see how the final product would fit together before I built it and also let me convert the drawing files into Illustrator files which could be laser cut.
Step 2: Laser Cut
I created a drawing file in SolidWorks with one of each part that I would need to laser cut. I then used Illustrator to create multiple copies of the parts that I needed multiples of (i.e. the pistons, spacers, and piston rods) and to prepare the file to be readable by the laser cutter. Finally I cut all of the parts out of acrylic using the recommended speed and power settings posted in the laser cutting room.
Step 3: Assembly
I used nails as makeshift axles. Each one was cut to the right length, inserted, and had a spacer/washer epoxied on to the tail end. This prevents the axled from coming out. The engine body and backing disk were glued together using acrylic glue.

Final Product:
The model moves fairly well and looks quite good. I added a bit too much space/tolerance between a few of the moving parts in my design, so the pistons and the crank disk wobble a little bit.
The quote reads: “I have free will to do what I want but I choose to oscillate”


