Introduction
For this project, I began by (unwisely?) selecting the most complicated object from the prototyping library: the snap joint box with a living hinge. I had never seen a living hinge before, the box looked really cool, and I didn’t really have many other thoughts before selecting this option. After our first day training, I went to the laser cutter with Jacob Song and together we got material focused the laser, and began cutting our parts. In mistake number one, I simply put my material in, picked a decent spot, and immediately began cutting the entire shape (15+ minutes) using the setting given on the wall. Honestly, the result turned out pretty well (it is in the correct box on the library on the wall) but this was a stroke of luck, as I had not tested the setting on my specific piece of material, which I had just assumed to be the same as what we had used in class before.
 As you can see, it has relatively little burning, pretty clear lines, and the laser did indeed go all the way through the material, and I was able to assemble it into a small press fit box. However, on the underside of the living hinge there is in fact substantial burning, as can be seen below.
 Of course, I ideally would have been able to see this, adjust my settings accordingly, then go on to produce a better copy. If I had been even wiser, I would have actually made my first cut a simple 1cmx1cm square, which would take all of 5 seconds to cut and would tell me the same information about my settings, and would not have wasted material. Sadly I did not realize this going in, and given the large size of this item, I actually could not find enough material of a consistent type and thickness to cut another two perfect copies. Because of this, I then decided to switch to the 2D living hinge, which is significantly smaller, albeit much flimsier and more finicky.
2d Hinge: round 1
First: what is a 2D hinge? As I discovered, it is a hinge that allows motion throughout an entire plane, rather than about any one single axis. This was another object I had never dealt with before, and so I found it to be a satisfying option for my real homework.  Here you can see what exactly it is that makes this hinge 2D: there are long snakelike cuts weaving back and forth from top to bottom, along with cuts along the sides that free up the whole assembly. This allows the top and bottom to move, bend, and rotate with significant freedom relative to one another, something not seen with 1D hinges.
At this point, I clearly had not learned my lesson about testing settings on a single, tiny square of material, and to make a long story short, I laser cut 11 different 10-15 minute 2D hinges that all failed in one way or another, whether cuts didn’t pass through, burnt the material, or otherwise were not ‘perfect.’

Rather than bore you with details of each an every one, I would like to point out a few lessons I took away from this part of my homework exercise:
- For multiple passes, make sure you actually hold the piece still when seeing if the 1st cut went all the way through. As you can see from the picture below, I had one trial in which the laser didn’t make it all of the way through the piece. I tried to jiggle the cut piece, it didn’t move, and so I closed the lid and ran another laser pass. However, I did a poor job of holding the material still, and the laser began cutting about 1/2mm offset from the first pass, leading to the (admittedly cool) effect seen below.
 Note: I ended the cut while it was still etching, hence no double cuts on the hinge itself.
 - Conduct test runs on simple shapes (such as 1cmx1cm squares, NOT full objects. This has been discussed before, but I would have saved over 6 hours and lots of material by not doing my test cuts as full pieces, but rather keeping it simple with something that takes mere seconds.
- Order of cuts can matter significantly. Many of my laser cuts were broken, as is visible above. This was due to the order of cuts. Below is a picture of the first cut path:
 Note how one ‘side’ of the spring is cut, then the outside, then the second spring cut is completed to finalize the object. Well, what happened on many of my cuts is that after the outside is cut, it released tension on several of the long thin members, which then shifted slightly, skewing the final cut pass. This results in 2D springs that looked like this:
 Observe how many of the cuts are extremely offcenter, and nearly sever the side of the hinge piece. In order to counteract this problem, I turned all of my laser cuts into two parts: first the ENTIRE inside, and THEN the outside cut. This solved the problem, and I was able to continue on my merry way.
 - Material consistency matters. Due to material flaws (such as knots) some areas of my cuts were perfect, while others wouldn’t even come close to cutting all of the way through. The only solution to this issue is to either visually inspect your material and select an entire area that is consistent, or to purchase material that you know to be consistent throughout.

2d hinge: round 2
At this point, I had spent several days in the laser cutting room, and I still didn’t have 2 perfect copies of my object. I talked to Dr. Wettergreen and he provided me with two pieces of higher quality laser cutting plywood, and taking my lessons into account I proceeded to produce my two perfect copies.
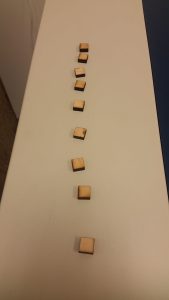
I began by conducting numerous test cuts, cutting small squares with wildly varying settings. 
 Eventually, I was able to find a setting that didn’t cause burning, cut all the way through on a single pass, and otherwise satisfied me. Once I had determined this, I conducted my cuts, producing two copies of the below:

This resulted in cuts with a pleasing level of toastiness, no burning (if it looks burnt, it’s because of my photography skills; rubbing it with my finger showed no soot), and engraving that was quite legible. With this, I had satisfied the homework both in letter and in intent, making numerous mistakes that have caused me to learn more than I would have otherwise, and also producing the two ‘perfect’ copies as requested.
postscript
By this point I have become quite familiar with the laser cutter, and indeed I find it extremely enjoyable to use. In order to broaden my horizons I decided to try another type of material, red acrylic, kindly provided as well by Dr. Wettergreen. By now I knew exactly how to go about successfully cutting the material, and I picked settings from the wall, cut test squares (with engraving this time) and adjusted accordingly. Then, I was able to cut a 2D hinge out of this material as well! It too is located in the wall prototyping library.

Overall I have had a wonderful time making mistakes and learning to use the laser cutter, and I look forward to creatively cutting my own designs and projects in the near future!
