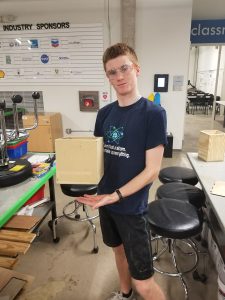
The overall lesson from this project is, as the title says, bless Fernando. I’ll get back to why I say this later in the post.
The box making process began last Tuesday after class thanks to Josh asking if I was planning to get started soon. Honestly, if Josh hadn’t asked I would probably be working on my box right now on Sunday afternoon.
I began by searching out wood to use. Near where the scrap laser cutting wood is stored, I found a sheet of scrap MDF that I decided to use. MDF worked well for this project because it warps a lot less than the actual wood that we have in the OEDK. The downside of MDF compared to real wood is that it splits a lot more easily than real wood, so I had to take that into consideration when I was assembling the box. The other downside of the scrap MDF is that there was scratch writing on it that I didn’t notice until I was already assembling the box :|.
Once I acquired my scrap MDF, I marked out a 8”x8” base, two 8”x8” sides, and two 8”x7” sides. I measured out the thickness of the MDF to be about half an inch so that meant I had to cut down the width of two of the sides to 7 inches to accommodate. Then, with the help of a lab assistant, I cut the board of MDF into the individual pieces using the table saw. Unfortunately, the saw took off way more material than I predicted, so my cuts were all slightly off. I had to desperately fix this later.
After I cut the pieces, I went to try to use the rounder for the edges. Tragically though, pretty much nobody in the OEDK knows how to use the router, so that wasn’t happening that day.
Two days later, on Thursday, I came back to the OEDK to try to find a single person who knew how to use the router, especially how to change the bit. After Josh and I looked at the router for many minutes to no avail, Josh went in search of help. After being gone for around five minutes, Josh came back with pretty much every lab assistant in the OEDK. The collective brainpower of the two of us and four or five lab assistants still couldn’t get us to an understanding of how to change the bit, so one of the lab assistants went off in search of Fernando. Finally, Fernando arrived and saved us from confusion. He showed us how to change and adjust the bit, and we set a 3/16” bit for the rounding of our corners. Seriously, bless Fernando. We were truly doomed without him.
Once the router was working and had the proper bit in place, I rounded the bottom edges of the base and the top edge of each side. When rounding the edges, I ran each edge through the router twice. Once I rounded those edges, I assemble the box by screwing the bigger sides into the base and the smaller sides into the bigger sides.
Once I had the box assembled, some of the edges did not exactly match up even close to properly, so I went ham with the belt sander to make the edges flush. After my heavy sanding, I went back to the router to do the edges of the box. In order to not destroy the router bit by hitting a screw, I had to selectively remove two screws, round the edge corresponding to those two screws, then put the screws back into the box. Once I finished all the edges, my box was complete!


