This week we were tasked with 3D printing impossible objects scaled down to fit in a small gumball-like container using the 3D printers in the maker bar and the commercial ones located in the wetlab. For this assignment we had to have an understanding of the 3D printers here at the OEDK and the different methods they use and choose the best one for the object we are to print.
We started the task by being introduced to thingiverse, a universe of 3D-printable things/objects online. We then had to choose one impossible object from this universe to print. At first I decided to go with a mutilated nut and bolt system where the impossible factor was that the nut somehow found its way to the bottom of the bolt but cant come out because the bolt was cracked into four at the top. For the CAD design the designers purposefully skipped a layer in between the nut and head of the bolt which allows the nut to be pried from head of the bolt. Although this can carefully be recreated with an actual nut and bolt, it would be very difficult to do so at this small of a scale.
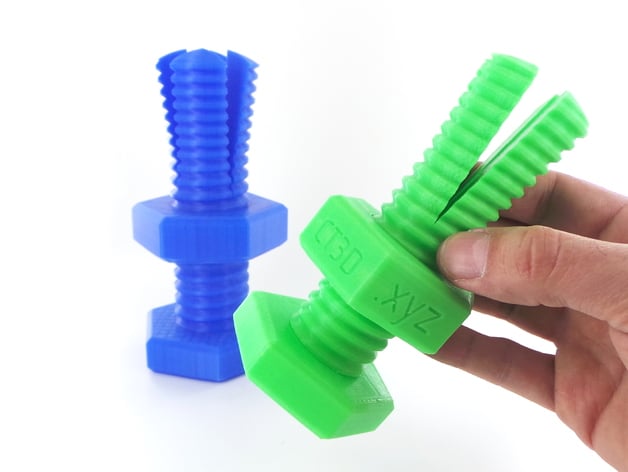
Figure 1: Impossible Nut & Bolt
For the 3D printers I first used the form lab 3D printer, which was uses SLA (Steriolithography) printing in which resin is hardened upon exposure to light to form the object. The print came out well but when I tried to loosen the nut from the bolt it was almost impossible. This wasn’t the best method in general because at such a small scale the resin could have hardened engulfing the “skipped” layer. Another possibility could have been that before the print I noticed that the printer said “repairing file” which could mean that it filled in the skipped layer. Probably.
I then tried the simpler FDM (Fused Deposition Modeling) Maker Gear printers in the maker bar. I was hopeful for this one because on the Simply3D program the simulation showed the skipped layer. Therefore, confident that it can work I went ahead and used one of the FDM printer located in the Wet Lab, the Fortus. After the maker gear print was done I tried to pry off the nut but instead simply snapped the head of the bolt off. This mishap turned out to be good because I was able to see that the nut was attached not only to the head of the bolt but was also fused to the teeth of the bolt. I then looked at the Fortus print with hope that the commercial printer will be more accurate. It was more accurate because it included support material in place of the skipped layer which when dissolved separated the nut from the head of the bolt. However upon further inspection I noticed that it hadn’t avoided the issue of the nut being attached to the teeth of the bolt because I wasn’t able to turn the nut on the teeth. I believe what caused all of these was the size constraint which didn’t allow for the printers to be as accurate as what they could have been if the object was scaled bigger.

Figure 2: Trying to cut nut from head of the bolt. Impossible.

Figure 3: Maker Gear print mishap that shows that nut actually fused to the teeth of the bolt

Figure 4: Fortus and Form Lab 2 Prints
I then had to look towards other impossible objects to print. I was pointed towards the account mathgrrl on thingiverse for these impossible objects. I found a design that she made of a tangle, which seemed quite impossible to make with anything other than 3D printing.

Figure 5: Tangled Object (Right)
I first started printing with the FDM maker gear printers which allowed me to find the appropriate scale for my pieces. (I decided on a scale after my second print). I noticed however once the print jobs and after I removed the support material the piece had a rough finish because of the visible layers. From the nut and bolt print I really liked the smooth finish of the form lab print therefore I decided to resort back to that printer. After going through the alcohol wash and strengthening the resin even more in the UV light chamber, I finally felt content with my piece. For the printers in the Wet Lab I chose the Object 260 which utilizes polyjet printing where resin is deposited from a nozzle and then cured by UV light. After using the waterjet to to dissolve away the support I was able to get the similar smooth finish because the layers weren’t visible like on an FDM print.

Figure 6: (Left to Right) Maker gear 2x scale, 3x scale. Form lab 3x scale, and Objet260 3x scale.
Although I wasn’t able to print my desired object due to the size constraints, I was able to print something that I liked and indeed was impossible to recreate in another way. Besides multiple 3D printed objects this week has left me with a better knowledge of the different 3D printers available at the OEDK and the different methods each of the printers employ.
Cost Analysis
Until we start getting charged for filament on any of the 3D printers available in the Maker Space i’m going to assume they are free. The amazing tool found on the log sheet for the commercial printers in the Wet Lab simplified my job for Cost Analysis.
- Tangle on Objet260: Rigur Material – 9 g. Support Material-17 g. Cost: $6.89
- Bolt & Nut on Fortus: Model- 0.31 in^3 Support- 0.30 in^3 Cost:$9.96
- Labor: $8/hr. 1.5 hrs. Cost: $12
- Total Cost: ~$39
Labor I lowered a little because most of the time spent on this assignment was waiting from print jobs to finish therefore the hour and a half clicking around, setting up prints shouldn’t pay that much. It makes sense that most of the total cost should be coming from printing materials used.
