My project is impossible because of the functional embedded walls, as seen in the video below. They move freely and it would be nearly impossible to create such a toy using a different machine. I used the Ultimaker and Original Prusa i3 MK3 for fusion deposition modeling ( FDM) and the Original Prusa SL1S for stereolithography(SLA).
This is the link to the file I downloaded from Thingiverse. I like that the user uploaded the same design with a different number of walls surrounding the toy. The user had CAD files for 3, 6, and 9. It allowed me to explore the different ways my print could look. I just the 6 walls because of the look and I thought it would be most manageable for the printer while still maintaining some levels of impossibility.
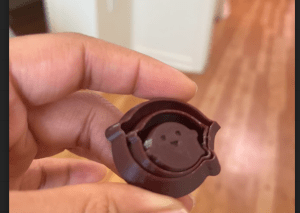
An iteration of how the FDM print looked for only 3 walls.
First, I printed my object as it came downloaded. [First Print]
Then I practiced scaling a bit, FDM printing for the largest dimension between 35 mm to 42 mm. My final prints are 42 mm.

Comparison of First to Final Size
SLA
The slicing software is different for this machine. The total printing time was about 30 minutes. Washing was 10 minutes and curing was 15 minutes.

Slicing settings for my SLA print. I only changed the scaling to 75.
I only got to print once on the Prusa SL1S. It came out really nicely, I love the way it looks. Sadly, the next day I came into the OEDK, and the machine was out of order. However, if I did print again I would use the shape below. With the help of a lab assistant, he helped me figure out a way to get a better-looking print with closed walls. This angled print would look better for the unity of my walls.

This orientation would have been my second iteration for the SLA printer.
Another type of machine option for SLA was available, however, I was concerned about my object’s functionality after being printed. I also considered time constrictions and decided that using that printer would not be optimal for me. I am curious to see what my print would have looked like.
Overall Thoughts for FDM
I disliked the way the Original Prusa i3 MK3 printed my parts. I figure there are some other settings I should have changed in order to have uniformity along the walls of my print. I love the range of motion I am afforded with the Original Prusa i3 MK3 compared to the Ultimaker. The Ultimaker had a beautiful smooth print with beautiful walls. However, that FDM print wasn’t as fun to play with and didn’t functionally act the same way as the FDM print from the Original Prusa i3 MK3. With the Original Prusa, I had tried using a brim, raft, and neither. I tried decreasing the infill setting ( because of my walls) , and tried changing the wall thickness. Most of these prints took about 50 minutes.

Different iterative settings when slicing for my FDM print are pictured above and below.


Altogether, I didn’t like the way any of the options looked. The bottom layer of the print always seemed to detach or get messed up.

Sample iterations
In the iterations above, the last layer was messed up, or the raft was too difficult to remove from the object. Also, while it is possible to print multiple objects on the same bed, I have learned that if there is any error, it will show up in all the prints on that bad. Since they are identical, the machine will mess uo on the same spots of the object. So try to to be cautious.
I also believe after dozens of use nonstop by students, the Original Prusa didn’t provide me with the print quality I desired. On the other hand, the Ultimaker prints kept their integrity after I took them off the print bed. There was only a skirt utilized. It does have some range of movement, but not much compared to the prints from the original Prusa.
In both of the 3D printing methods I used, the details of my ghost were kept and I think a final size of 42 mm was a good choice. The featured image is a picture of 2 out of 5 of my final products. The red fidget was printed by FDM and the orange fidget was printed using SLA. Altogether I chose to only submit the print from the SLA and the 4 prints from the Ultimaker because of aesthetics.

Here are some friends. PS. Would like to petition for Tori to be hired as a lab assistant
Cost Analysis

Labor – 15 hrs * $7.25 = $108.75
FDM prints- range from $0.08- $0.35
approximate cost for the submitted 4 FDM prints – $0.45
SLA print – $69/bottle with 1 kg of resin
7.5 ml of resin used and 345 layers = ~$5.18
Total – $114.38
