For this assignment, we had to use the plasma cutter to cut two copies of one of the U.S. states out of 1/8 in aluminum sheet metal. I chose to do Tennessee, since I had a friend from Tennessee, and my partner was going to do North Carolina, so in the end, we could put our states together.
Initially, I wasn’t too sure what a plasma cutter was. I knew it could cut metal with plasma, but I didn’t understand what that actually entailed until we went and actually used it. It wasn’t what I expected with its huge grill filled with murky water. When it started cutting, I was surprised at all of the sparks that were flying out, but I was also amazed. It looked so cool, kind of like a fireworks show, and the metal that was cut out looked good as well. The cut metal looked really professional to me even with the little bit of dross that some of the pieces had.
When my partner and I went to the machine shop to plasma cut our states, it was actually pretty straightforward. We just followed the instructions and the practice that we did before class, and everything ran pretty smoothly.
My state came out very well. There was only a tiny bit of dross on it, and the rest of it was nicely cut out. The edges were kind of jagged, but I think that’s expected, since it was like that with the practice ones we cut out in class too (Figure 1).

Figure 1: Freshly Plasma Cut 1/8 in Thick Aluminum Tennessee
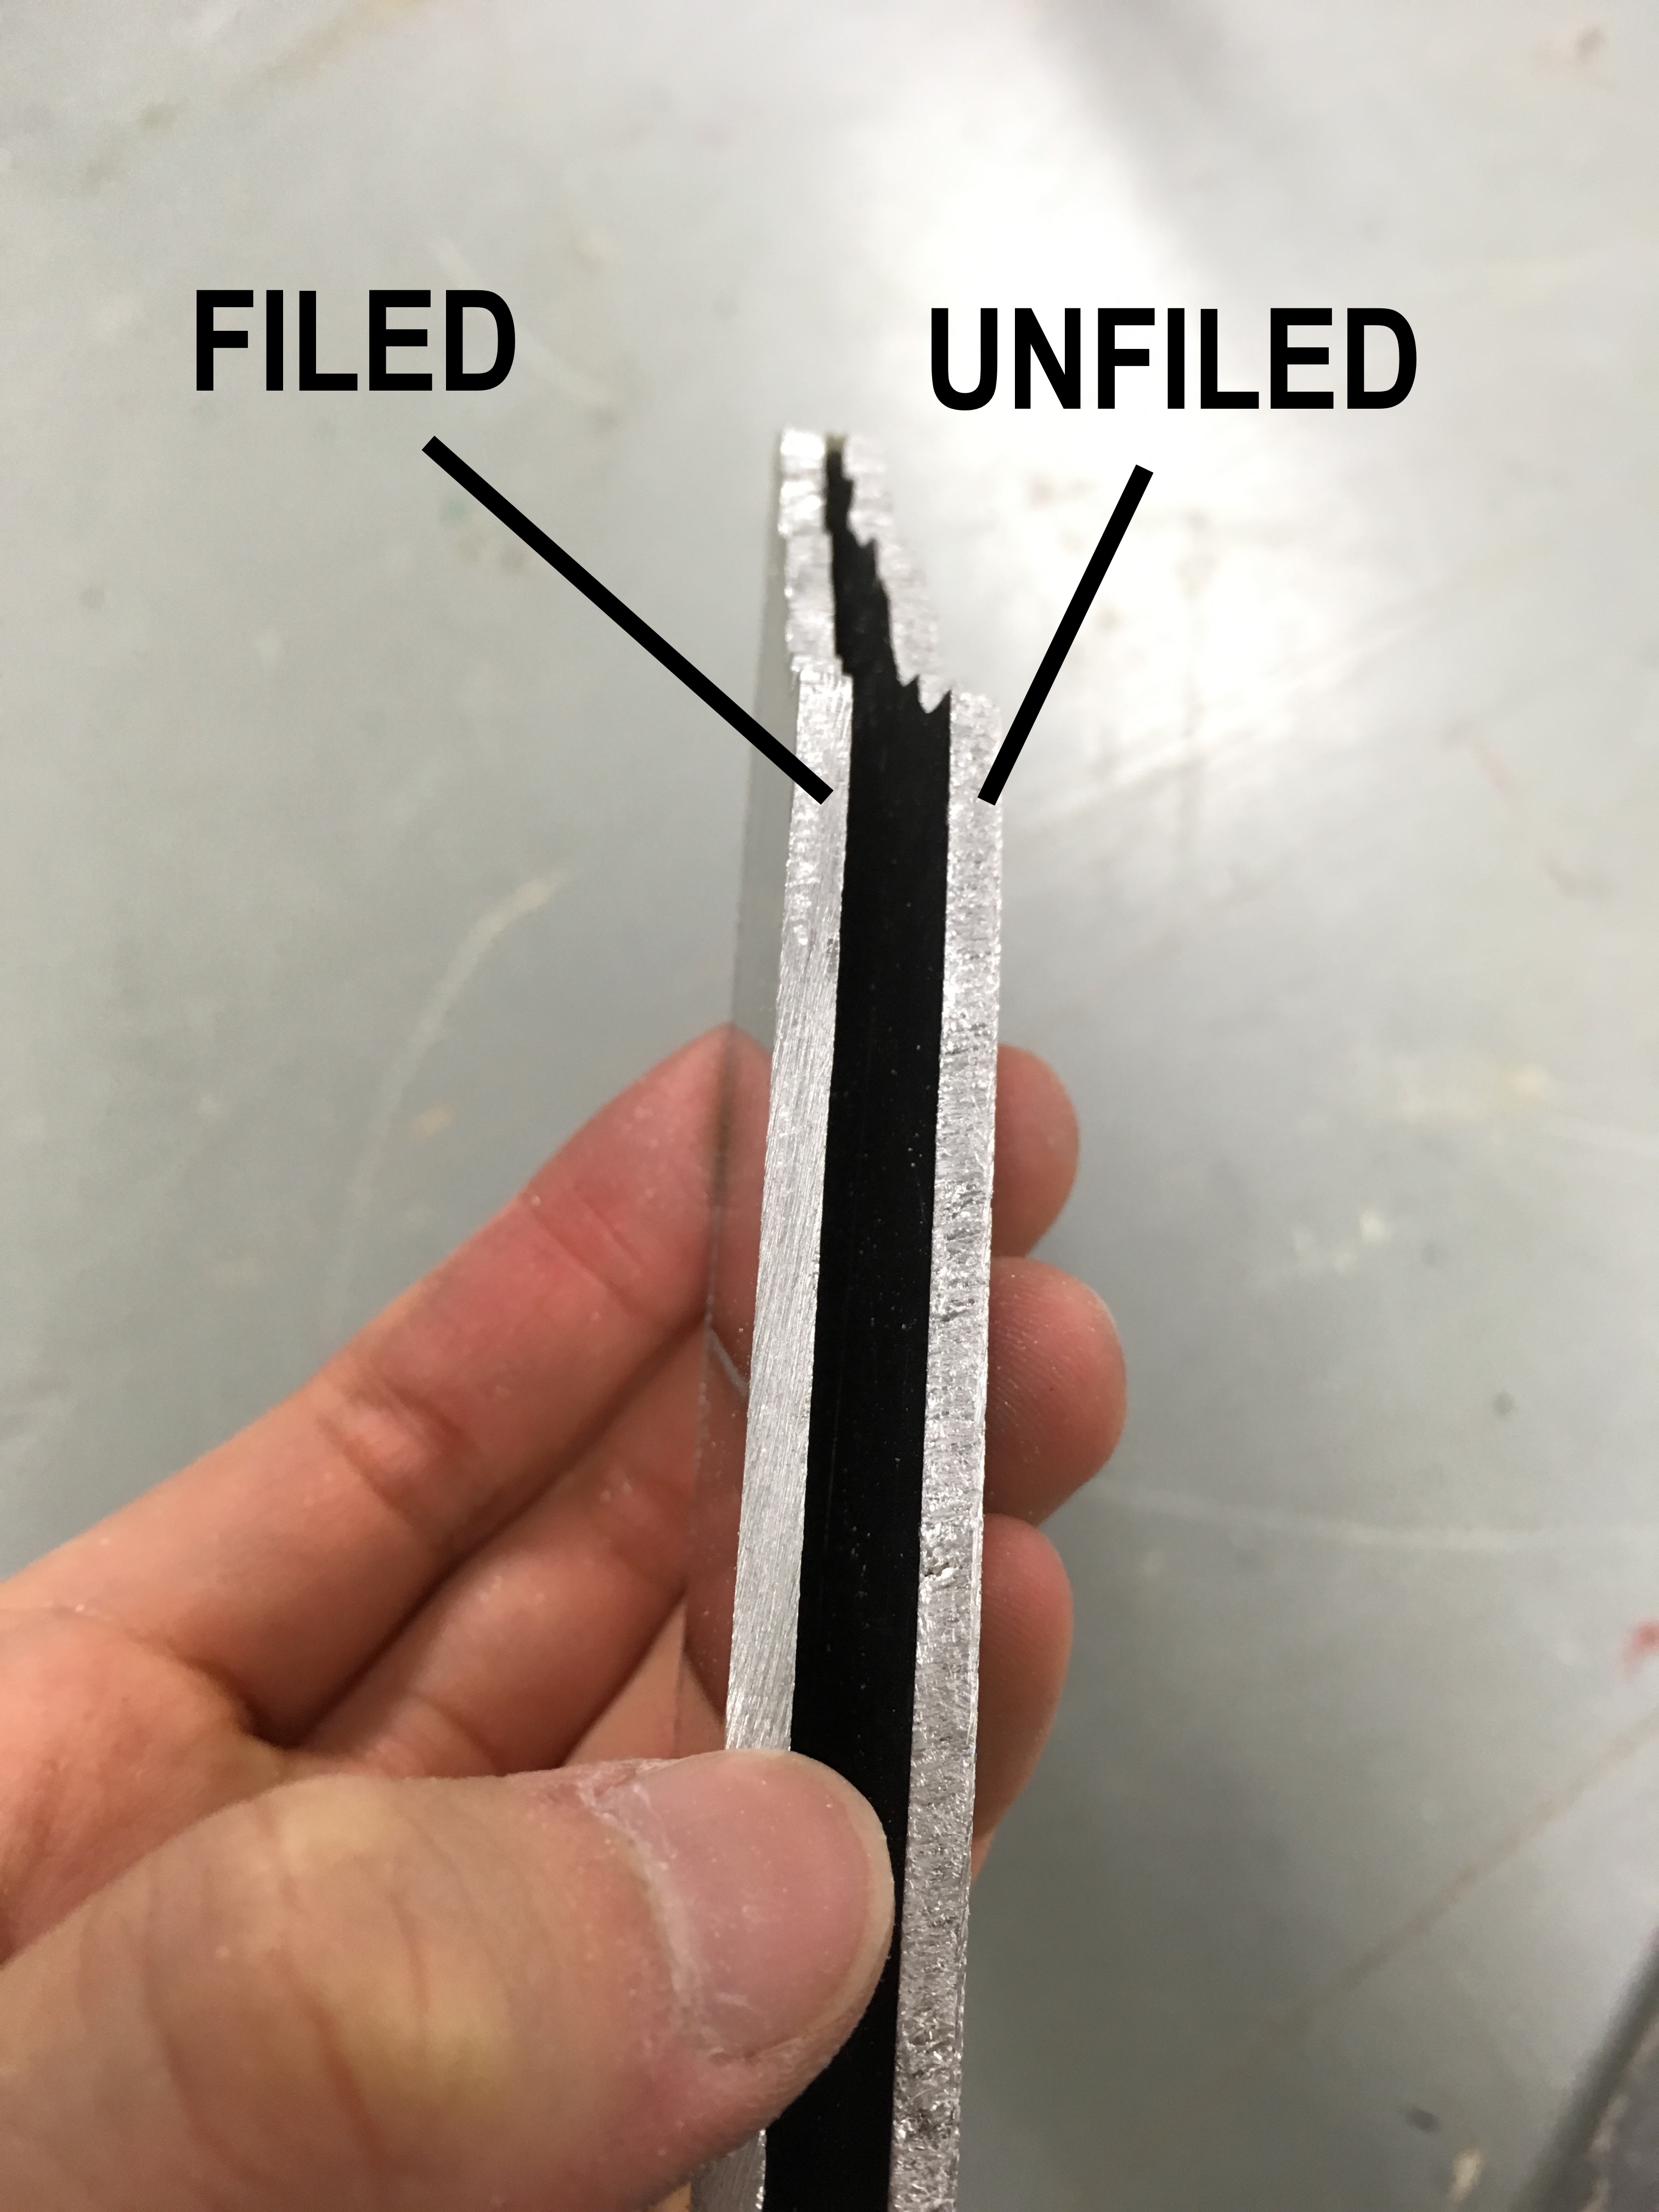
Figure 2: Filed vs Unfiled Sides of Plasma Cut Aluminum 1/8 in Thick Tennessee
After plasma cutting my two states out, I went to file down the semi-jagged edges as well as to file off the few pieces of dross on the metal (Figure 2). At first, I was filing pretty slowly because I wanted all of the edges to be very sleek and smooth. However, I got advice from an awesome lab tech, and she told me that it’s best to file it fast so that the filing will be more evenly distributed. This helped a lot, and helped save me a lot of time too.
After filing the edges to be smooth, I sandblasted the two Tennessees (Figure 3). I couldn’t really tell what was going on in the sandblaster, so when I took out the states, not all of the metal surface was sandblasted unfortunately. After sandblasting the metal
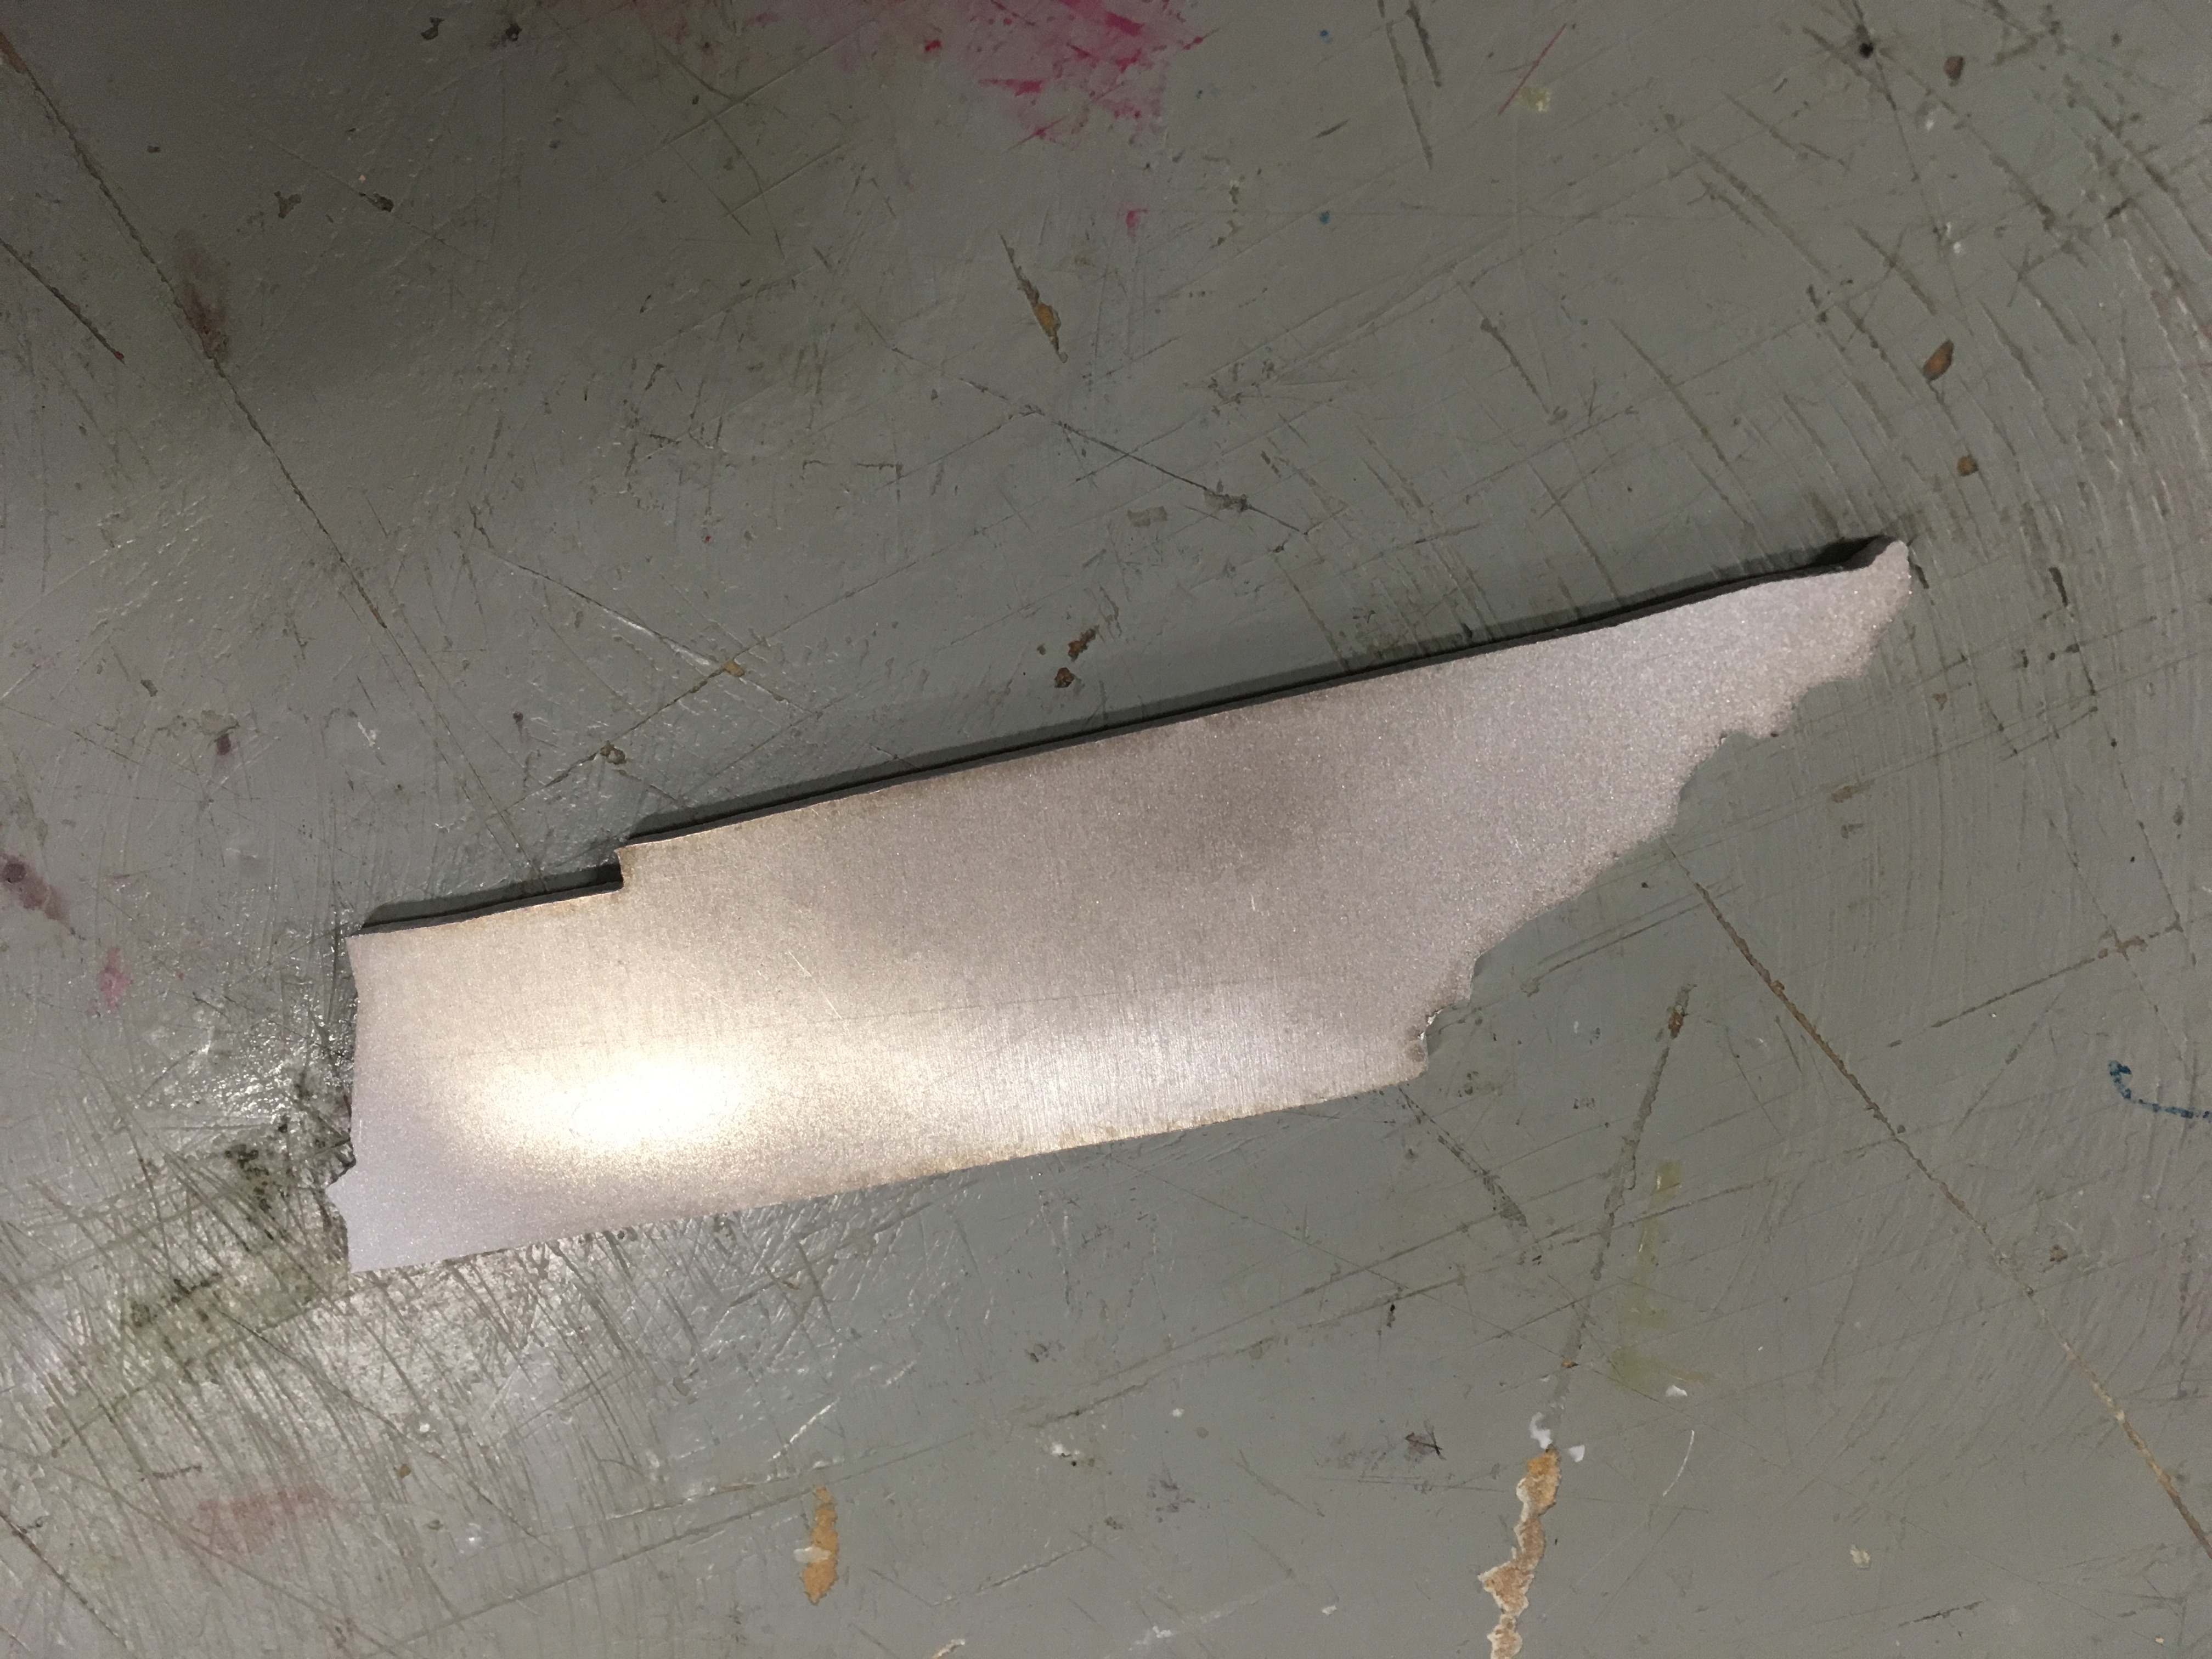
Figure 3: Sandblasted Aluminum Tennessee
states again, I painted one side of them with a nice red paint, and the next day I painted the other side (Figure 4). However, when I went to check on them a few days later, I realized that I had made a terrible mistake. I had put them on a newspaper so that they wouldn’t get other stuff dirty with the paint, but I didn’t realize that the paint would stick to the newspaper (Figure 5). When I tried to peel off the states from the newspaper, there were pieces of paper stuck to them that were very difficult to get off. I had hoped that putting another coat of paint would hide, them, but then when I checked on them again after applying another coat, I realized that you could still see and feel the newspaper stuck onto the metal.
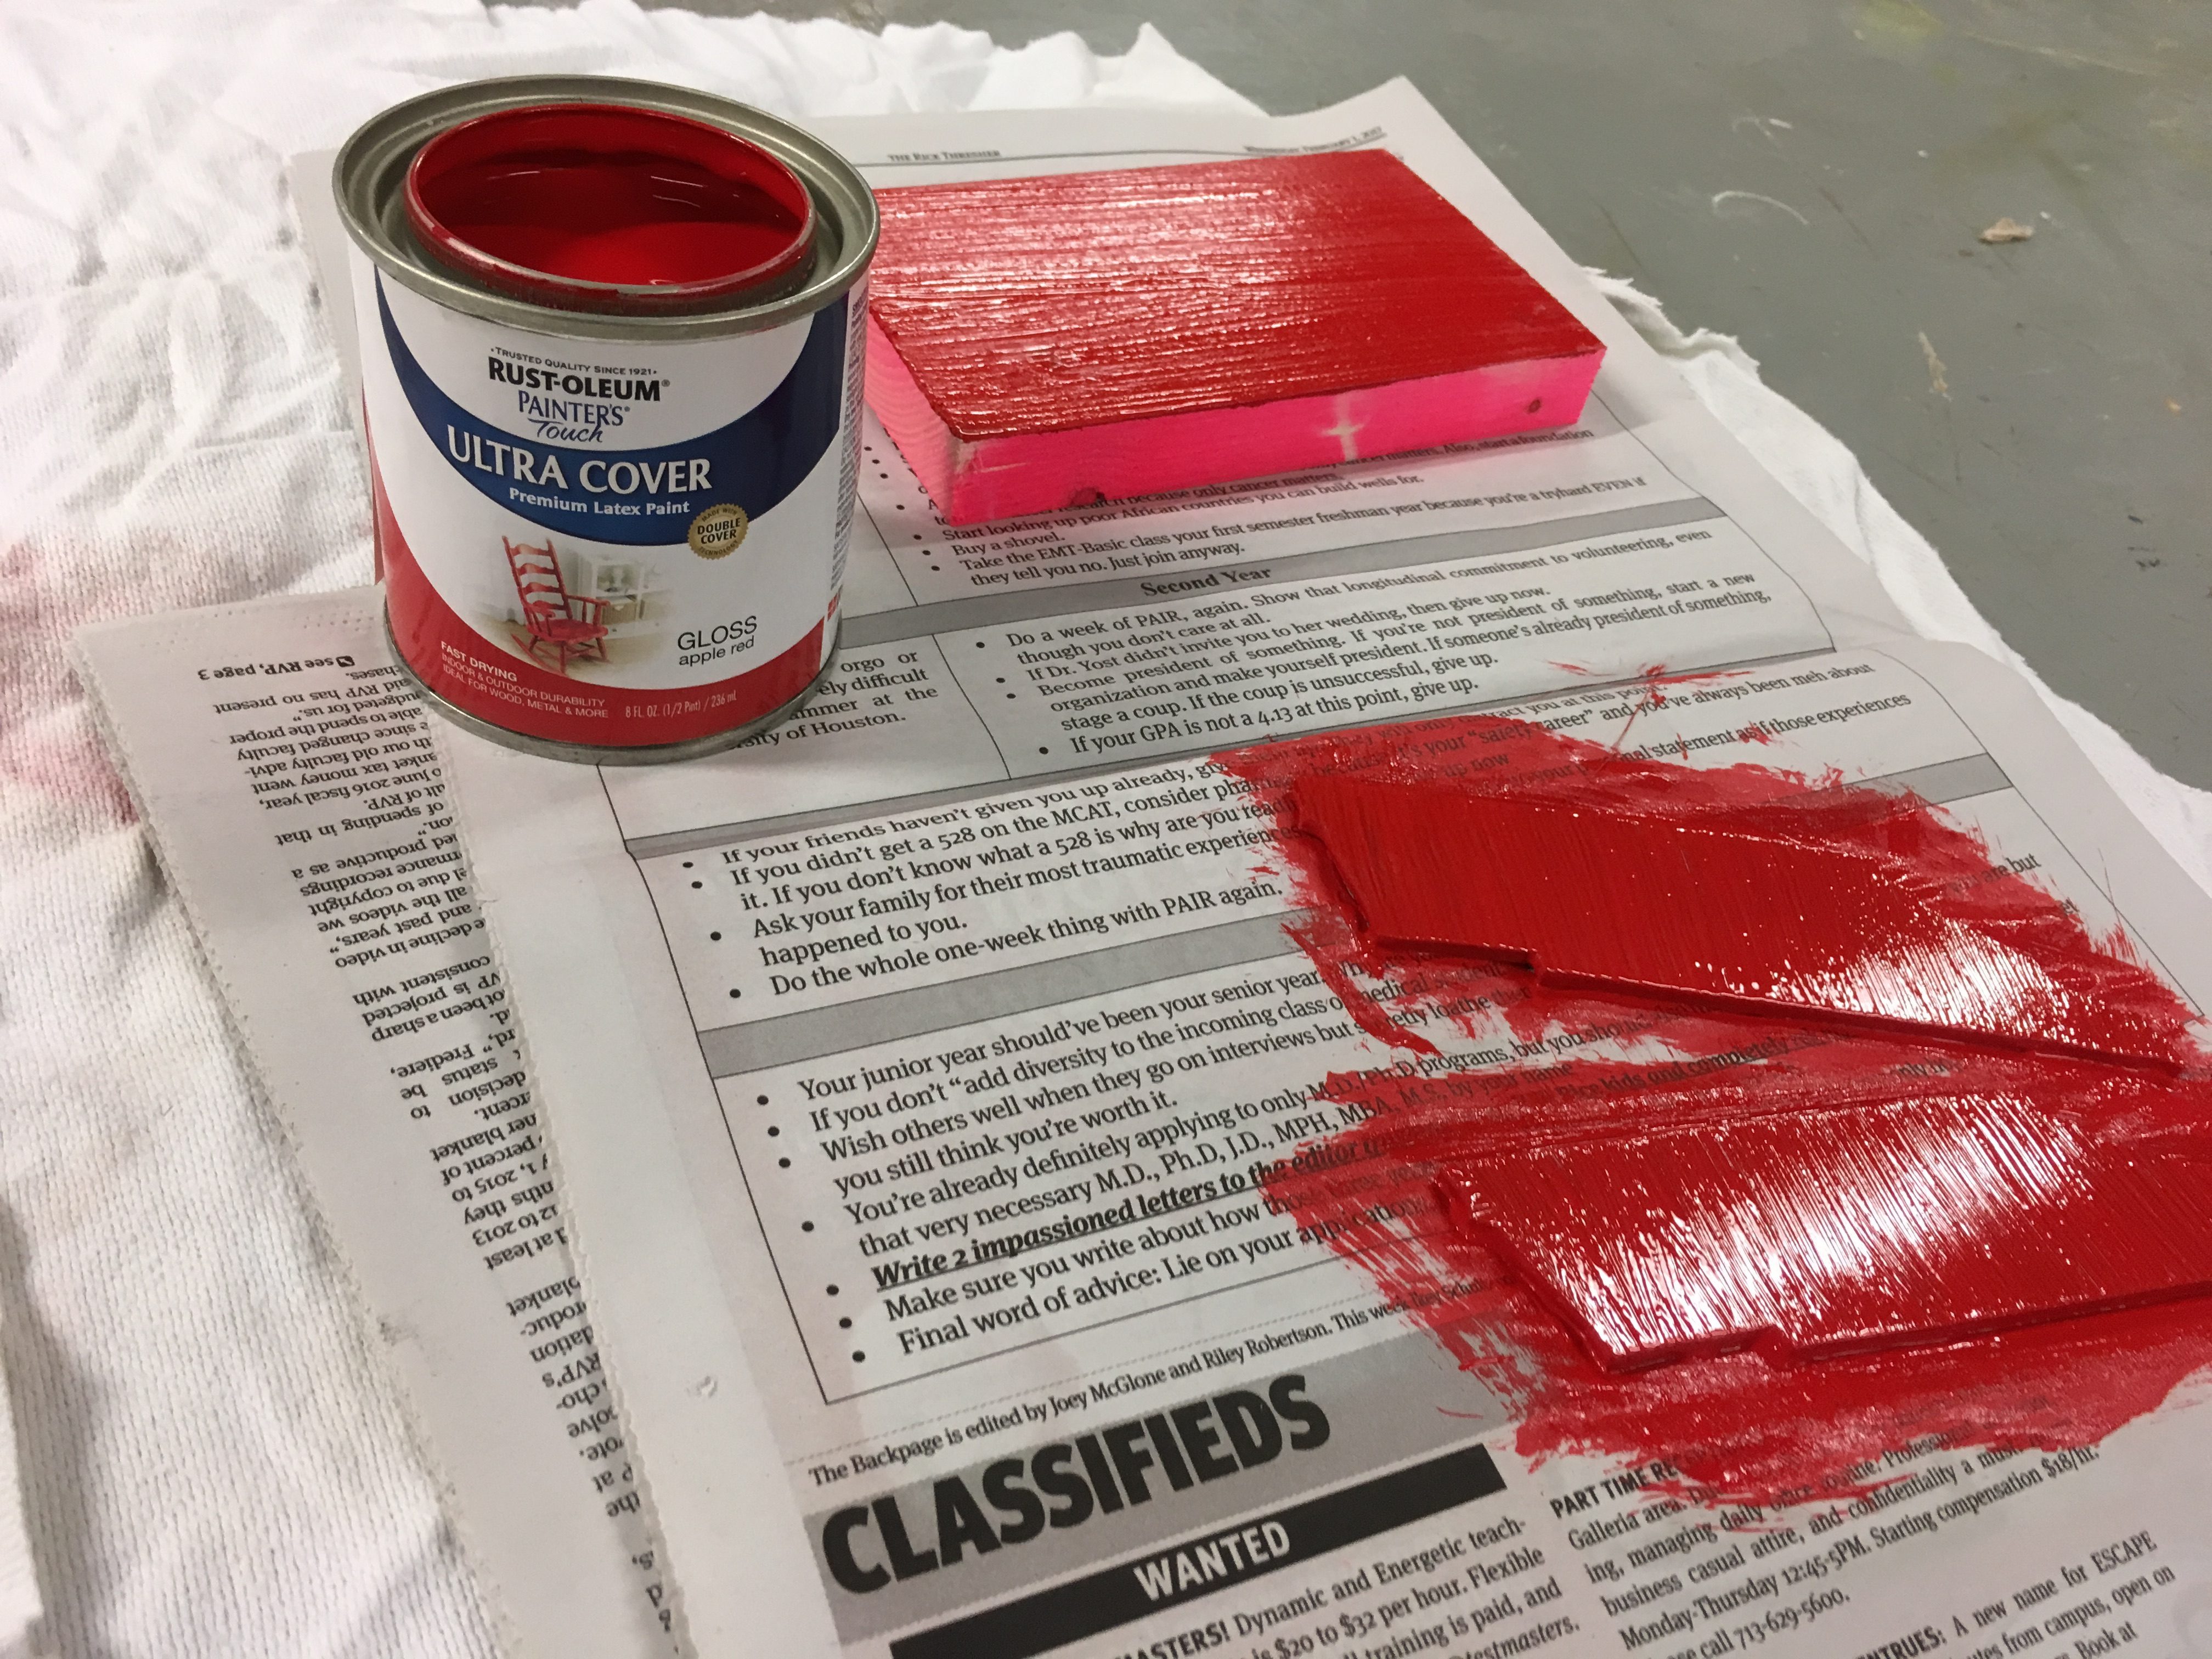
Figure 4: Two Aluminum Tennessees & a Test Wood Block Covered in a Layer of Red Ultra Cover Paint
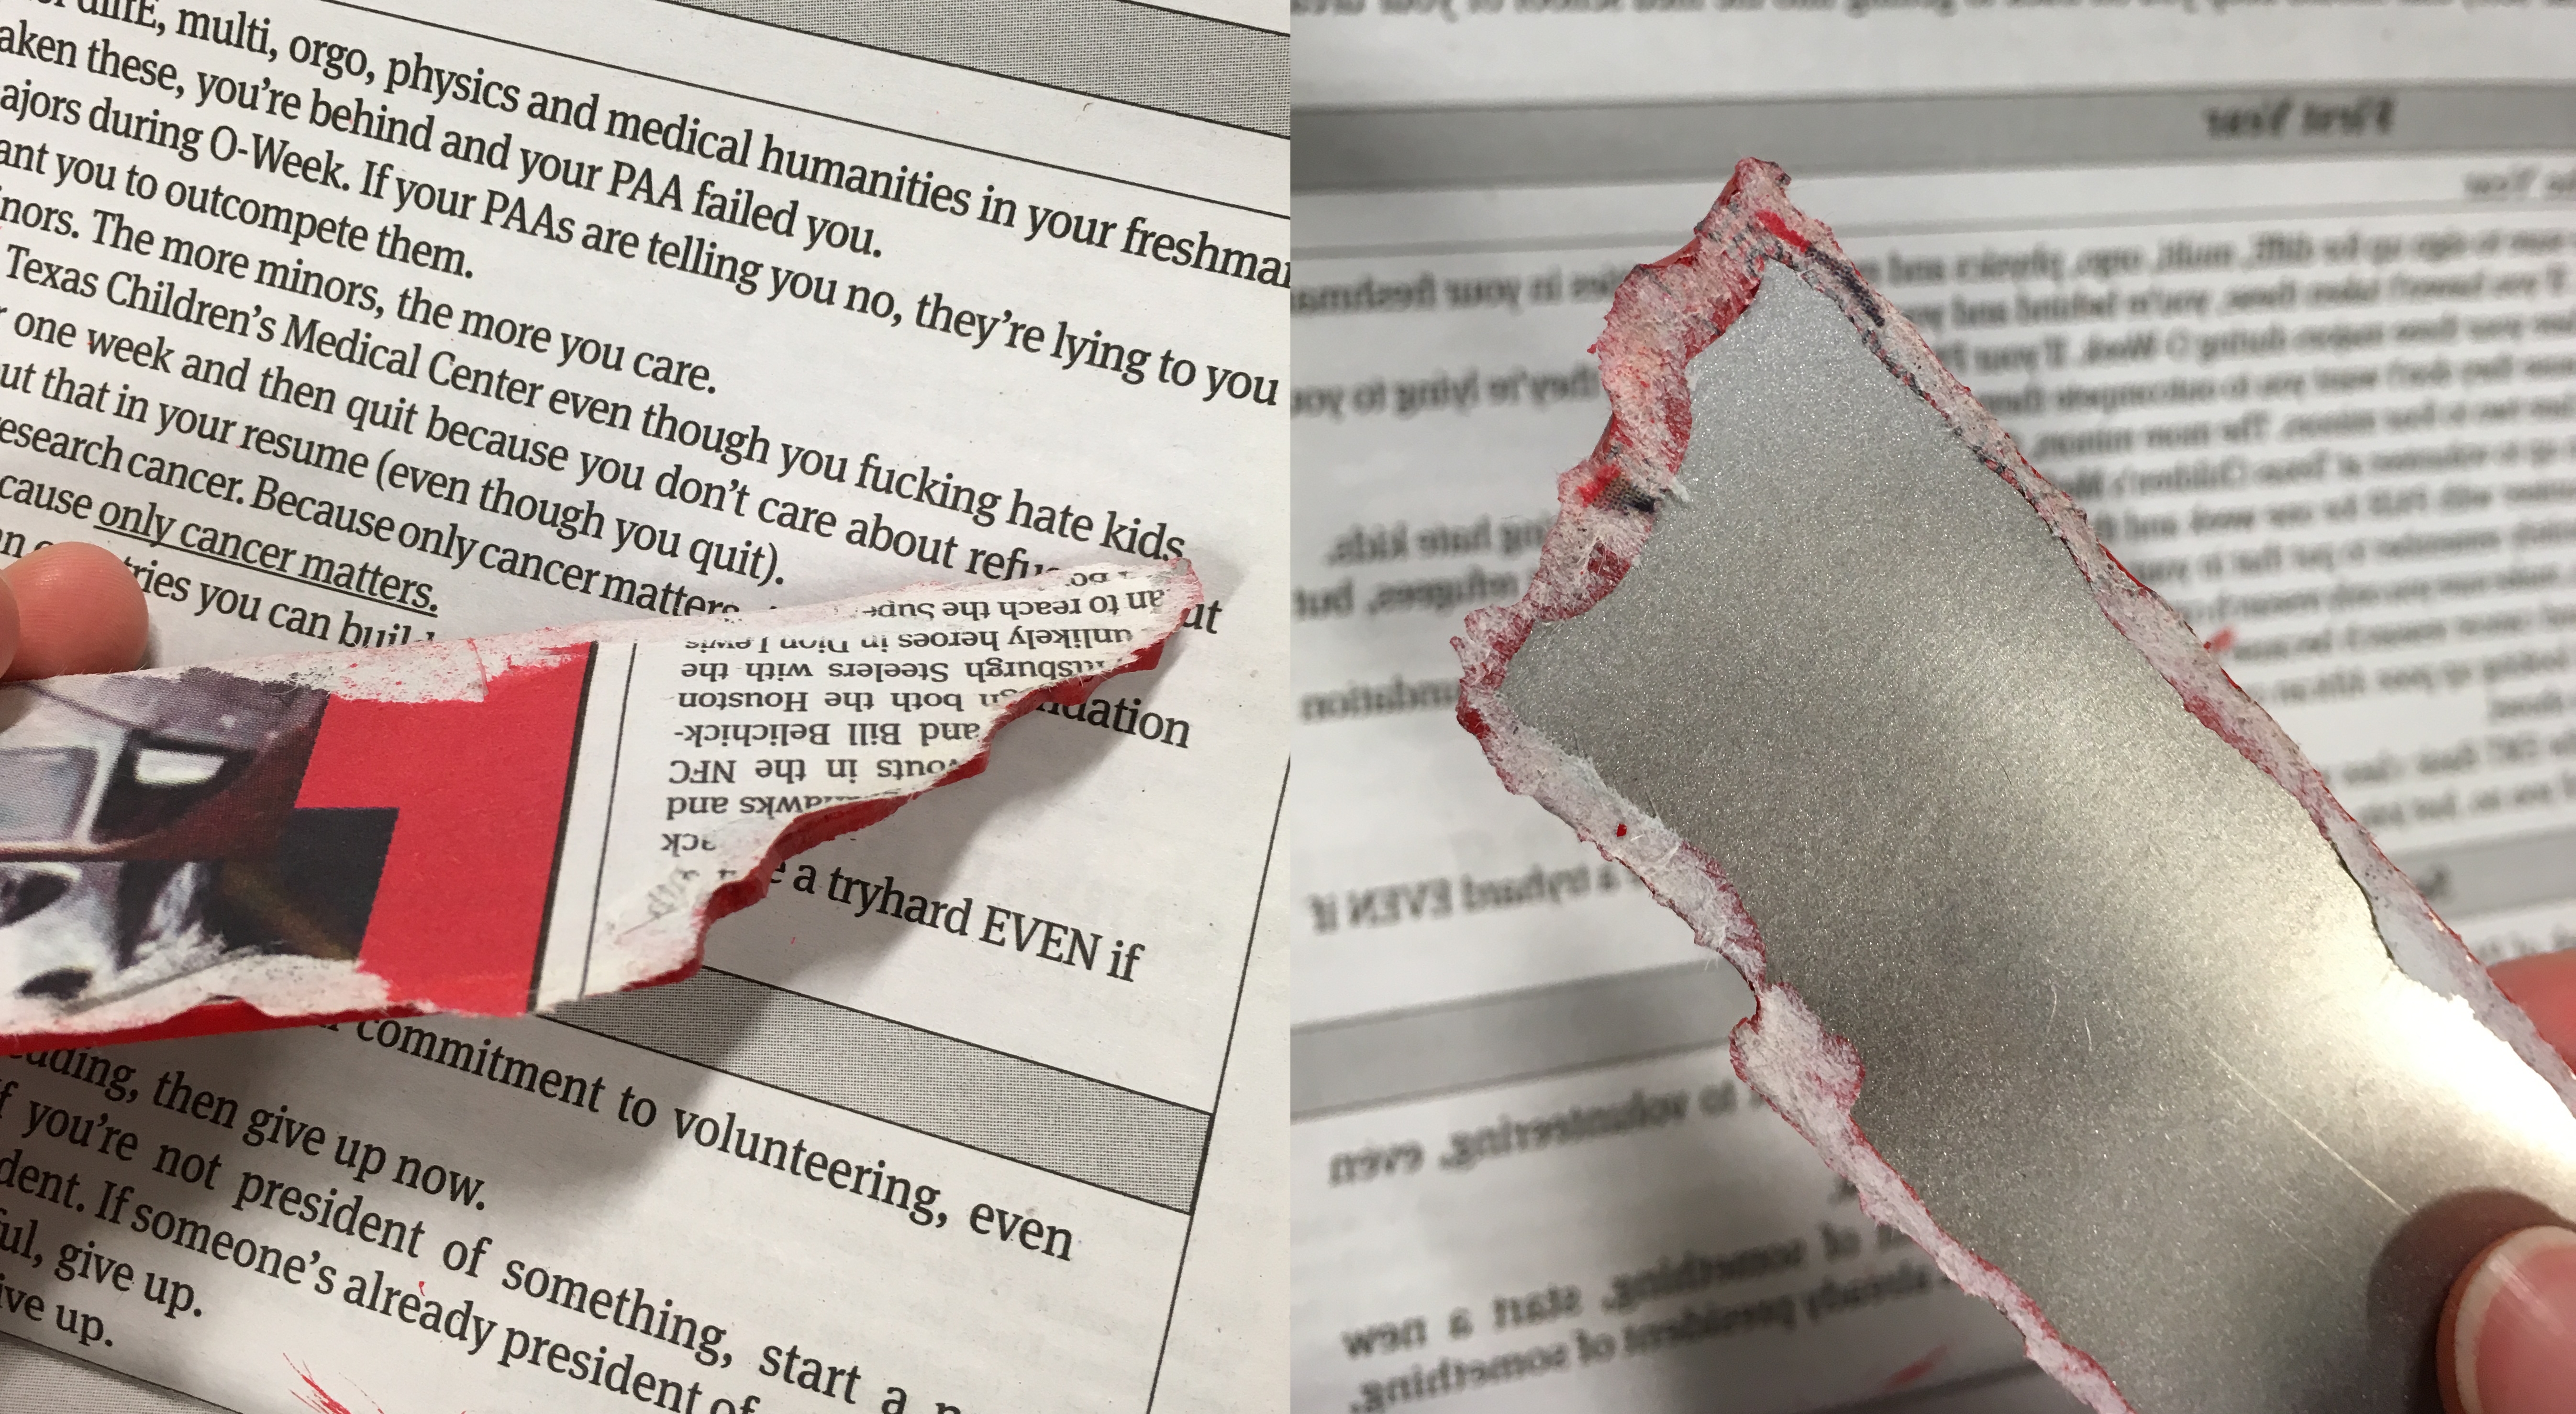
Figure 5: Newspaper Stuck to Back of Aluminum Tennessee
I learned my lesson with the newspaper mishap and left my drying states on a wooden block instead. However, I found out that leaving them on the wooden block was a mistake as well…
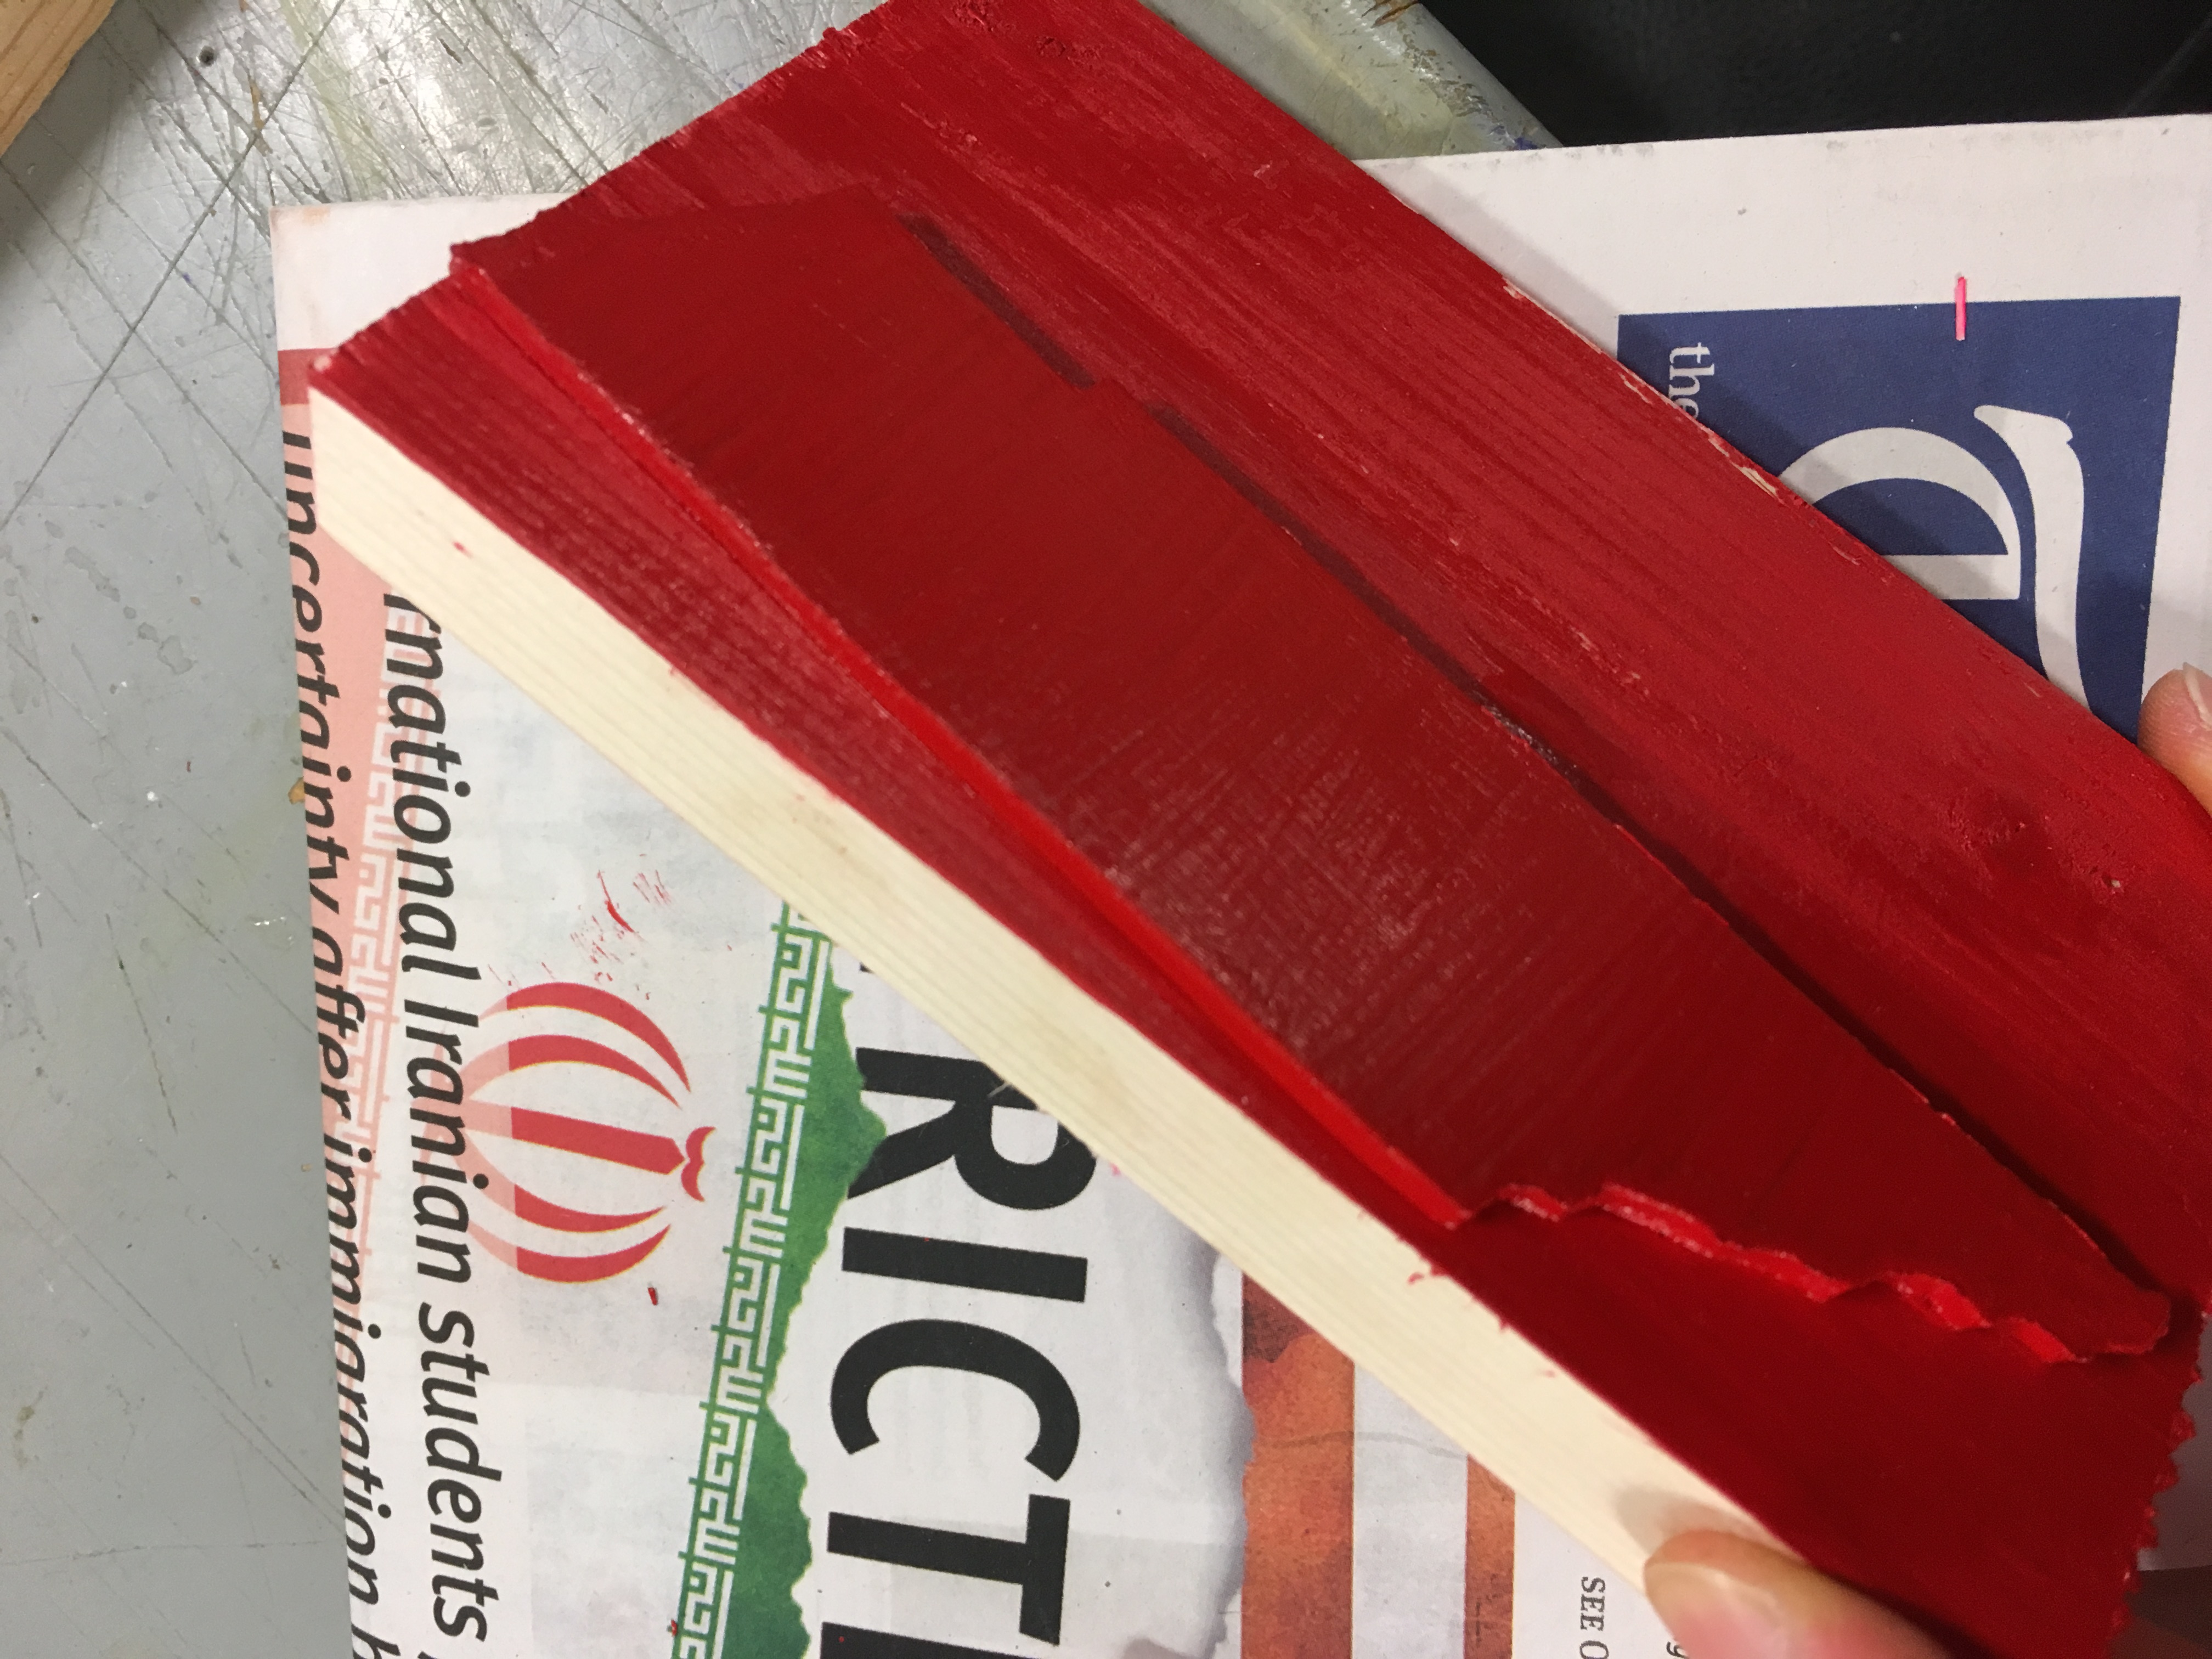
Figure 6: Tennessee Stuck to Wood Block
They had stuck to the block as they were drying and were extremely difficult to get off (Figure 6). I ended up having to use a screwdriver to pry them off of the wood. The side that had stuck to the wood had a lot of paint scraped off because of the screwdriver and because it had stuck to the wood. Also, the newspaper was still stuck on the metal, so I also decided to file it off along with most of the paint so that I could just repaint it (Figure 7).
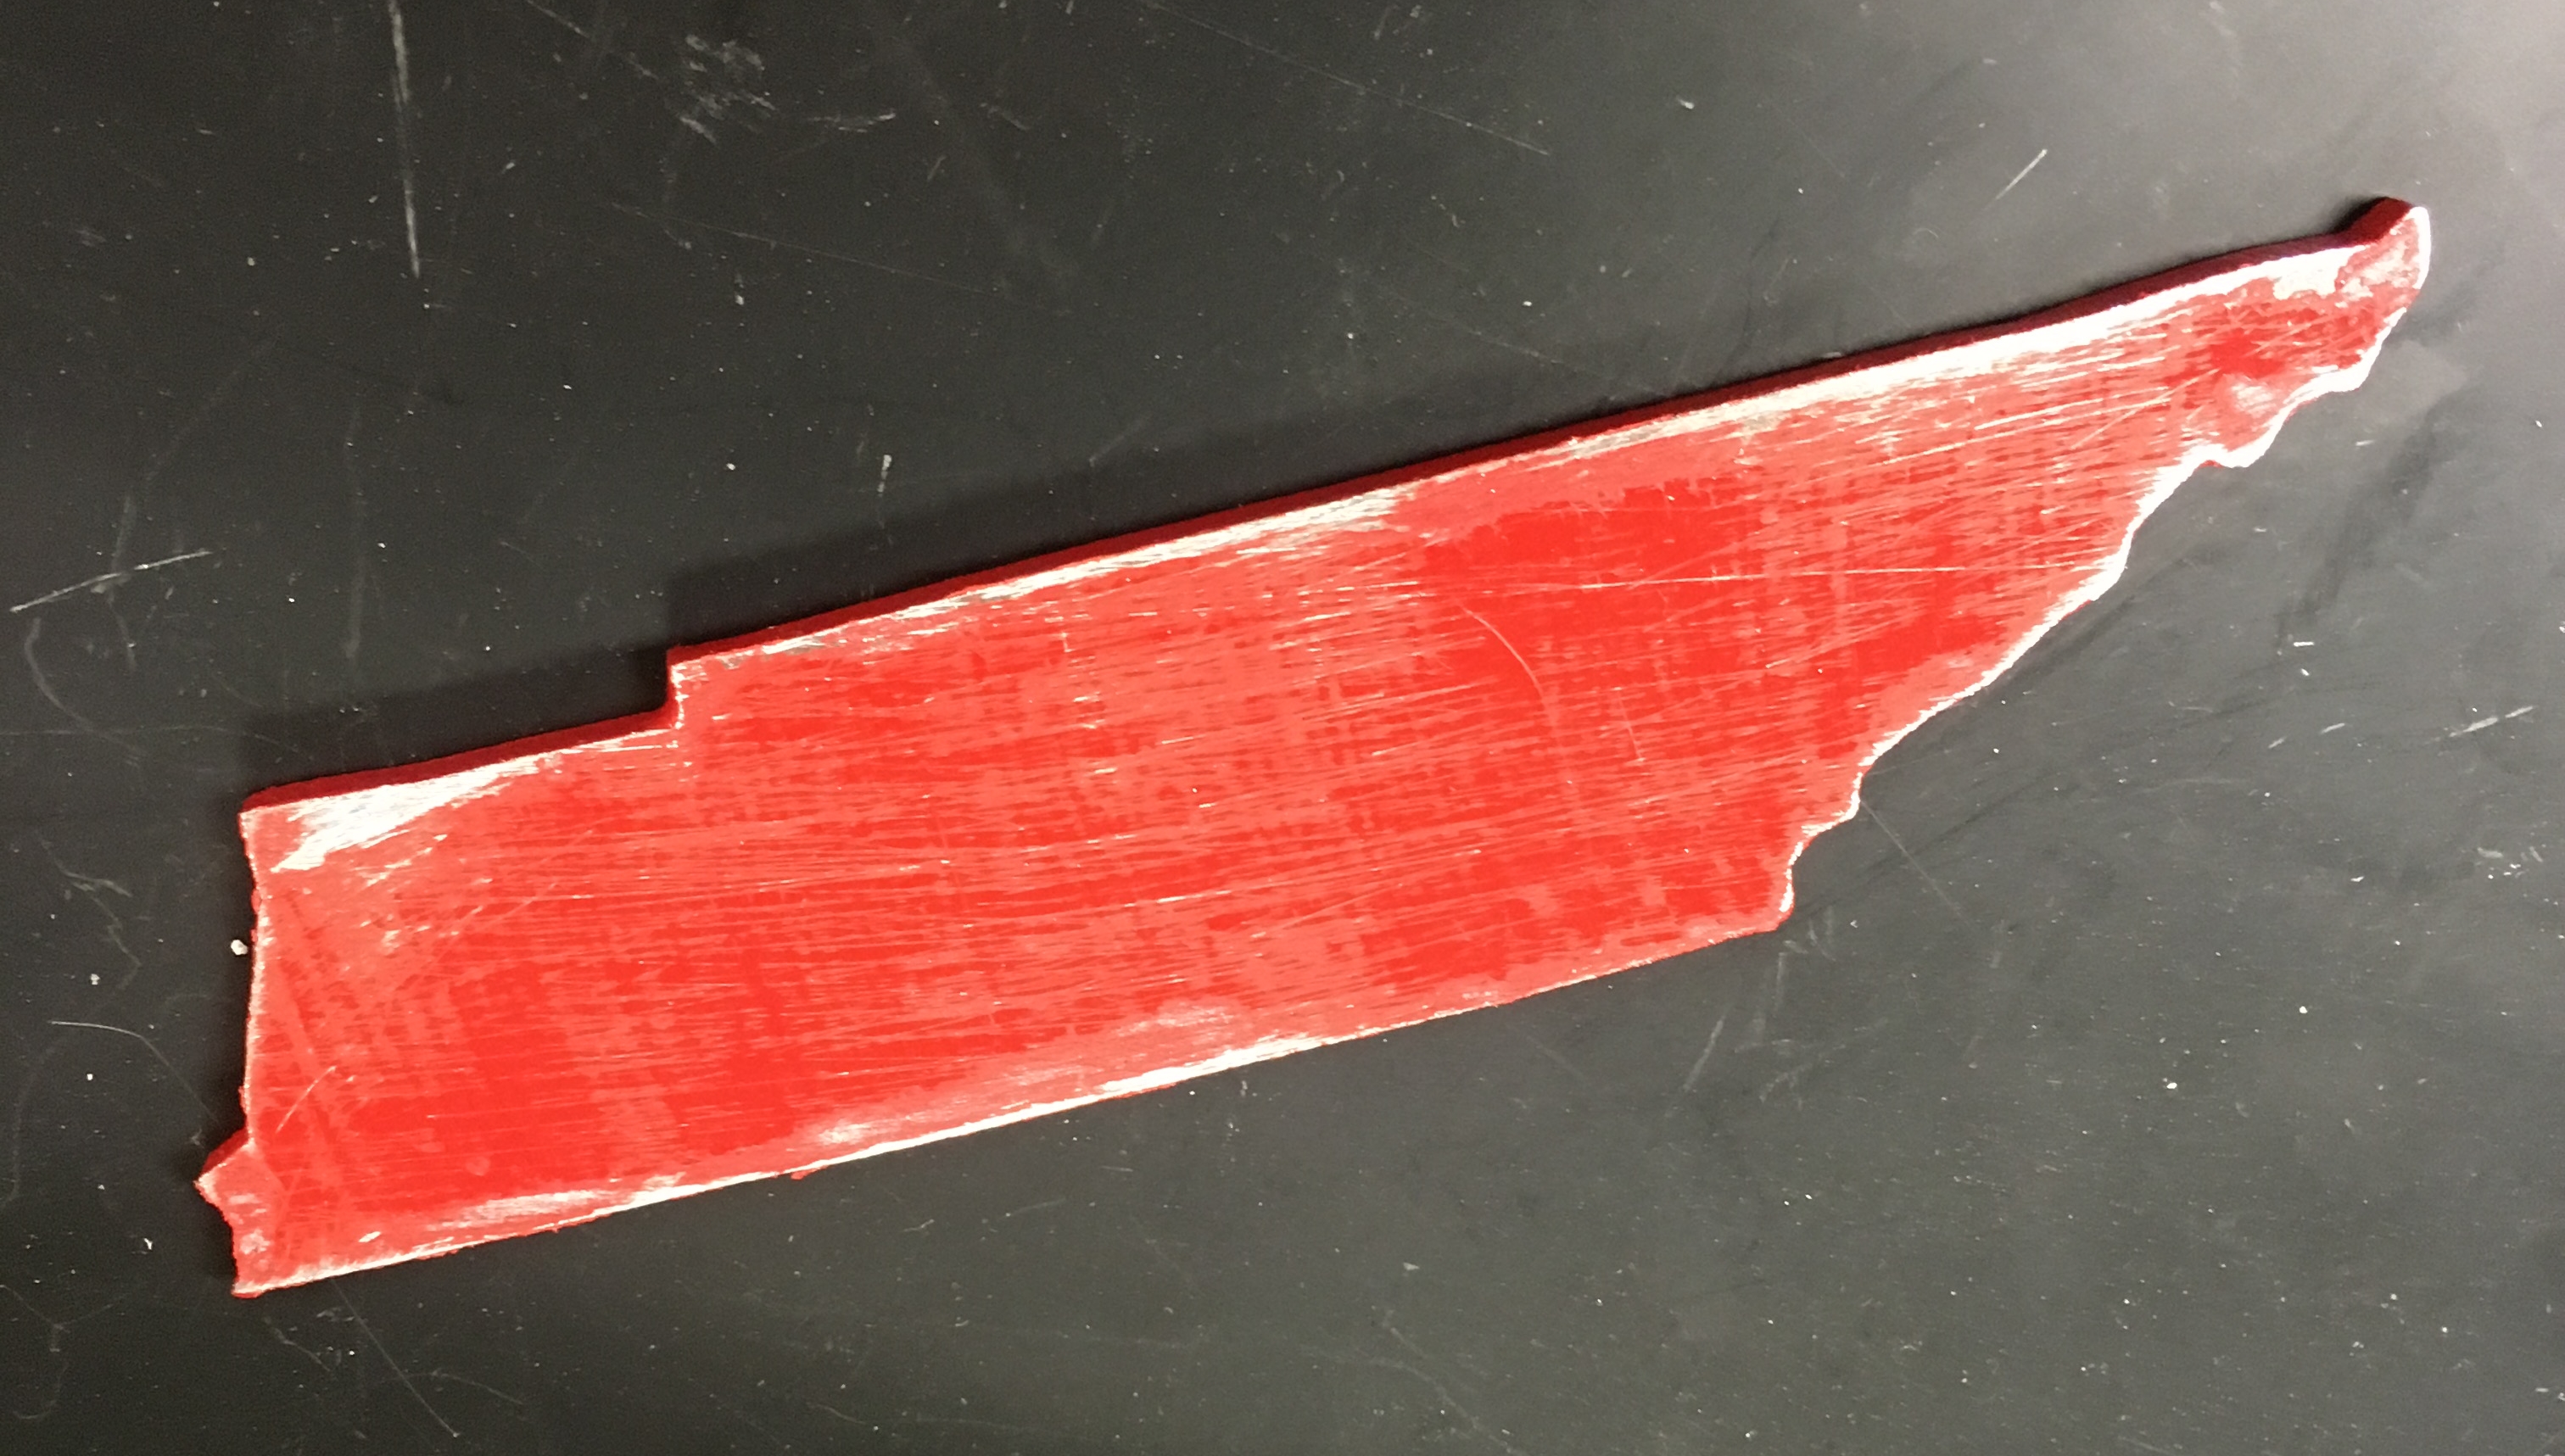
Figure 7: Tennessee After Filing Away Newspaper and Chipped Off Paint
I then painted them again, and this time I placed them on a Popsicle stick so that the edges with paint won’t touch the Popsicle stick holding them.
In the end, I finally got two finished Tennessees (Figure 8). I’m disappointed that I couldn’t get both sides to be as smooth as they were before they started sticking to stuff, but I really like the red color. Now I’m very wary of paint because I feel like if I had used spray paint, I wouldn’t have had to repaint them so much. All in all, I thought this was a cool assignment because of the plasma cutting and being able to put my own personal touch on the states I cut out. It’s also made me realize just how much time you need when post-processing because if it doesn’t work out the way you want it to the first time, you have to keep going back and fixing it. I also am now going to make extras just in case things don’t go as planned.
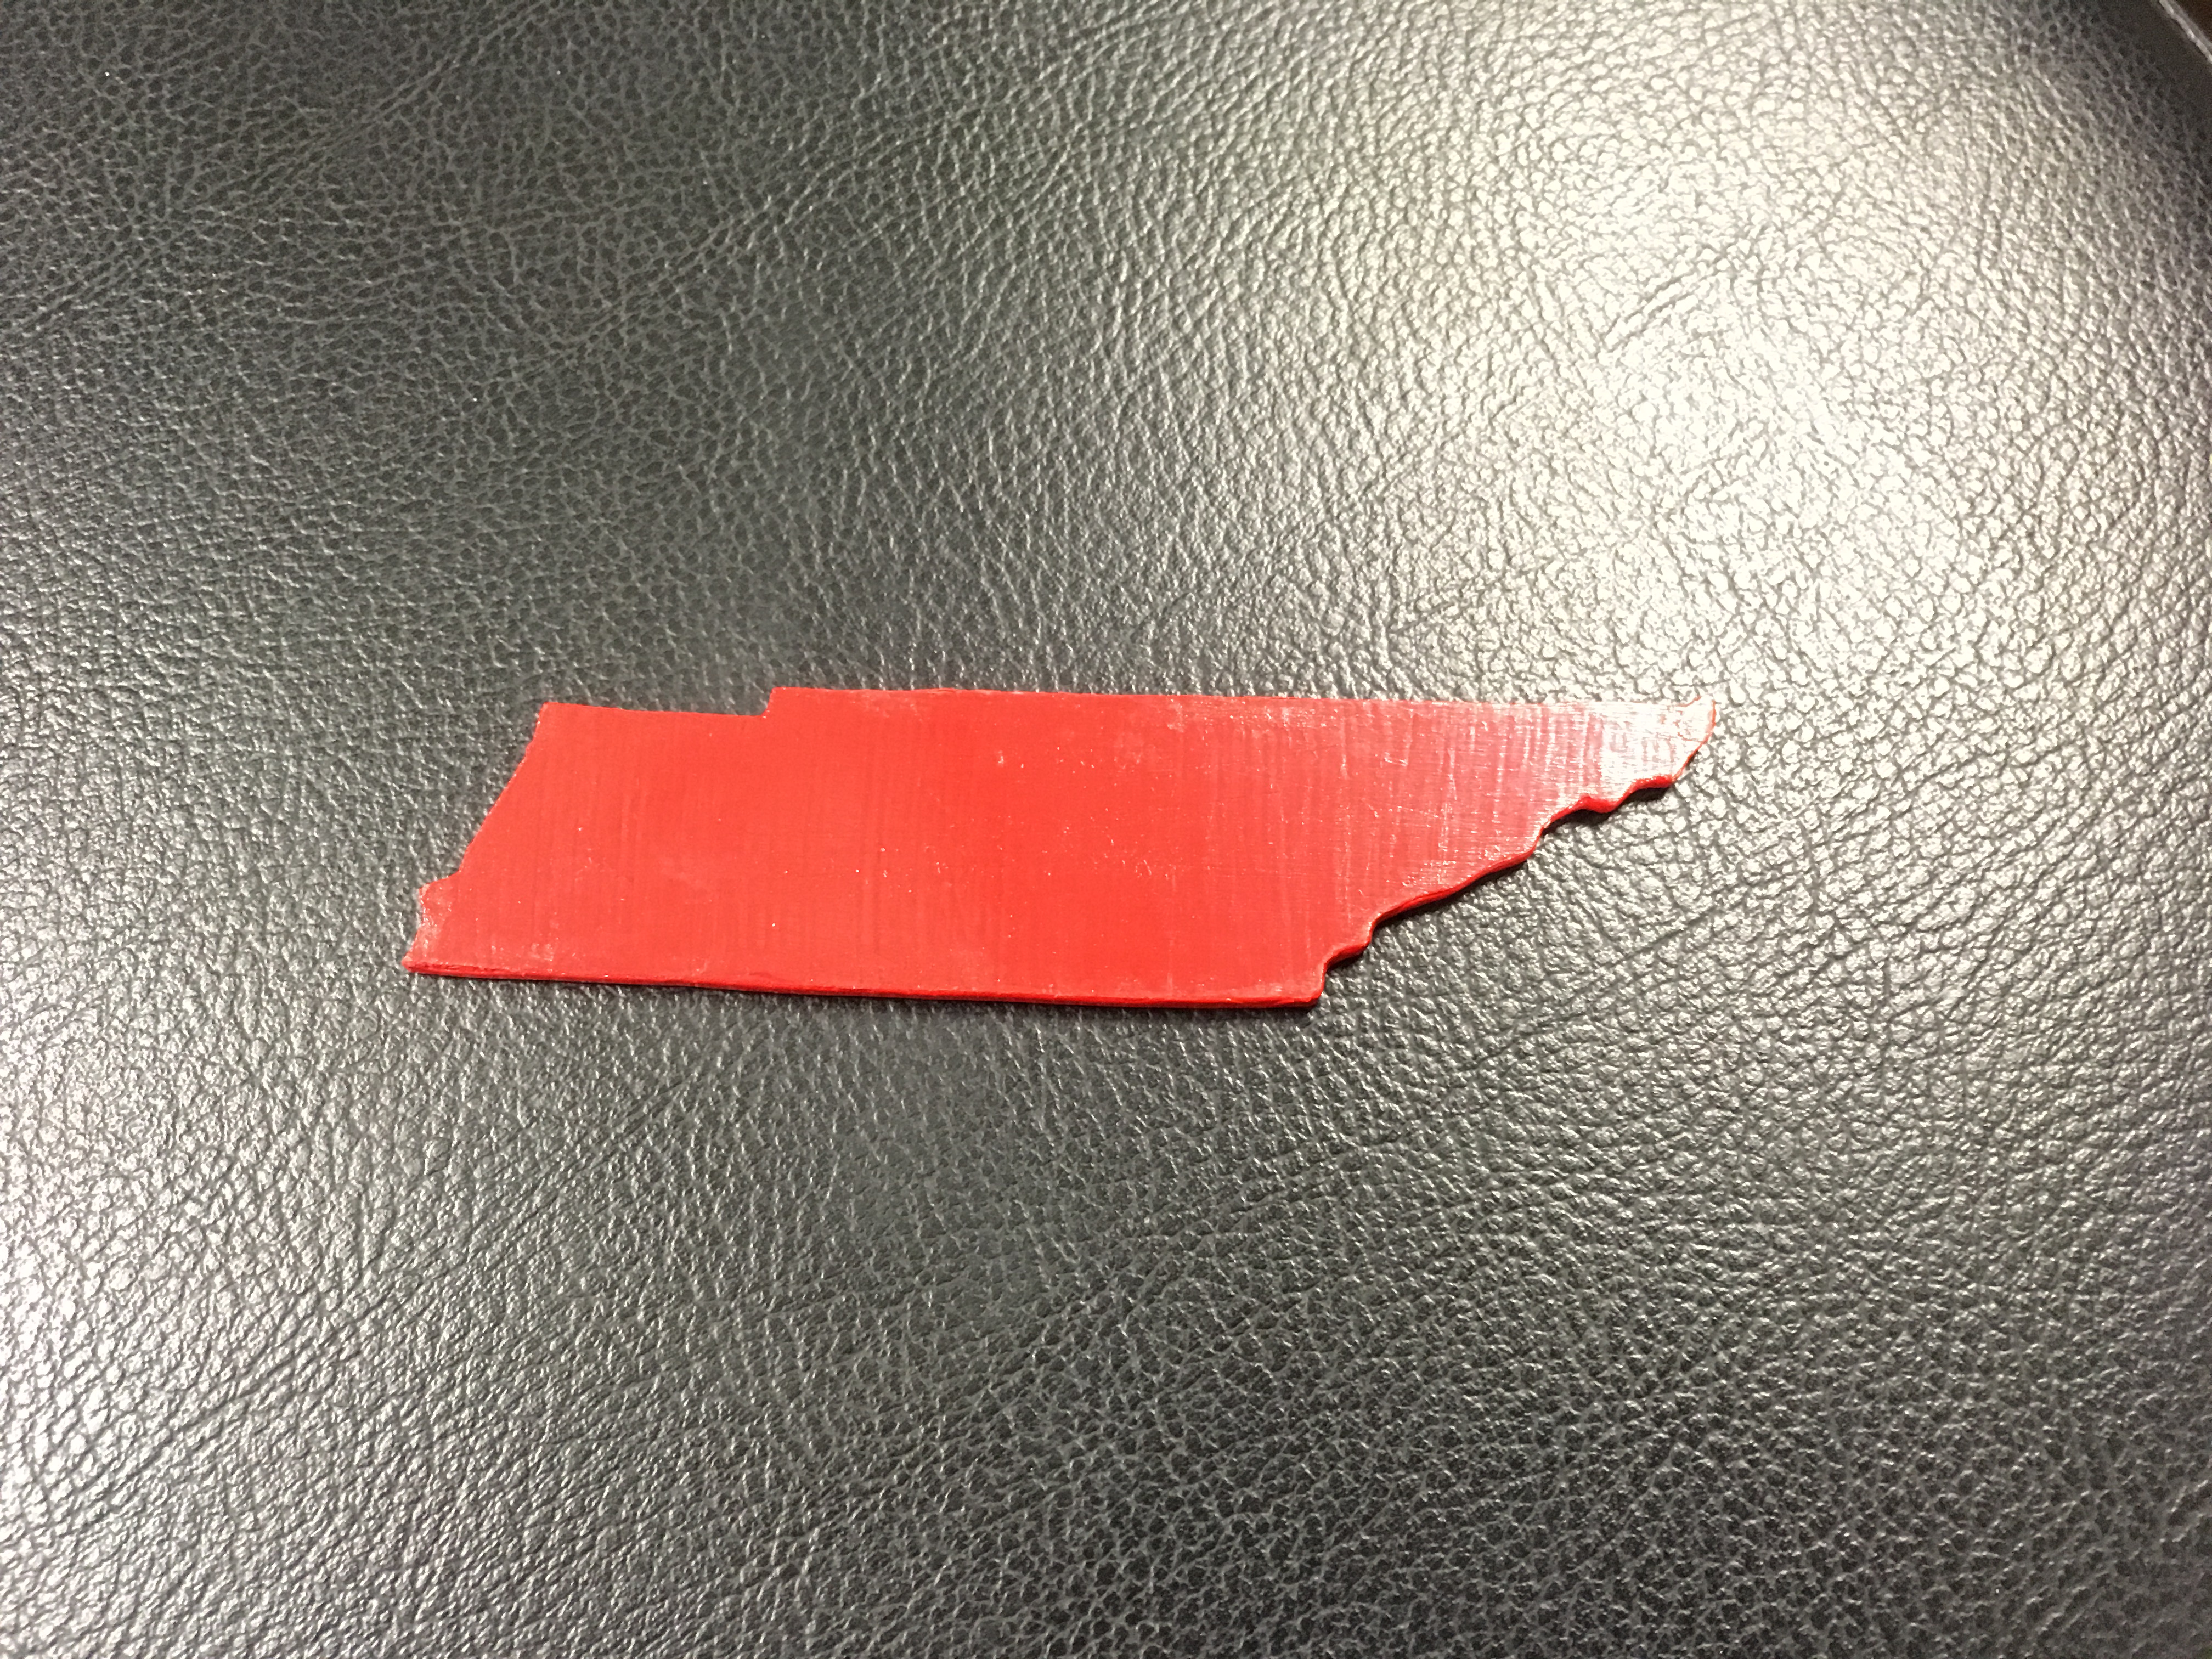
Figure 8: Final Version of the Aluminum Plasma Cut Tennessee
