For this project, we were charged with creating a laser cut box of at least 4 inches. I started by creating a design in makercase. I had some issues getting this design into the laser cutting computer the first time I tried, so I resolved to create the box on the laser cutting computer itself the next time I came in. I chose to use wood that was leftover from another classmates box, which was around 1/8″. At first, I used makercase again and started trying to create test pieces using different kerfs. This proved to be incredibly difficult. I made several mistakes including setting the pt value wrongly for the vector and setting the wrong zero for the jog function. After several hours of making test pieces:

I finally found that switching to makeabox made things much easier. I found a kerf which I thought worked and was ready to set up my real box. I created a simple design that I quite liked which involved my name, the class, and the date as required as well as a sunflower from the noun project. While I thought that I had set out the dimensions relatively well so that the cut would fit in the available work, this cut ended up going right up to the very edge of the wood. I was very grateful that I had not set the 0 even a millimeter lower, as I would have had to recut the whole thing again. It was at this point that (if you don’t count spending hours doing test cuts and almost cutting off the edge a disaster) that disaster struck. I knew from the test pieces that the kerf was going to be very tight, but that was what I wanted as we are not allowed to use glue for this project. However, because the pieces were so much larger than the test pieces I made, I could not apply uniform pressure to the finger joints and could not get the pieces to press together. My frustration hit its peak at this moment. I left with my pieces and began to think back to middle school science. My first attempt was to put the pieces in the freezer I figured that the cold may contract the wood a little, enough to press the pieces together. This did not work. I was nearly ready to return to the OEDK and begin filing down the fingers, but I had one more idea. I took out some cooking oil and used it to lubricate the edges of each piece. Miraculously, and with much effort, this allowed me to put together the box:

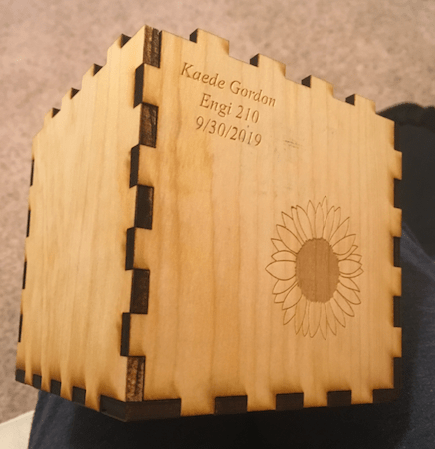
I wanted to stain the box yellow in keeping with the sunflower theme but found there was no yellow stain. I also considered using spar varnish, as it had a lovely shiny yellow hue, but found that the OEDKs spar varnish had dried out. Thus this was the end of my box construction. Overall, I am very glad to understand better how to create a laser cut box as I feel this is a very necessary skill to have.
The cost of the box can be calculated as follows:
3/4 inch Wood: 13$ (amazon)
Tools: 50$ (txrx makerspace lab in houston)
My time: 40$ (~4 hours at 10$/hour)
Total: $103
