Making these diamonds were really fun! I struggled with coming up with a design in the beginning, since the plasma cutter is not very precise, and post processing can get extremely difficult. So, I decided to go with this simple design that would not require too much post processing and would be very easy to file.
The plasma cutting part went pretty smoothly; I was able to correctly cut my diamonds on the first try (a blessing).
Then, I used the angle grinder from the machine shop and a small c clamp to eliminate the dross on the edges and also smooth the top layer on both sides.
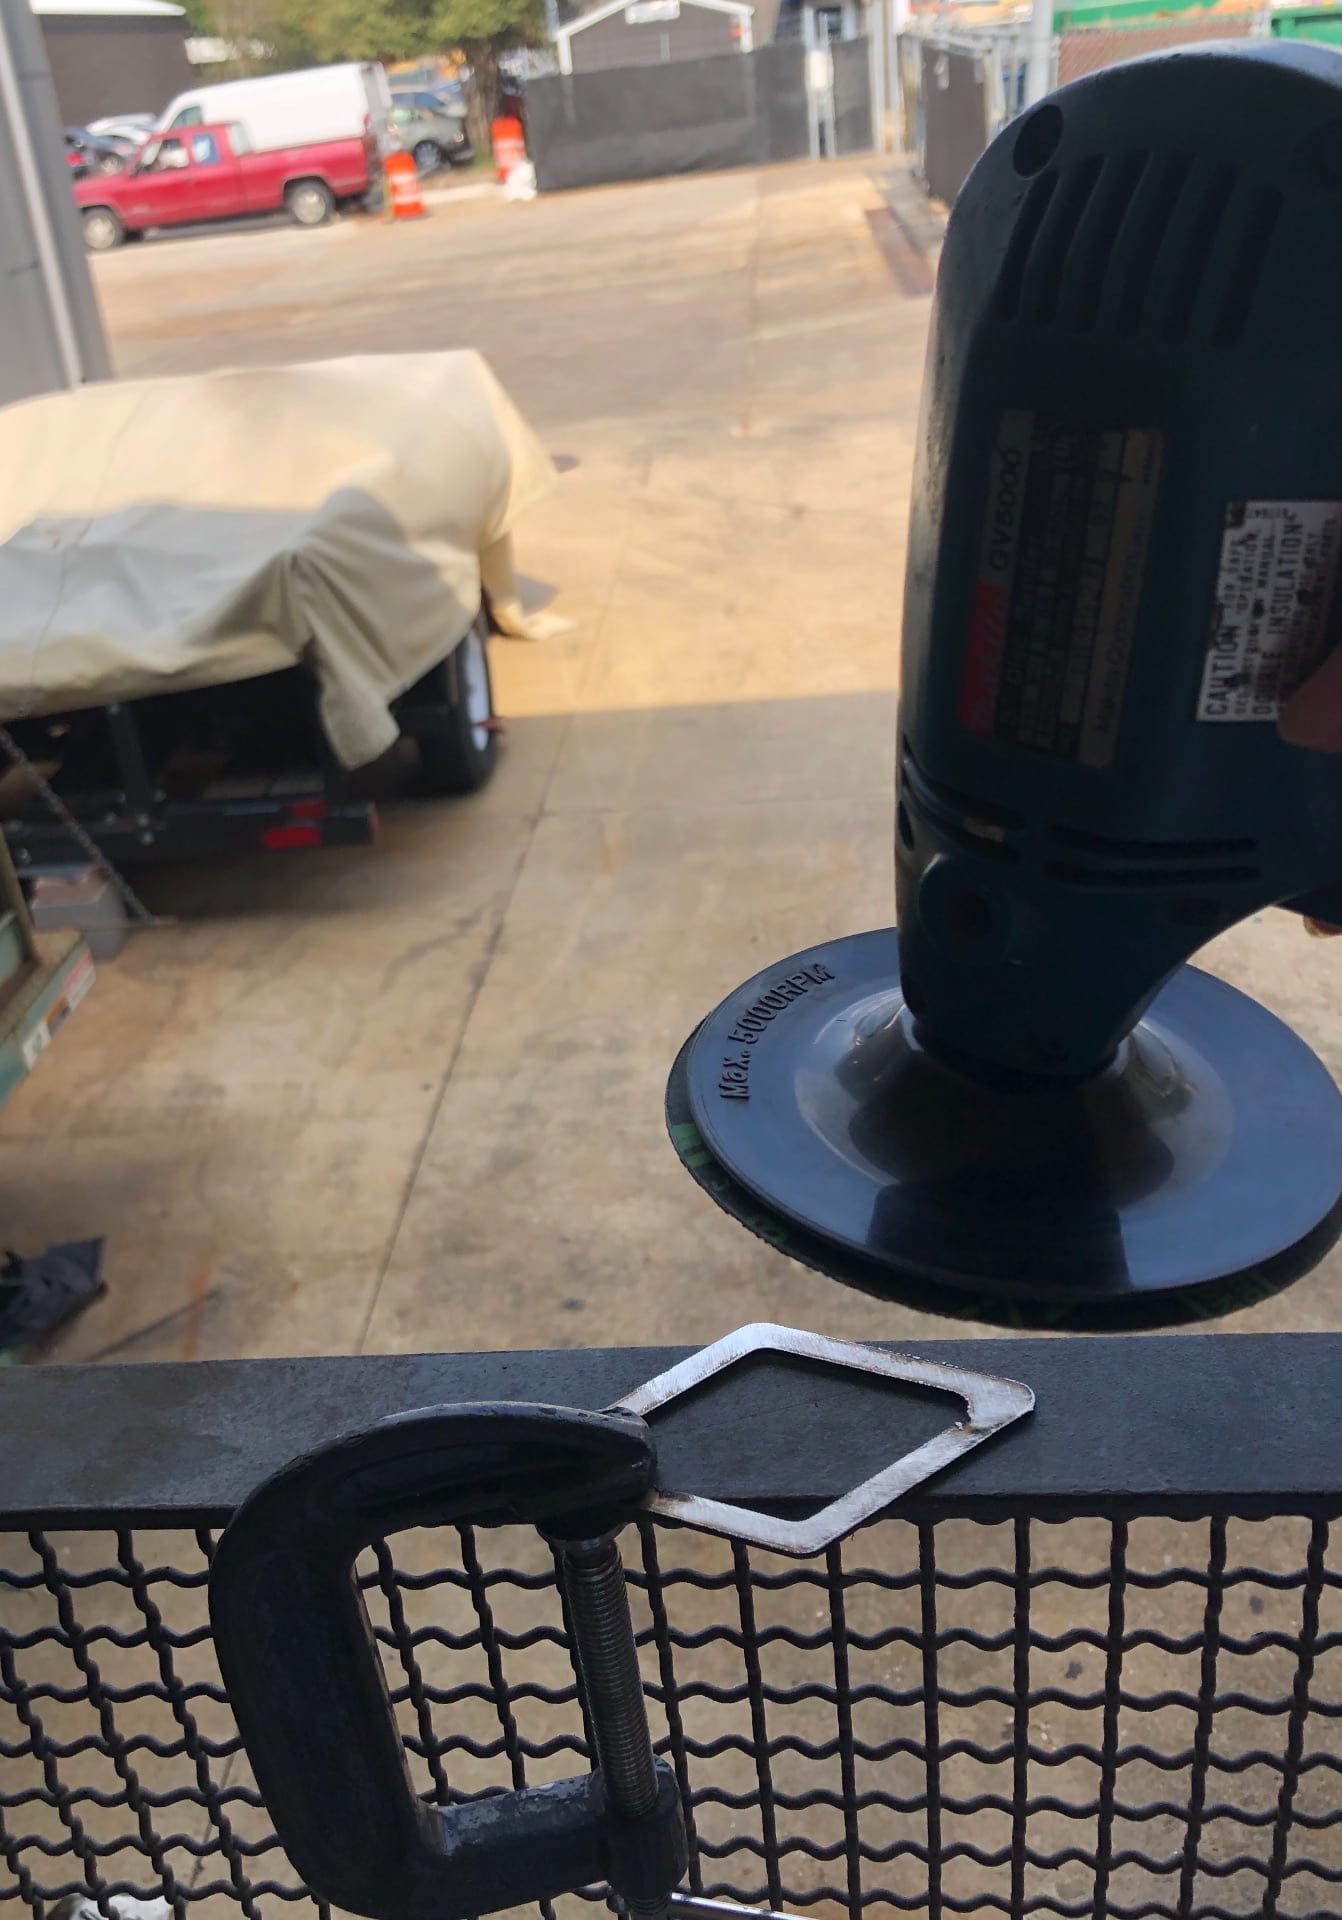
I then also used a metal file to file the edges so they were less rough and looked more clean.
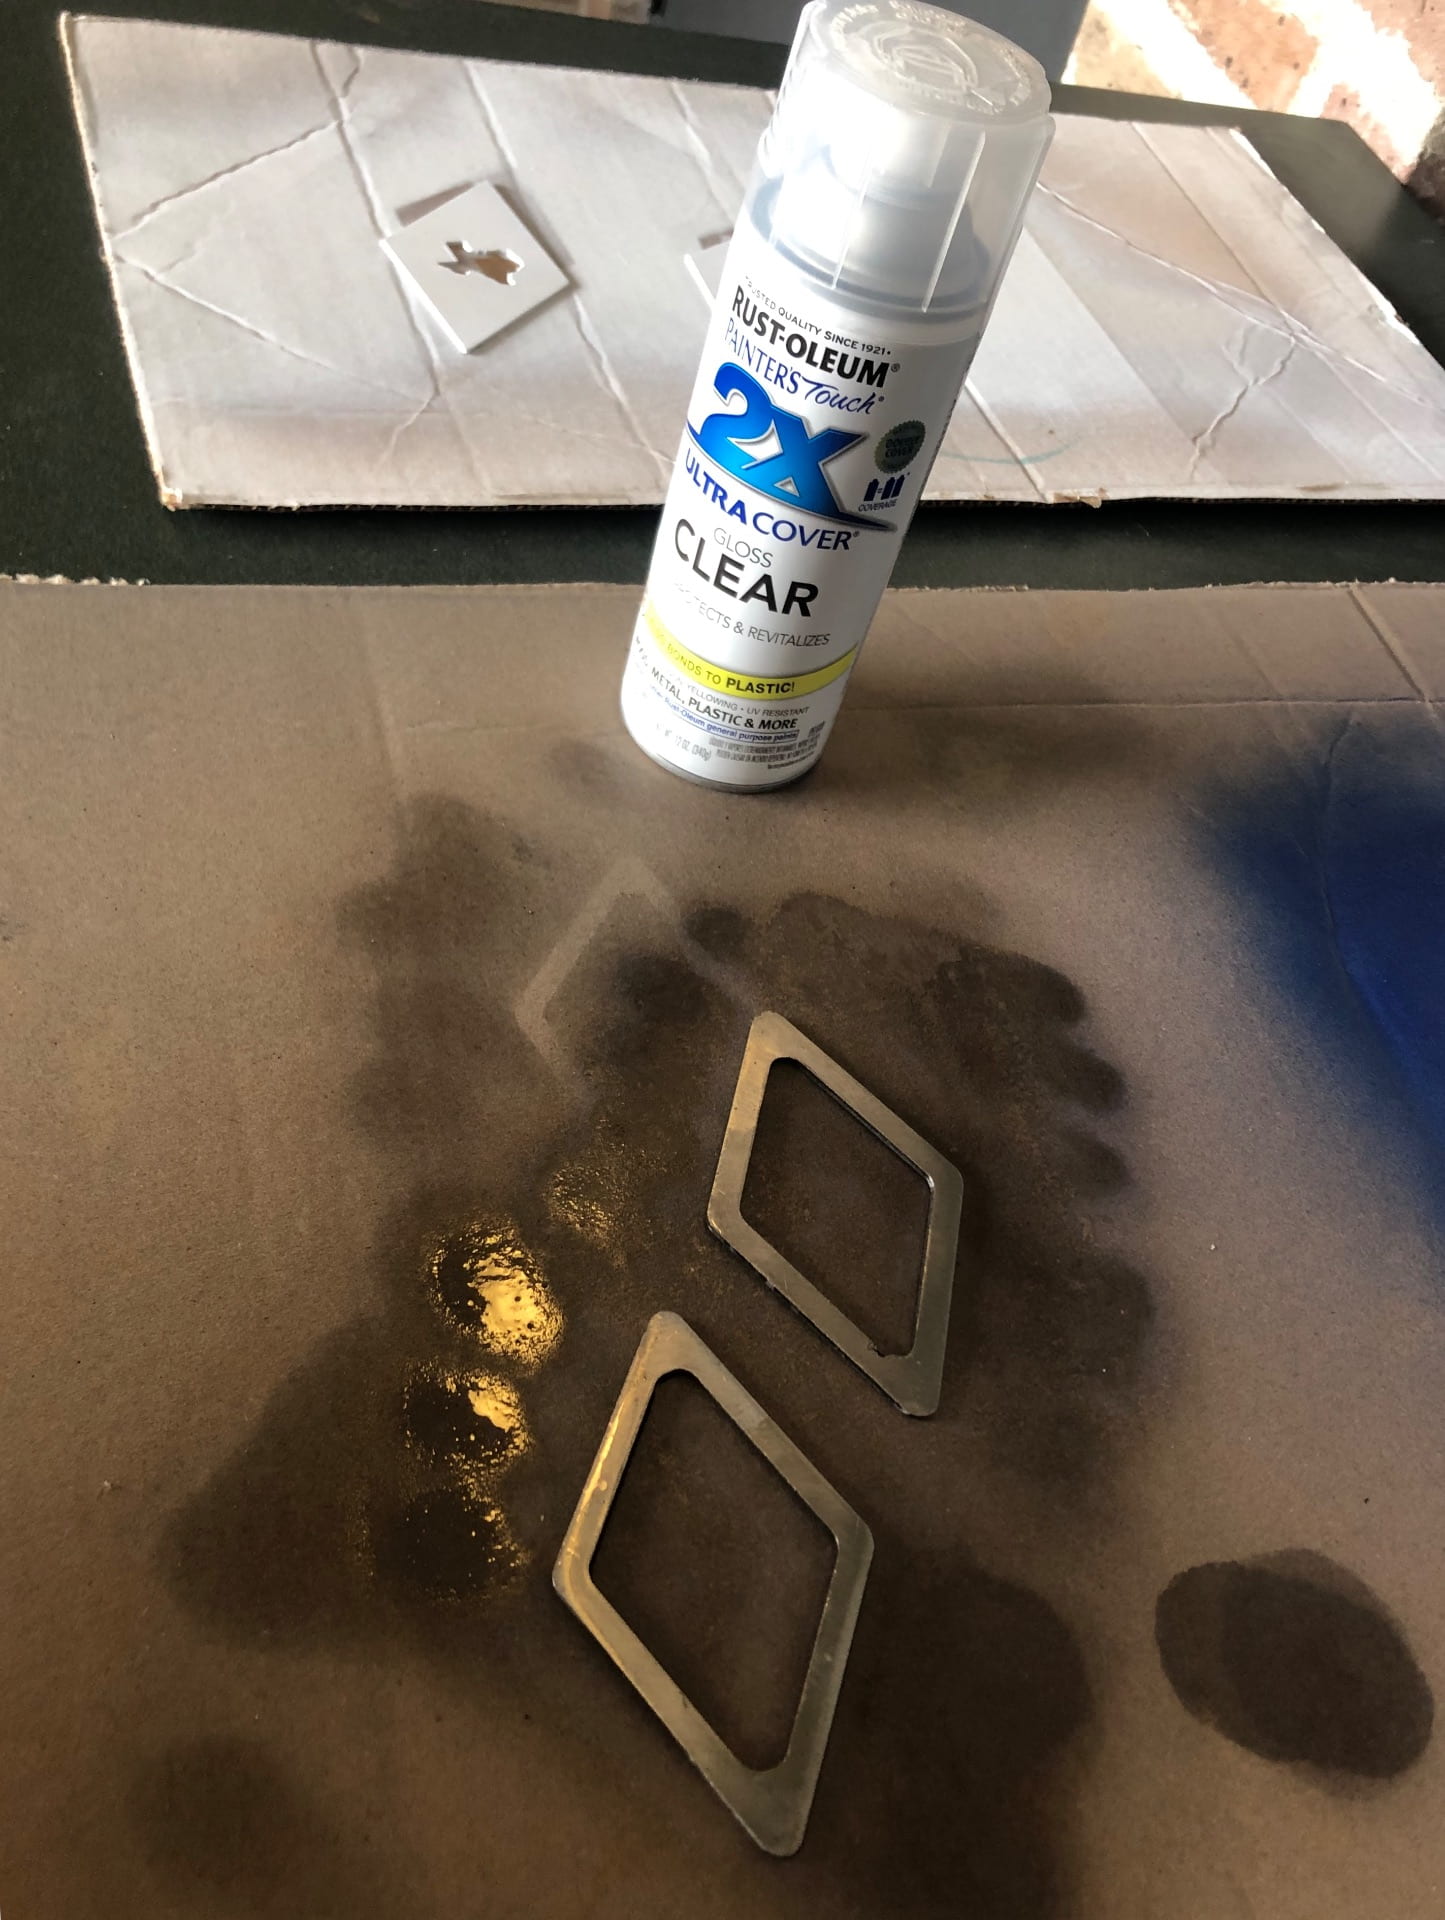
I sprayed a layer of clear gloss on both sides first to protect the metal and let dry for a day.
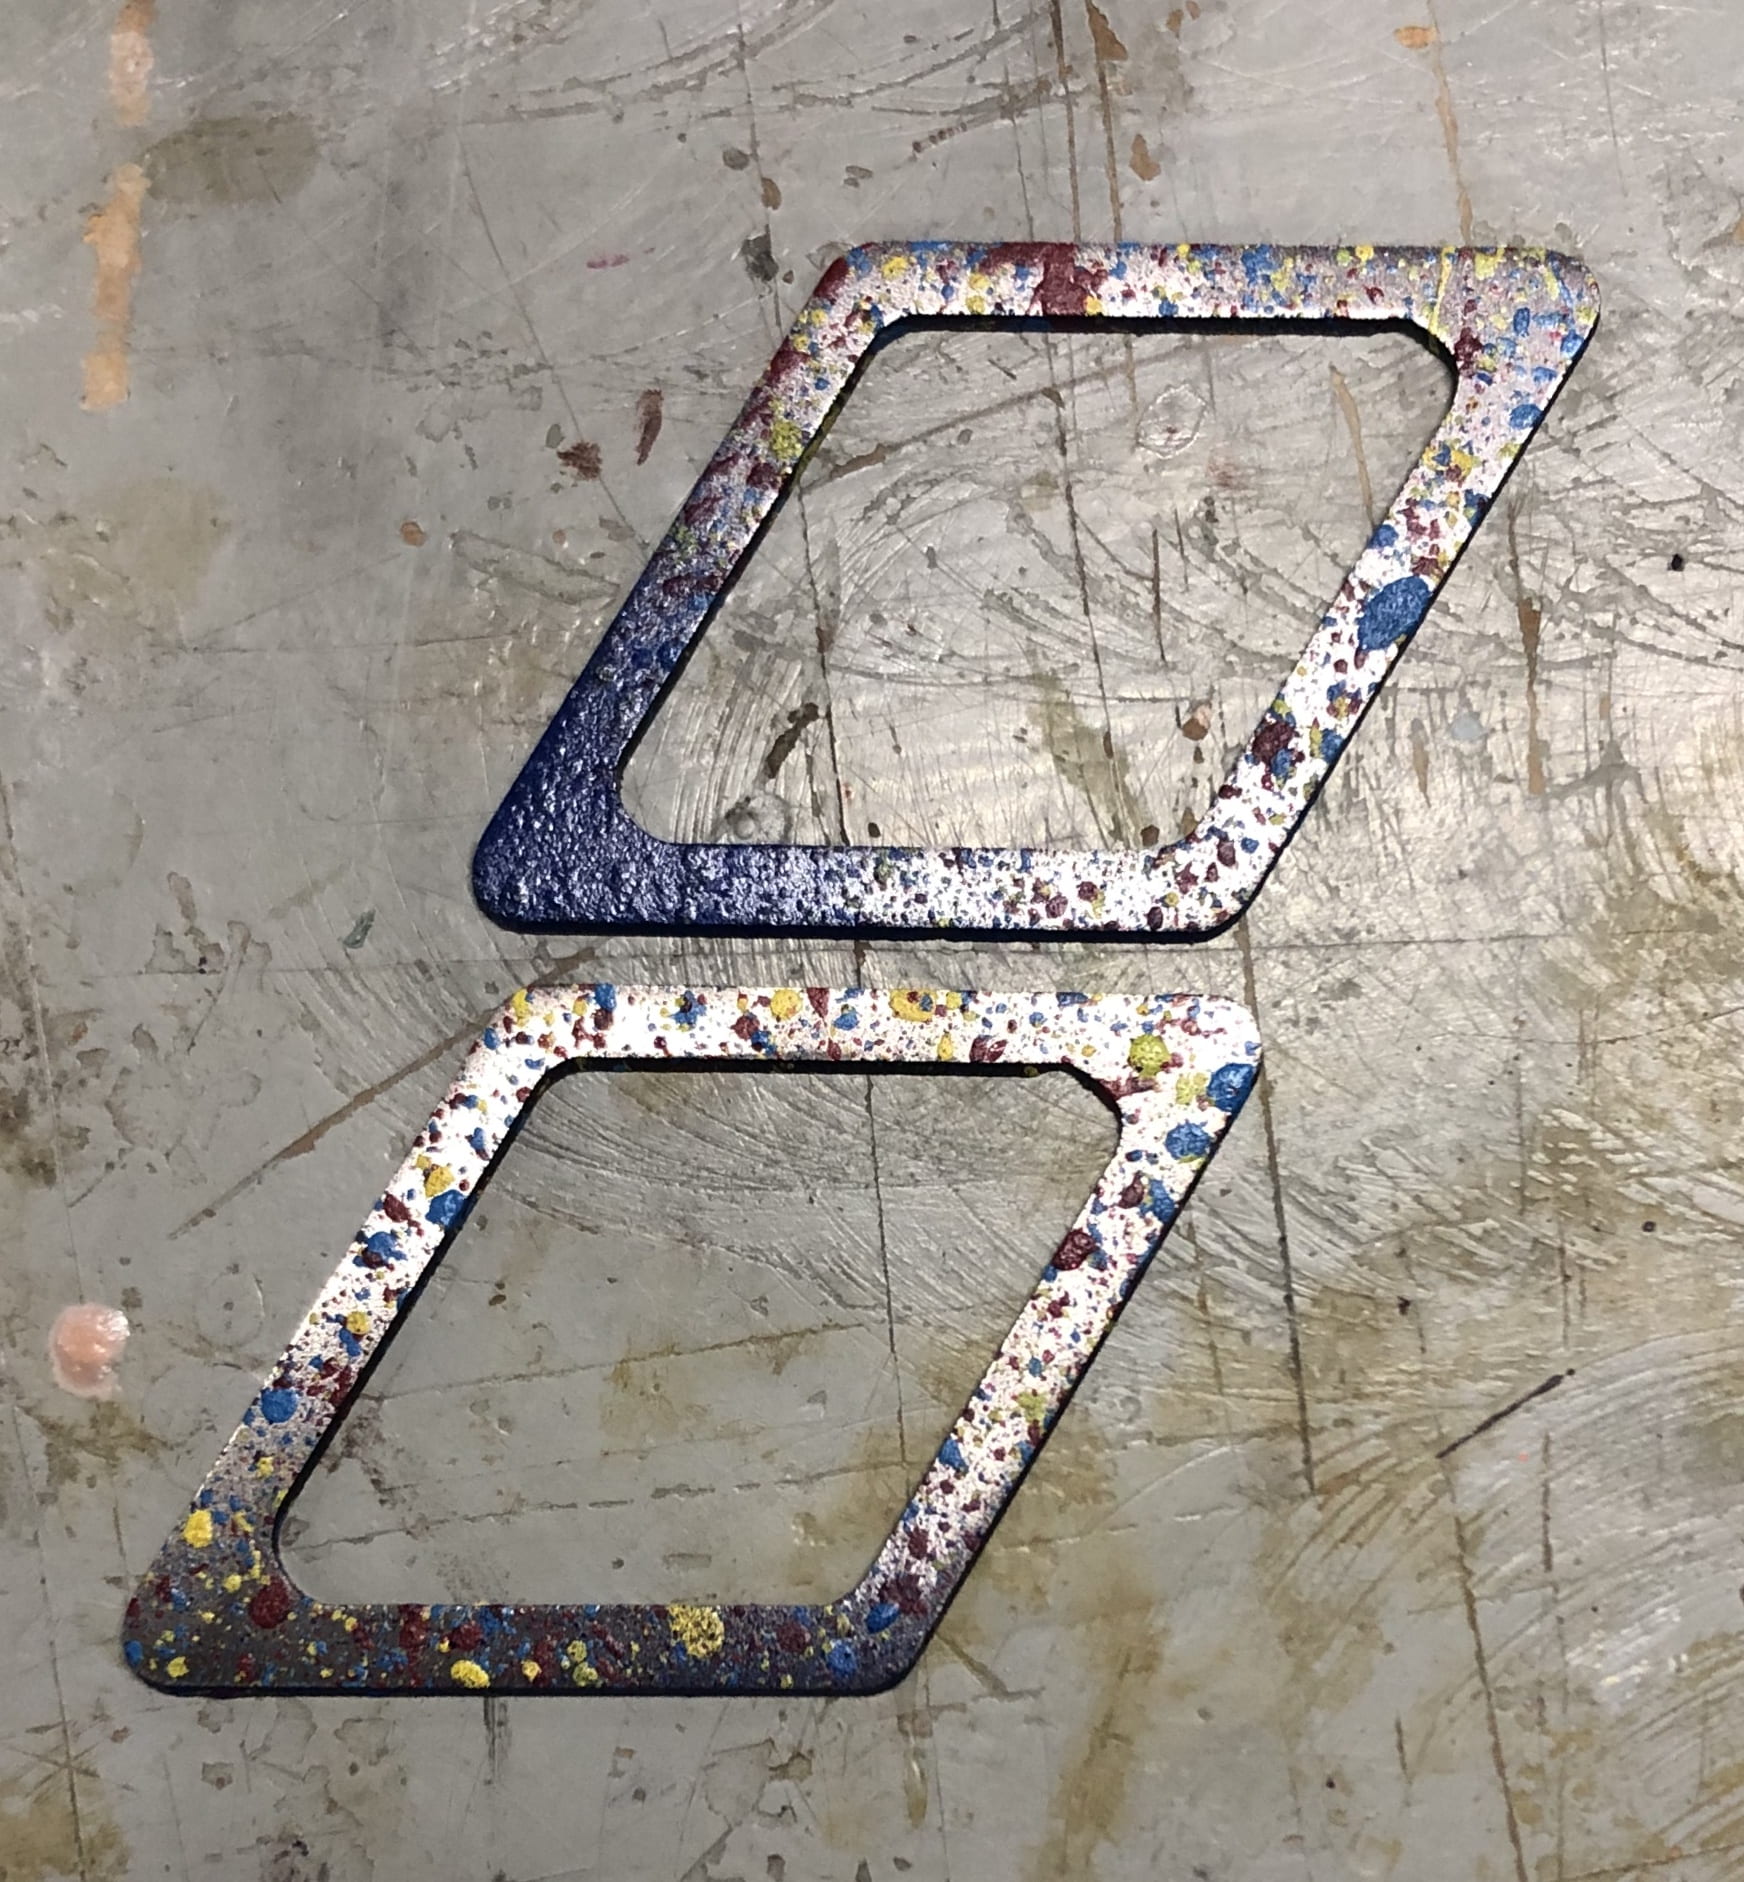
Since my diamond design was already simple, I wanted the paint to help it stand out. I used red, blue, and yellow acrylic paint and a brush to splatter paint all over the diamonds. I was worried at first that the paint wouldn’t stick to the metal and this design may just look like a complete mess, but it seemed to work out at the end!

I let the acrylic dry for 2 days (just to be safe), and during that time period, my diamonds were spray painted blue on accident by someone else ):
At the end, I sprayed another clear gloss layer just to seal everything in and protect the acrylic paint from coming off.
In the real world, one diamond would probably cost $10 (as an art piece?? it’s not really something functional), but to me, it would cost $50. I spent around 3 hours to create these two diamonds together ($10/hour), the materials (paint and metal) cost around $10, and the wear and tear of the plasma cutter is estimated to be $10.
