Brainstorm
Before actual prototyping. 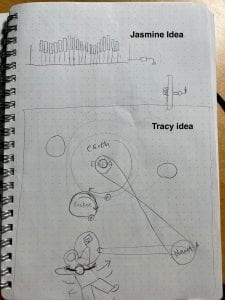 We spent a lot of time aligning our project vision and clarifying design requirements. Tracy was interested in creating planetary gear with the earth as the sun gear and a rocket as the planet gear driving around the earth. However, my idea was to create a purely mechanical model that resembles wave movements.
To align the project objective, we researched and analyzed the 2 different mechanisms’ creation requirements and workload by looking at other engineers’ work/models & applications in the industry.
As a result, we decided to combine our idea to create a purely mechanical model of the planetary gear system with 1 sun gear and 3 planet gears.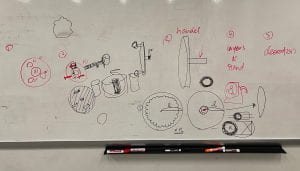
Prototyping Process
Low fidelity
We first laser-cut some cardboard to make a low-fidelity prototype to 1. help us understand the mechanism and 2. help us figure out the optimal parameter we should apply and the relationship between each component (size, gear ratio, teeth…). Once we saw that our idea could work, we decided to create a medium prototype to help us visualize our idea. 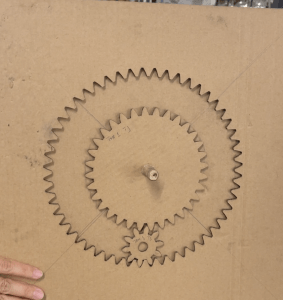
The goal for this step was to test assumptions using a more detailed featured cardboard model and use this to inform future creation processes. We were able to test and adjust the parameter at a very low cost, and it also allowed us to play around with more design ideas. Inspired by a YouTuber’s 3D printer model that turned the outer path gear into the driving gear, we decided to try using the 3 small planet gears to drive the sun gear.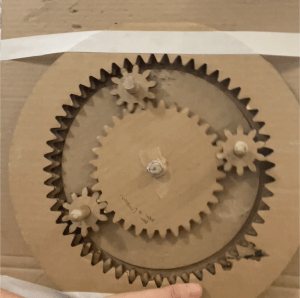
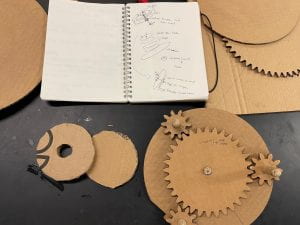
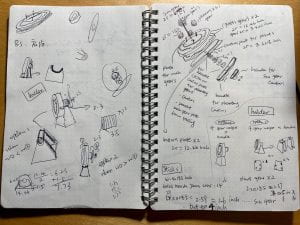
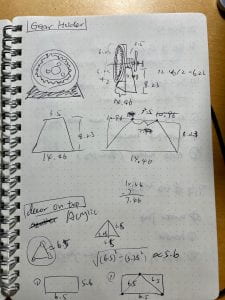
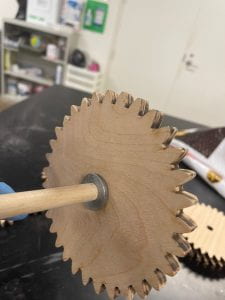
It was not easy to use planet gears to drive the sun gear. Despite the friction between teeth, we also identified several creation pain points that we need to be mindful of for future creation processes, such as gear ratio, the distance between each gear, the order of assembly, etc. In addition, we were able to clarify key elements/components & their design requirement, which helped us develop sketches to guide our next step.


(We realized that with this amount of teeth, we need to save time for constant sanding and adjusting, so we picked up the pace and moved on to the high-fidelity creation).
We cut out all pieces using the laser cutter and started to assemble the main body first. 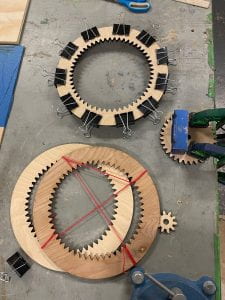 We glued components together as planned, but surprisingly find that it was not that easy. We cut out 4 layers of path gear to satisfy the thickness that we were looking for but it was really difficult to glue all gears together while making sure the teeth are aligned with each other. Since the wood glue was slippery and it will be nearly impossible to undo if we made mistake, so we worked together to use clamps and binder clips to glue pieces together. Besides making sure all teeth are aligned on all gears, we also spent a long time sanding them and repeatedly running small gears around the path gear to ensure teeth’ smoothness.
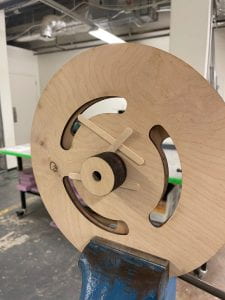
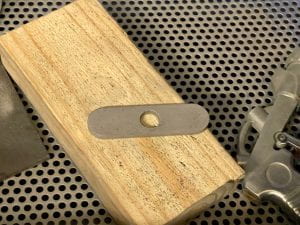
However, when we attached the handle components to the gear system (which directly controls sun gear movement) we found that there were some gaps between the handle and backboard, causing the sun gear to move around disturbing other motions. To solve this problem, we used a waterjet cutter to cut out a flat washer which helped fill the gaps and reduced the “wiggles” in sun gear. Then we finished assembling the main body.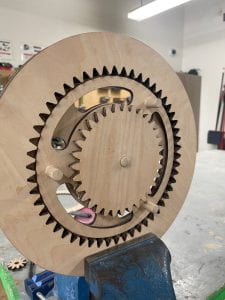
Besides the metal washer we cut out using the waterjet, our other metal components are the metal washers we attached to each gear to reduce friction and the metal handle that we cut out using the waterjet.
Next, we attached the main body with supporting materials and tested the entire model movement to ensure all gears moved as planned. And for fun, we vectored some patterns on the backboard as well~ 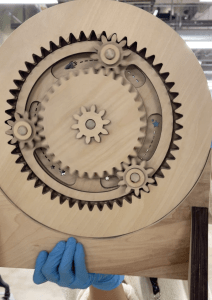
Lastly, we applied bee wax & super glue to protect the wood and further smoothen the gear motion.
And here’s the final result: (click here for slide)
Reflection
It was such a fun project! To be honest, did not expect it would be this challenging but overall it was really rewarding. There are definitely places that we could improve on, such as how the sun gear is still not completely in space, so it might interrupt the planet’s gears’ motion causing them to move out of path sometimes.
Cost Analysis
Materials:
Wood: $2.75 * 5 = $13.75
Steel Flat Plate: $47.63 * 1/20 = $2.38
Zinc Flat Washer: $16¢ * 5 = ~$1
Wood polish: $9.98 * 1/2 = ~$5
Labor:
Design and file preparation: 3 hours
laser and waterjet cutting: 4 hours
Research, Design & Assembly: 50 hours
post-processing (sanding, and coating): 8 hours
65 hours * $15 (Rice minimum wage per hour) = $975
TOTAL COST: $13.75 + $2.38 + $1 + $5 + $975= $997.13
