This week’s project was to use the CNC machine. At first I wanted to do the beginner level and just engrave a pretty shape onto the piece of wood, so I looked through The Noun Project and found a butterfly.
I was working on this homework over the hour that the CNC machine was working on our final project, so I had some extra time. I first prepared the file in Carbide and exported it as a G-code, then was playing around with it to kill time.
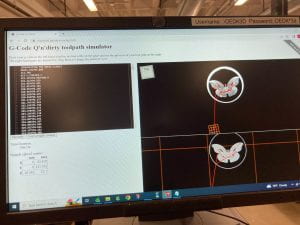
Me playing with the butterfly cut and checking the path with the G-code simulator.
However, then as I was glancing through Noun Project I found a Jigglypuff noun, which would stay consistent with the Pokemon theme. So I tried cleaning it in Adobe Illustrator and imported into Carbide. Since I had extra time, I also added layers.
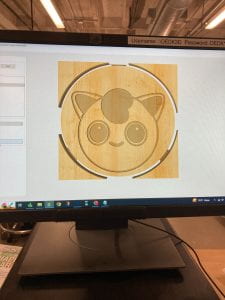
The Jigglypuff cut simulation.
Then I realized that I could instead make a Cherrim, which is my favorite Pokemon, by converting a png into a svg on this png-svg convertor online.

A photo of cherrim.
Then I did the same thing creating different layer depths depending on the color.
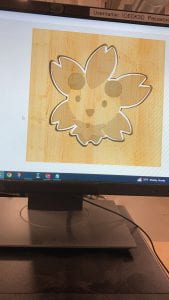
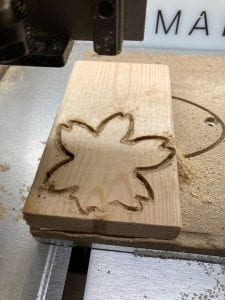
First time trying to create the layers of the Cherrim. This already looks very good and I was satisfied at the time.
Since I still had extra time waiting for the CNC to cut, I really wanted to make the eye look more realistic (since the eye is a really important part), so I drew two small circle in Carbide where the eyes are and tried to adjust the engraving of the eye. After a few tries, I was satisfied with how the eye turned out.
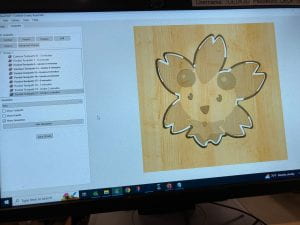
The cut I used on my first trial. This is very similar to the last cut except I got rid of the two dots on the two cherries on its head. Details are mentioned later.
I also added 2 dots on the cherry to add some 3D texture to the cherries (as seen in photo above), but then I realized that only looks good in the simulation, but that doesn’t resemble what the cut looks like realistically. In the actual cut out, the two dots were just very weird so I got rid of them.

The first print I did happened to have a black eye, which is honestly a very funny accident. The piece of wood was also just not great, so I made some small adjustments (got rid of the dots on the cherries) and redid it on 2 better pieces of wood.
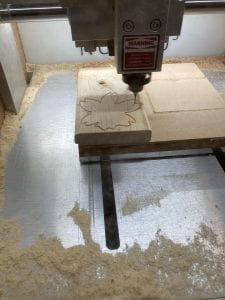
The final cut out in action.
I had some issues as I was trying cut them out. The mill started smoking and the whole chamber was filled with smoke. The lab technicians also didn’t know what was going on, so I went on and tried restarting the machine and computer, which fixed the issue. But there are still some burn marks on one of the final products. I suspect it might be a specific setting the previous user changed that might’ve caused the issue.
I then had to really sand down the wood especially near the edges. I first filed off the extra bits near the edge (I wanted the thin wall near the edges because it looked good in the simulation, but it didn’t turn out great and it’s also too fragile, so I filed them of), then sanded down with 200 grain sandpaper.
The comparison between sanded and non-sanded
As a finish, I sprayed it with a clear coating.
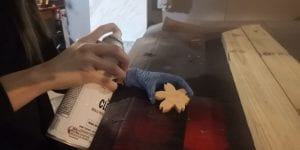
Spraying it with a clear coat
The two holes where the cherries are supposed to be was very bothering me, so I decided to glue small pom-pom as the cherry. I looked through the low-fidelity carts to find different pom-pom.
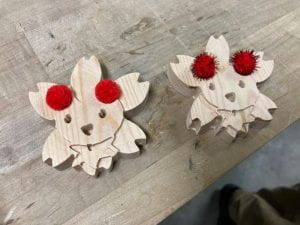
Comparing the different pom-pom. I settled with the ones on the left because the ones on the right looks like it has thorns.
I couldn’t decide between pink and red, so at the end I made one of each (since the actual color is right in between the two colors). I labelled them and left them on the table.
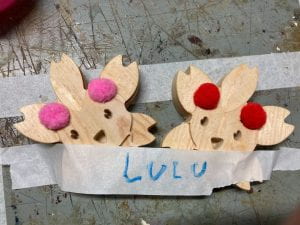
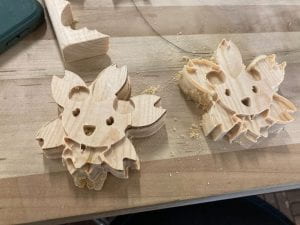
The final products.
Cost Estimation
Wood:
2 pieces * $2=$4
Clear paint & pom-pom: Negligible
Labor: 4hr*$7.25/hr=$29
Sum: $33
