INTRODUCTION TO OUR PROJECT
For our BIOE 555 midterm project, we were tasked with creating a mechanical model that demonstrated a mechanism from the 507 Mechanical Movements. Sydney and I browsed through Pinterest and YouTube for inspiration and came across examples of a kinematic wave sculpture. We were drawn by the illusion of a wave created from a simple gear motion, specifically mechanism #24 from the 507 movements. This simple structure ended up being very labor-intensive, but we overcame design challenges to create the desired wave effect. This project brought together the prototyping skills we’d acquired in the course so far, and we used many of the OEDK tools at our disposal.

Inspiration for our project
PUTTING OUR IDEAS ON PAPER
The first step was to sketch 2D drawings of the different sculpture components in Adobe Illustrator. The main components of our wave are the planks, the spacers in between the planks, the cams with an offset/rotated cross-axis, and the large and small boxes enclosing the cams to keep them in place.
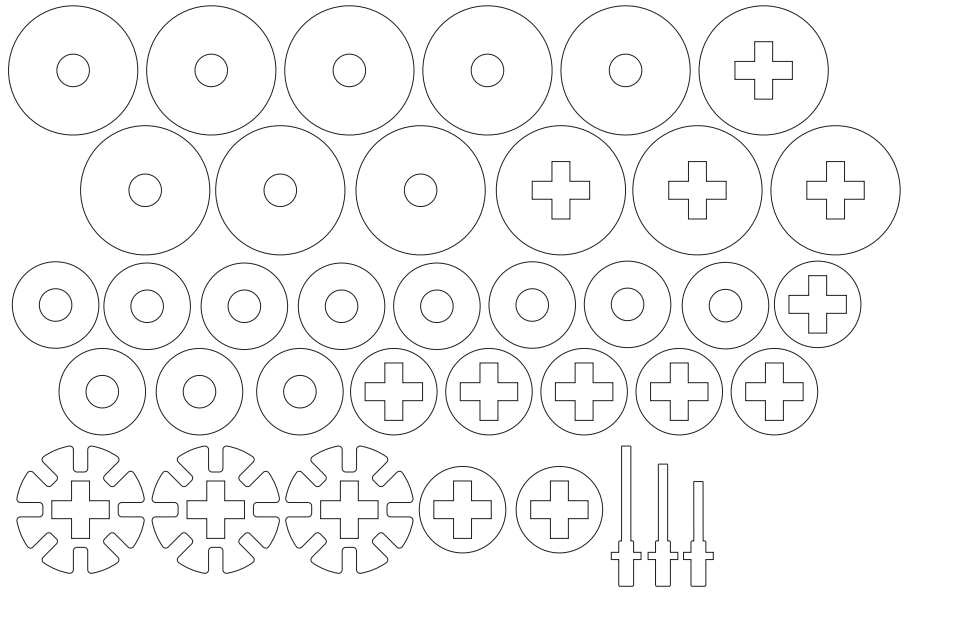
Spacers for the round and plus-shaped rods, along with drafts of how we could attach fish to spacers.

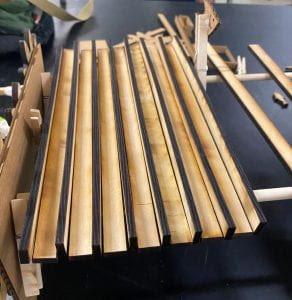
Planks, large and small boxes. Ideally, we would have used the engraved lines on the plank to place our big and small boxes, but we miscalculated the distance and did not end up using these guides.
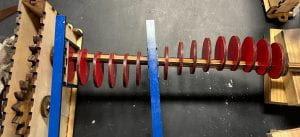
Cams with axis offset. A plus-shaped dowel was used to accurately offset the cams to create a uniform wave illusion.

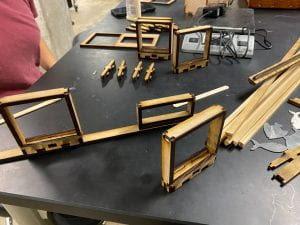
Gearbox supporting rods and storing gears. Made in en.makerspace.com with the side plank feet added.
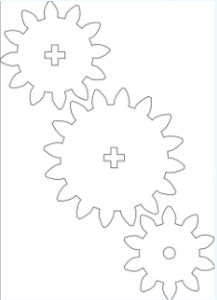
Three gears driving the wave motion made using gear generator software
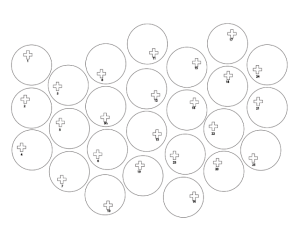
We made 17 total planks, enough for a full wave to form with one rotation. The planks are suspended on two rods, one with a cross shape and the other with a circle shape. In order to make the sculpture move, we designed a helm-shaped crank and 3 gears that would make our rods move in the same direction at the same time.
LOW-FIDELITY PROTOTYPE

Cardboard planks and cams
Cardboard gears
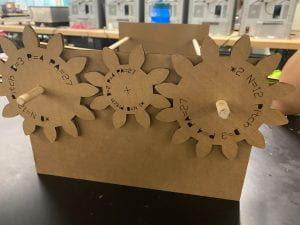
From our low-fidelity cardboard prototype, we learned that it would be important to add spacers in between the planks and on the sides of the gears to achieve a smooth motion. Since it’s crucial that the gears make contact, we also decided to make them thicker by gluing two of each gear together. As we turned the rods on this prototype, we also realized we’d have to glue the cams onto the rod, or else they’d slip and move in uniform motion as opposed to a wave motion
MEDIUM-FIDELITY PROTOTYPE
From our medium-fidelity prototype, we realized we’d have to reduce the number of planks from 25 to 18 since our rods were not long enough to support all 25 in addition to the spacers in between. We also found that we’d have to replace the rod holding the cams from a circle to a cross-shaped cross-section. The reason for the cross rod was to have more precise axis rotations in the cams, a precision that we wouldn’t have if we tried to glue them onto a circular rod.
HIGH-FIDELITY PROTOTYPE
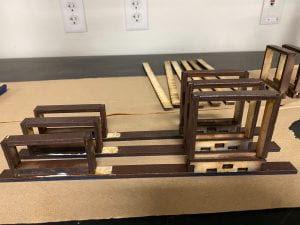
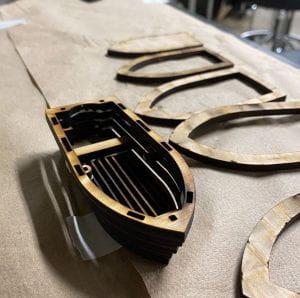
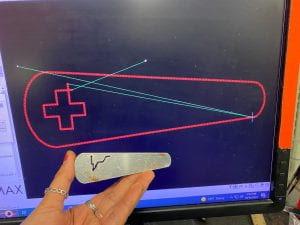
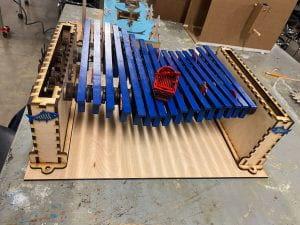
From our high-fidelity, we found that the spacing between the large and small boxes on our planks was too short, which did not allow for the cams to complete a full rotation on the dowel. This was an important finding, but it meant we would have to redo and repaint all of our planks. In the image to the left, you can see that we had to shift the small boxes away by about 1 cm. After this modification, the cams completed full rotations and produced the wave motion we wanted.
FABRICATION METHODS USED
Laser Cutting
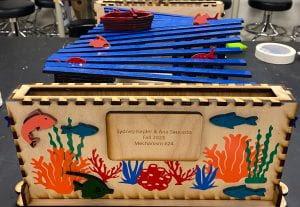
The functional components for our wave sculpture were laser-cut from wood and spray-painted. These include the gears, cams, planks, large and small boxes, spacers, gearboxes, and cross rod. Another important piece we laser-cut was our nameplate. We laser-cut our boat from wood and spray-painted that, as well.
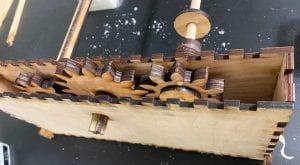
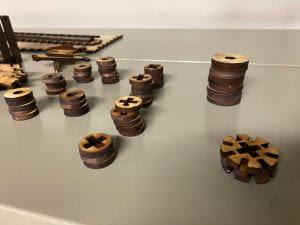
We ended up not using the plus-shaped spacers shown above. The big box attached to each plank that slid over the cam during rotation was smaller than anticipated. This meant that at the lowest point of cam rotation, the big box on the plank shown above was almost touching the plus-shaped dowel. If we had put any spacers in between the cams on the plus-sized dowel, the big box guiding the cams would hit the spacer, preventing a full rotation. While we initially planned not to use any glue around the dowels and instead hold everything in place by filling the dowel with spacers, we had to glue each cam in place so it would not slide along the dowel, and not use any spacers in between.
Waterjet Cutting and Post-Processing
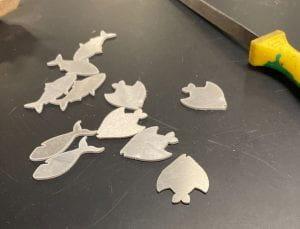
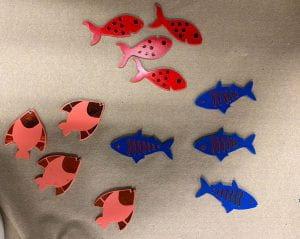
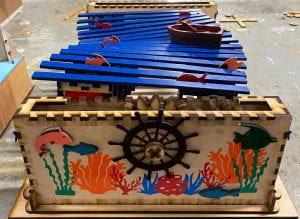
Two aesthetic components of our sculpture are some fish and the helm, which we made by waterjet cutting aluminum, sandblasting, and spray-painting.

When trying out different handles/cranks to move our wave, we ran into some challenges in getting the cross-shaped hole. After a few tries, we changed the cut path to cut the cross first and then the rest of the crank. Ultimately, we chose to make a crank shaped like a helm for aesthetic purposes.
Vinyl Cutting
In order to give our project a more cohesive, finished look, we decided to use the vinyl cutter to create sticker details. We used Adobe Illustrator to create markings for the fish that would go on the planks, as well as for coral reefs we placed on the gearboxes.

CONCLUSION
This project was incredibly time and labor-intensive. We ran into some design challenges along the way but made significant progress with each iteration. In retrospect, we should’ve tested the distance between the boxes on the planks earlier, and we could’ve cut extra pieces to assemble modified versions of the planks and test them faster. Additionally, we really wanted the metal fish to rotate with the rods for a “jumping out of the water” effect, but this would’ve required us to figure out how to attach them a lot earlier in the process. We could’ve made the helm a bit bigger and thicker to make it easier for users to grab and turn, but unfortunately, we did not allocate enough time to modifying it. Overall, we are very proud of our final product and the smooth motion of the wave. We were initially concerned that using a cross rod would make the motion rigid, but Sydney came up with the idea to coat it with candle wax and this really made a difference. By attaching a floor “base” at the very end, we were able to add more stability to our project and make it easier to transport.
If you get a chance to play with our project, we hope you appreciate our boat, rowing gently down the stream, merrily, merrily, merrily, merrily, because life is but a dream.

“Life is but a Dream” Demo Video
Cost Analysis:
|
Cost Type |
Item |
Price |
Source |
Quantity |
Total |
|
Materials |
Wood Plank |
$20.99/12 sheets |
1 order |
$10.99 (6 sheets) |
|
|
Aluminum sheet |
$5.99/2 sheets |
1 order |
$5.99 |
||
|
Vinyl |
$8.99/roll |
1 |
$8.99 |
||
|
Wood glue |
$9.99 |
1 |
$9.99 |
||
|
Spray paint |
$6.04/bottle |
2 |
$12.08 |
||
|
Labor & Design |
Design Engineer |
$26/hour |
20 hours x 2 people |
$1,040 |
|
|
Overhead |
Laser Cutter |
$0.82/hour |
8 hours |
$6.56 |
|
|
Water Jet Cutter |
$19.86/hour |
4 hour |
$79.44 |
||
|
Waste |
Wood |
~15% of total cut wood |
$1.65 |
||
|
Metal |
~15% of total cut metal |
$0.90 |
The total for our kinematic wave sculpture comes out to $1,176.59.
