Design
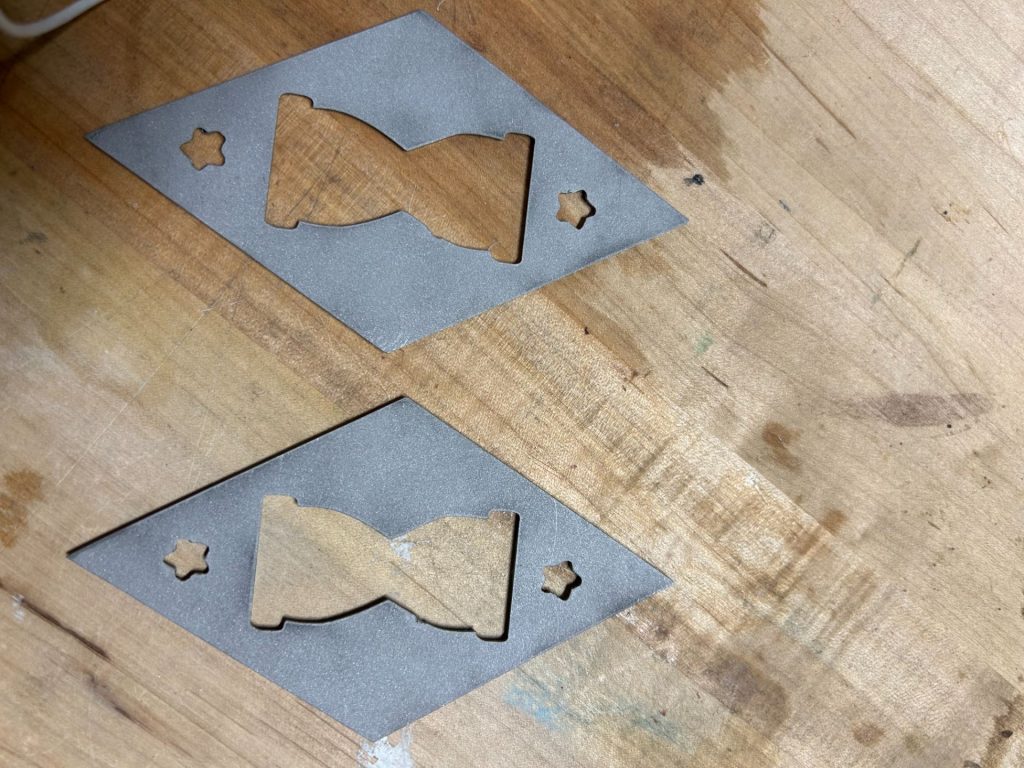
There are 2 versions of design to my project. Initially, I had a hourglass pattern with hollowed out inner geometry. The middle pieces of the hourglass are connected to the diamond through the thin strip of metal running across the “waist” of the hourglass.
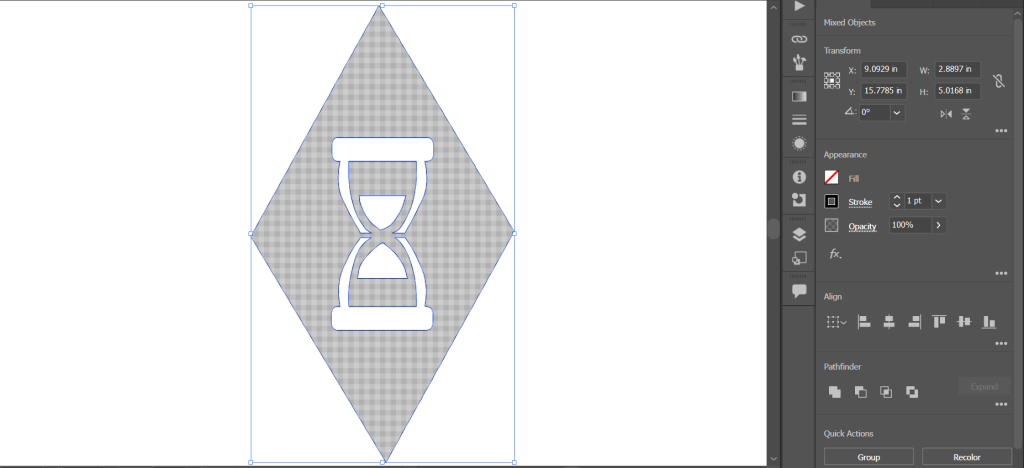
The original design in Illustrator
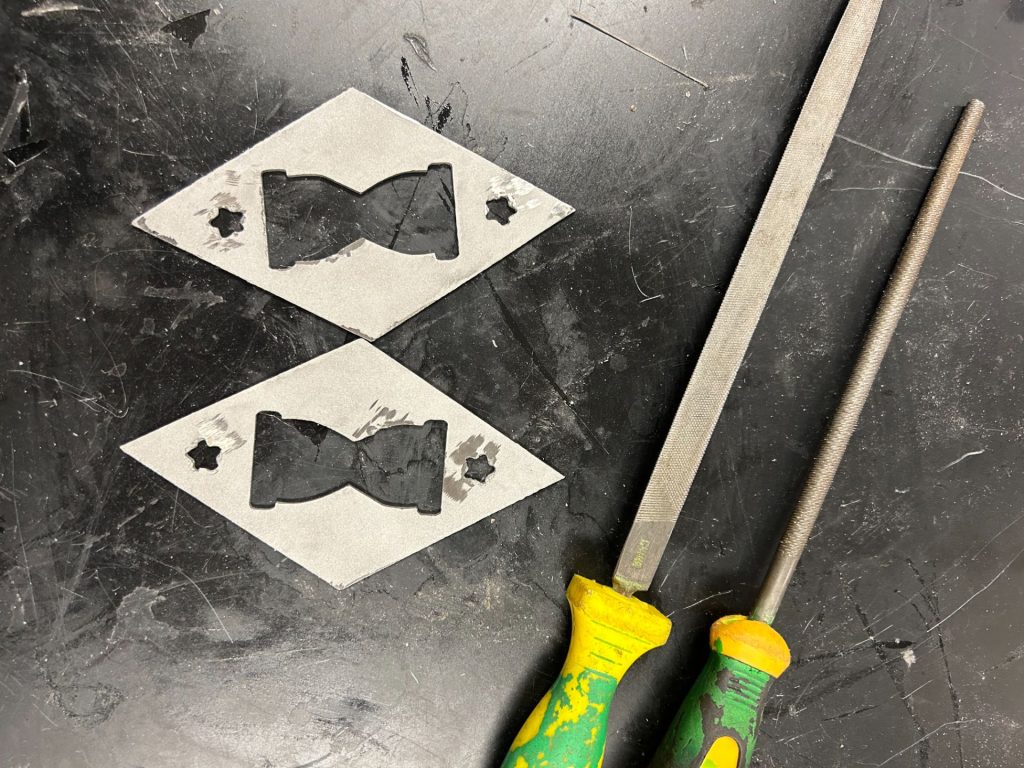
Unfortunately, the details within the hourglass is too small for the plasma cutter. When implemented, the plasma blows away most of the inner details of the design. Some portion of the hourglass was also not properly cut out. 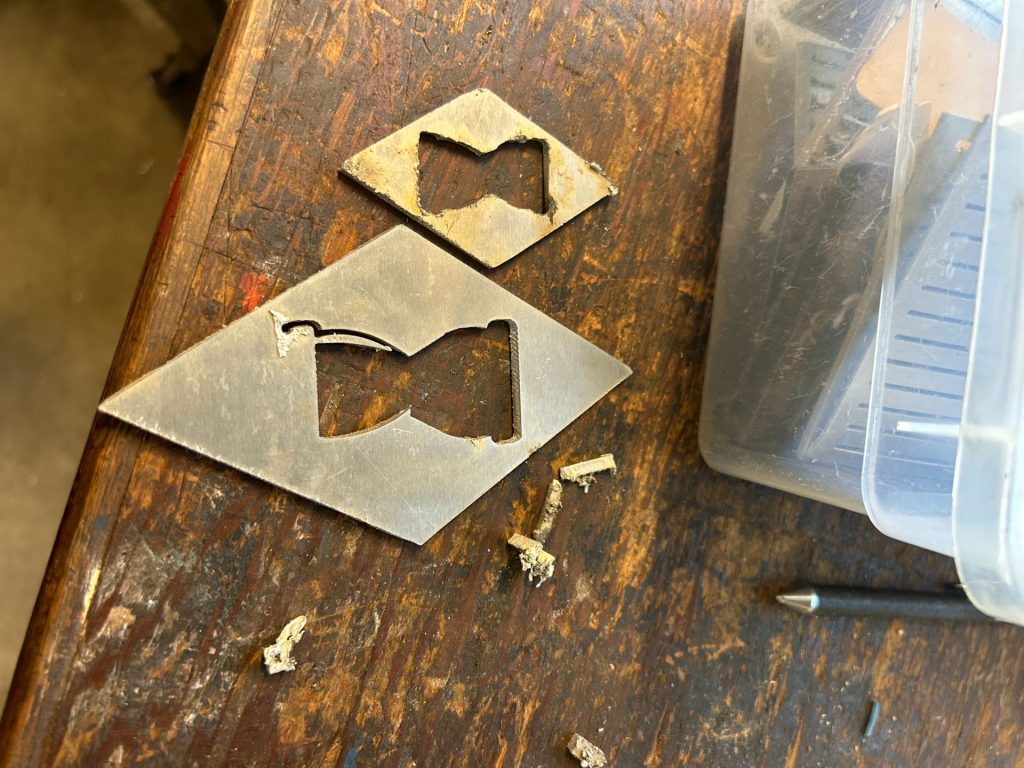
Failed attemptsTherefore, I went back to the Illustrator to revise the design and get rid of the inner details. This ended up being my final version of design.

Revised design in Illustrator
Plasma Cutting
There were many issues arise when operating the plasma cutter. The cutting itself was straight forward and swift, taking less than a minute for each piece. It was the file preparation and cutting software where most problems occurred. There were three main types of problems that happened to me: unintended scaling up of the object, strange cutting path, and curve size warning.
The scaling up problem took me the most time to trouble shoot. The issue is when importing the DXF illustrator file into the Torchmate CADlite Software, the shapes goes from the normal dimension (~2’*5′) to a extreme large scale (~200’*500′). The origin also becomes a very large negative number (ex. -60, -823). It’s not an obvious error unless you examine the shape properties before exporting the file. Once in the Torchmate Driver Software, it’s not possible to make any changes to the coordinates and dimensions. The faulty scaling cause the cutter head to try to move beyond its indented range of operation and hitting the surrounding walls. For me, I never truly resolved issue. The failure disappeared for my second version without my intervention. All my modification was done to the same AI file so it’s unknown as to what cause this problem in the first place. There is one quick fix to the problem I saw working for other people. When importing file to the Driver Software, manually alter the scale in the appeared dialogue window.
The second issue was the strange path generate by the Torchmate Software. My design is intended to be one continuous shape so I choose male cut for everything. However, the generated path initiates from both the outside and inside of the shape. Upon a closer inspection of the original illustrator file, it was found that there are partial duplications on some of the lines and improper grouping. Clearing them fixed the improper path trajectory. However there was still a small glitch when cutting process. Part of the hourglass and the bottom half of the diamond got cut twice. It was fortunate that this occurs after the cutter ran through every line once already, so I simply pause the process immediately when the cutter head is moving to do the redundant cuts. I double checked my Illustrator file afterwards and found no duplication/ overlapping lines so it remains unclear as to why the program commanded the repeated cuts.
The last error is when setting the lead-in cut, the program gave me a warning of some of the shapes are too small for the arc value set. The arc was set at 0.2 according to the manual, I reduced it to 0.12 and the error message goes away. This is triggered probably because of my star patterns’ tight inner corners.
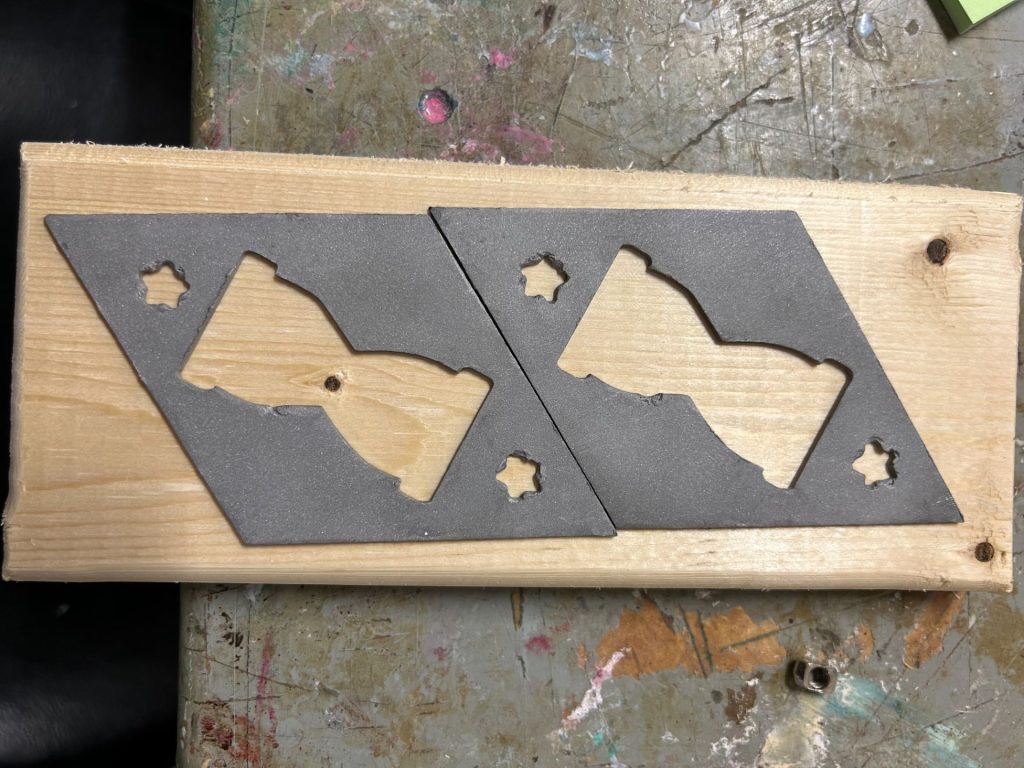
The final product retained most of the details of the design. The stars’ 5 corners are more rounded probably due to their small size, the setting and physical limitation of the machine.
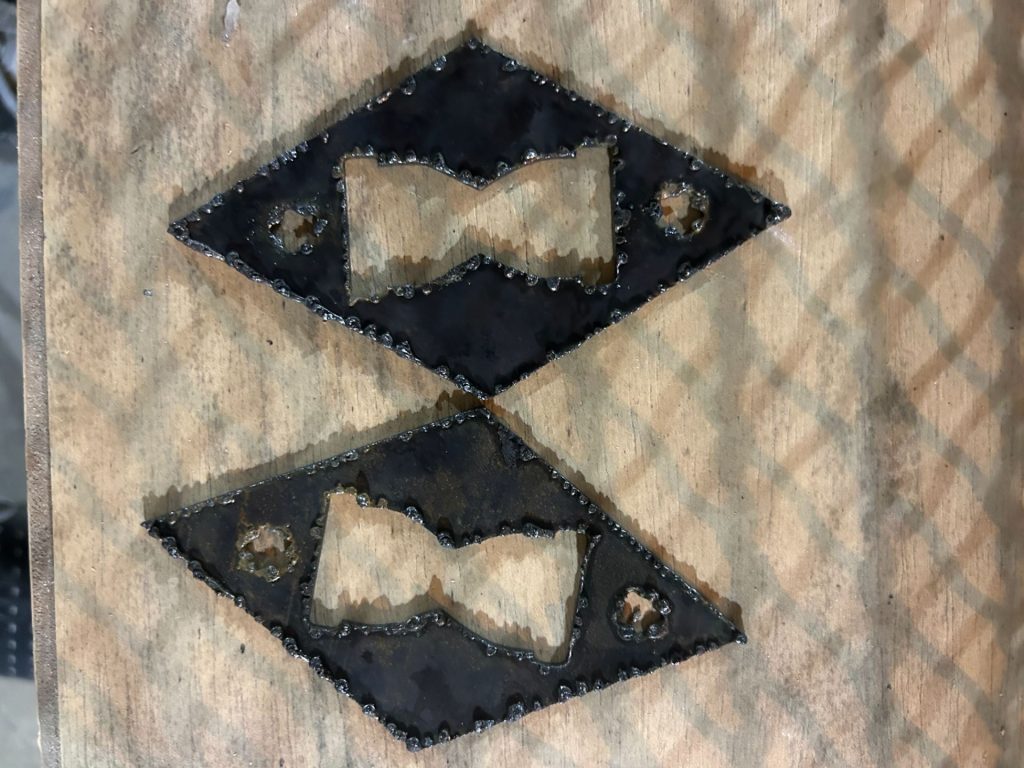
Plasma cut shapes before post-processing
Post Processing
I did 4 types of post-processing: angle grinding, filing, sand blasting, and spray painting.
Perhaps because of the geometry of the shape or the doubling cut of the plasmid cutter, there seems to be abundant amount of dross on the back side of my product. I spend a lot of time grinding down some of the larger pieces on the edges. In fact, I went back to angle grind a second round after sandblasting as this process highlights what defects are present on the surface.
Back side of the shape after 1 round of angle grinding and sand blasting
Front side of the shape after 1 round of angle grinding and sand blasting
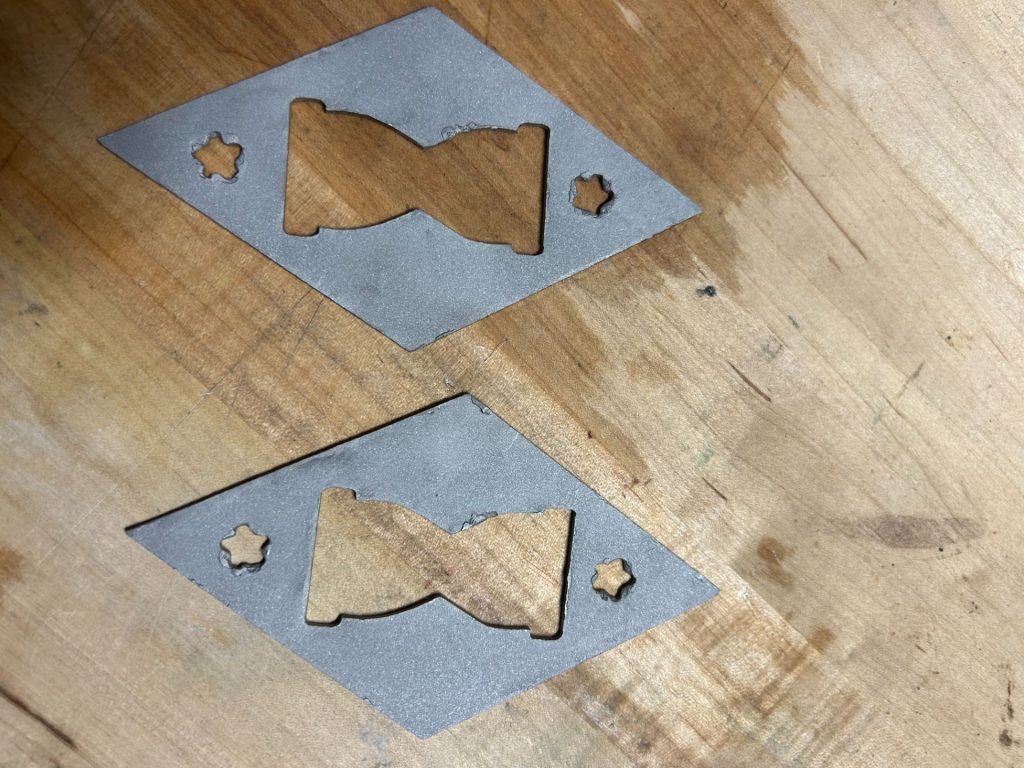
Shape after second round of angle grinding and the files used to file town the inner corners
The second round of angle grinding took off most of the dross that was missed during the first round. The unfortunate side effect is the star shapes was slightly compromised during the process. The dross was all cluttered together due to the small size of the stars, during the process of removing them, the blade nicked some of the inner corners of the shape caused small dents.
Back side of the shape after second round of sand blasting
The shapes were taken out to the loading dock to be spray painted. The paints adhere to the surface well. The most notable defect is on one of the shape there were some small bubbles in one area. This is most likely cause by some dust on the surface that wasn’t cleared off when spray painted. If I were to do this again I would hang my products and wipe the surface before spray painting to get a more even and smooth finishing.
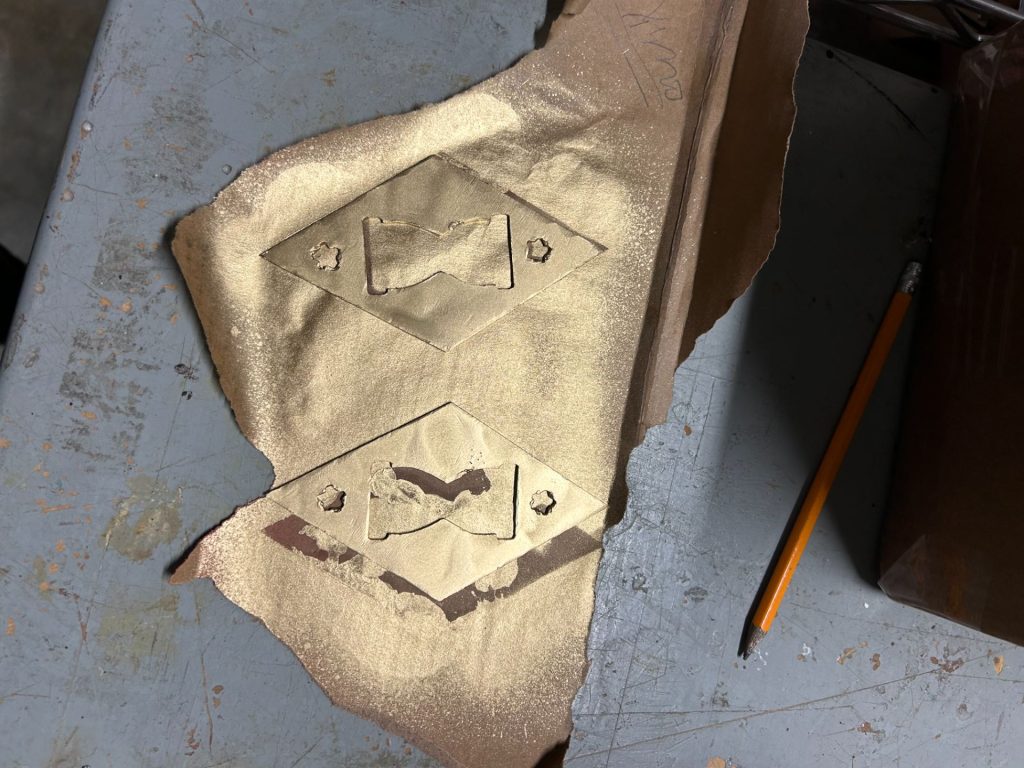
Spray painted products
Cost Analysis
| Cost Type | Cost | Price | Source | Quantity | Total |
| Material | 24 in. x 48 in. x 1/8 in. Aluminum Sheet | $22.89 | Home Depot | 5/288 | 0.397396 |
| 24 in. x 24 in. 22 Plain Sheet Metal | $46.47 | Home Depot | 5/144 | 1.613542 | |
| 11 oz. Spray Paint | $6.98 | Home Depot | 0.5 | 3.49 | |
| Labor | Plasmid Cutter Operator | $20/hour | ZipRecruiter | 2 | 40 |
| Custom Metal Finisher/Polisher | $19/hour | beBee | 0.5 | 9.5 | |
| Prototyping Engineer | $36 /hour | ZipRecruiter | 1 | 36 | |
| Quality Control Engineer | $37 /hour | ZipRecruiter | 1 | 37 | |
| Overhead | Facility Cost (Machine Time) | $50/hour | industryarena.com | 1.5 | 75 |
| Total | 203.0009 |
