For the Midterm project I was more than a little intimidated. With shelves of well-made examples to study from previous classes, I wondered how I, with a total lack of wood-working experience, would be able to create something on the same level. Thankfully, I chose a relatively simple motion to model with movement 32.
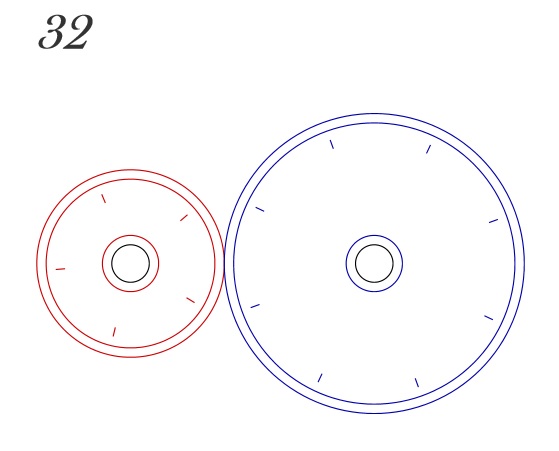
Mechanical Movement 32; the one I chose to model.
However, even with a simple model, I still had to make it, and make it look good. The big challenge would be making a support that would hold the two wheels at the perfect distance to be just touching. I spent a lot of time worrying about how I could do that than actually thinking about how I could do that.
Somewhere between all that worrying however, I was able to create the first low-fidelity prototype. Emphasis on low. The laser-cut cardboard wheels were super-glued to wooden dowels, and barely transferred any torque when they touched. And the two wheels touched infrequently because the stand I made (also out of cardboard) had holes in it made from tracing the two wheels. This revealed that such a method made the two wheels too far apart to touch.
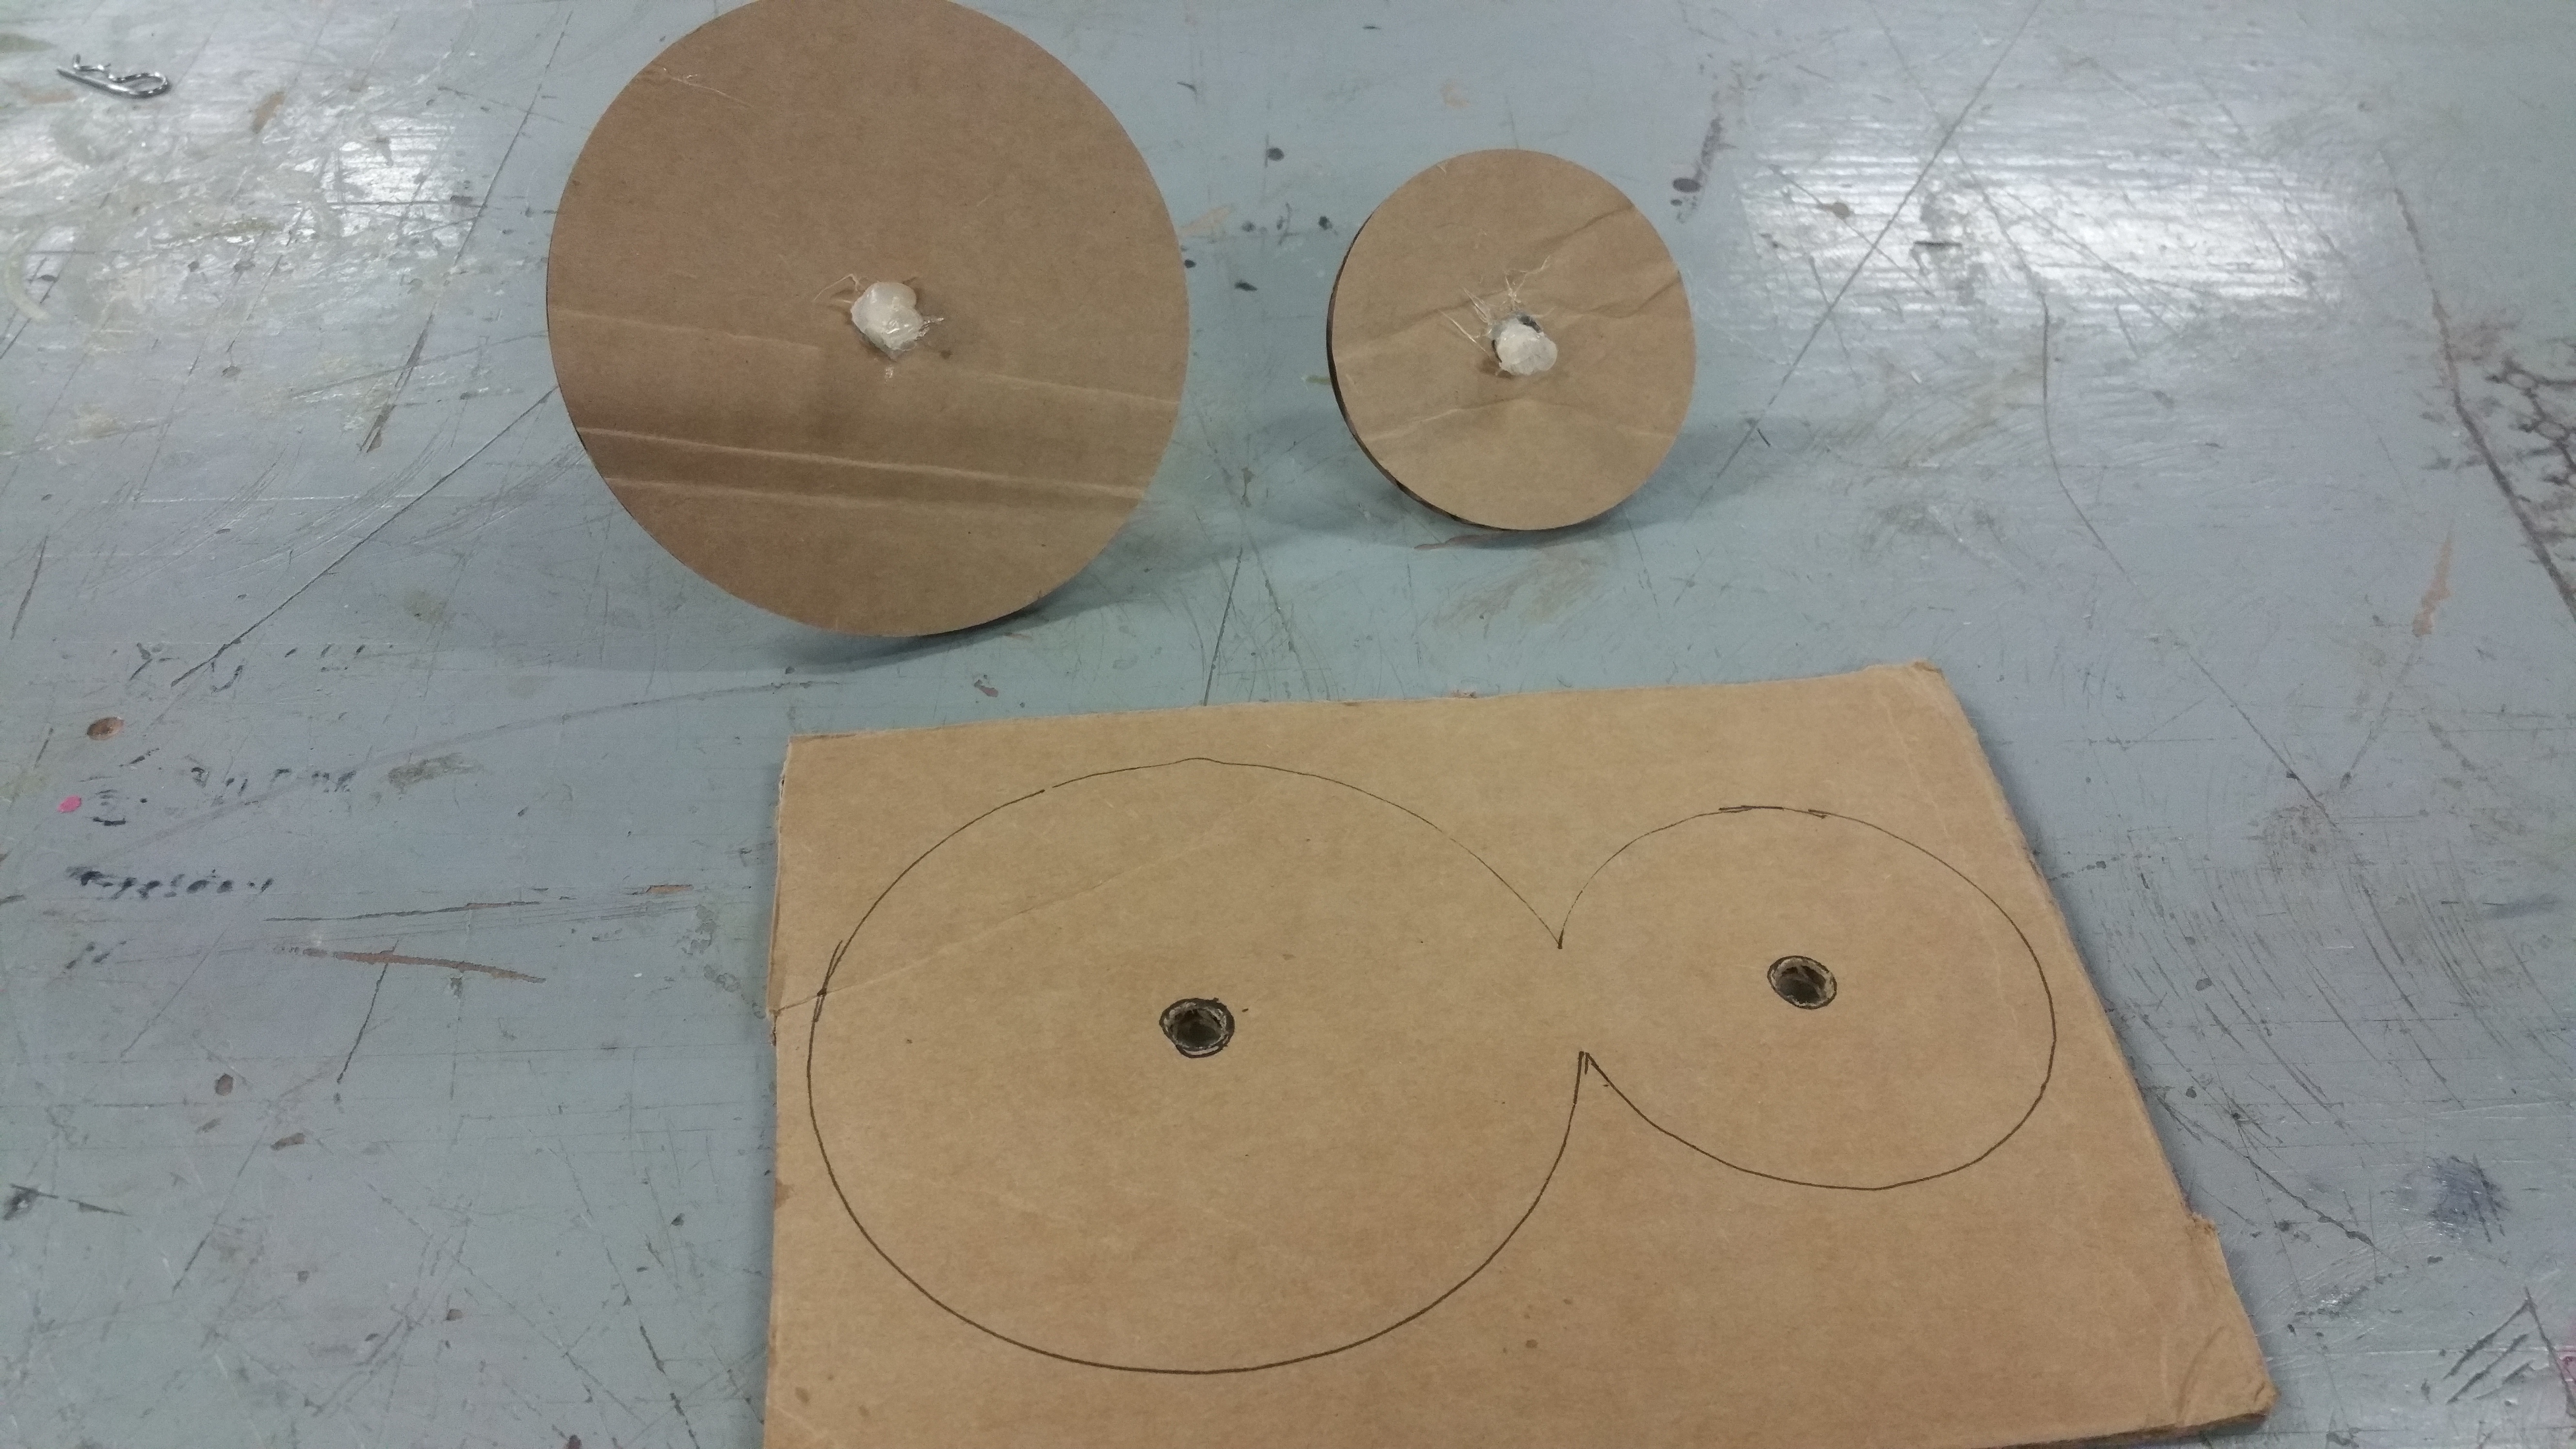
The Cardboard Prototype
Next up, I laser-cut actual wood for the wheels so that they could transfer torque on contact. I also laser-cut a stand out of wood using my Illustrator drawing of movement 32 for the distance of the holes. Dr. Wettergreen suggested laser-cutting a stand with a slot in it for moving one of the axles, which would allow for finding the perfect distance. A mechanism could be created later on that would keep the two axles at this distance. This “mechanism” would turn out to be a rubber band.

Slotted stand, with rubber bands affixed.
Even with the basic form of the Midterm project complete, there came the question of what I could make it look like. I thought about making it look like a drag-racing car, but having the wheels touching on a car? Ridiculous! Luckily, a friend suggested I turn the model into the face of an owl. I laser-cut the necessary pieces and ran with the idea once I realized it looked surprisingly funny.
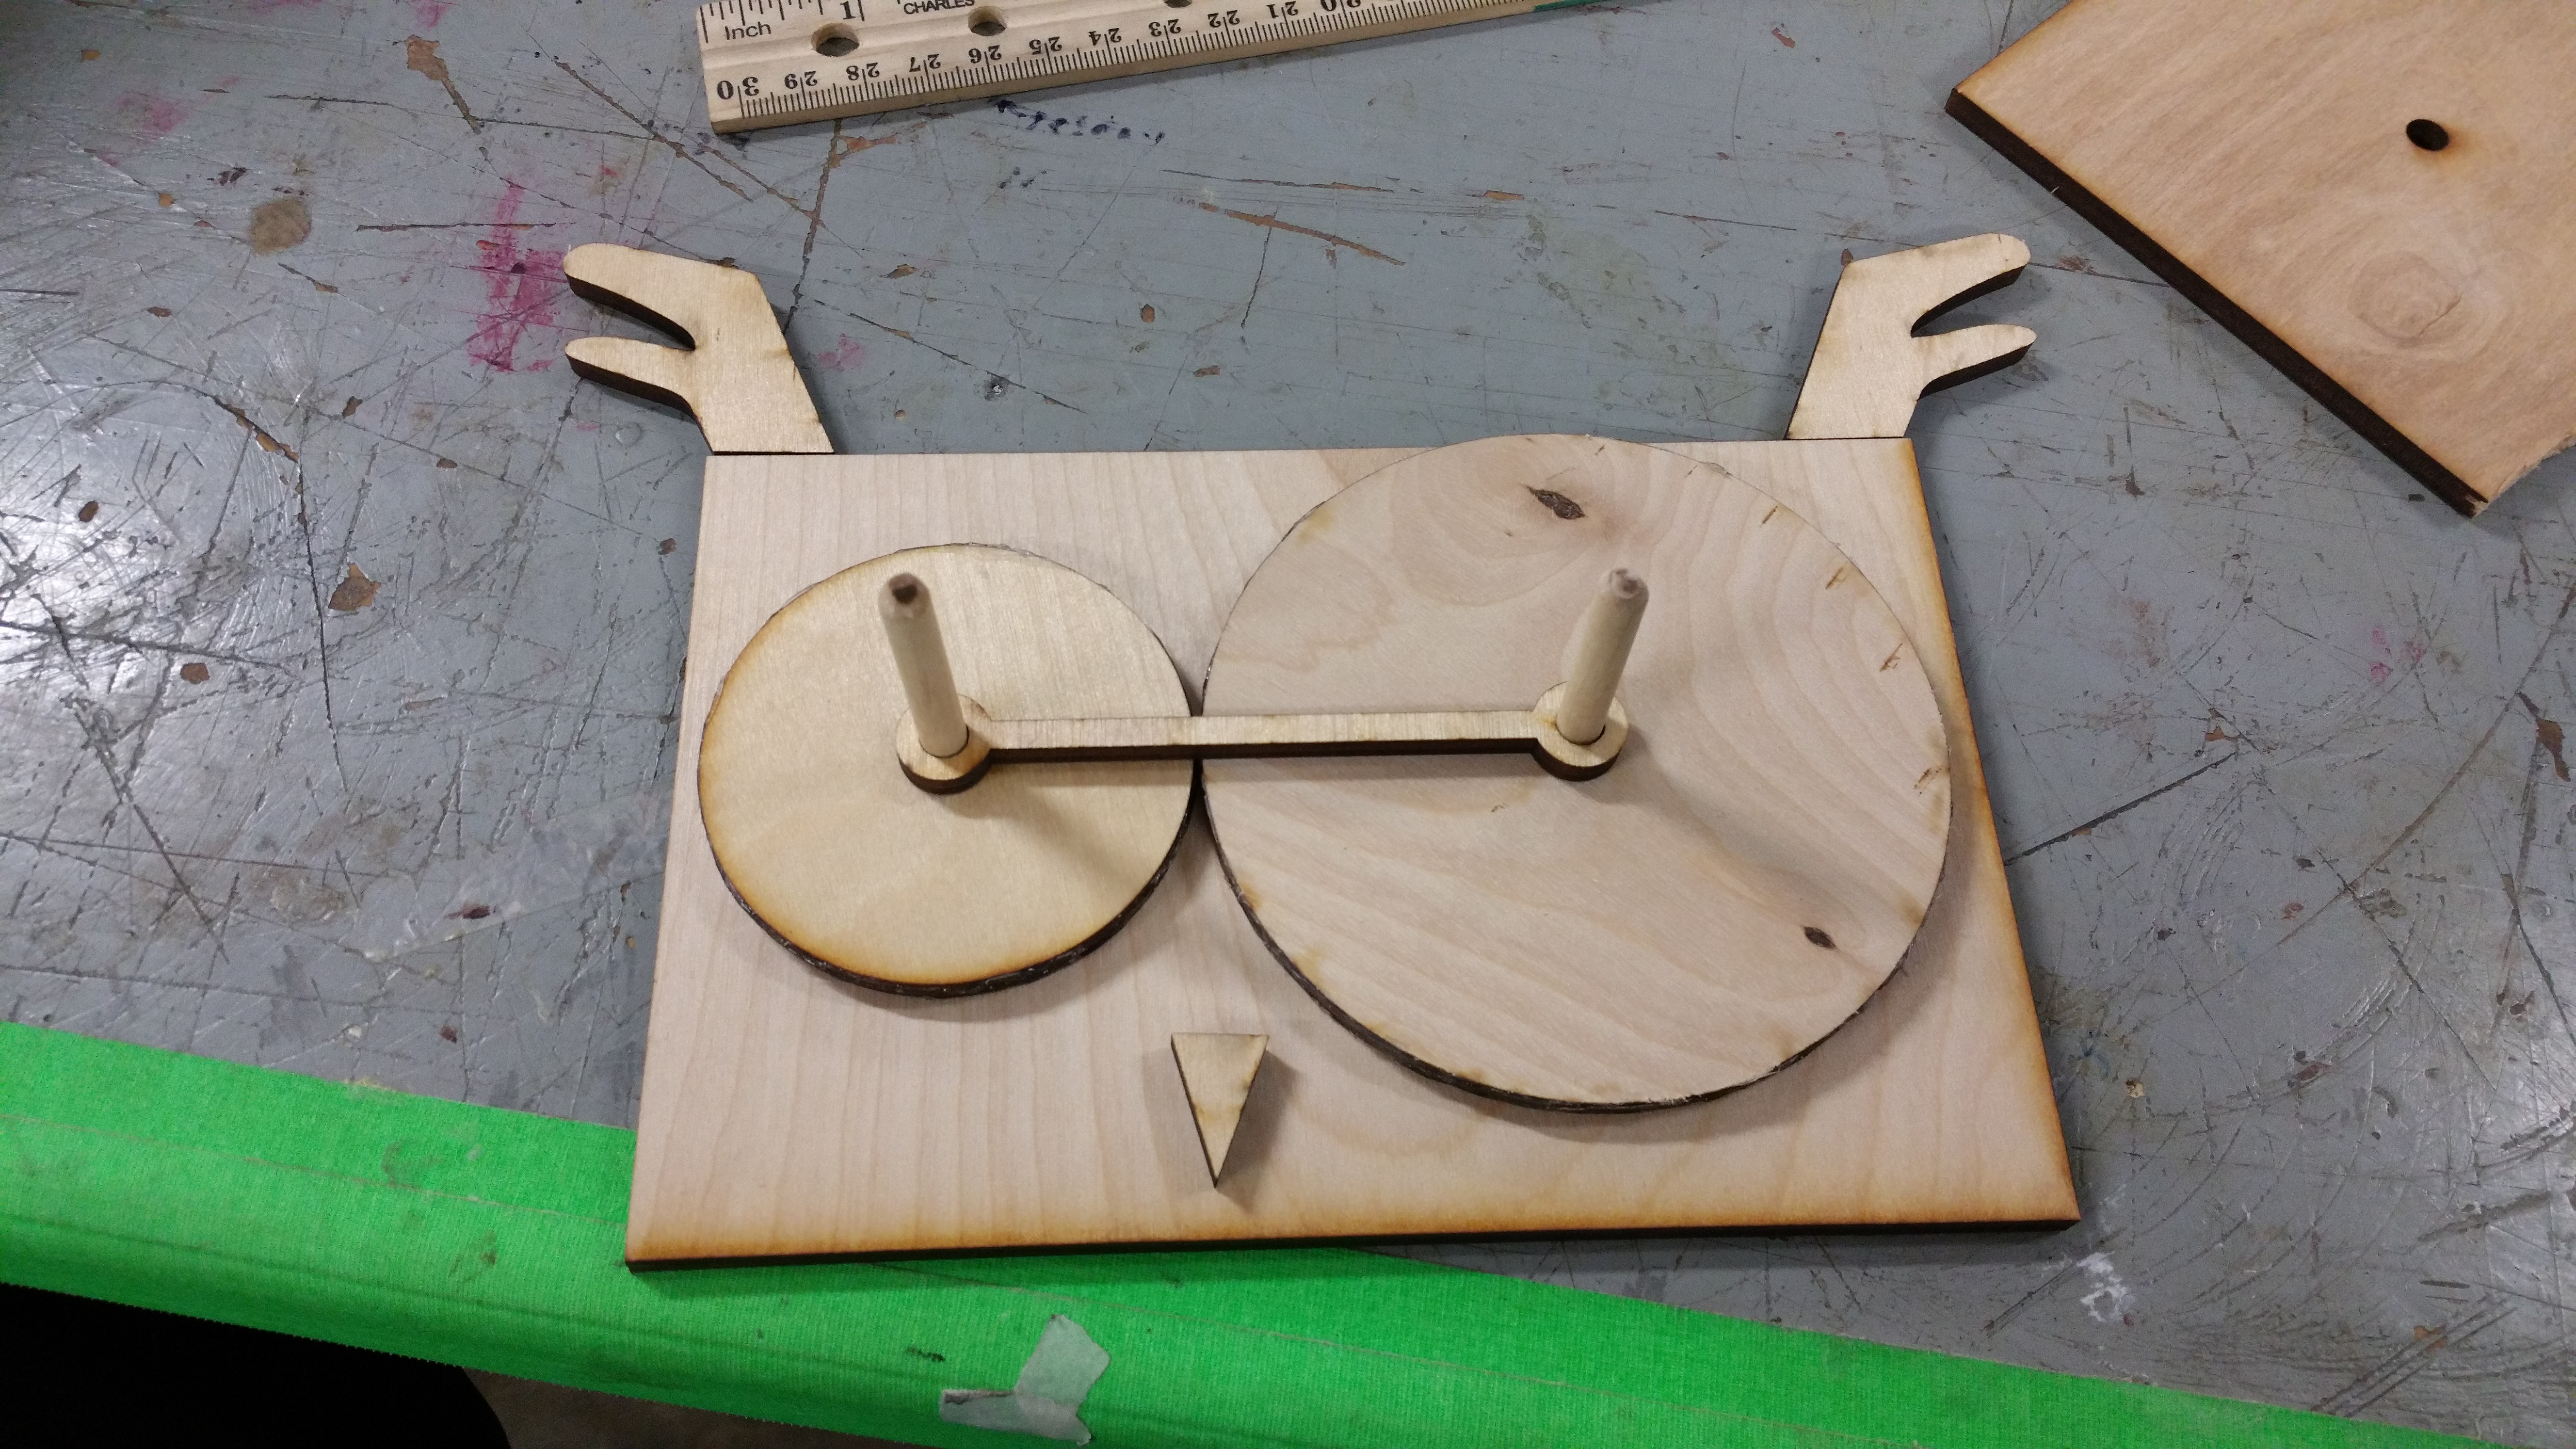
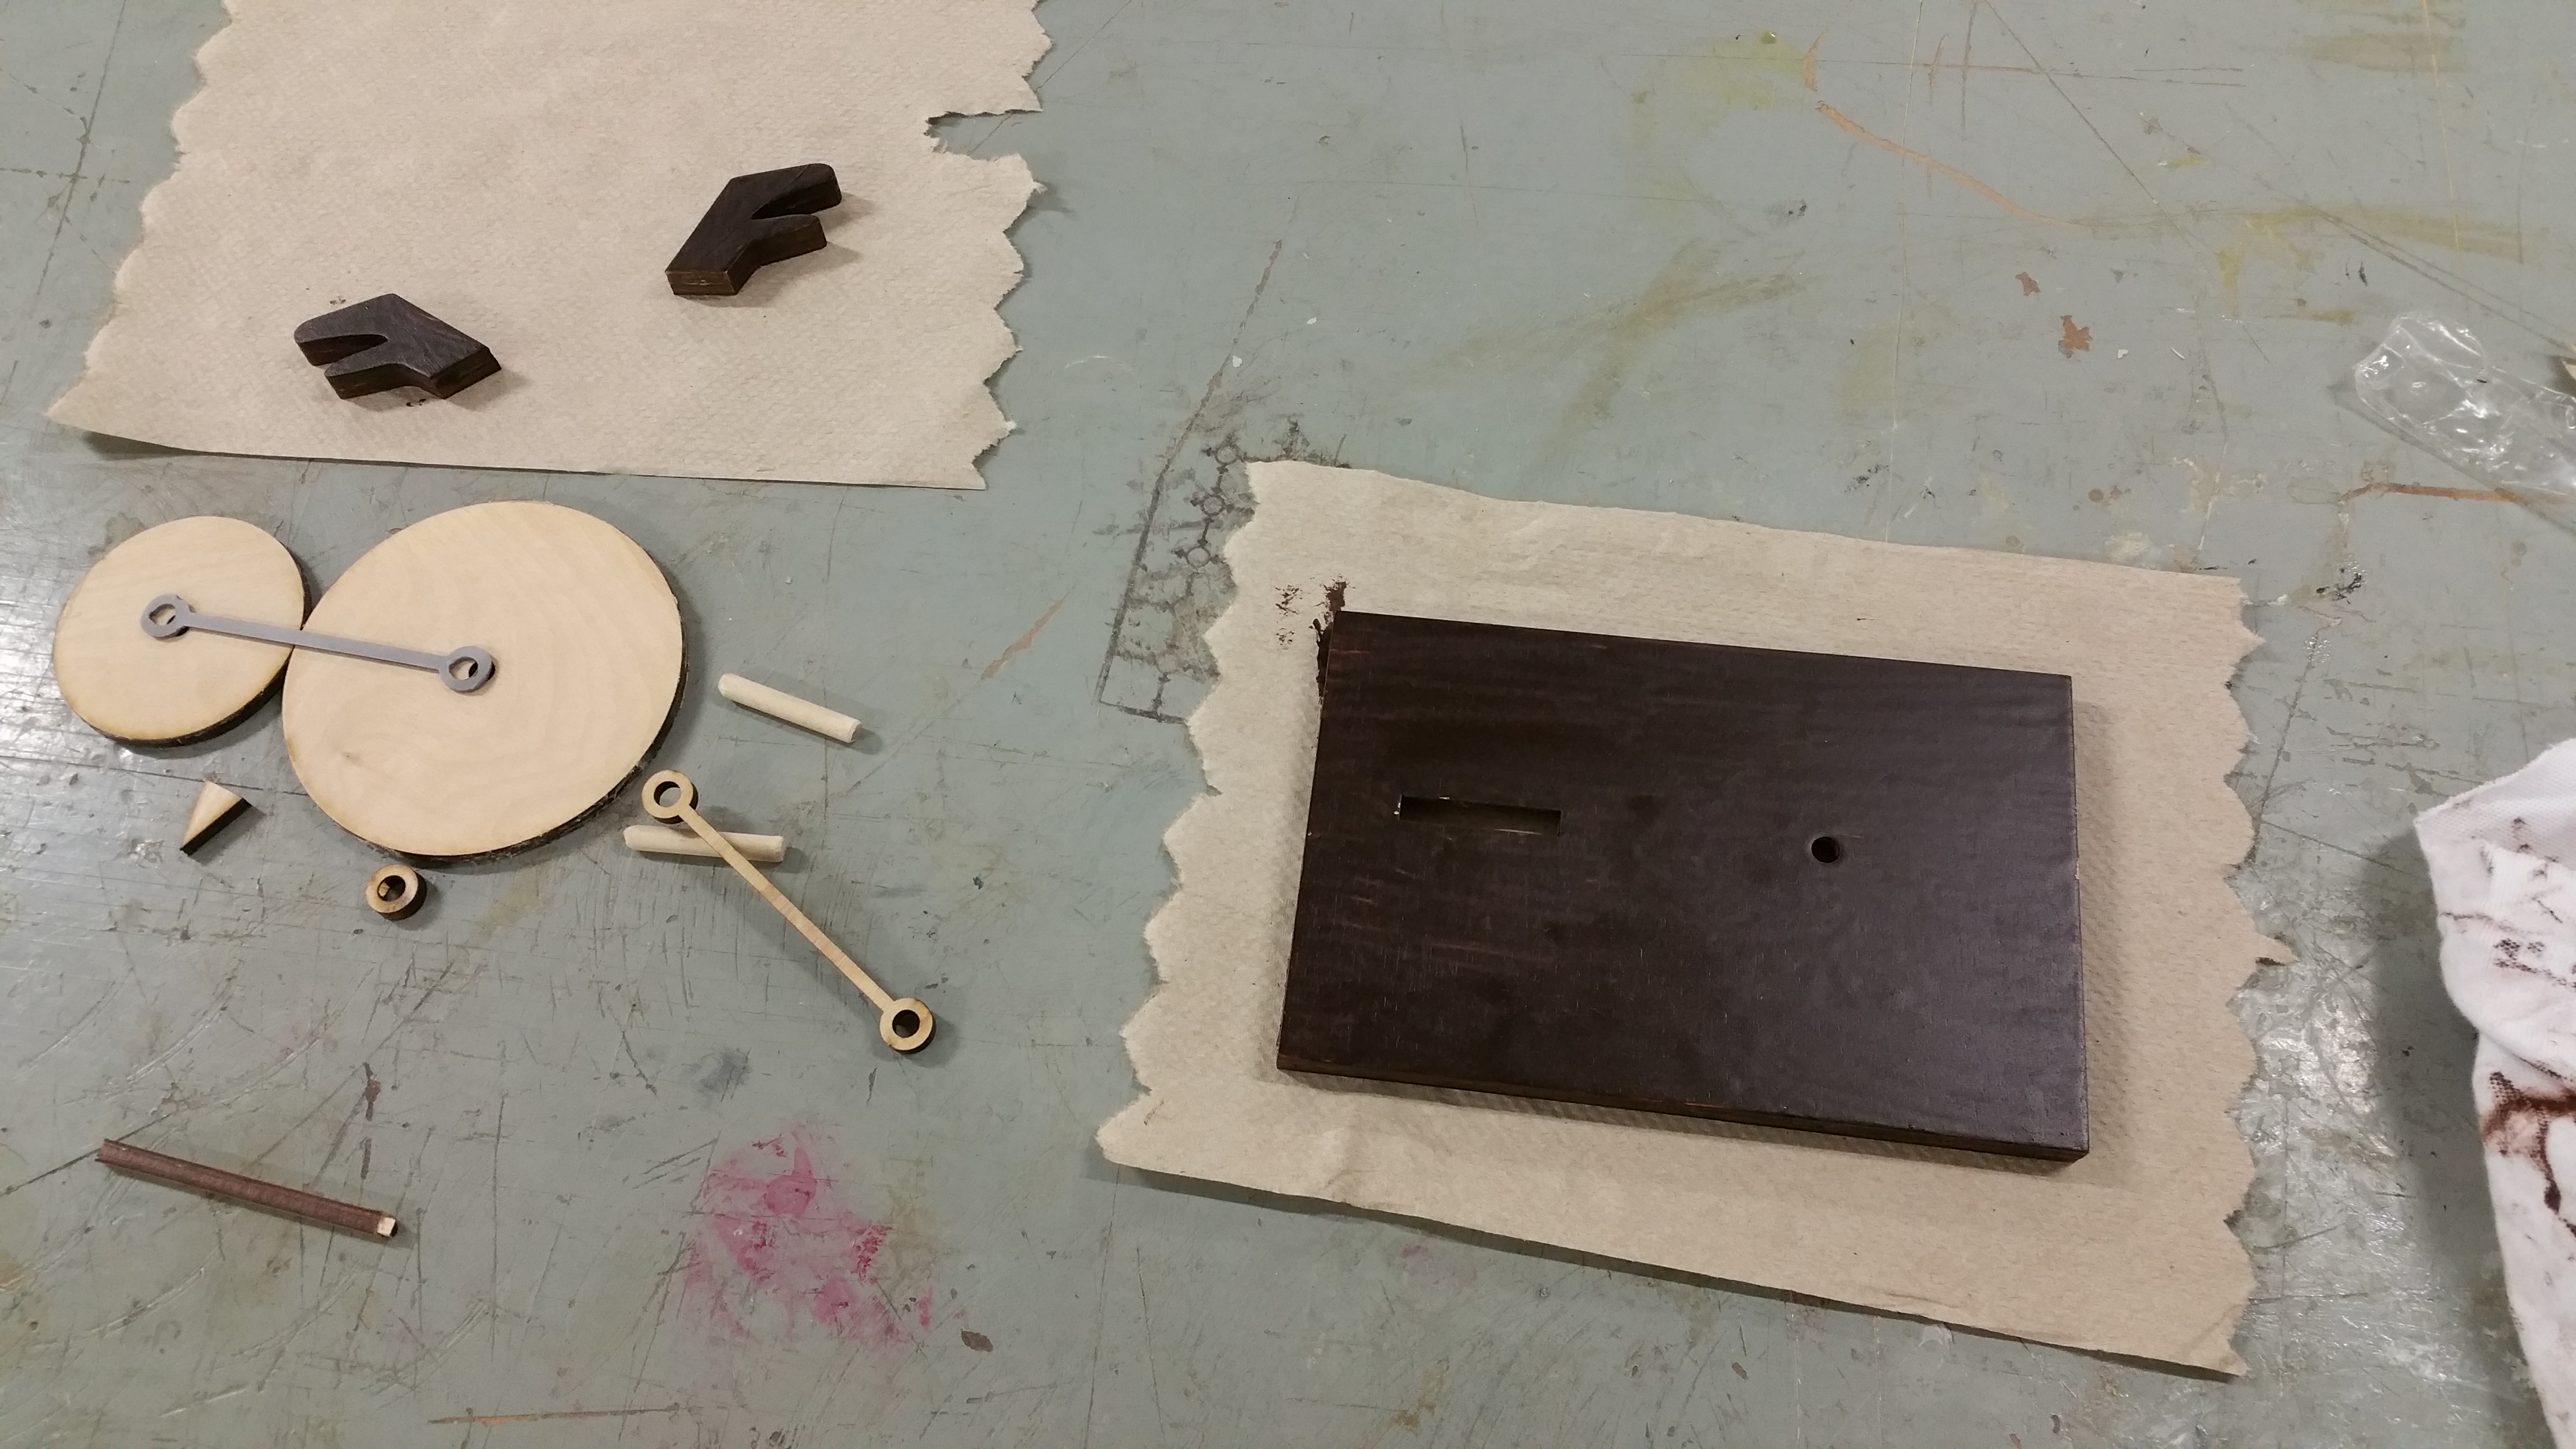
Unfinished owl model with laser-cut wooden piece connecting two dowel rods (more on that in a bit).
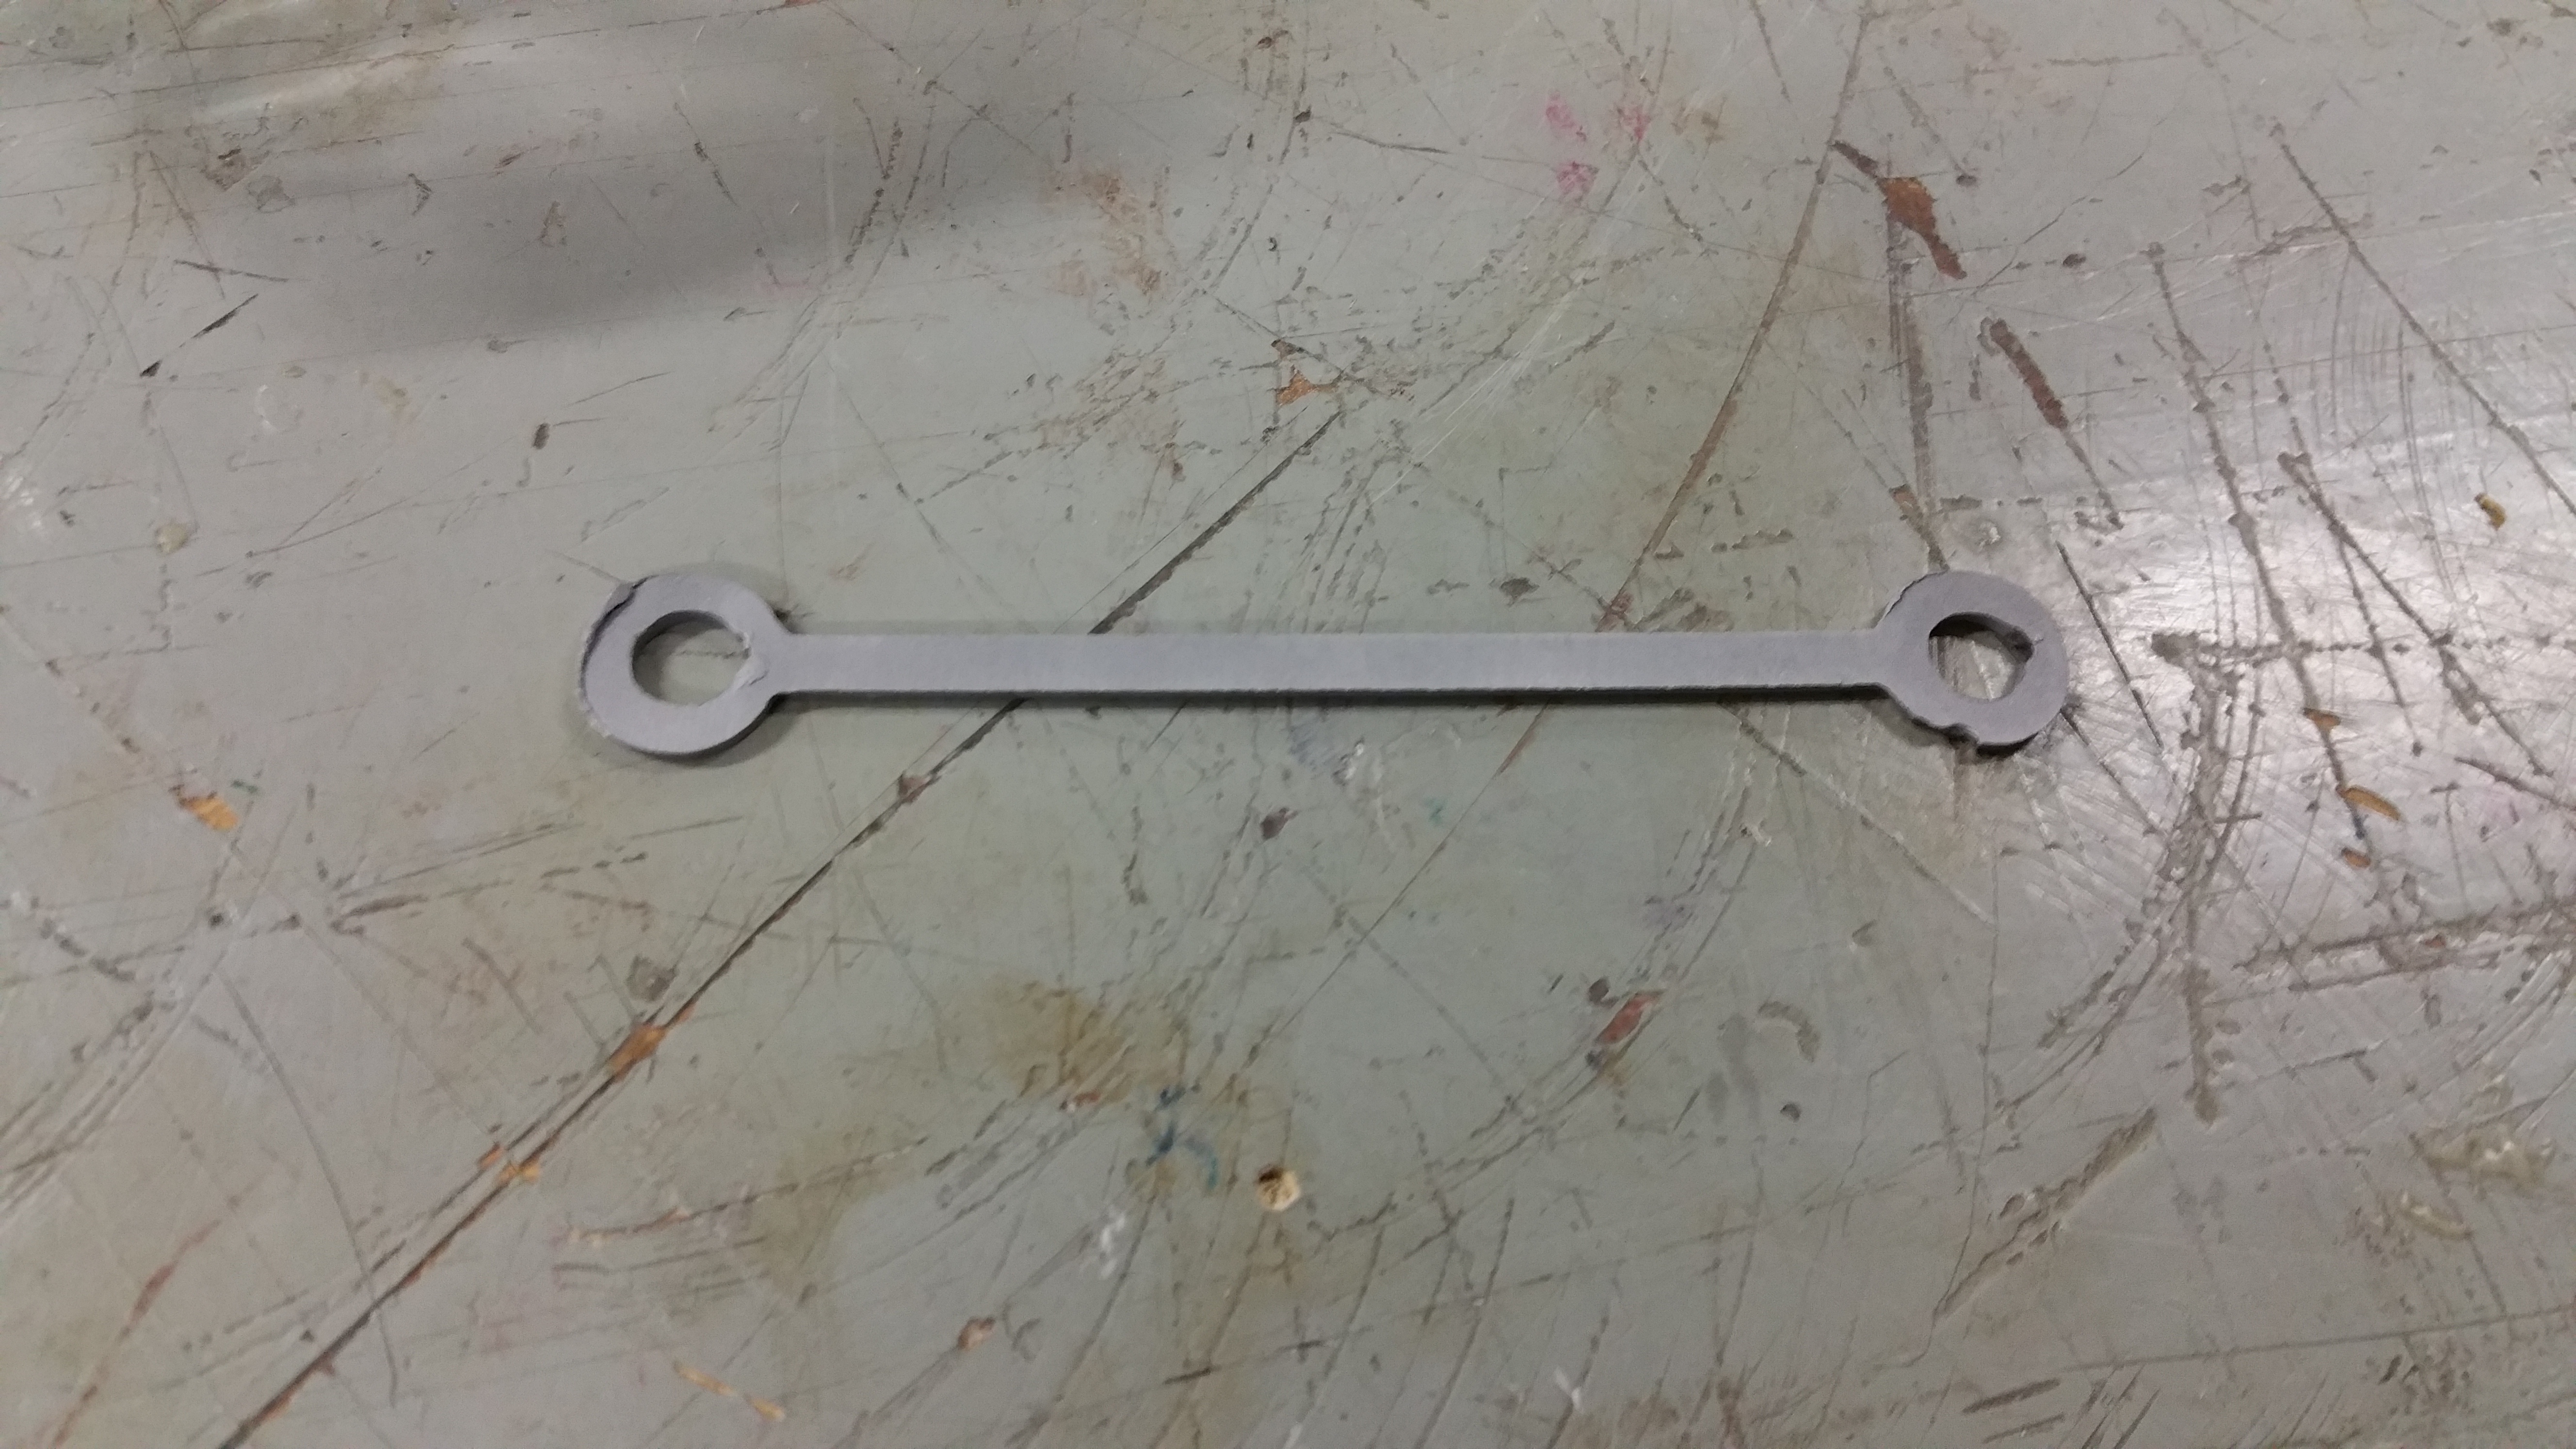
Along with a themed appearance, the final project would also need a metal plasma-cut piece. I could not make wheels with the plasma cutter because the metal would be too thin and the edges are never as clean as those made with the laser-cutter. The idea then became that I could replace the rubber bands with a metal piece that would serve the same function. Of course, I would run into the problem of making sure this piece was the perfect size to hold the two dowels at the perfect distance. I measured the length of the rubber band and made a slightly-undersized illustrator model that I hoped would be close enough.
Unfortunately the resulting piece was just too short. Not only that, but the holes in each side of this metal “tie” were too small to fit the wooden dowels.
First plasma cut piece of metal. Too short.
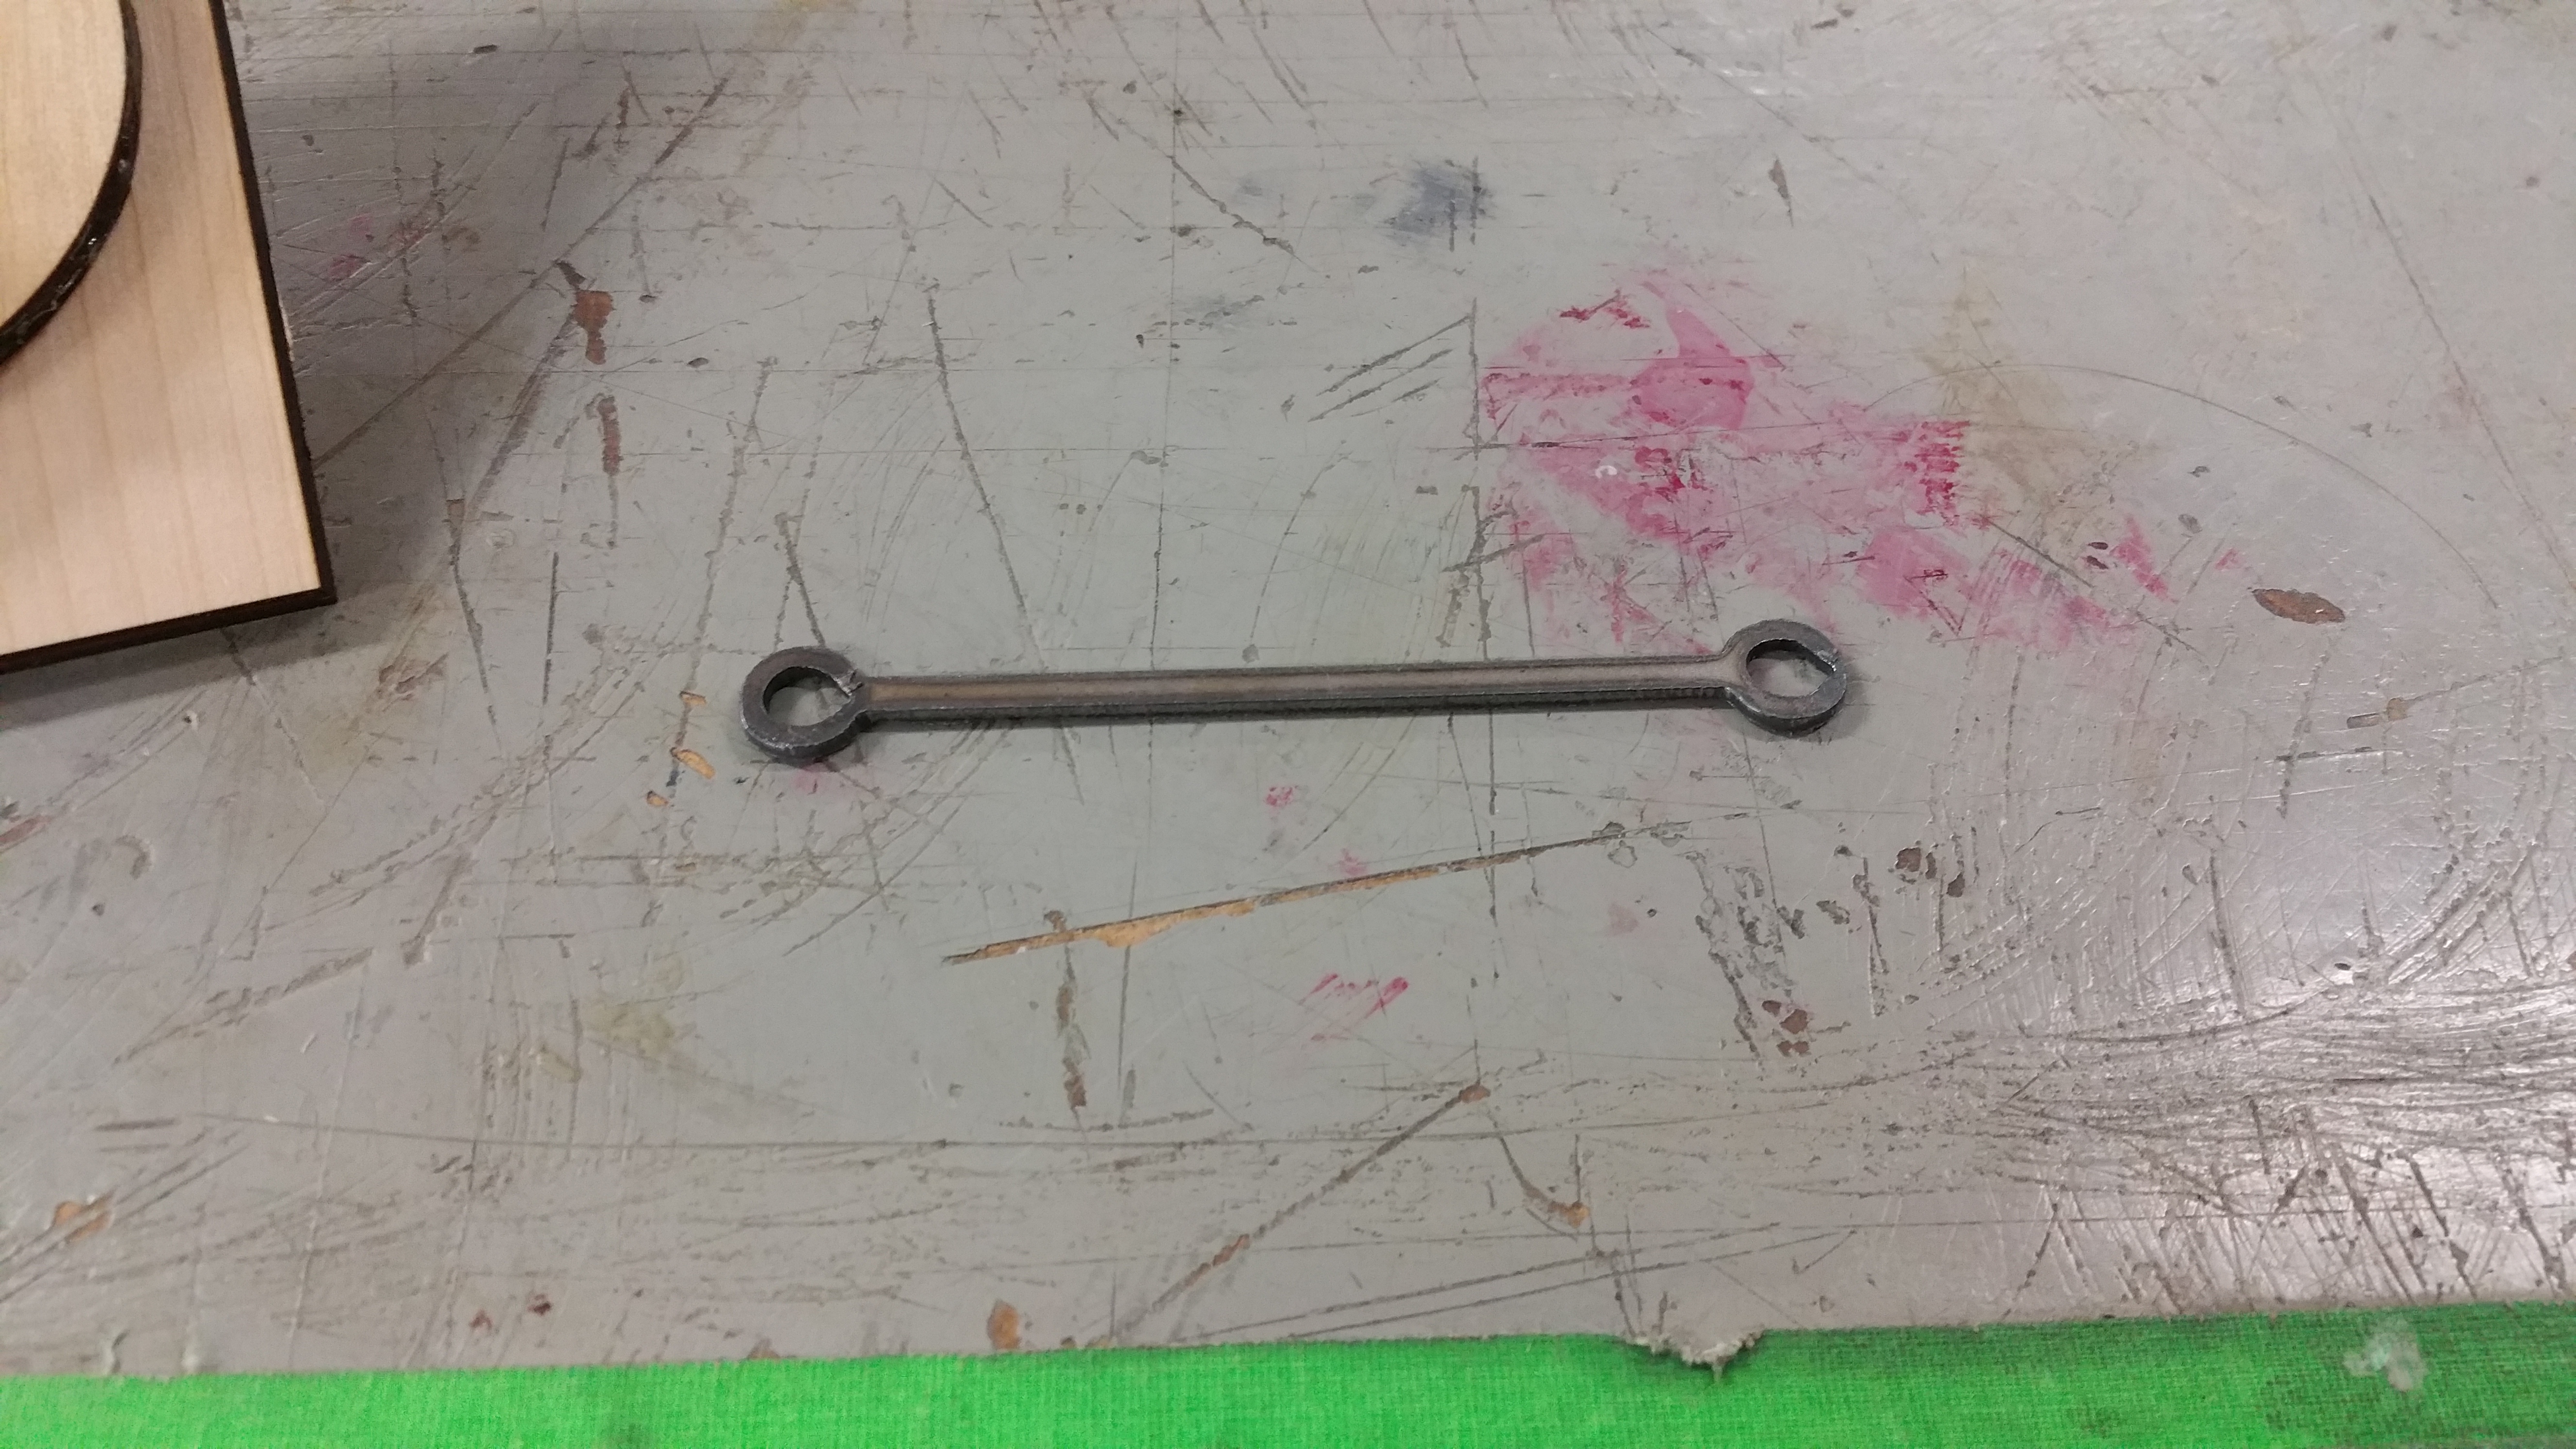
I experimented with the length a couple of times, laser-cutting two more exploratory pieces before getting to the elusive perfect distance. And after much delay, I cut out this final tie. However, the plasma cutter’s inexact geometry meant the holes in each side were once again too small to fit the wooden dowels used in my model. To remedy this, I used the drill press to open up the two holes to the necessary quarter-inch diameter. After that, a quick run through the sandblaster was enough to polish up the surface.
Plasma Cut piece V.3; after being angle-ground, drill-pressed, and sand-blasted.
Next in the saga, I attempted to make the owl look more defined by staining the wood. Specifically, I would use mahogany stain on the “face” of the owl to strengthen the illusion of looking like the bird. Unfortunately, when I read the directions, I paid much attention to the words “apply liberally” and less to the command: “after 3 minutes, remove excess with a clean cloth.” As a result my piece is now covered with a thick layer mahogany stain that impedes the movement of the wheels.
Mahogany stained “face” and “ear tufts”, in the deepest brown physically possible. Wooden dowels, wheels, and metal piece are all also visible.
After failing to remove the stain with a wet cloth several times, I accepted my fate. I began final assembly of the various pieces. While the wheels do not move as well as they should, my owl is now complete.
I learned a lot on this arduous journey. Most importantly that I need to work on my time management and reading comprehension. But also, I got a lot of practical experience in wood-working, plasma cutting, and laser-cutting that I would never have otherwise.
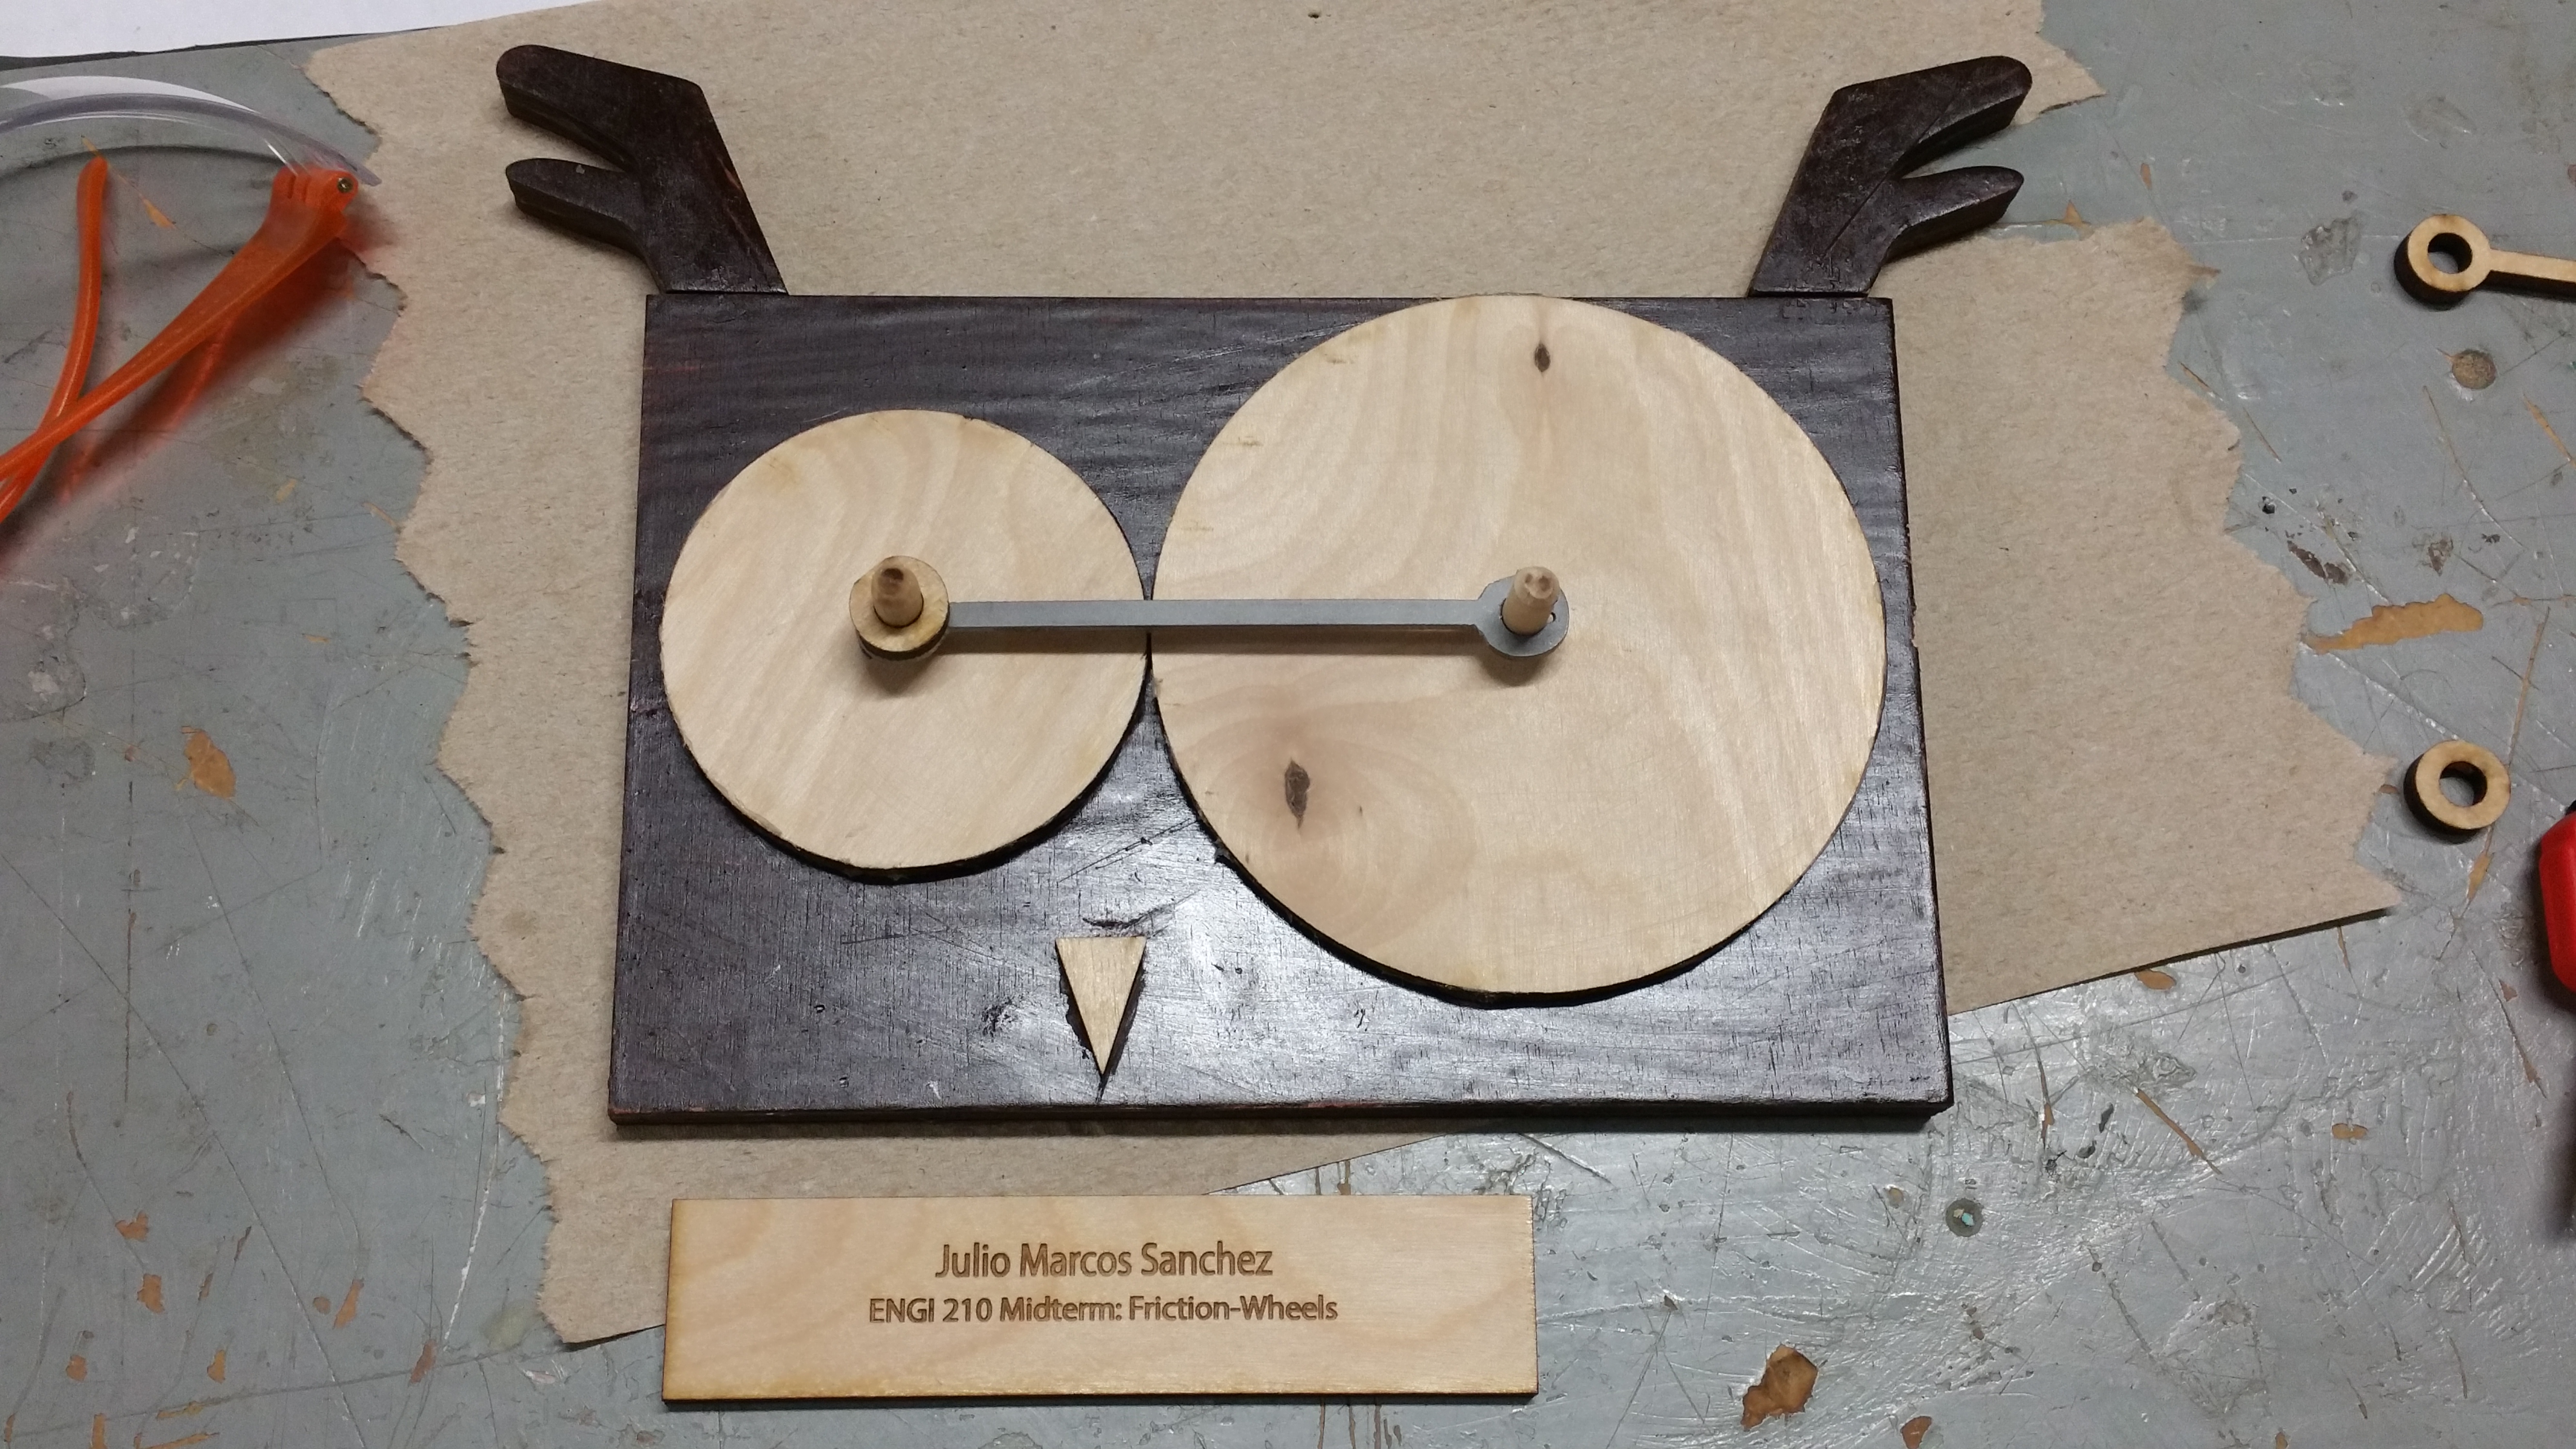
The Owl face model, completed.
