For this project, we were CNC machining. This was a process that I had never done before, but I enjoyed learning how to use it. Once I knew how to use it, it was fairly easy to do the homework. I picked out my noun ahead of time and was able to finish my pieces on Sunday. At first, I struggled with what to pick for my noun, but I settled on a gear to represent my major in one symbol.

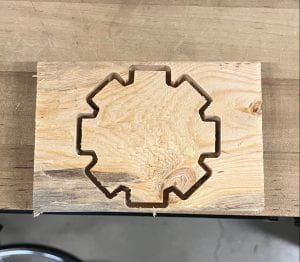
The image I chose
The Nomad was booked when I was about to start my homework, so I started on the Shapeoko. Shout out to Yimo and Cassidy for their help with setting things up! Setting up the file in Carbide Create was a breeze. After measuring my piece, I chose two contours and one pocket for my tool paths. Now it was time to open up Carbide Motion. I made sure to jog the machine and zero at the corner of my wood. When I started the print, I was watching it carefully with the mouse on the stop button and I was able to catch my first mistake. The drill bit hadn’t started spinning, but I realized I hadn’t enabled it. Thankfully, no damage was done to my wood, so I just turned on the spindle and restarted the job. About halfway through cutting, the next mistake was revealed. I had used tape to secure my piece to the bed, but at this point, I could see it lifting, and it eventually flew off.
The part that flew off
I may not have not put enough pressure when sticking my wood down, but I also had the contour paths before the pocket – which was never going to go well. I quickly switched the tool paths to the right order, and then I cut out my first piece.
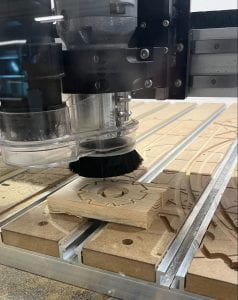
The Shapeoko after it was finished
The print took about 18 minutes and I watched it for the beginning and end, playing on my phone in the middle. About halfway through the cut, I realized that because my first piece of wood messed up, I just grabbed a new piece but didn’t measure it. Thankfully, the cut fit, but I made sure to measure my second (third) piece of wood before cutting.
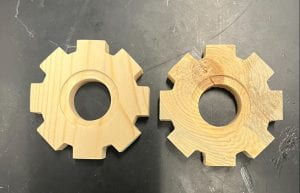
The pieces after being cut out
After cutting out my pieces, I vacuumed up the Shapeoko and started sanding my pieces. I hand-sanded the first gear, but the second one was cut from wood with more deformities. I took it into the wood shop and used the sander there for more efficiency. After they were sanded down, I stained them. Unfortunately, I found no cloth rags, so I used a paintbrush instead. I tried to get an even spread and left my pieces on a stick to dry. This was a nice introduction to the CNC machine for the final project, and I feel confident in using it again.

My finished gears
Cost Analysis:
- Wood: A 1x4x14 is $5.98 (Home Depot) and I used about 10 ft, so that is $4.27
- Stain: 1 qt of wood stain is $12.98 (Home Depot) and I used about 1 oz, so that is $0.40.
- Labor: 3 hours of work for $15 per hour, so that is $45
Total: $49.67
