For this assignment, I chose to do the intermediate level in order to practice using different depths. To start, I looked for an image on the Noun Project. I ended up choosing a simple owl to CNC.
After downloading the owl shape file in SVG format, I modified the file using Carbide Create on the CNC computer. To do this, I first imported the SVG file into Carbide Create. I used calipers to measure the dimensions of the piece of wood and then input these into the Carbide Create settings. I then scaled my owl to the correct size, so that it was 3 in wide.
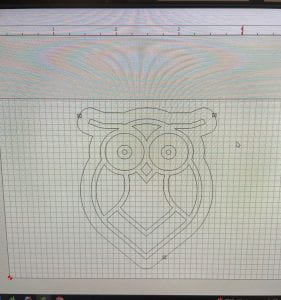
Setting up object in Carbide Create
Next, I created my toolpaths. I created a contour to cut the owl shape out of the wood. I also added pocket cuts to create the features of the owl.
After finishing my file, I set up the Nomad3 CNC machine. First, I used double sided tape to stick my piece of wood onto the machine. Then, following the instructional guide and YouTube tutorial, I opened my modified file, initialized the machine, and homed the probe to set the zero. Now, I could start cutting out my two owls.
Unfortunately, the contour cut for one of my owls did not go completely through. Since there were a lot of people waiting to use the Nomad, and only a small portion was not cut, I decided to use the band saw to finish cutting out the shape.
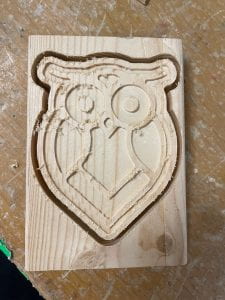
Owl before post-processing
To post-process my pieces, I first used 80 grit sandpaper to smooth out, by hand, the inner pocket cuts and rough areas where I had used the bandsaw. I then followed up with a 120 grit sandpaper. I also used both 80 and 120 grit sandpaper with the orbital sander to smooth out the back of my pieces. Because the quality of the pieces of wood that I used were not great to begin with, there were lots of cracks and divots that were difficult to completely sand out. Finally, I used a walnut stain to finish my pieces.
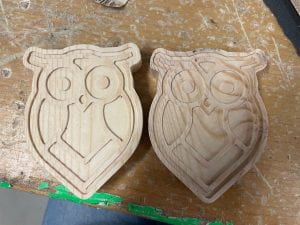
owls after sanding
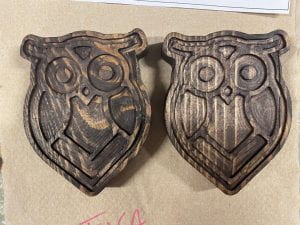
Finished owls 🙂
Overall, this project wasn’t too difficult. At first, setting up the Nomad3 took a bit of time, but it got quicker as I gained familiarity with the process. I am really happy with how my little owls turned out
Clean work areas
Cost Analysis:
- About 10in of 1×4 wood, costing $3.98/3.25ft = $1.02 (The Home Depot)
- About 2 oz of walnut stain, costing $13.98/1qt = $0.87 (The Home Depot)
- About 40in of double sided tape, costing $6.98/1.67 yd = $4.60 (The Home Depot)
- Membership to makerspace with CNC machines $60/month (https://dallasmakerspace.org/join/)
- 3 hours of labor, costing $15/hr = $45
Total Cost: $111.49
