This week’s lab in ENGI 210 was based around the laser cutter. We were tasked with creating two perfect identical copies of Rice’s War Owl.

Hex Code Color Chart
My original plan for the War Owl was to utilize the Epilog’s ability to interpret hexadecimal coded colors as different shades to be engraved. To start this process, I downloaded the formated .ai file from Canvas and used the magic wand tool to select all the portions of the War Owl that were of the same color. By using this tool, I was able to change the like colored portions of the War Owl at the same time. To select my colors I used the hexadecimal reference plaque to give me a better understanding of what colors and speed/power settings to use. I finally decided to use a 40s/50p speed/power setting with 4C4C4C as blue, E5E5E5 as yellow, and B2B2B2 as grey. Once, I was happy with my Owl in Adobe Illustrator I sent it as a raster engraving to the Epilog. After the engraving was completed, I sent a second job as a vector cut that consisted of the just the owl outlines so the owls would be cut from the wooden board. I was forced to split the jobs in order to use the hex color codes as engraving settings. The cut and engraving for my two three inch wide owls took a total of about seven minutes. I was not was not happy with this first batch of owls. I believed that the coloration was too dark and my owls were too small.

Rice War Owl with Hex Colors

Final Product with Hex Color Coding

Epilog Color Mapping Menu
For my second try at making the Rice War Owl, I took and entirely different approach to the color engraving. This time I chose to create the color shading directly on the Epilog’s print setting menu and increase the size of my owls. This time I made no edits to the Rice War Owl file from canvas other than copy-pasting a second owl. To select my colors I used the raster engraving reference plaque to give me a better understanding of what colors and speed/power settings to use. For this method, I only needed to set the power and speed setting for each color on the War Owl. First, I used the eyedropper tool in Adobe Illustrator to find the exact RGB color code for the blue, yellow, and grey portions of the owl. Next in the Color Mapping Menu of the Epilog’s print settings, I created exact color codings using the RGB codes from the previous step with my personal speed and power settings. I chose 8s/40p for blue, 25s/30p for yellow, and 20s/40p for grey. I then sent to print job to the Epilog as a 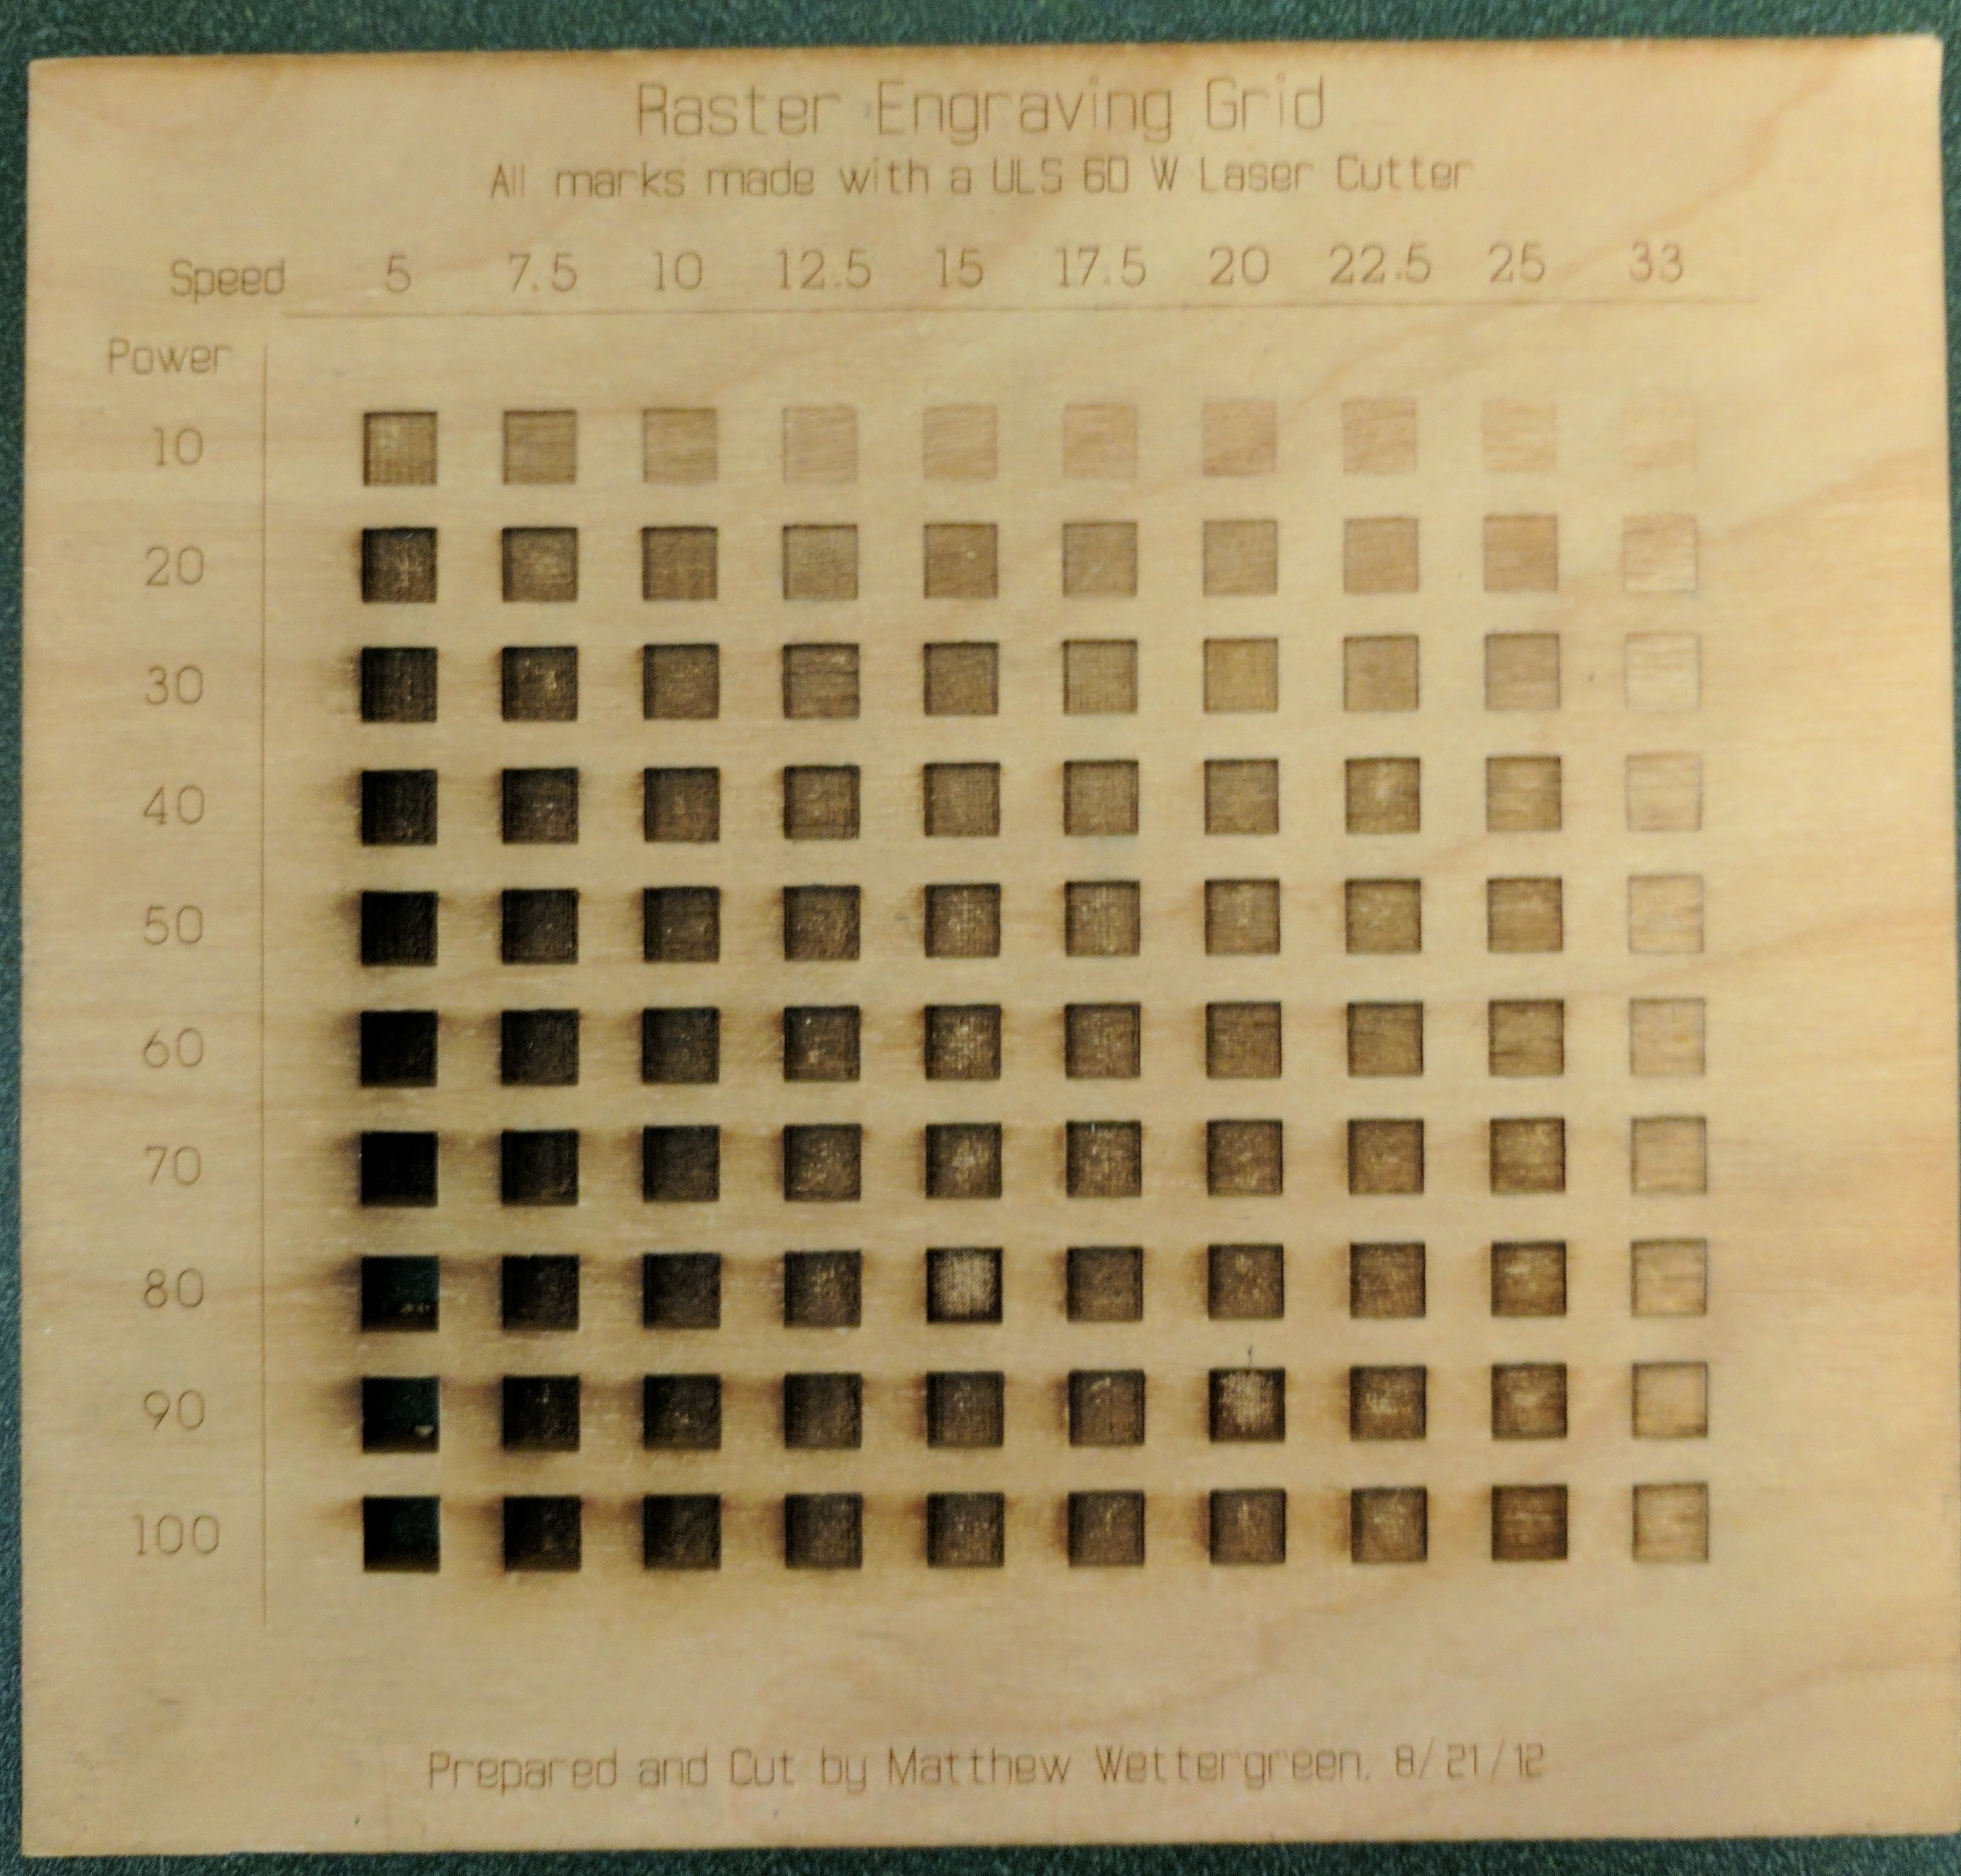 raster engraving job. By sending as a raster engraving only, the laser cutter was able to engrave all the colors in one pass. Using other settings for the engraving would have caused the printer to only engrave one color per pass. This would necessitate multiple passes of the laser head over the owl and increase print time. After the engraving was completed, I sent a second job that consisted of the just the owl outlines so the owls. For the second job, I set the printer to only vector cut my War Owls out of the wooden board. Together, the cut and engraving jobs took 15 minutes to create my Rice War Owls. I attribute this increase in time more to the fact that I made these owls significantly bigger than my first print, rather than to my different color engraving method. I was much happier with the final product of this print. I now believed that I had created a perfect Rice War Owl.

Rice War Owl with No Edits

Final Product with Color Mapping
I really enjoyed learning how to use the laser cutter in this lab. The Epilog Laser Cutter is now by far my favorite tool in The OEDK.
