box design
For this assignment, we were tasked with building a wooden box. I designed my box such that it would meet the assignment requirements while allowing for a large margin of error during construction. This mainly came down to two design choices. The first is that the box was glued together, instead of screwed. I did this because glue is much more forgiving than screws. If something is misaligned, you have upwards of 10 minutes to fix it, whereas with screws, alignment is very difficult to change without being apparent in the final product. The consequence of using glue however is that I needed very thick walls to meet the rigidly fastened criteria for this assignment. I ended up finding the thick walls aesthetically pleasing, so this ended not being a drawback. The second design decision was to arrange the walls in the 4 sector radially symmetric configuration. This meant that I could oversize each wall and then trim them down after it was glued together, without effecting the dimensions of the box.
box construction
cutting the stock
The box was made from 2×8 stock which has nominal dimensions 1.5″ x 7.25″. The base of the box was cut square at 7.25″ and the four sides were cut to 5.75″. I instructed the lab tech who was helping me with the miter saw to cut the piece over-sized so that I could precisely sand it to size later. When I took the pieces down to the woodwork area, I noticed that the pieces were severely warped. If I had glued them together in their current state, there would be gaps of about .25″. Instead, I used the belt sander to square them. This removed about .25″ from their thickness. In retrospect I should have used the planer, but by the time I realized how long it would take to do it with the belt sander, all of the lab techs had left and I wanted to get it glued together that night. This resulted in the pieces being observably flat, but uneven enough to leave very small gaps between the pieces they were to be fitted to.
Putting it all together
Although I removed .25″ of thickness from the walls, I was still able to achieve my desired 7.25″ box width because of my foresight to oversize the pieces when they were cut. I was therefore able to assemble the box with very little overhang. The first step in assembly was to attach the walls to each other. I started by spreading a generous amount of wood glue evenly over the surfaces that were to be glued and then lightly attached them. I then used four clamps to keep everything in place. I waited about an hour for the glue to lose it’s tack and then sanded flat the top rim with the belt sander while everything was still clamped together. I then checked the fit against the base and used an orbital sander to sand down the high spots. Once the fit was about as good as the walls had been, I spread a layer of glue around the rim and lightly attached the base. Because of the clamps I was already using to secure the walls together, I was unable to use clamps to secure the base. Instead I placed a piece of scrap wood on top of the base piece and then placed a very heavy motor I found on top of that. I then allowed the assembly to dry.
Finishing it off
As I had anticipated, there was some overhang that needed to be sanded away. I started with the belt sander to make the walls uniform. With the box square and sides uniform, it was time to add the bevel. I was hoping to use the fillet bit and to my luck, that was the bit that was already there when a lab tech gave me access. Unfortunately the fillet it produced was not large enough to removed imperfections in the stock that I had oriented as the outside edges in the hopes that they would be routed away. On the advice of the lab tech who was helping me, I packed these areas with a mixture of sawdust and wood glue. I then used a ruler to shape the mixture along the fillet. I let it dry for about 5 hours before returning to do a final sanding. I used the orbital sander starting out with 240 grit sand paper. I smoothed the sides, edges, and rounded off the corners which the router had left pointy. I then repeated with 400 and then 800 grit sandpaper.
results
I think the box came out looking great. If I were to spend more time with it I would sand the inside. Due to the size of the cavity, the orbital sander cannot be used which is why I chose not to for this assignment.
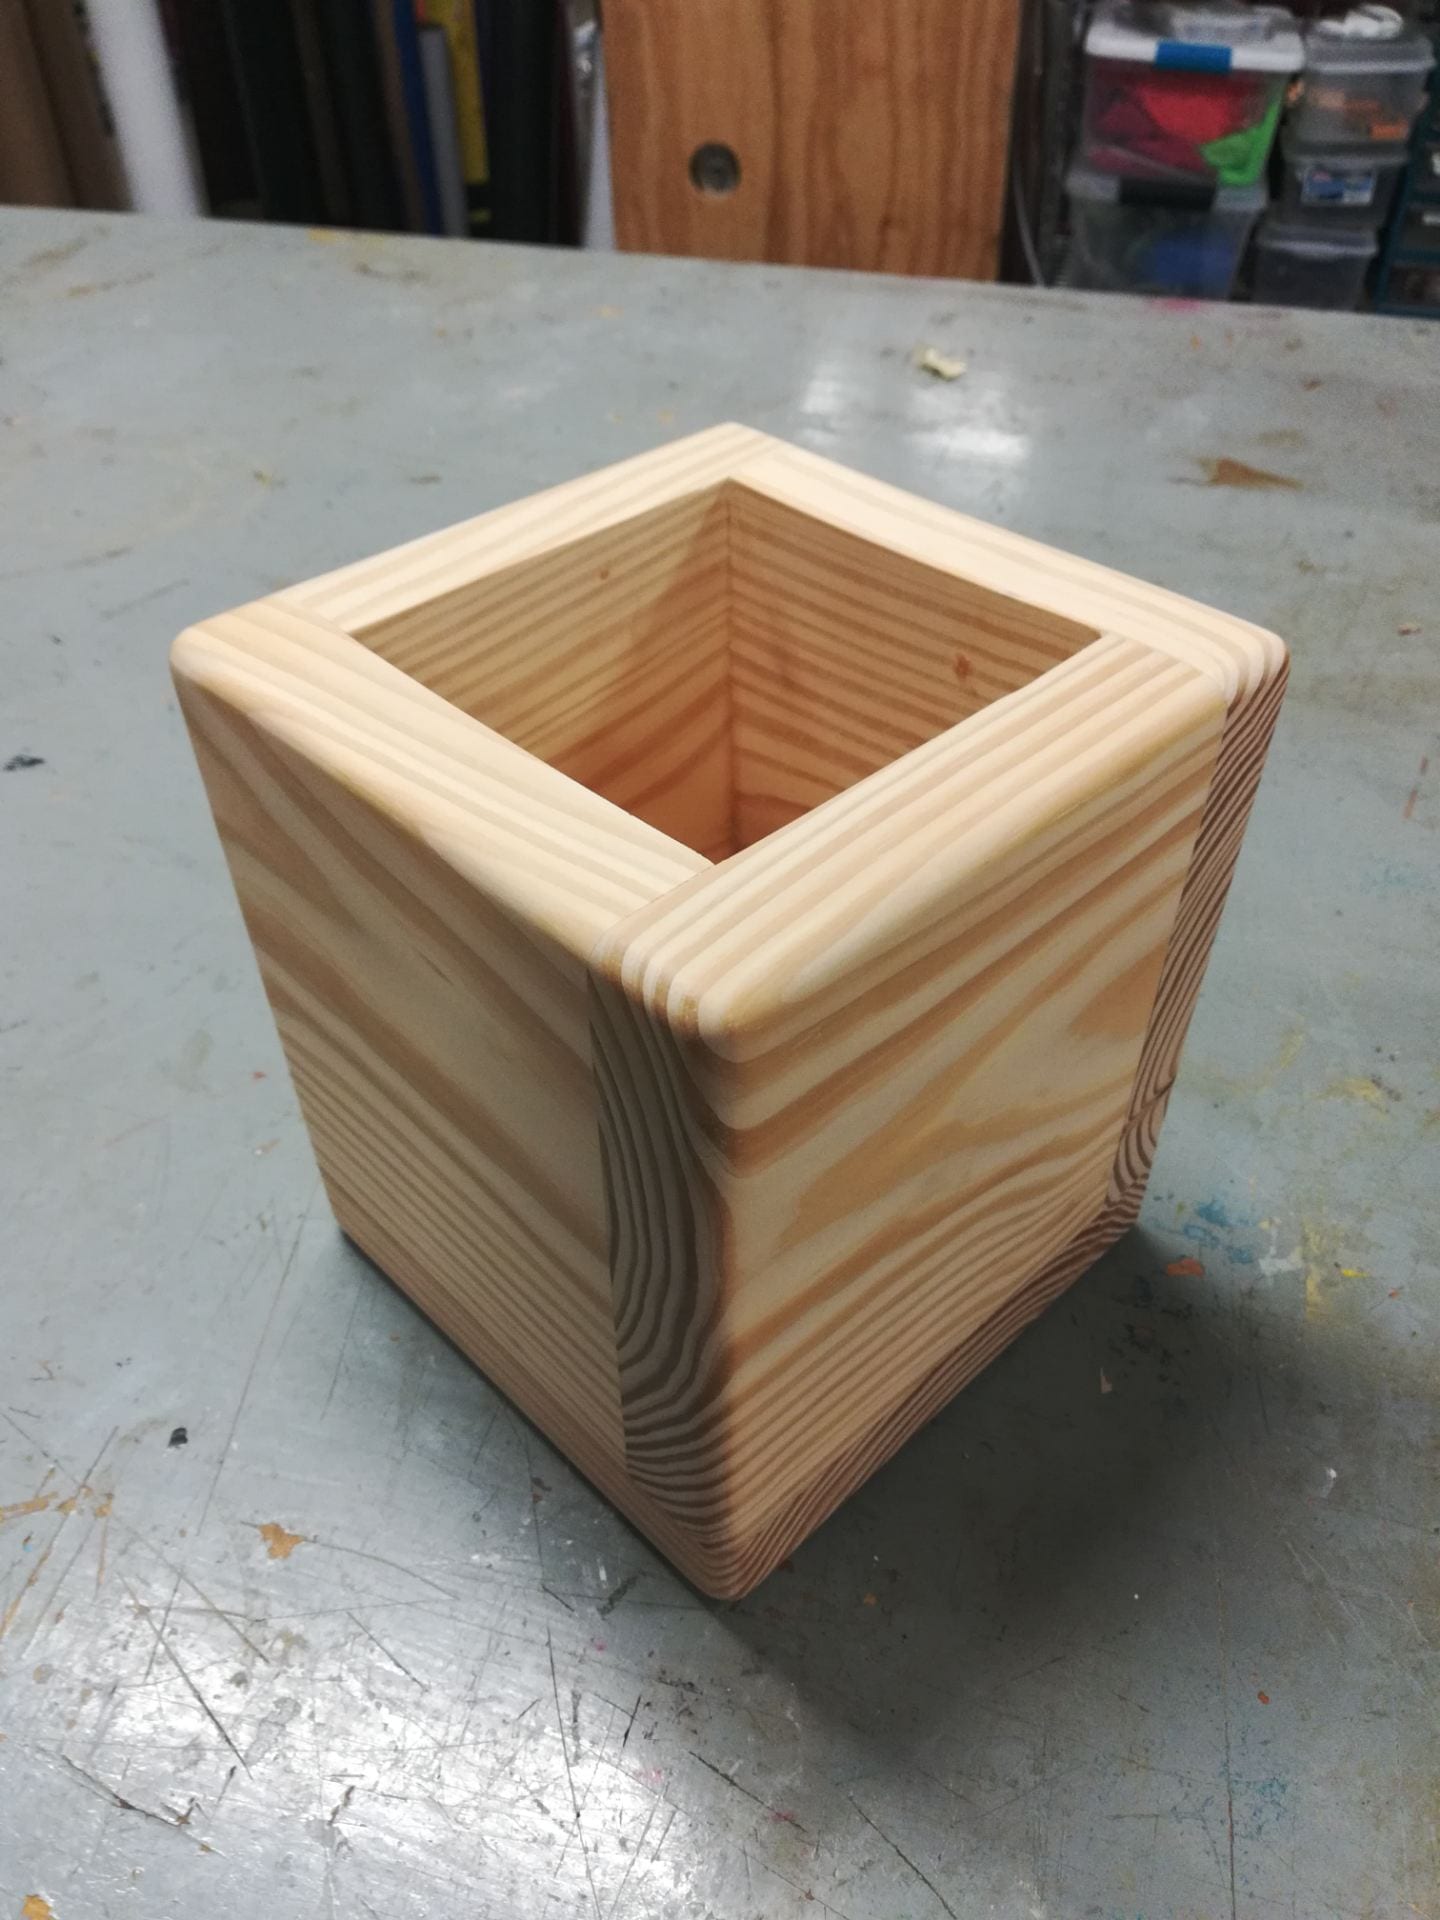
The rough areas of stock that I had filled with glue and sawdust came out well, but not perfect. I would definitely go back and add a second coat to fill the still existent voids if I spent more time on it.


Ultimately, the strength of this box is the surface finish. My choice to use 800 grit sandpaper to finish it really brought out the natural sheen of the wood and it feels great to the touch. At the right viewing angle, it is even partially reflective in the dark layers of the wood.
Cost analysis
I spent a lot of time on this box and therefore the most significant portions of the cost will be labor and machine time. To calculate machine time, I am using The Home Depot’s tool rental rates. Specifically, I am using the calculated hourly rate of their longest rental period because it best reflects the long term usage of the OEDK’s tools by students as a whole. This ends up being 46¢/hr for the belt sander, 29¢/hr for the orbital sander, 82¢/hr for the miter saw, and I am neglecting the router because I spent less than 10 minutes using it. I spent abut 30 minutes on the miter saw, 4 hours on the belt sander, and 3 hours on the orbital sander. Additionally, I spent about 2 hours on assembly and other small tasks. That comes out to $3.12 for machine time, and $190 for labor assuming $20/hr, which is the minimum I would work for while also a full time student. The rest of the cost is materials. Because the OEDK retains unused portions of stock and other consumables, I will account for only the portion that I used or made otherwise unusable. This comes down to wood, glue, and sandpaper. For wood, this is the 30.25″ needed for the box and about 2″ of cutoff. At Lowes’s price of 5¢/inch, this comes to $1.64. The glue is a difficult price to measure precisely, so instead I will give an upper bound of 1$. For sand paper I used a sanding belt and about 8 orbital sanding pads. Lowes gives a price of $12.96 for the belt and about $3.20 for the pads at about 40¢ per pad. This all leads to a final price of about 211.92$. The specific price breakdown makes it very clear that if spending machine time to reduce labor time is an option, it is well worth it.
Sources
https://www.homedepot.com/c/tool_and_truck_rental#powertoolrentals
