I had the unfortunate circumstances of the Covid-19 pandemic interrupting my midterm project, and returned home early before I could finish my midterm. Thus, to make up for the lack of a final product, I’ll try to “bring it to life” as well as I can.
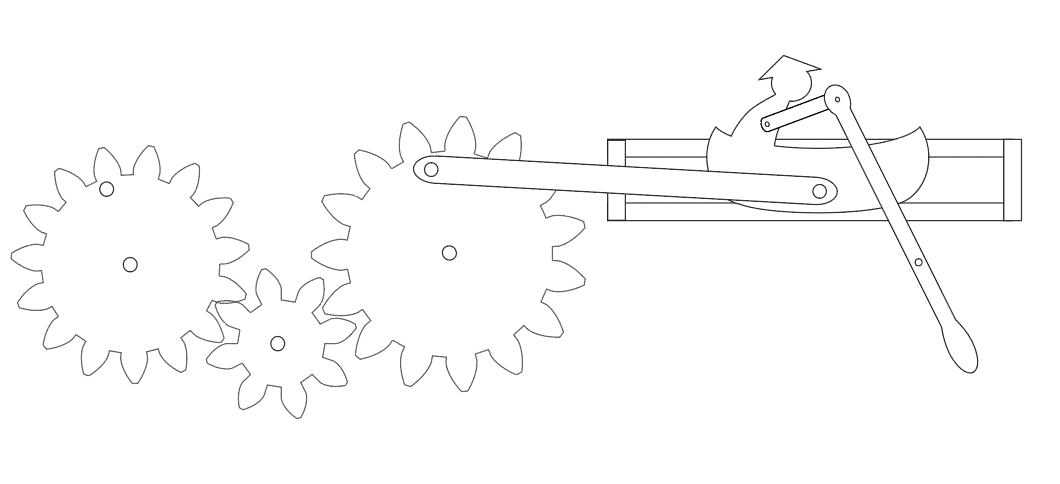
My project idea was to use primarily mechanical movement #92 to make a little rowboat and boatman look like they were bobbing back and forth, while another component of the project was the boatman’s arm and an oar that moved with the boat movement to make it look like they were rowing their boat.
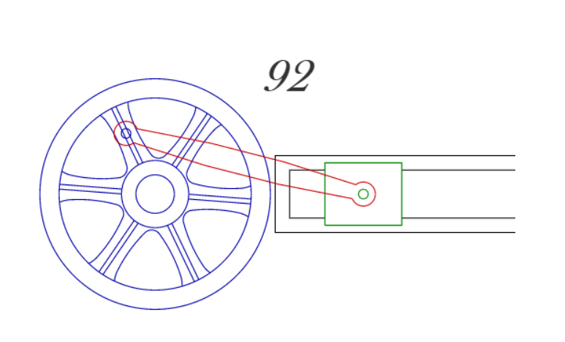
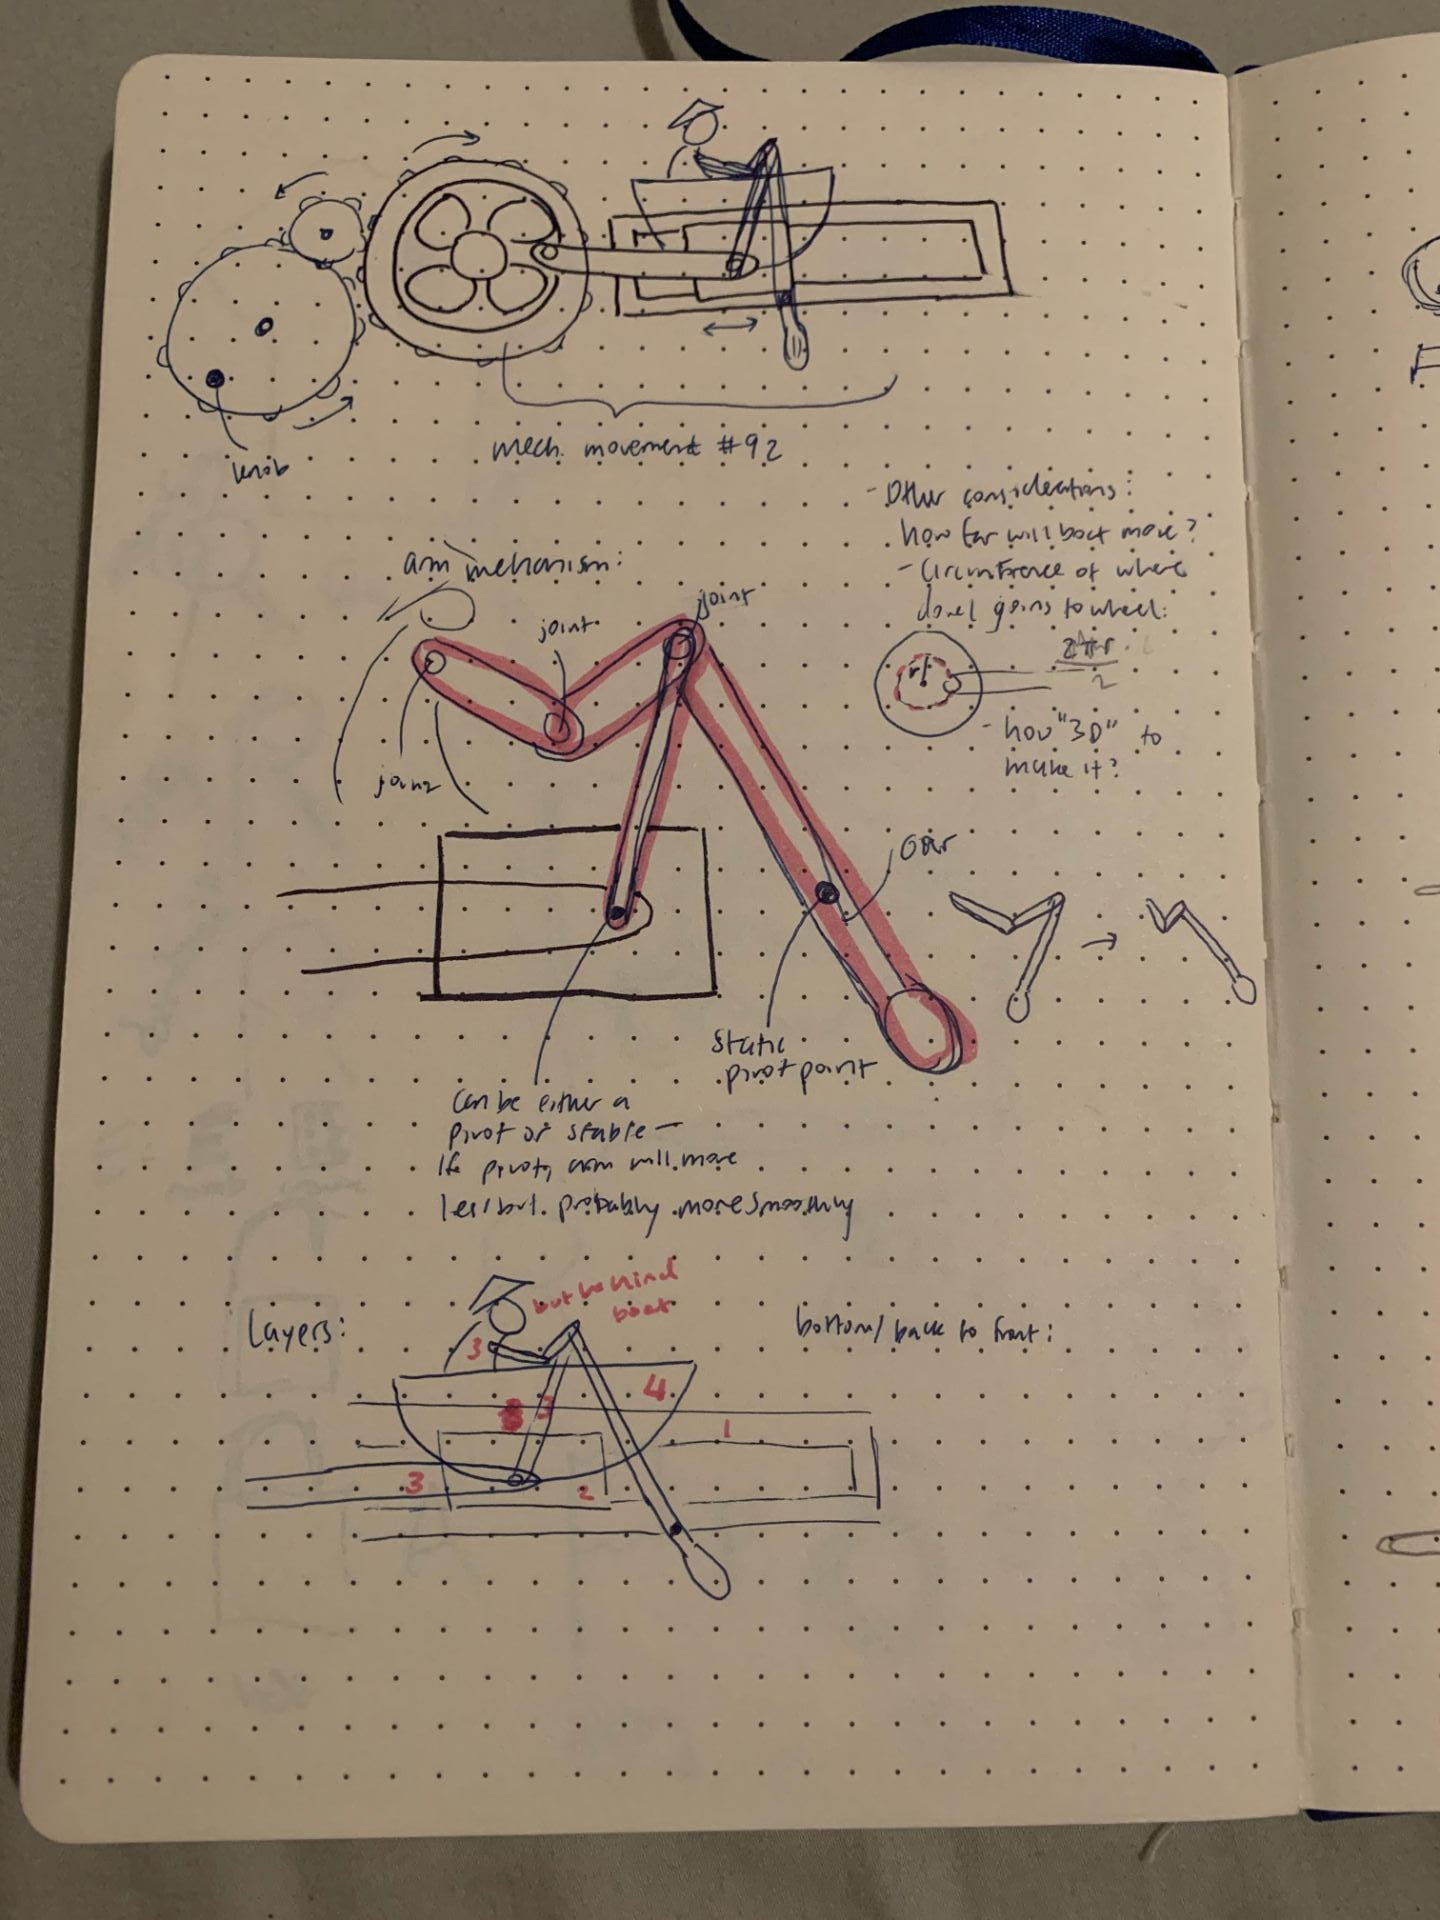
I started with brainstorming and sketches to help me conceptualize how I would translate the mechanical movement into a working 3D project. In the sketches, you can see brainstorming on not only how mechanical movement 92 would work, but also ideas for how my boatman’s arm and oar would look.
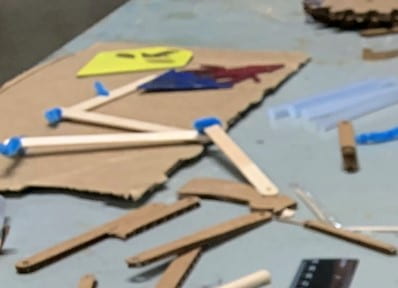
From there, I drew up my components on Adobe Illustrator and cut them out on the laser cutter out of cardboard for my first low-fidelity prototype.

Unfortunately I didn’t take pictures before we had to leave, but I did manage to somehow catch 2 pieces of cardboard on fire! Lesson learned: even if it’s double layered cardboard, there’s no reason to be using a slow speed to cut through it in one go.
The cardboard was too flimsy to test the oar and arm component since they were much more fine than mechanical movement 92, so I used popsicle sticks and some pipe cleaners to test if the arm movement was feasible. By doing this, I also simplified the arm and oar a lot because it showed me that a lot of what I designed was unnecessary and bulky for my desired movement.
Some other things I changed because of my low-fidelity: I realized the boat rocked back and forth too much, so adding a bar below the boat just inside the bar that connected the boat to the turning gear and outside the rails would prevent the boat from rocking and ensure it moved only translationally. I could disguise this bar by adding a piece in front of it that looked like waves.
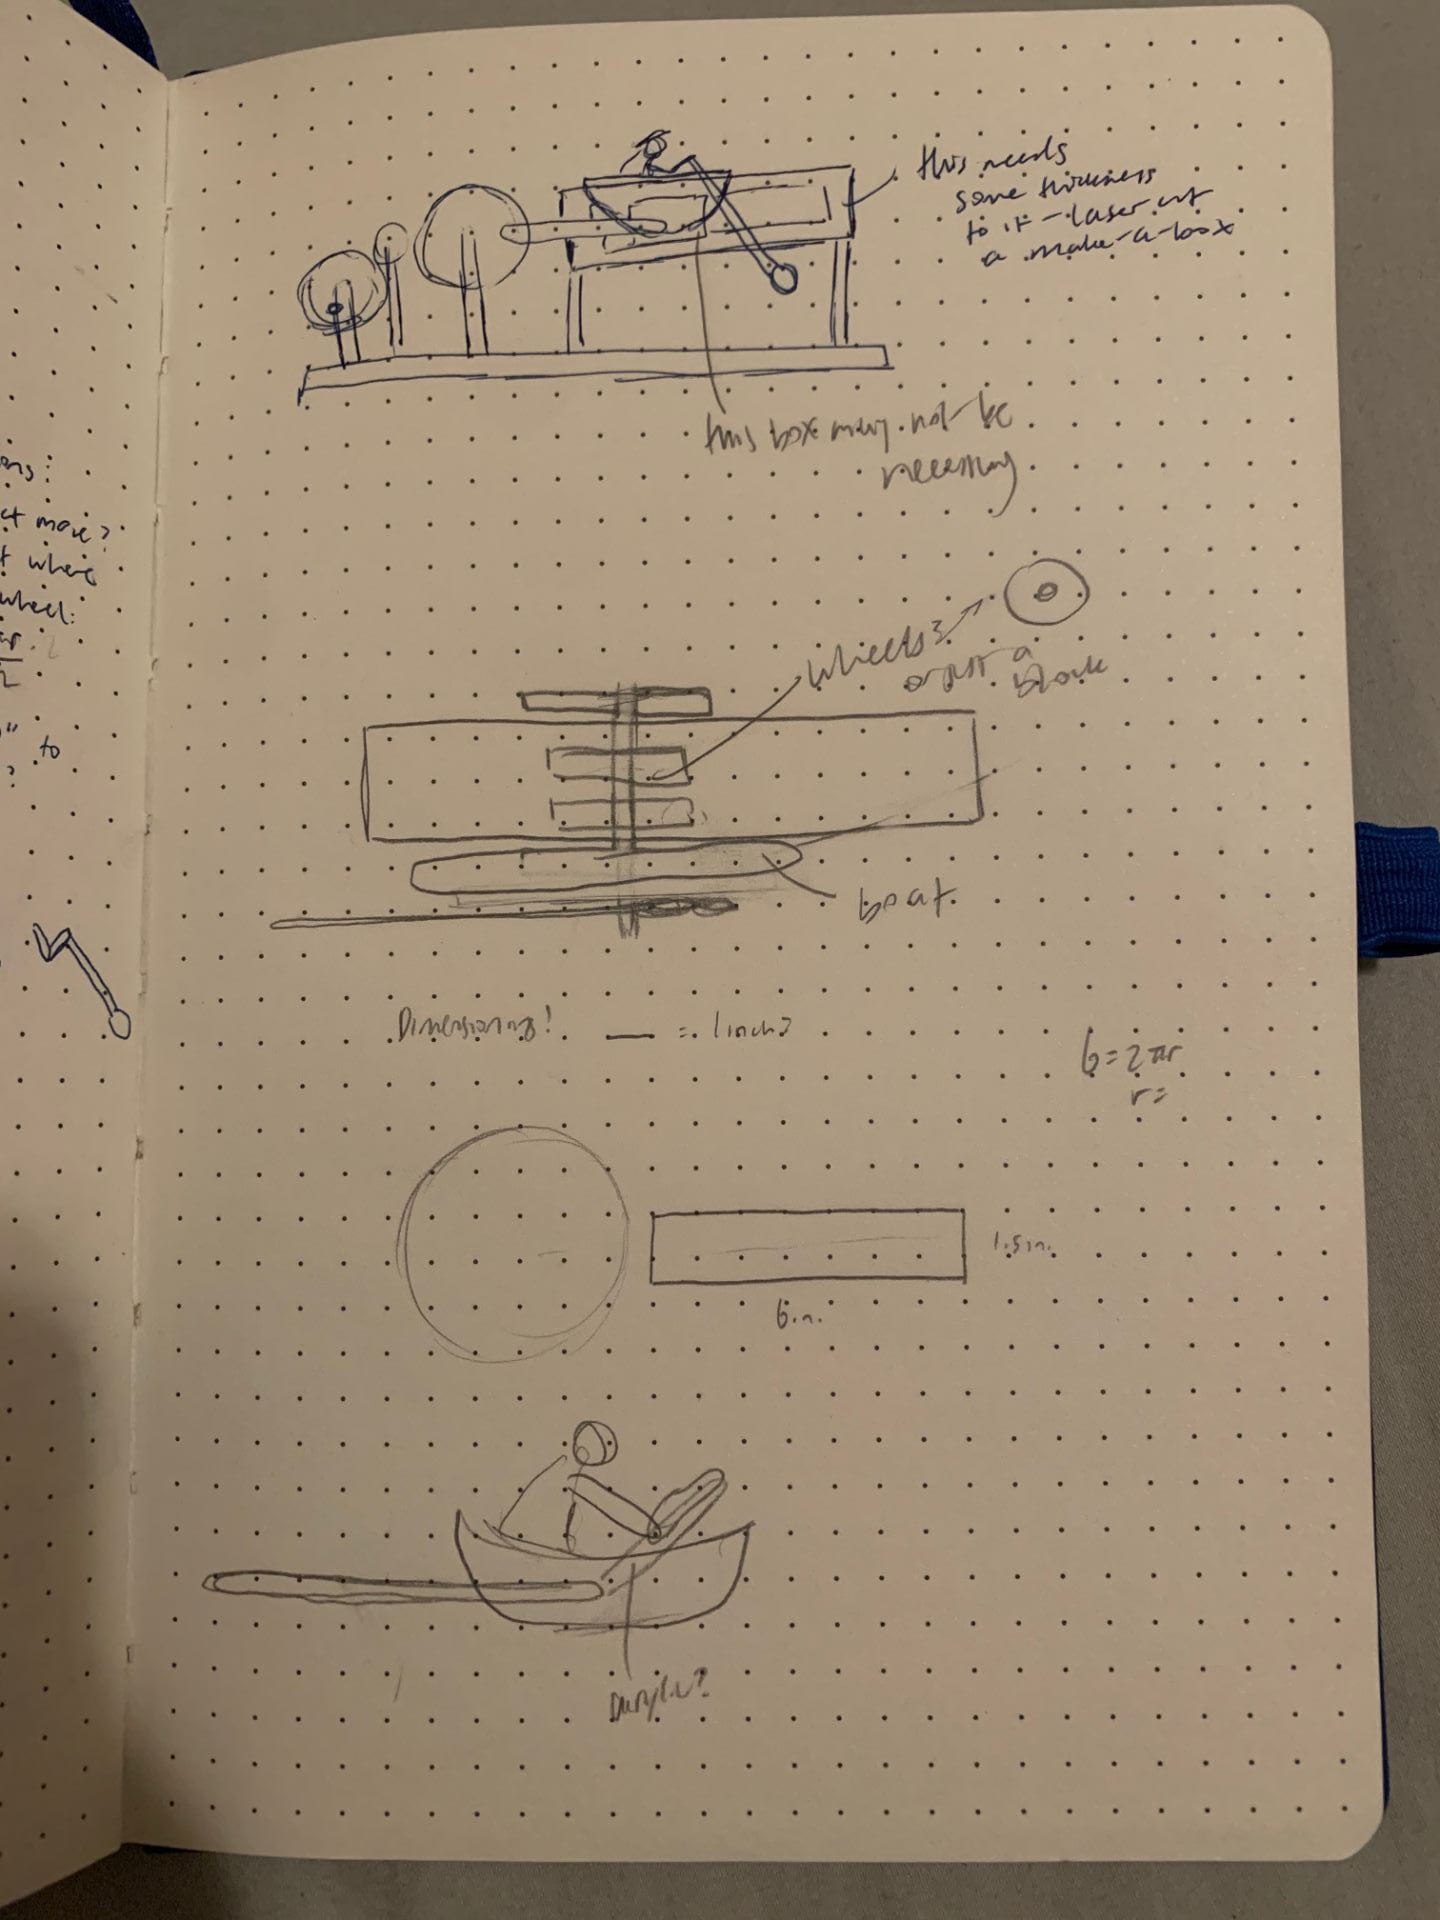
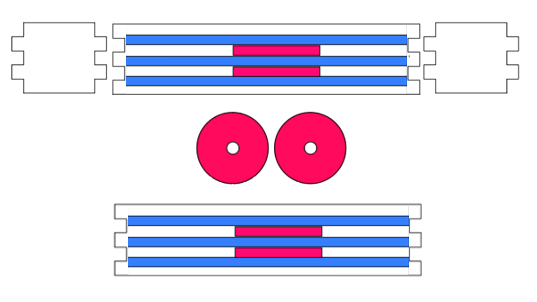
I also realized that the translationally moving piece would need wheels held in place by rails to give the smoothest motion possible. In the picture below, the outline is of the “box” that would serve as the piece confining the boat to move back and forth, the red circles are the wheels (the hole in the center is for a dowel that would run through the wheels and connect them to the boat), and the blue stripes are the ~1cm tall rails that held the wheels in place. The image below shows how both the top and the bottom of the box had rails.
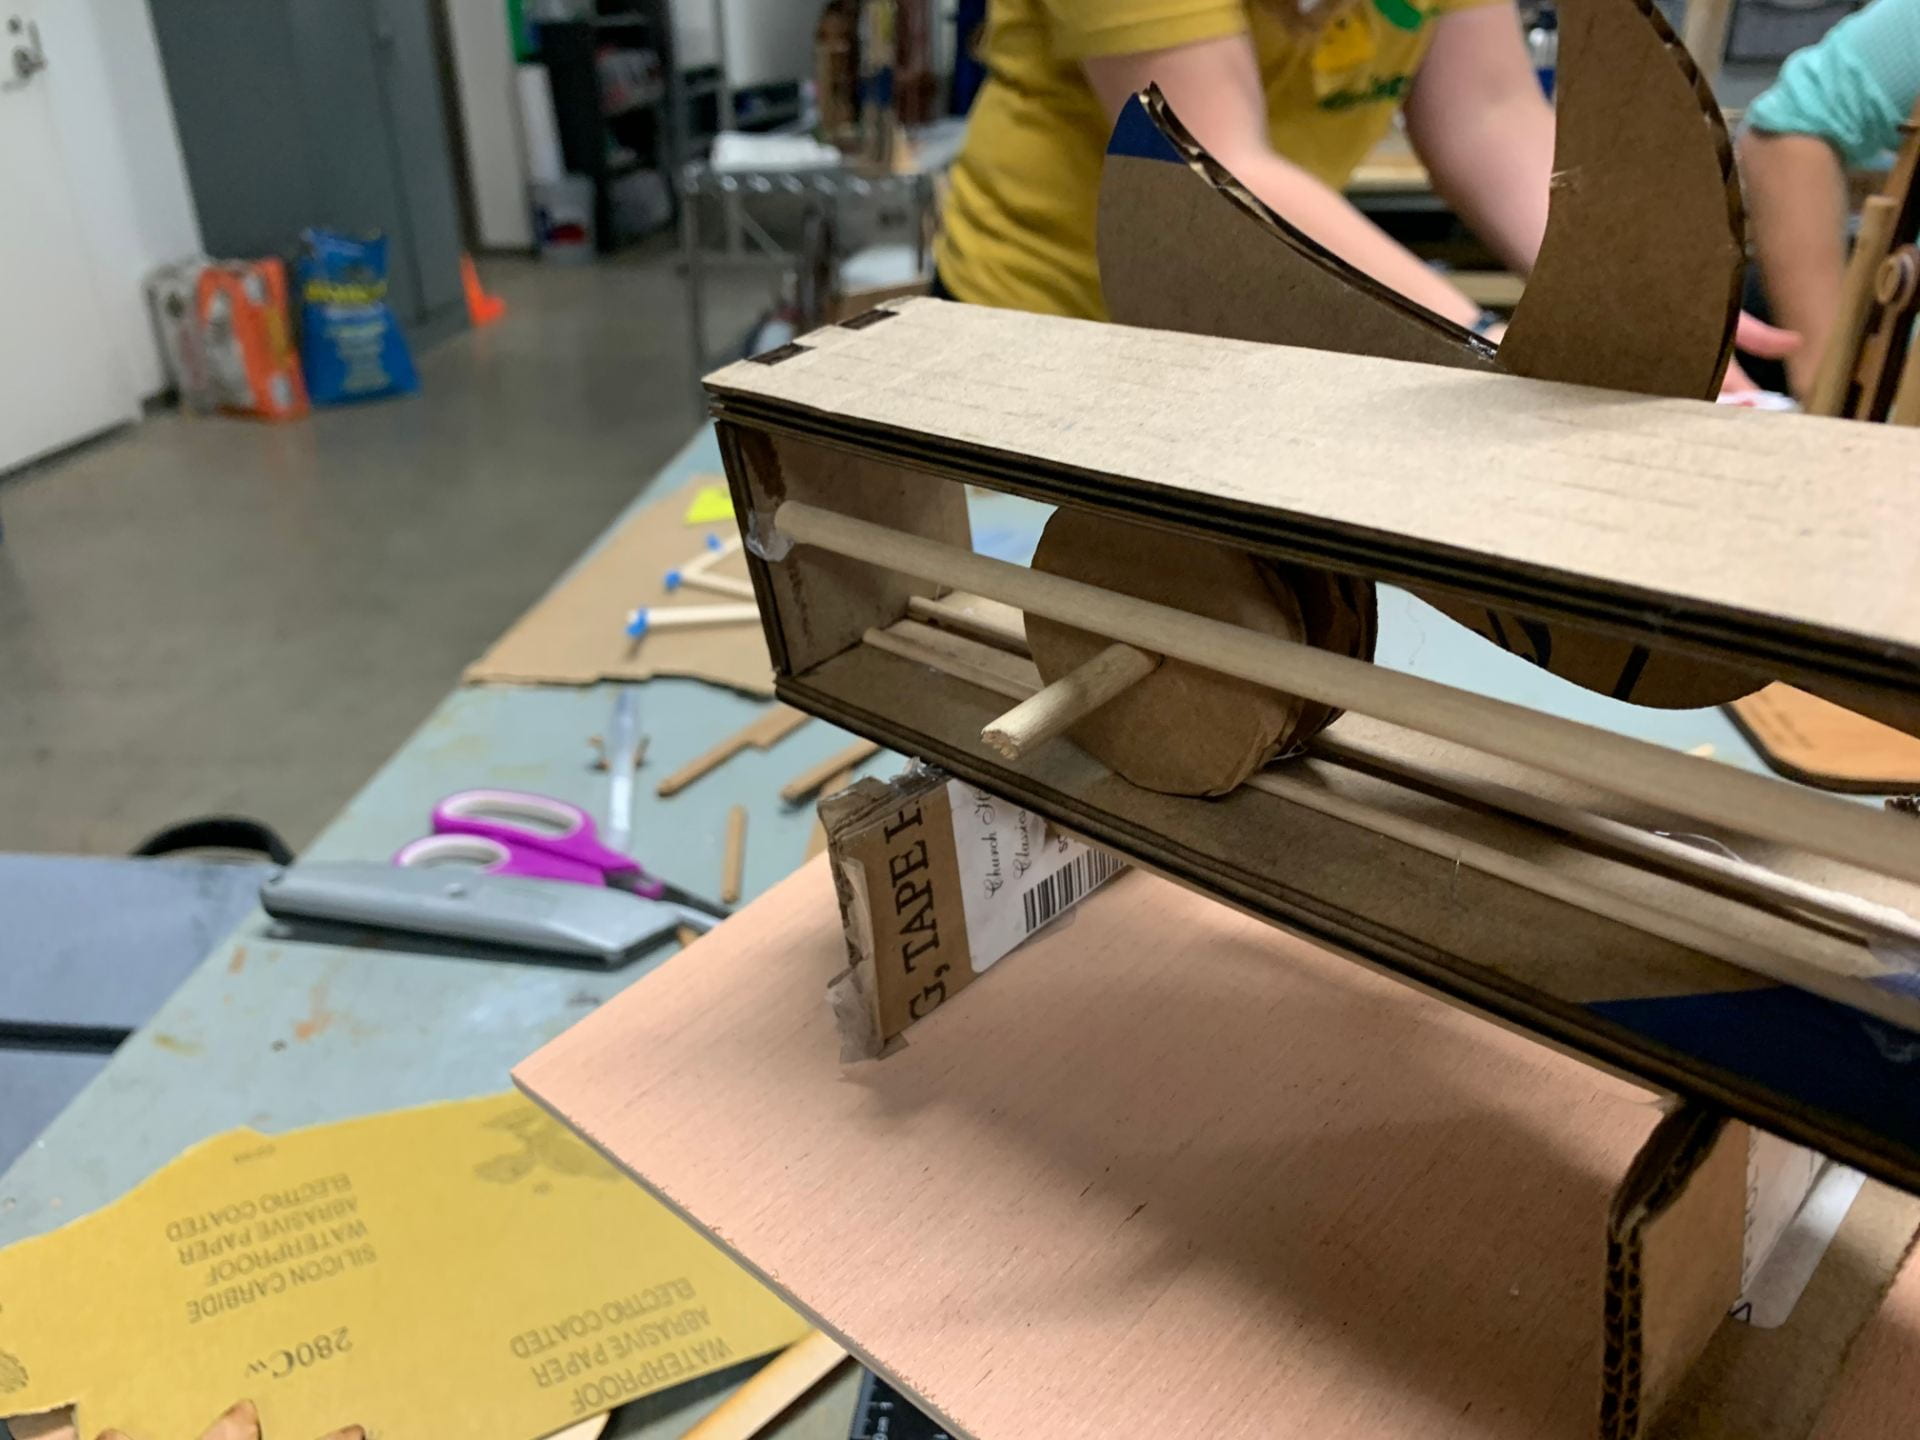
In the image below, you can see how I assembled it my low-fidelity with the wheels and rails. I also had an extra dowel to hold the wheels in place, but I assumed in my higher fidelity prototypes this wouldn’t be necessary as the material would be less malleable.
My low-fidelity worked, and I moved on to making a plywood mid-fidelity. It was in the middle of assembling this model that classes got cancelled and we were sent home, and I was unable to get pictures of my half-assembled mid-fidelity prototype. The parts I had assembled worked smoothly, so I believe my project would have worked with little changes.
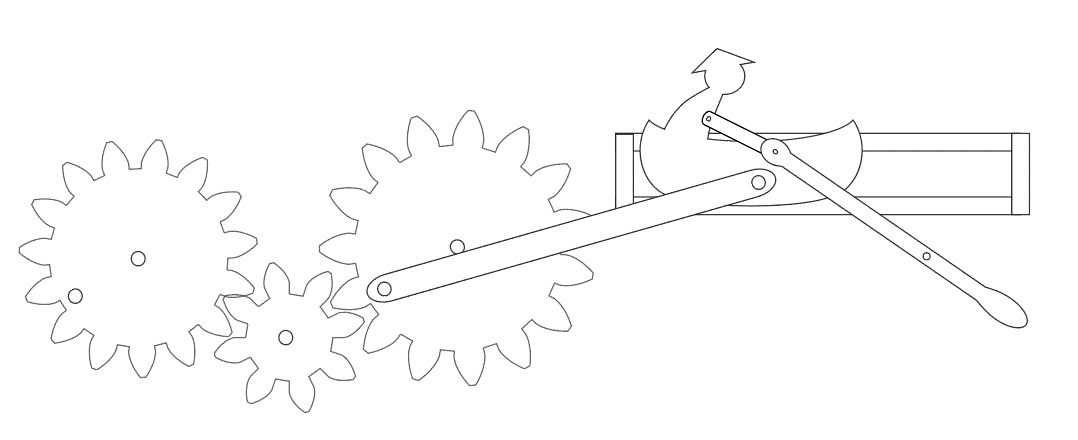
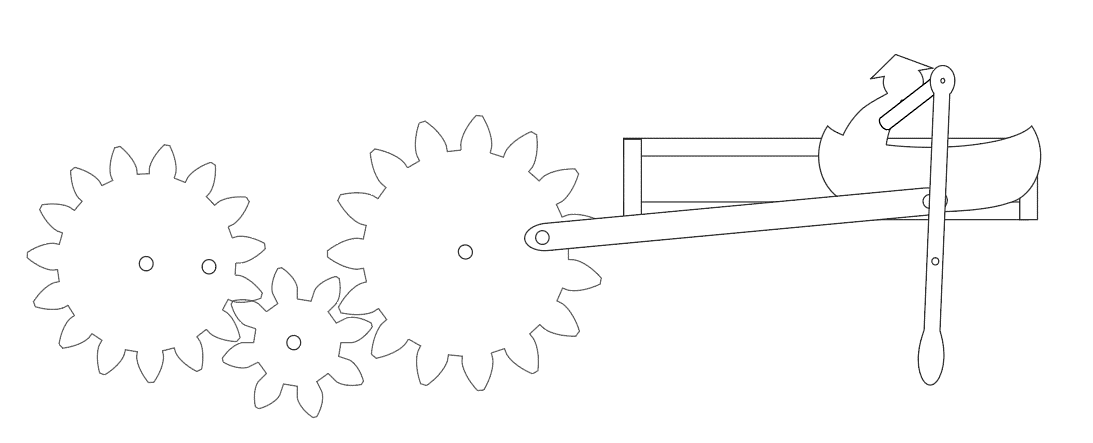
To give a better idea of what the motion of the boat and oar+arm would look like, here are several Illustrator drawings that show you what my project would do when used:


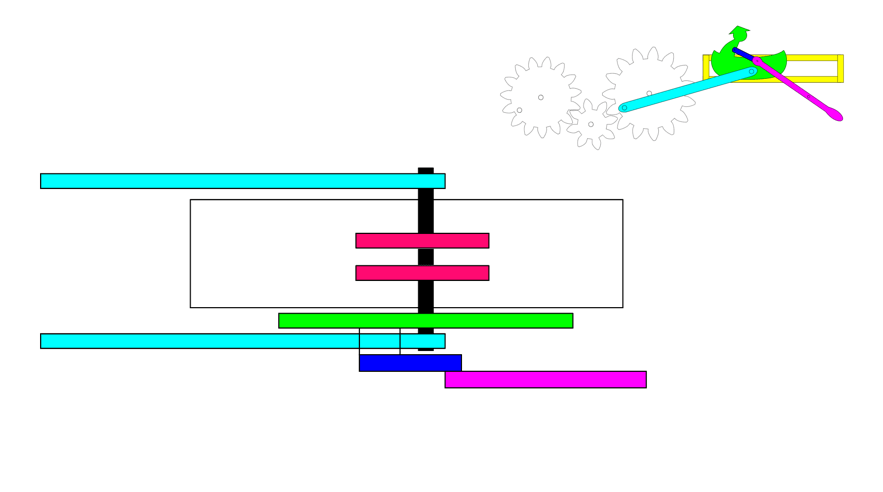
Another image that I created to help visualize the inside of the “box” and how the boat man+oar+arm would all fit together (imagine that the yellow box in the key from the top right corner had its top removed, and you could see the red wheels inside the box. The black rod is the dowel that holds it all together):
Had I finished the project, I would have sanded+stained all of the plywood, using a lighter stain on the gears and box and a darker stain on the boat+oar and arm to make those stand out more. I would’ve also used the waterjet to cut out the wheels to reduce friction as much as possible, then plasma cut the bar connecting the gear to the boat because it was a piece that had to be long, thin and stiff.
Despite not getting the chance to finish, I really enjoyed how creative this whole process was, and if I can get my pieces mailed to me I can finish a working mid-fidelity model in my own time.
To calculate the final cost, I’m going to include the materials I think I would’ve used for my final product:
plywood: 3 pieces, 3x$5.00=$15.00
Wood glue: A bottle is $4.00
wood stain: 2 types, 2x$4.50=$9.00
Metal: probably around $5-$10 since they are small components
Labor: estimated around 24 hours x $10 (lab-assistant wage) = $240
Total, not including equipment/tools used~ $278
