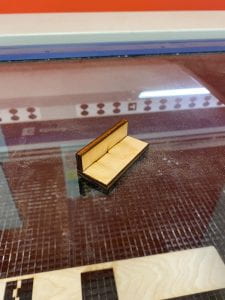
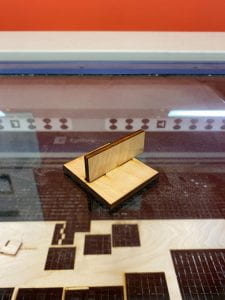
This week, I worked on creating a box out of a thin (0.2 inch thick) sheet of wood using a laser cutter. I have a fair amount of experience using the laser cutters at the OEDK, including the creation of multiple boxes similar to the one seen in the beginner-level instructions, so this project is the first time that I have decided to attempt the intermediate-level assignment. For this project, this means rather than creating a simple, cubic box with some engravings on the outside, I was to create a box with multiple compartments of predetermined size that will be used to display and store future ENGI 210 projects. It is worth noting that I also designed a lid for this box, but I do not intend to close it until the end of the class to maintain its tight fit so that it can serve as a sort of time-capsule to keep all of my projects together and in good condition once the class is over.
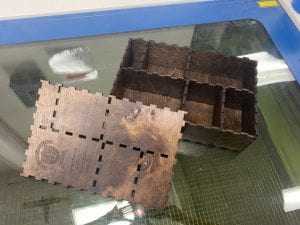
Figure 1: Finished product.
My Process
First, I began this project by performing a kerf test on the OEDK Epilog Laser FusionPro laser cutter. Unfortunately, the OEDK’s other laser cutter, which I am more accustomed to, was broken during the duration of this project, so I was slightly out of my element as far as this equipment was concerned. For my kerf test, I cut out 9 wood rectangles using 10 lines, pushed the pieces together in the hole, measured the gap, divided that measurement by 10 (since I cut 10 lines), and in doing so I found a kerf of 0.0087 inches.

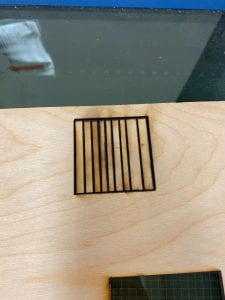
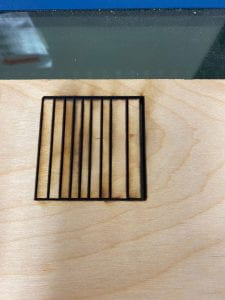
Figures 2, 3, & 4: The laser cutter I used, the kerf test after the cut, and the kerf test after pushing the rectangles together to create the gap.
Now that I knew the kerf, I visited Make a Box to create a rough design of my box. I decided that my box, accounting for the thickness of dividers, would be 7.7 inches tall and 11.9 inches wide. Inputting this information into Make a Box yielded a design for the front and back faces as well as the outer edges of my box. Over the course of a few hours of working with Adobe Illustrator and making test cuts/engravings on the laser cutter, I had completed the AI file for my box. This process consisted of a lot of detail-juggling and methodical copying and pasting of certain parts of my original Make a Box file – I will spare you the details because there are quite a few as you can probably infer from the image below.
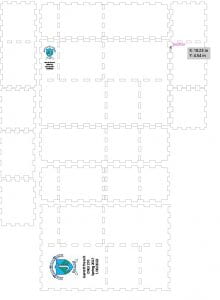
Figures 5, 6, & 7: My AI file, a corner test, and a hole test.
With the AI file made, I went to the laser cutter to make my design a reality. Before cutting, I covered the wood sheet in masking tape in order to prevent burn marks on the edges of the wood pieces near the cuts. About 45 minutes of cutting and engraving later, all of my pieces (11 in total) were cut out. I then removed the masking tape and used a high-grit sandpaper to remove some of the oddities it created in the wood.
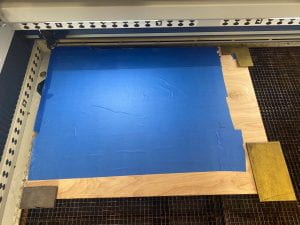
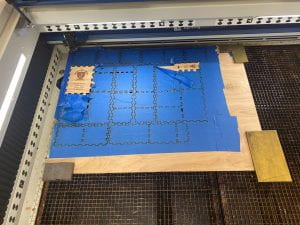
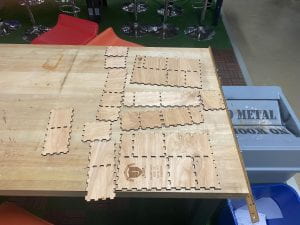
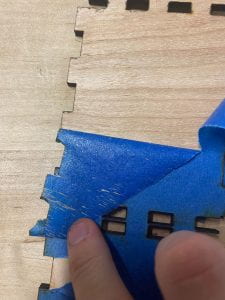
Figures 8, 9, 10, & 11: My wood before cutting and engraving, my wood after cutting and engraving, the pieces removed from the wood sheet, and the masking tape with the wood shavings it ripped off.
Now, my box was ready to be assembled. However, I wanted to take my box one step further by staining and clear coating it to improve the color and durability of the final product. First, I did a few test stains and decided that I liked Minwax’s Wood Finish Penetrating Stain in the “dark walnut” color.
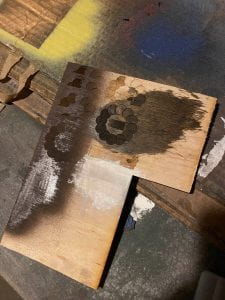
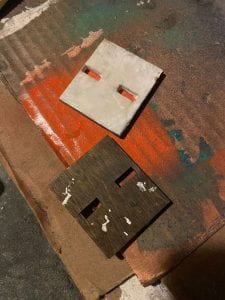
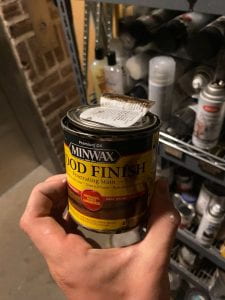
Figure 12, 13, & 14: A test of stains on engraved wood, a test of stains on wood pieces, and the wood stain I selected.
Now that I had picked Minwax’s stain, I went ahead and applied the stain. I did this by coating one side of each piece, wiping off the excess 10 minutes later, then flipped them over and repeated this process on the other side.
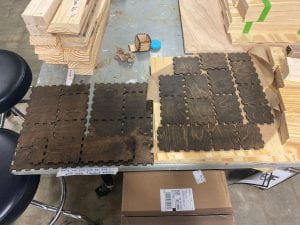
Figure 15: My pieces after staining.
Next, I moved onto the clear coating process. First, I did a few test coats with gloss and matte sprays. In the end, I decided that I liked Rust-Oleum’s “2X Ultracover Gloss Clear” the most,
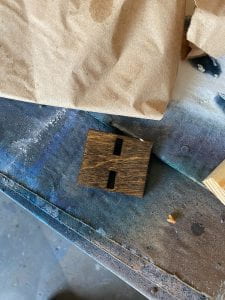
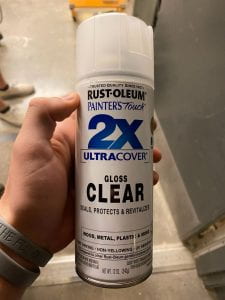
Figure 16 & 17: A previous stain test piece with a layer of gloss on it, and the clear coat that I selected.
Now that I had selected my clear coat, I began to apply. I did this by laying all of the pieces flat on a piece of cardboard outside the OEDK and spraying one layer of gloss on each of them, waiting a few minutes for them to dry, and applying two more coats in the same fashion. After their third coat, I repeated this process with the other side, but instead of laying the pieces flat I propped them up at an angle against a wall at an angle so that the still-wet underside did not absorb dust or debris from the ground. After each side had three coats of clear coat, I let the box sit and dry for 24 hours. After it had fully dried, I assembled the box.
At this point, I considered my box to be complete.
Areas for Improvement
To be honest, I am really happy with this product. I was a little bit nervous to attempt the intermediate version of this project because there were a lot of opportunities for error in the creation of the Adobe Illustrator file and I could tell that it could quickly turn into a nightmare if I didn’t pay very close attention to the details. However, to my surprise, my first draft had a near perfect fit. In fact, up to the point that the wood pieces were cut out, I do not think I would have done anything differently. When it came to post-processing and finishing, however, there was room for improvement.
As can be seen in Figure 10, when my pieces were first cut out, the engravings were dark and bold in comparison to the rest of the wood (I used a relatively high power compared to the recommended settings for the machine). They were so dark, in fact, that I was hoping that the stain would decrease the contrast in color between them and the rest of the wood. In the end, the stain definitely did this – but so much so that the engravings can be hard to see in certain angles and lighting. I think that this happened because I picked a stain that had such a dark color. At the same time, however, I do really like the way that the stain emphasizes the grain of the wood. If I do this again, I will try a lighter walnut stain so that the engravings will hopefully still stand out in comparison to the rest of the wood.

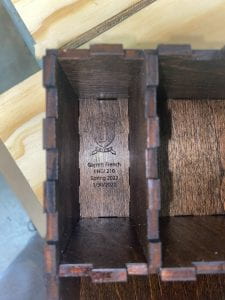
Figures 18 & 19: Engravings on my box after staining and clear coating.
There was also room for improvement in my clear coating. On the rear wall of some of the compartments, there are splotches were the coat was applied too heavily. I would include an image of these splotches, but they are very hard to capture with my phone camera. If you are able to, feel free to take a look inside the box to see what I mean.
Cost Analysis
The parts of this project that would have accrued costs are the wood sheet, wood stain, clear coat, time spent on the laser cutter, and the opportunity cost of the time that I spent working on this project.
Wood Sheet
The wood I used was a single “0.25” thick” (0.2 inch thick in reality) 32″ x 24″ birch plywood sheet. At the OEDK, which was where this project was made, these sheets cost $5 per sheet.
Wood Stain
The wood stain I used is Minwax’s Wood Finish Penetrating Stain, which ranges in price between $5-9 per can on a simple Google search. As a midrange estimate, I will estimate the cost of the entire can to be $7. However, I did not use the whole can. While I would say that 1/7th of the can is still a bit of an overestimate for how much I used, for purposes of making my numbers nice, I will use this approximation so I can likewise approximate that I used $1 worth of this stain.
Clear Coat
Most retailers seem to sell a can of Rust-Oleum’s 2X Ultracover Gloss Clear for around $5. I did not use anywhere near the entire can, but it is impossible to know how much of the can I used since I cannot visually see how much of the contents are left. Therefore, I will make a generous estimate of $1 for the amount of clear coat that I used.
Laser Cutter Time
For this project, between making test cuts and engravings as well as producing my final pieces, I would say that I spent roughly an hour on the laser cutter. Finding the cost of using a laser cutter for an hour was difficult, but I found a blog online (Dahlstrom Roll Form) that estimated the cost of running a laser cutter for an hour to be between $13 and $20. Since a business would want to profit from someone using their laser cutter, they would charge a customer more to use it than it would cost the company for them to use it. For this reason, I’ll estimate the cost of me using a laser cutter for an hour to be $15 (a midrange estimate) x 2 = $30.
Opportunity Cost of Time
In my last blog post, I based the opportunity cost of my time for the corresponding project off of my lifeguard wage. I just got a second on-campus job as a Technology TA, which has a higher hourly wage of $12, so I will base the opportunity cost of this project of of this new wage rather than my lifeguard wage. I spent about 8 hours of my own time on this project, so the overall opportunity cost of this project was $12 x 8 = $96.
The overall cost of this project was $5 + $1 + $1 + $30 +$96 = $133. Similar to the apron project, costs associated with the time I spent working (opportunity cost of my time and the cost of equipment time) make up a great portion of the cost – almost 95% in this instance. Since I now have the AI file prepared and am more familiar with the post-processing and finishing process, I think that if I did this project again, I could significantly reduce the time requirement, and with it, the price.
