I was incredibly excited to complete this project! It lined up nicely to my robotics club responsibilities of printing out 3D objects for prototyping, and it was also a perfect excuse to try out printing on the new FormLabs Form 2 printer.
CHoosing the object!
For my 3D object, I decided to print out an articulated gecko from Thingiverse (https://www.thingiverse.com/thing:3630897), because geckos are cool, and also because I wasn’t comfortable creating my own 3D object to print.
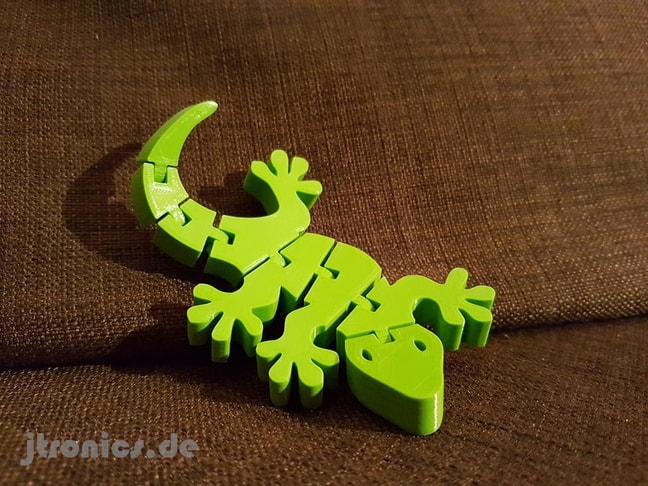
Image of the model showcased on Thingiverse!
I faced a couple of setbacks while making this project, but ultimately, I learned a lot about how to set up a print for success!
fdm printing!
First, I printed my object using an FDM printer, as it was the type of 3D printing that I was most familiar with.
I first tried printing on a Bambu printer with Margo, and Izzie, but this print failed. I wasn’t entirely sure why, but I theorized that it could have been from the filament not properly adhering to the bed due to a lack of supports.

So for my next print, I decided to print again on the Bambu, but this time putting rafts on my object.
This was a horrible idea. I ended up having well printed geckos that were stuck to their bases. When I would try to free them, they’d end up snapping in half. 🙁

Finally, I decided to just print on the Original Prusa i3 MK3. This time, I ditched the supports, and put a thin layer of glue on the printing bed to ensure that the filament would adhere to it. This worked great! My little geckos were well articulated, and able to flex well! Yippee!


sla printing!
I then printed using an SLA printer. I loaded up my file in FormLabs, and added mini rafts as my shape wouldn’t need much support as I learned from my previous prints. I printed a total of 8, as Izzie recommended to print extra as some might break.

I ended up cleaning and curing someone else’s print to be able to print my part, and thankfully someone did the same to my piece, as when I came back the next day, my prints were already done (didn’t need to clean or cure! Yay!). I originally tried removing the supports with an X-Acto Blade, which ended up taking way too much time. Eventually, Zion came over and recommended wire cutters instead, which worked great in comparison! I removed these supports, and then learned why Izzie told me to print extras. 2 of my prints broke since I was a bit too forceful with removing the supports.


I then realized that all the joints fused together for most of my pieces, except for one. I thought I could “loosen” the joints by moving them gently, but instead I ended up just breaking another 3. I then broke another one trying to fit it into a capsule when it was too large.
I was finally left with 2, and one of them was incredibly stiff, while the other had only 3 out of its 6 joints fuse together. This less stiff one I put in a capsule, while the stiff one was not submitted, as it wouldn’t fit in a capsule. This comedically sad moment taught me why it is incredibly important to be cautious when removing supports from prints, and why printing extras is always a good idea.

From this project, I learned it’s not the best idea to print small objects with articulated joints on an SLA printer, as the resin will fuse together. I’ll be sure to reserve the resin printer for prints that do not have moving joints, as while I loved the smooth surface it provided, I did not like having a stiff gecko 🙁 .

Final Assembly!
Cost estimate:
- Materials:
- PLA filament (3 Prints total) – Used 11.13 m : $0.66
- Grey Pro Resin -$199 per 1 L (https://formlabs.com/store/materials/grey-pro-resin/) – Used 45 mL: ~$9.00
- Labor:
- 3d Printing Technician at $17 an hour: $25.50
- TOTAL: $35.16
