For our final project for ENGI 210, we were tasked with creating a set of 8 chess pawns. To do so, we were required to produce half of our desired shape through 3D printing and the other half through CNC milling. With two halves, we were able to create two molds that when filled together, could cast replications of our piece.
Donaldo came into this project with an idea: what if our piece was a prawn? A prawn pawn? A lover of bad puns, Maddie agreed. We went onto Thingiverse and struggled to find a prawn pawn, but we did manage to find a 3D-printable prawn that we were confident we could edit in Fusion 360. We downloaded it and uploaded it to Fusion, but we immediately got the feedback that the piece was too complex to be CNC milled. Back to the drawing board.
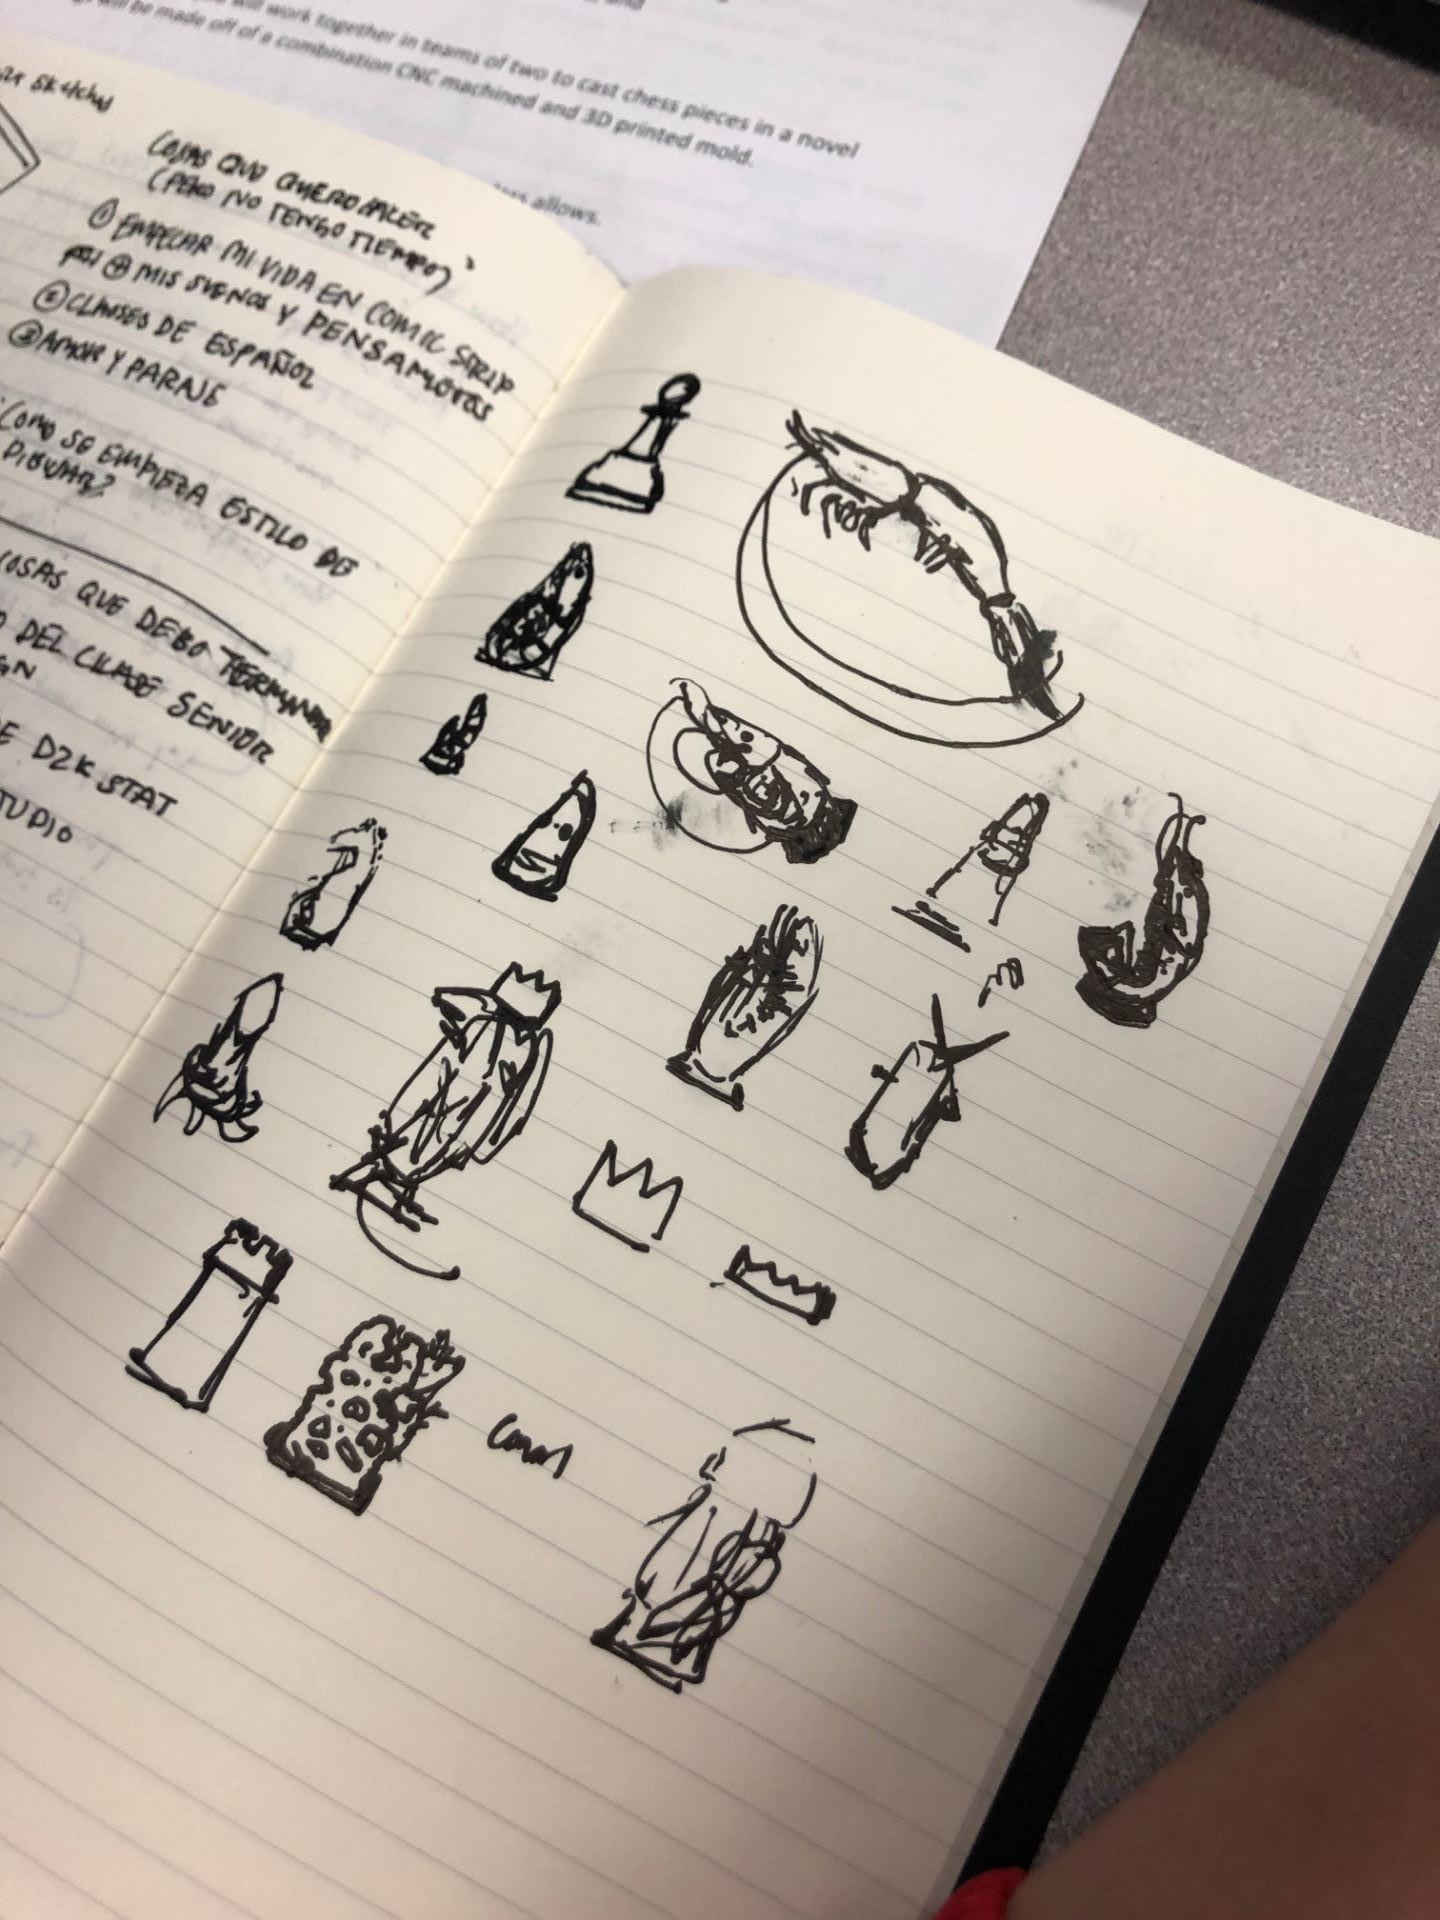
We realized that it may be easier to take a 2D prawn drawing and extrude it into a 3D chess piece. We grabbed a prawn we liked from the Noun Project and uploaded it. We were uncertain if the legs and antennas on our desired prawn would be too precise for 3D printing, so we edited the drawing in Illustrator before putting it into Fusion.
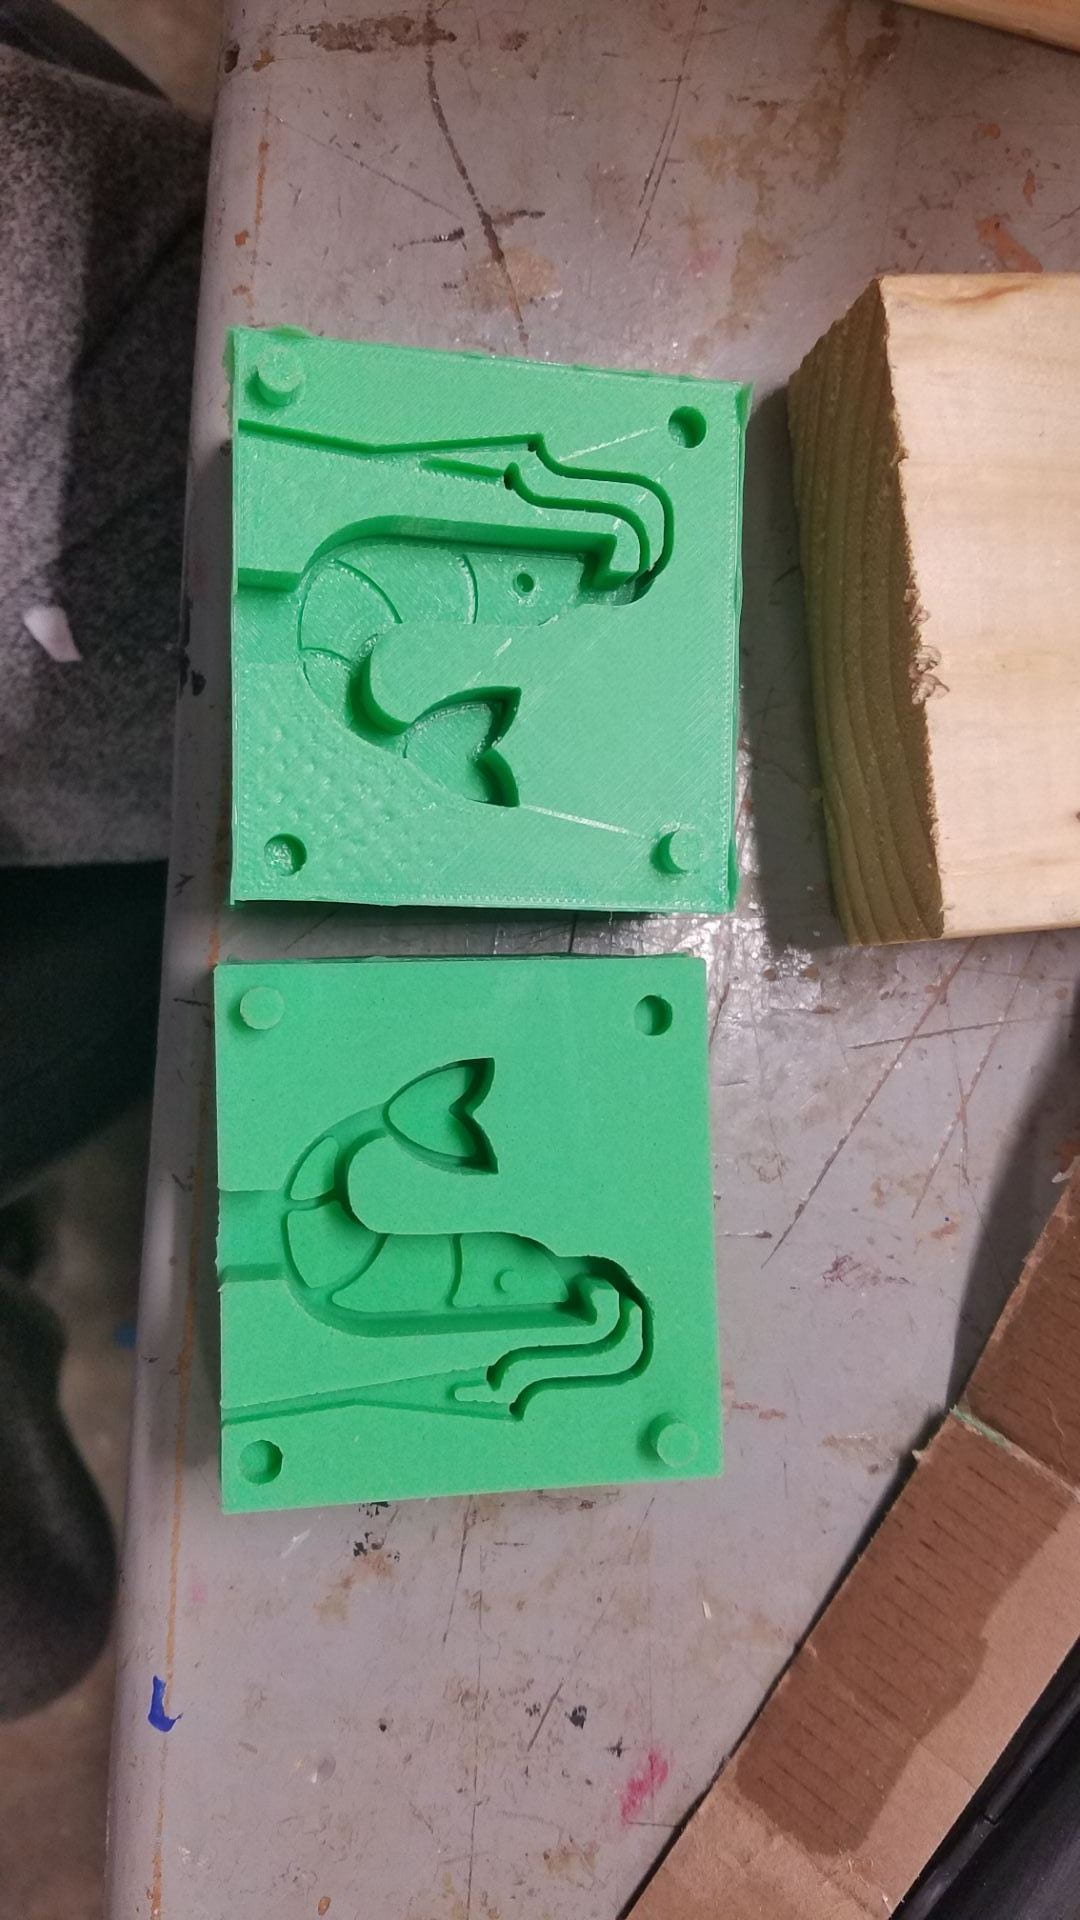
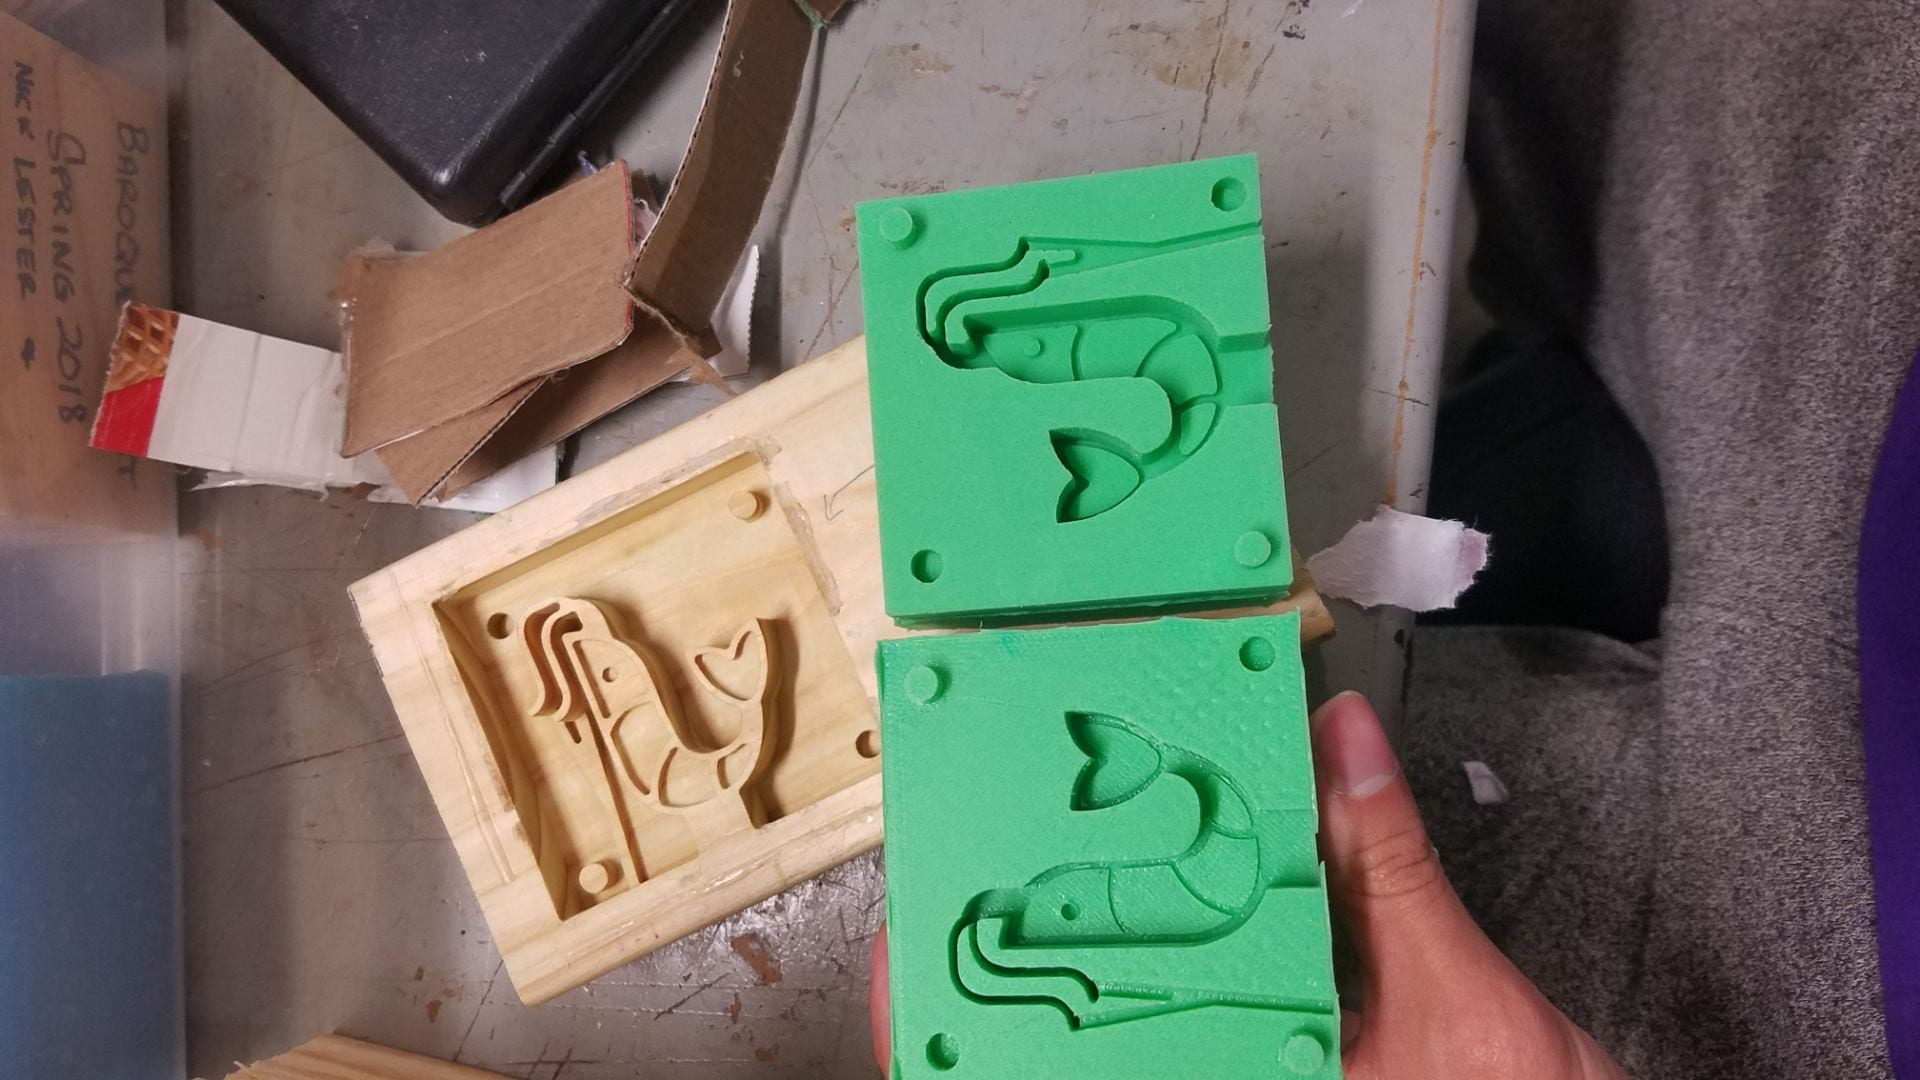
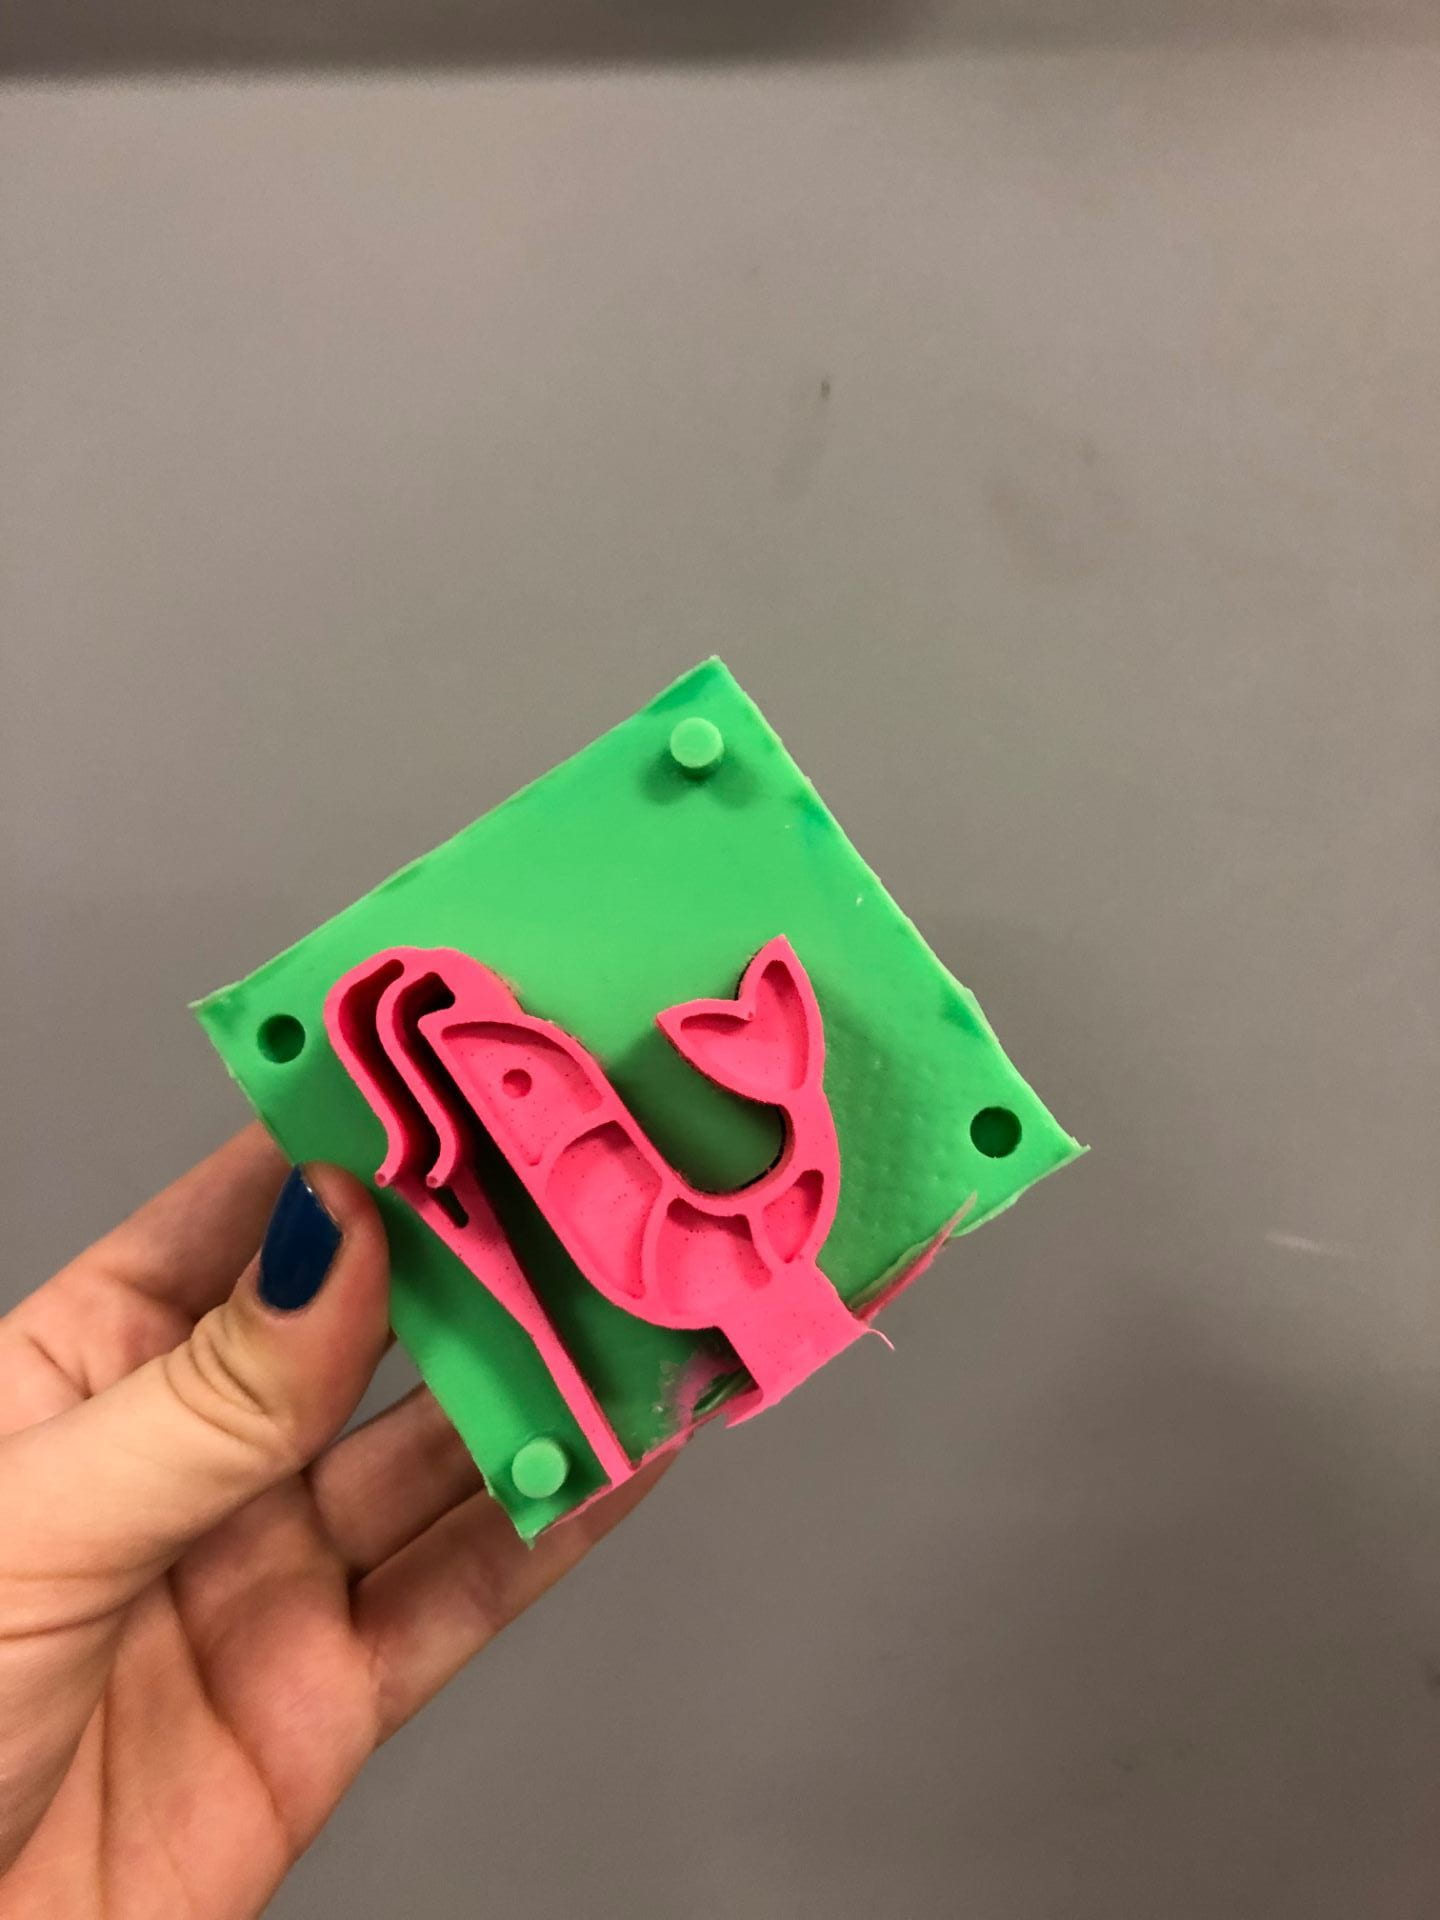
In Fusion, we extruded the drawing, making small alterations (some with more hiccups than others) throughout. We decided to give the piece two distinct heights so it would still be complex as an otherwise entirely flat piece. We added a base, a hexagon, and air paths that would come in hand later when we needed to mold and cast even the detailed parts of our design. We saved the file to a USB drive for our first 3D print.
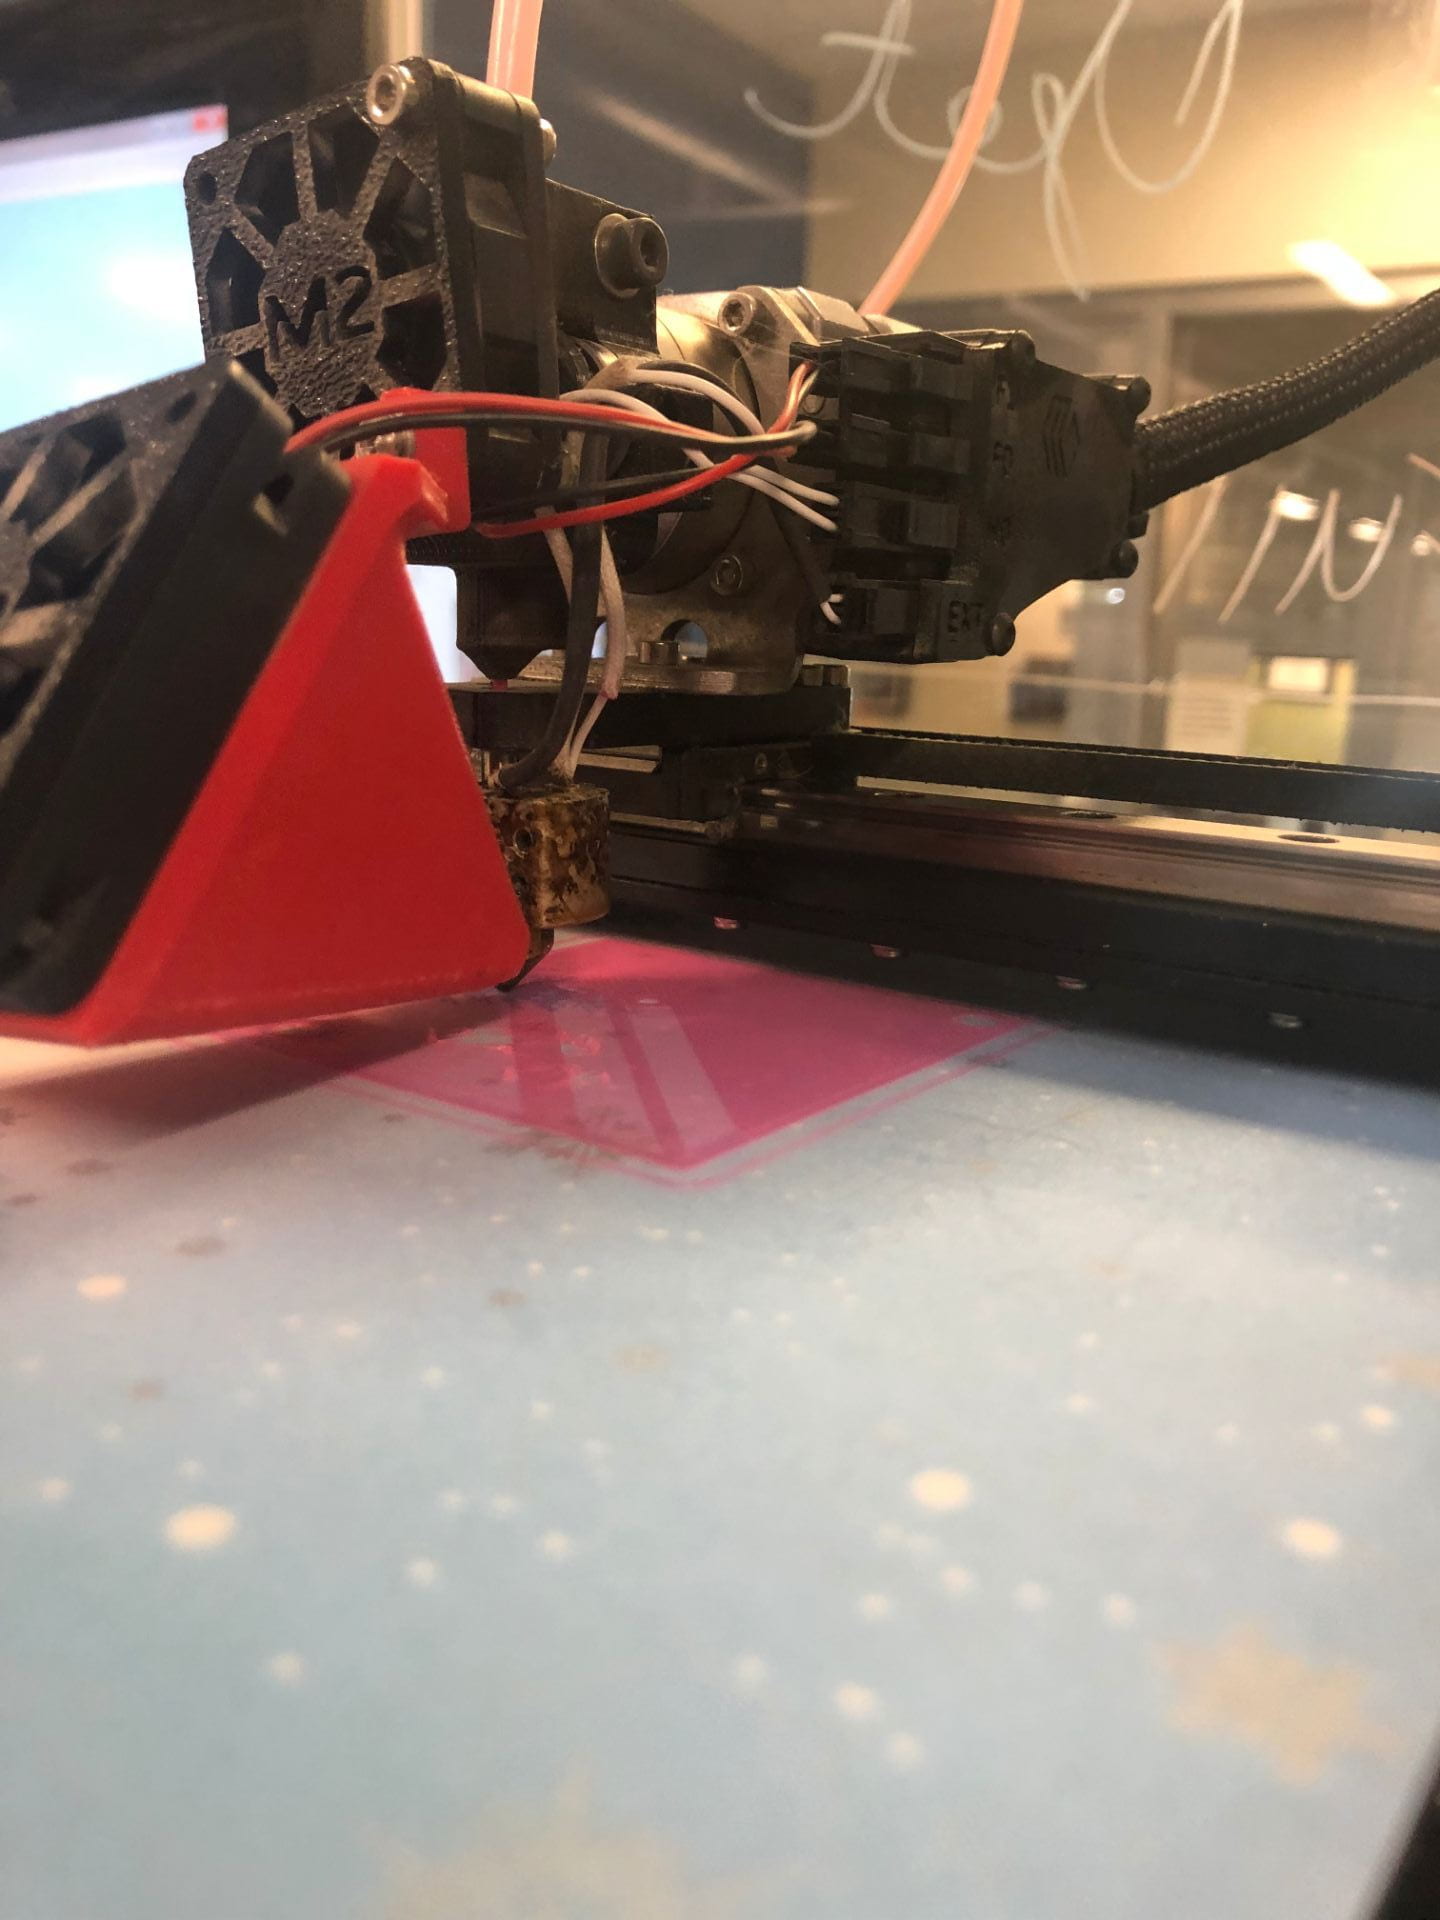
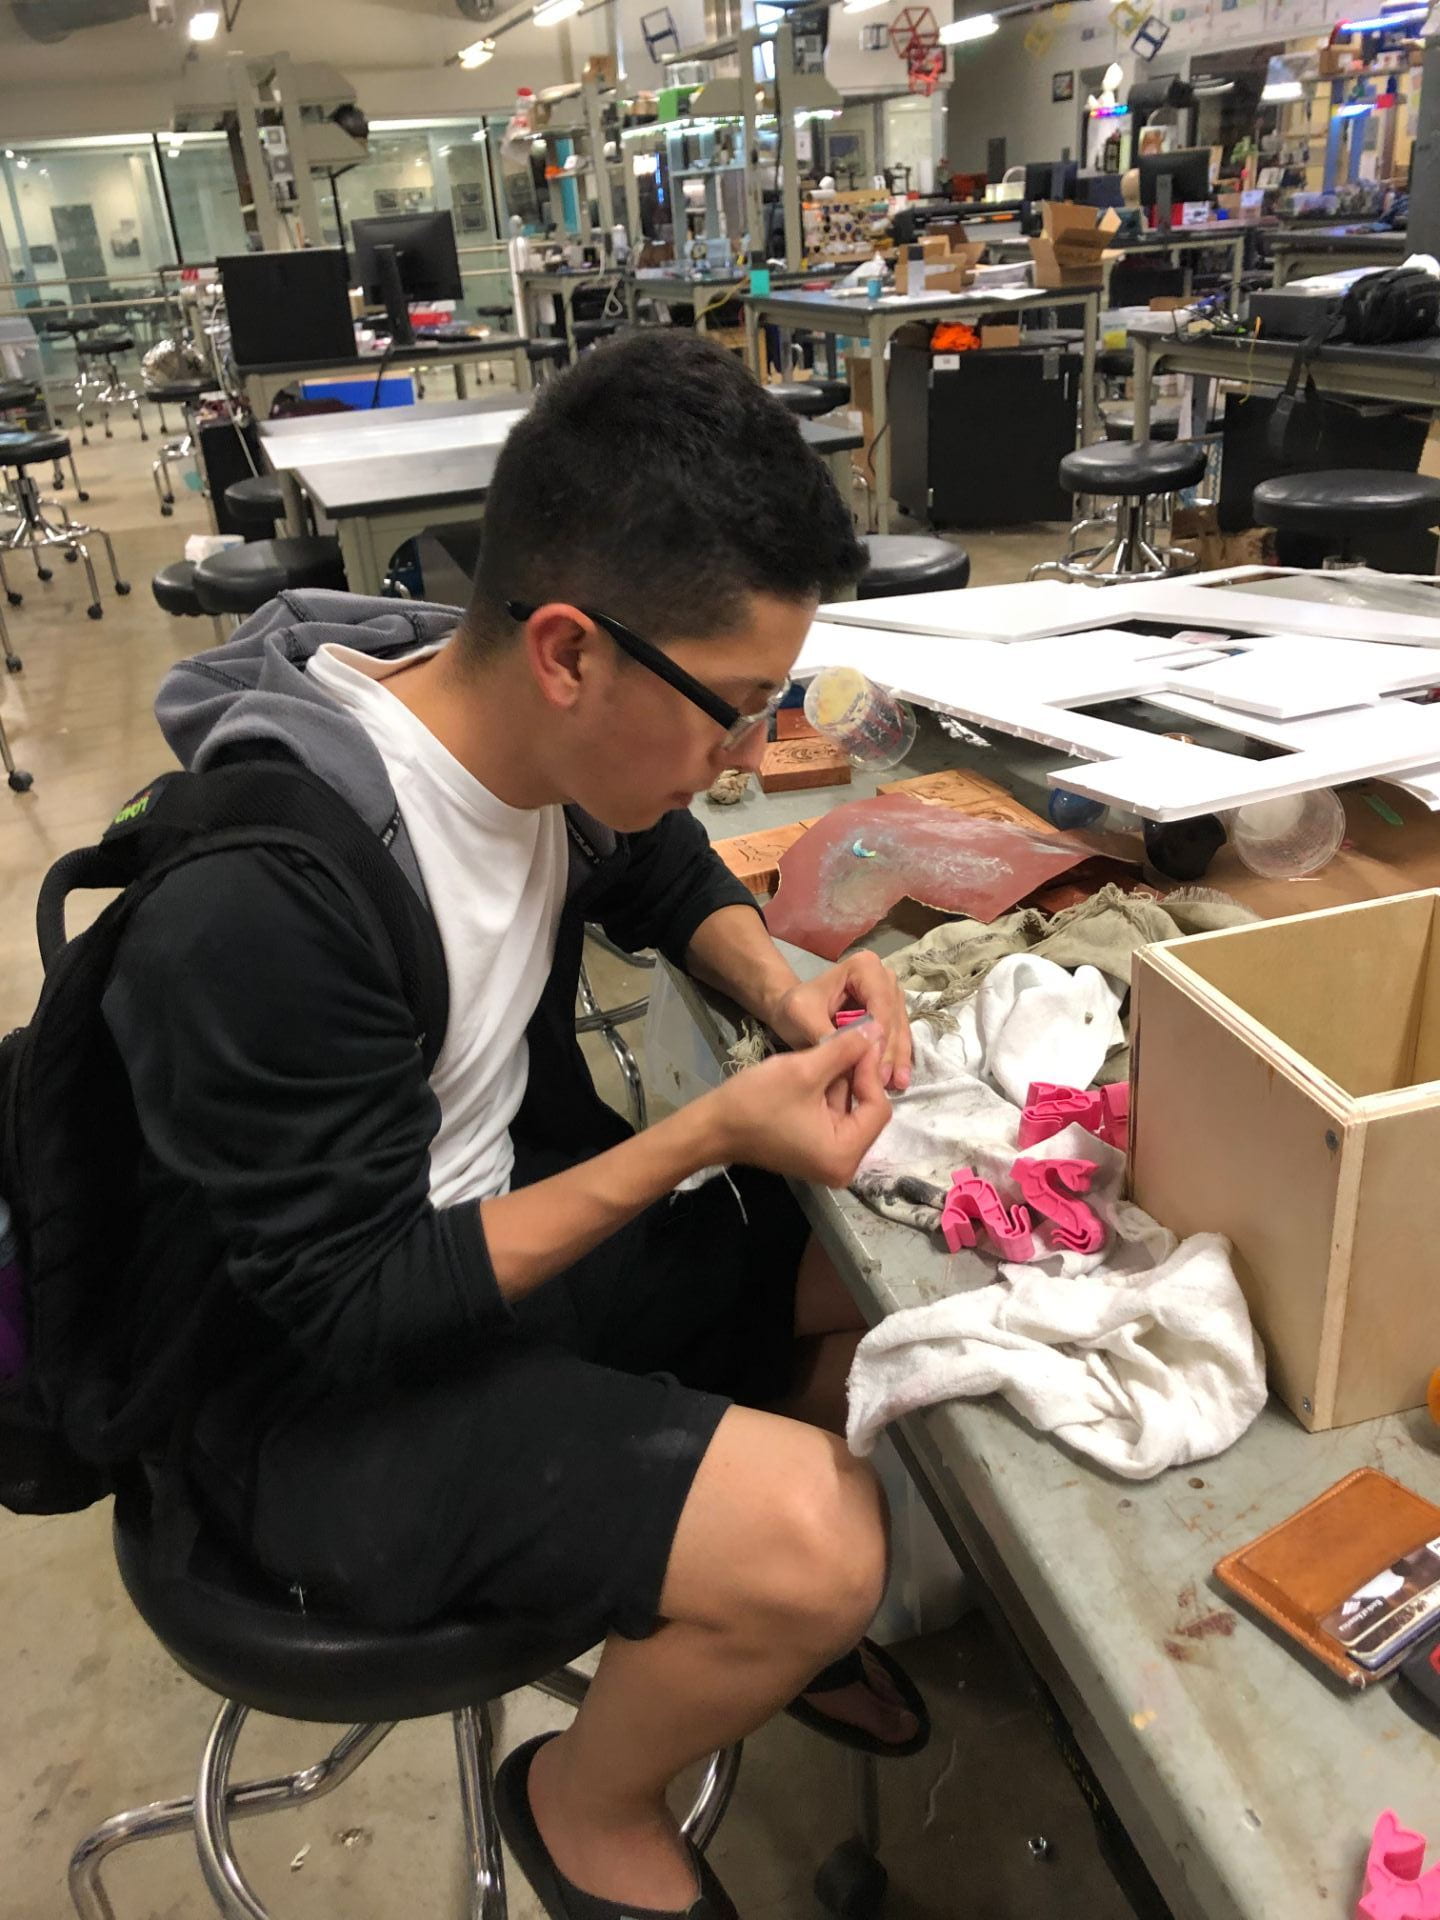
We took it over to the 3D printer and wanted it to be “really high-res,” so we slowly churned out a 3D print with .01 layer height. When we returned at the end of our (no kidding) 8 hour print, we were dismayed to see that something had gone wrong on the top of our print. We aren’t 100% sure why there were holes and unwanted texture on the top layer, but with the lab-techs, we came up with a few theories: 1) maybe the print didn’t finish, 2) maybe the later height was too thin and just didn’t provide as smooth of a finish as we would’ve liked, or 3) maybe the top layer separated from the rest of the piece sometime in those eight hours that we were gone. Regardless, our first 3D print provided important learnings for our final version. Holding the physical prawn in our hand, we noticed there were areas way too tight to cut using the 1/16 inch CNC bit. We marked those areas on our piece and went back to the computer to make alterations. Dr. Wettergreen happened to come by as we were starting, and he pointed out an area we had missed in our check: the point where the prawn intersects with the base.
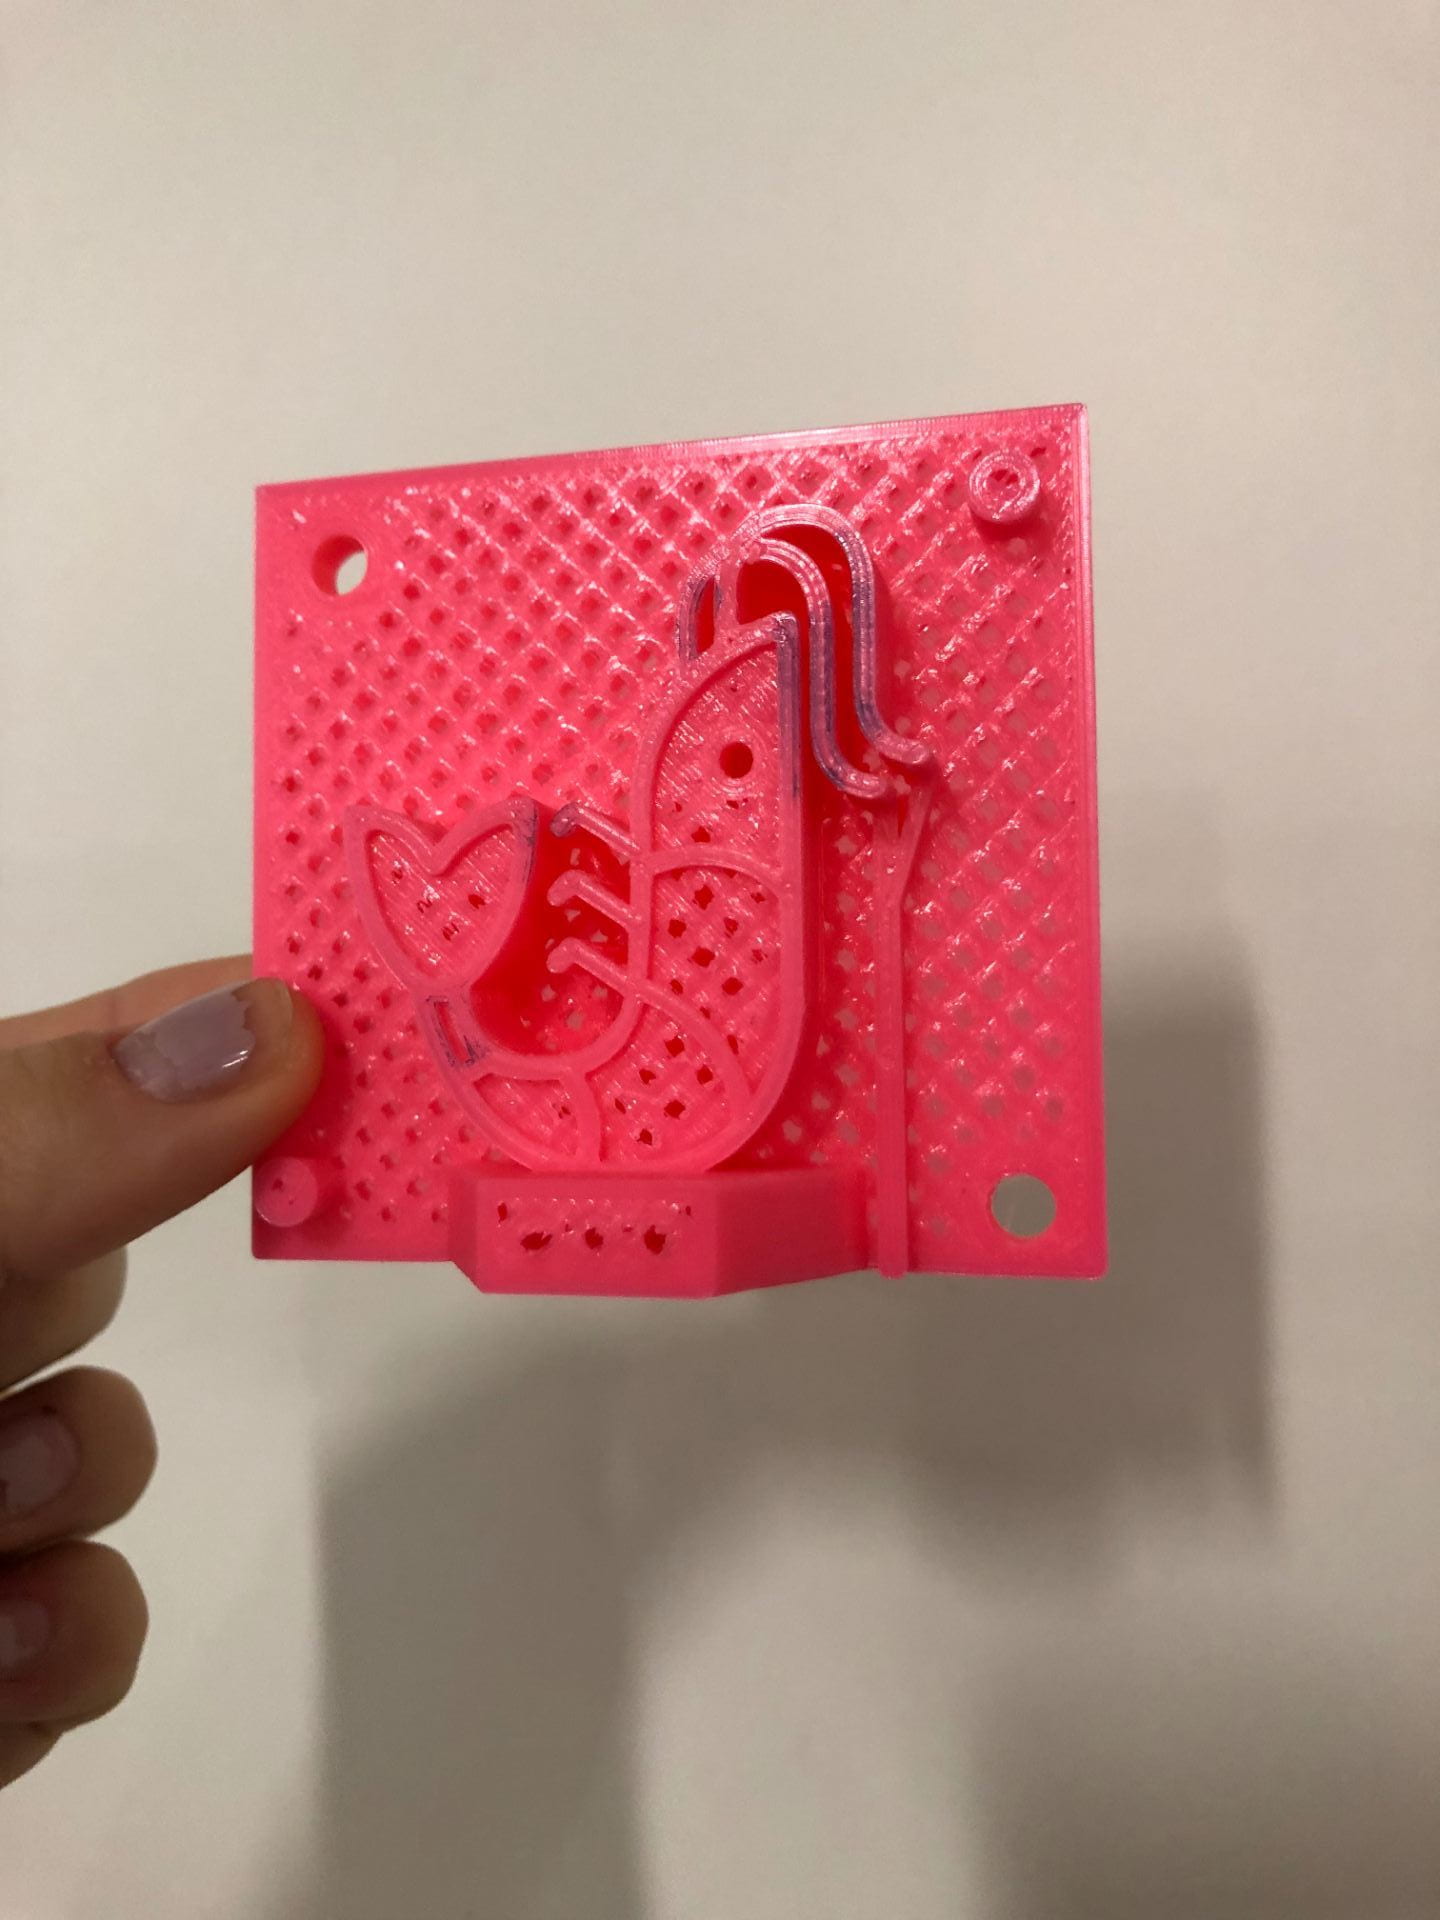
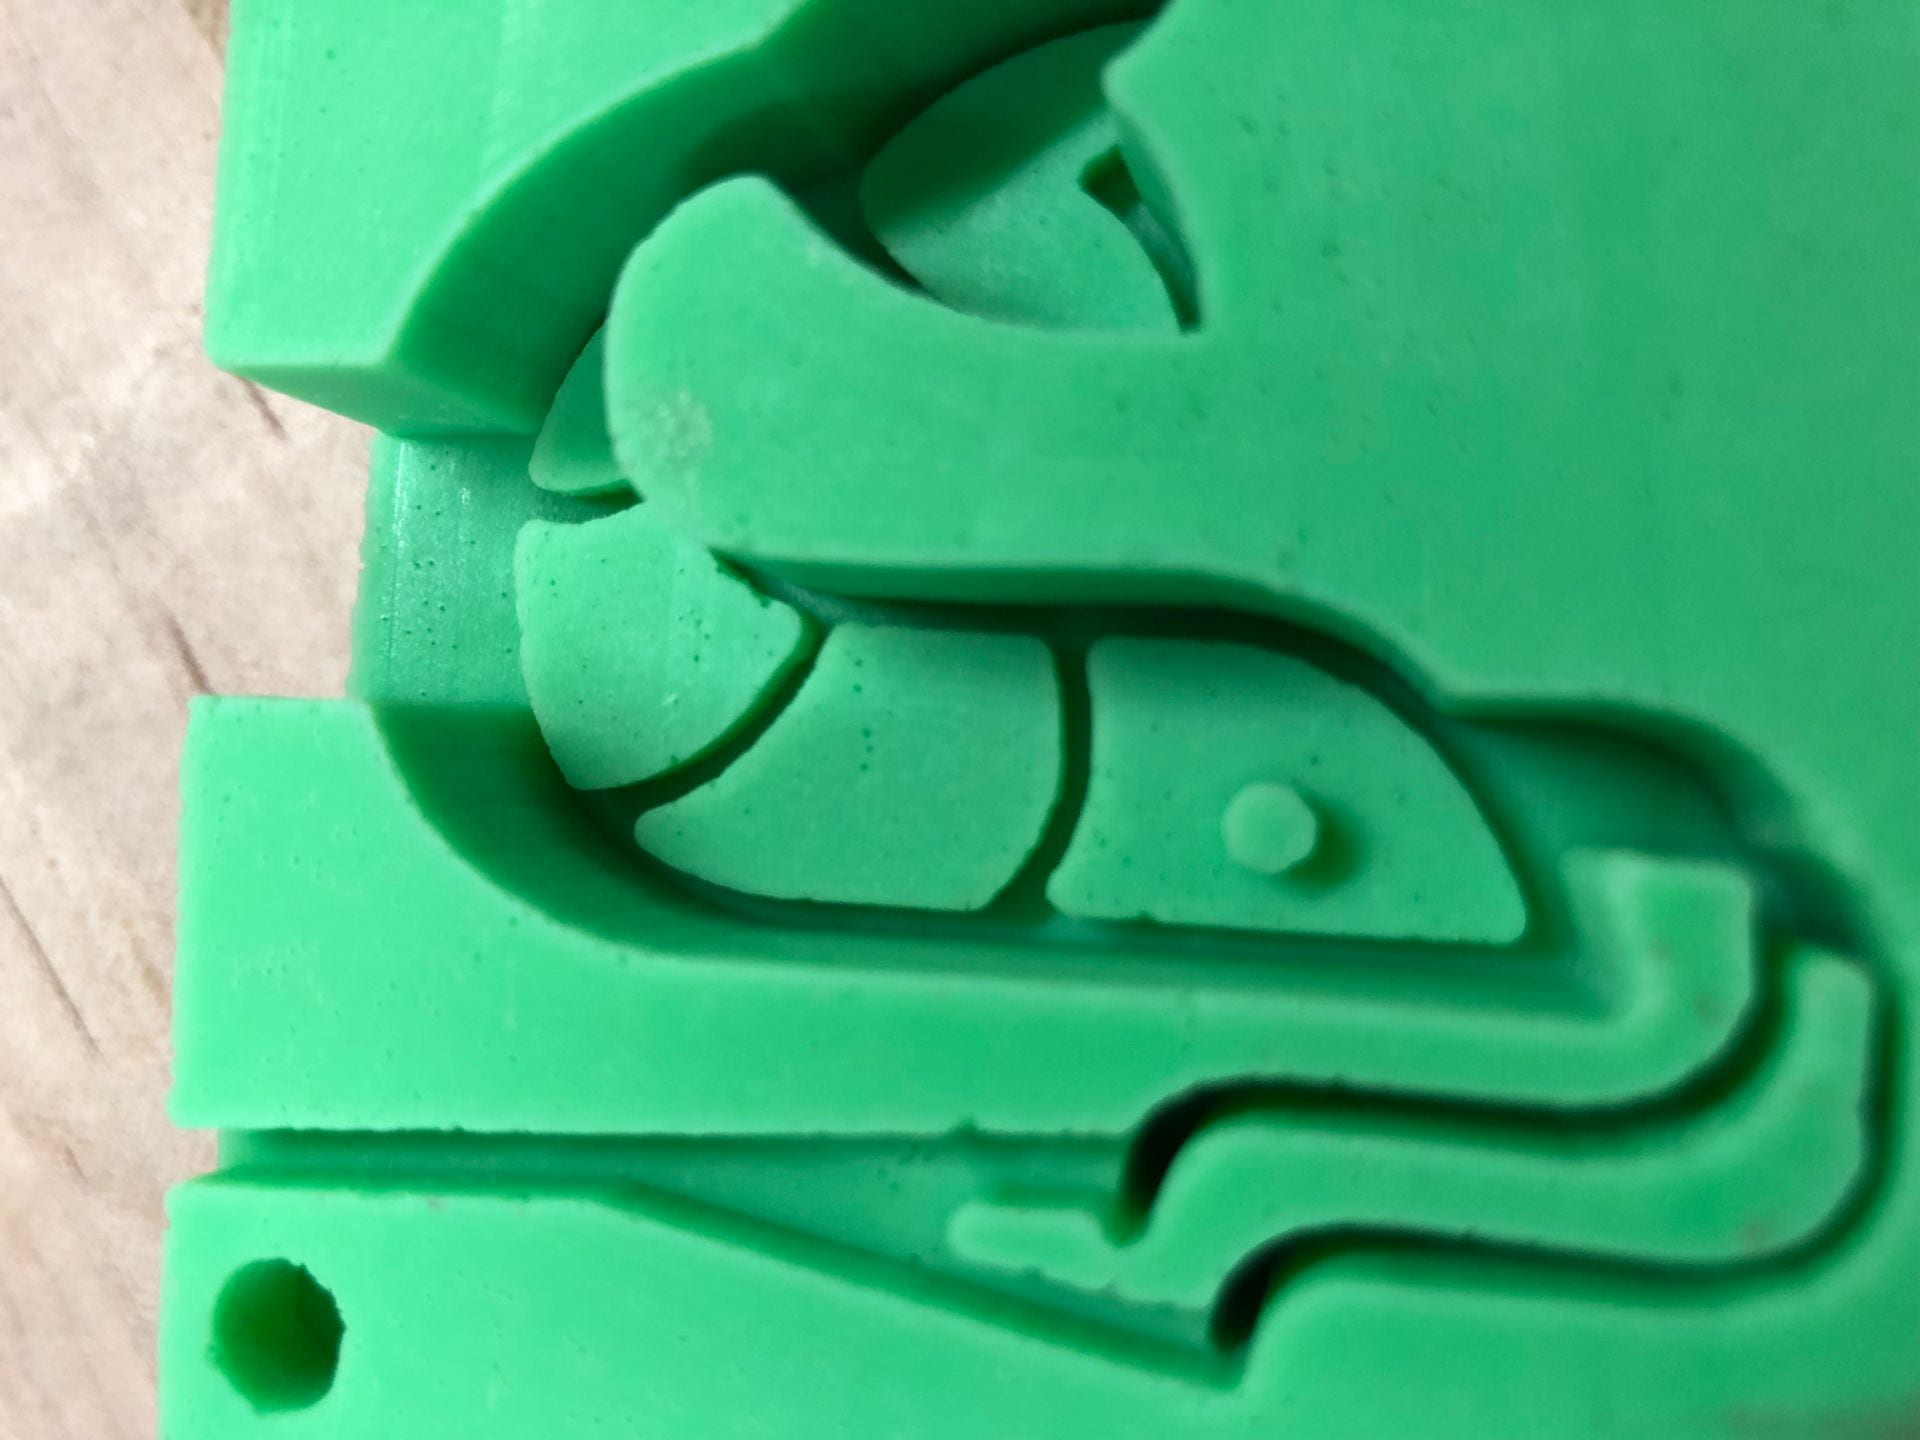
Our first change was to open up the base intersection point, making the base a rectangle instead of a hexagon to create more space for the prawn. We then attempted to edit the antennas and the legs by going back and editing the sketch. However, we struggled to edit the sketch in Fusion because it was primarily composed of imported lines. As we made updates, the 3D version was not updating too. Adulfo gave us a hand by showing us that by “breaking” the original sketch, we were able to make slow, but effective, modifications. A few headaches later, we had removed the legs altogether, and we had separated the antennas to be a more feasible distance to cut on the CNC machine.
Back to the 3D printer we went, and we printed our new piece. This time, our layer height was much thicker at .05, and we put in additional, thicker top layers to ensure we didn’t have the same texture problem as in our first print. A more reasonable four hours later, we arrived to see a pristine print.
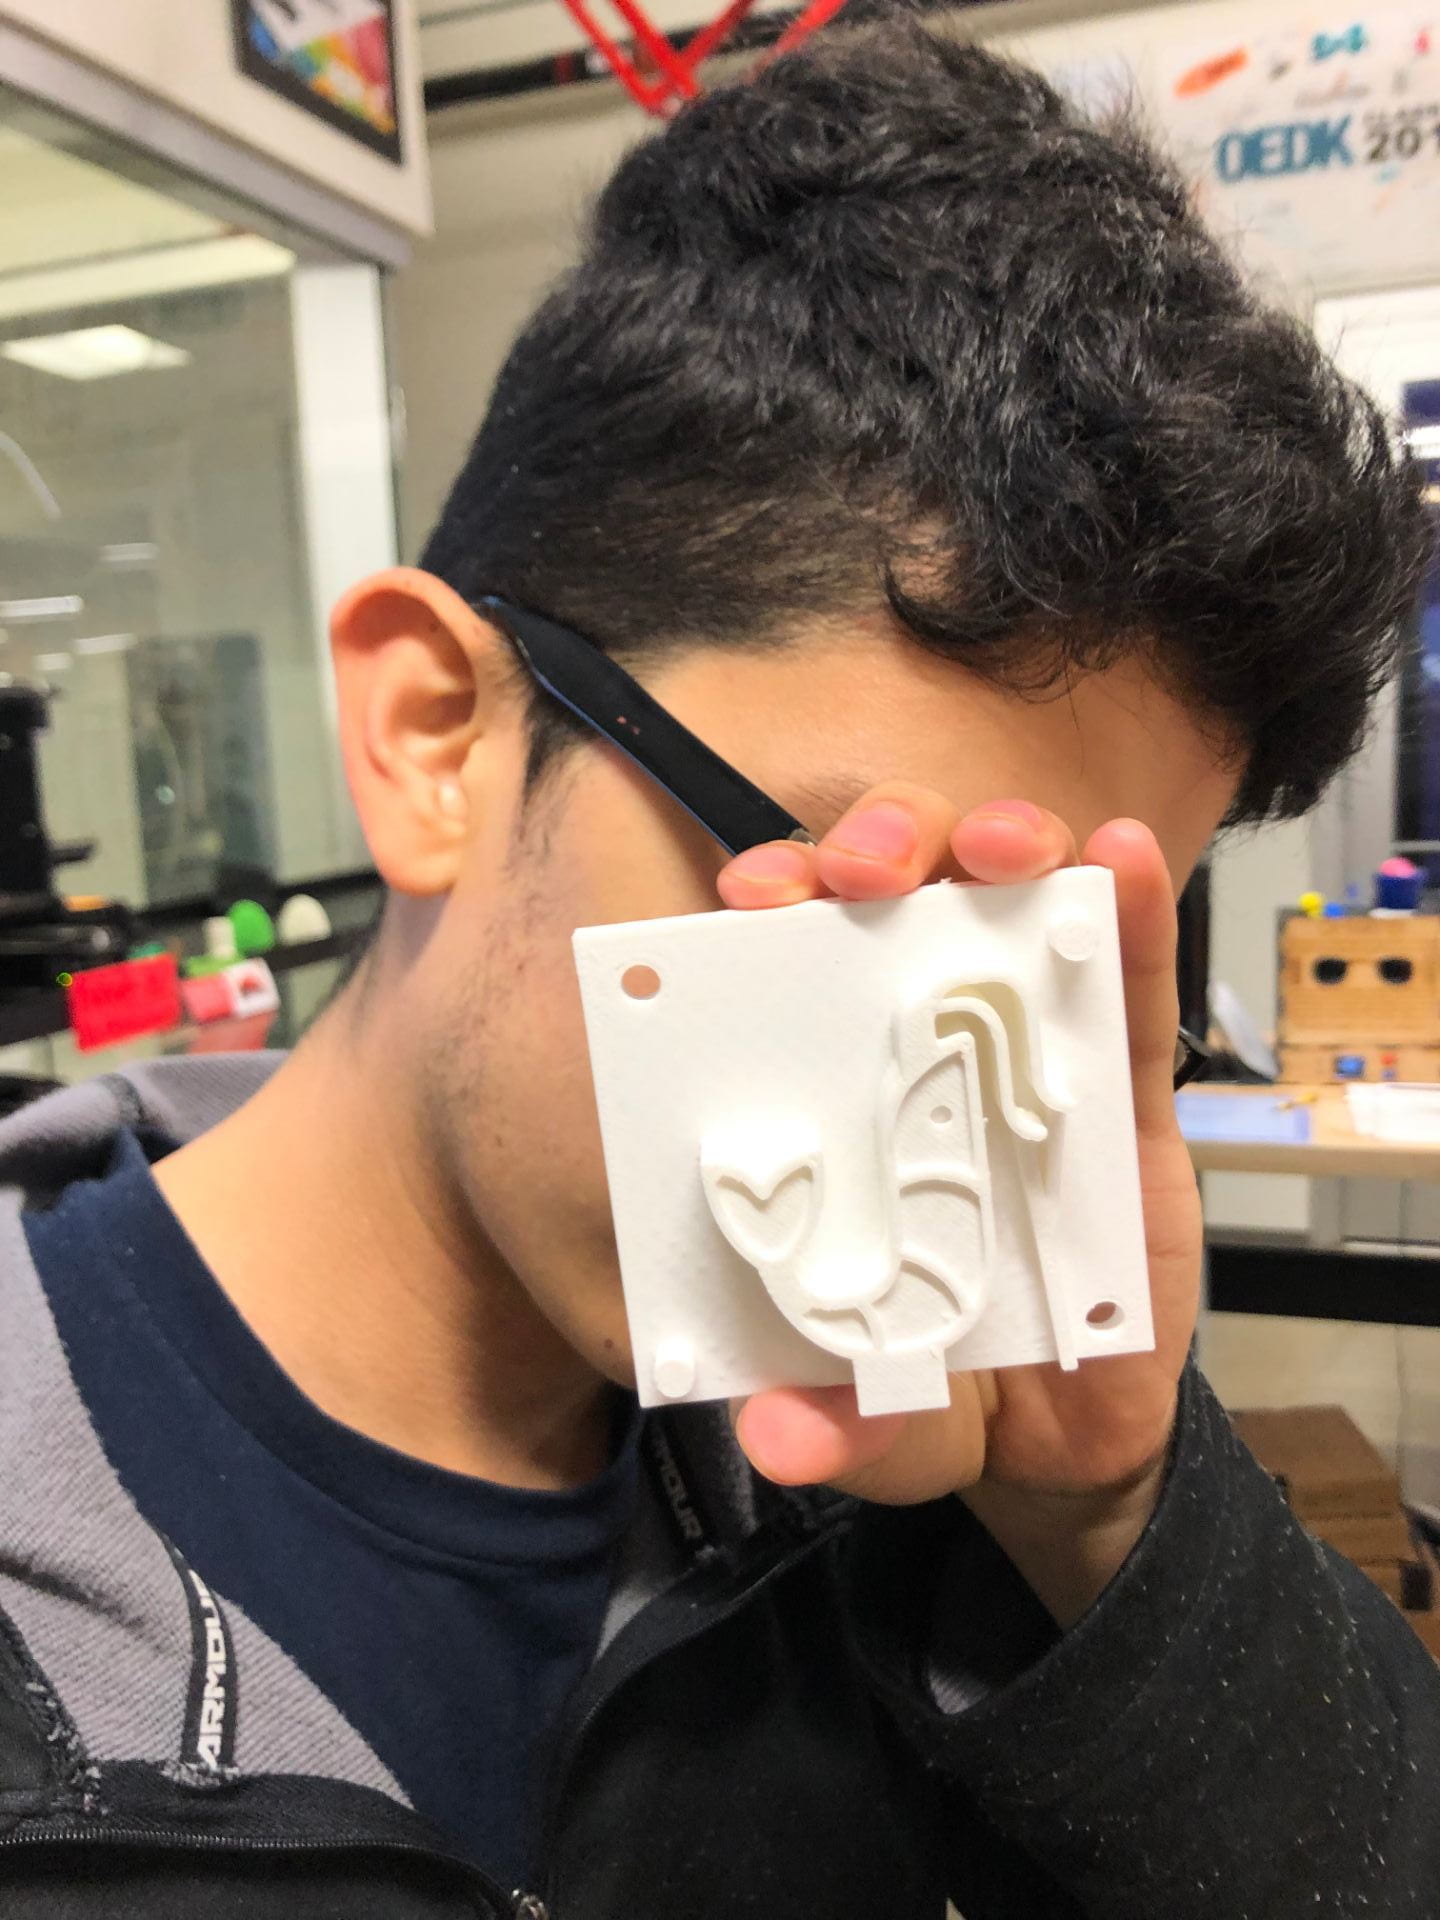
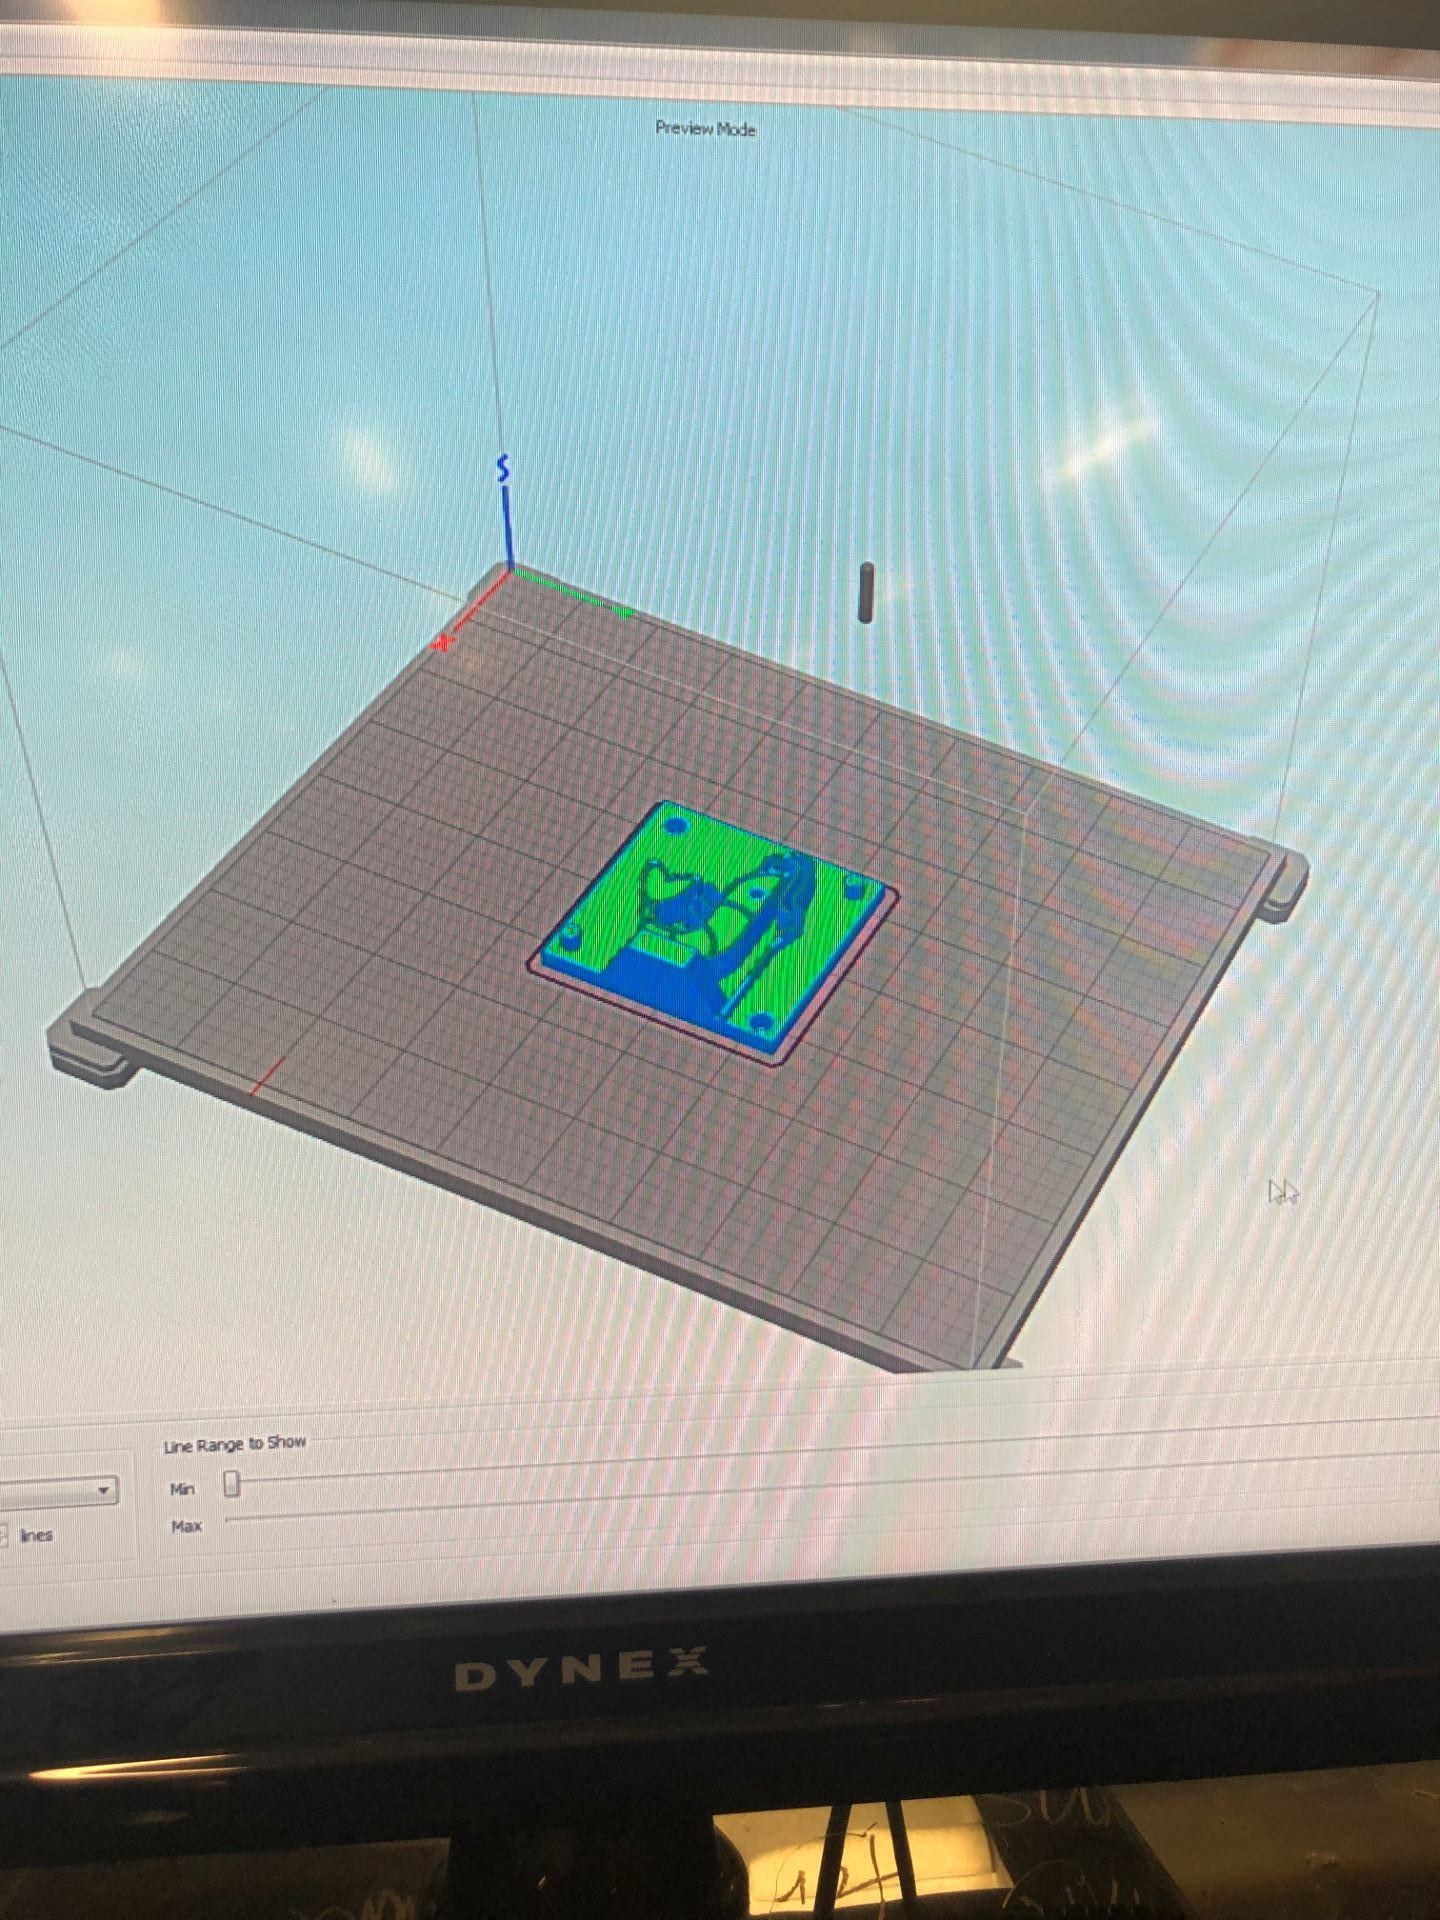
With our 3D print complete and as we wanted it, we split to conquer the next phases of the project. Maddie began to prepare the file to be CNC milled, while Donaldo built a pretty box of indeterminate size around our fresh 3D print. About an hour later, we hit a hiccup. The CNC path that we had successfully generated was not including the antennas of our piece at all. Without the antennas, how was anyone going to know it was a prawn?
Donaldo then had a genius idea: if our design is flat, then we don’t we prepare the CNC cut in illustrator? He exported the Fusion360 sketch as a svg file, prepared the file on Easel, and set up to cut on the Carve. It turned out that the block of 2×4 wood we had was too wide to use the red screws but too thin to use the orange – to fix this issue we used a few washer to add some extra height for the orange screws to successfully clamp the wood down. Using a 1/16 in bit we successfully got our CNC milled in about 40 minutes. Donaldo built another pretty cardboard box around our cut piece, and Maddie proceeded to make them into molds.

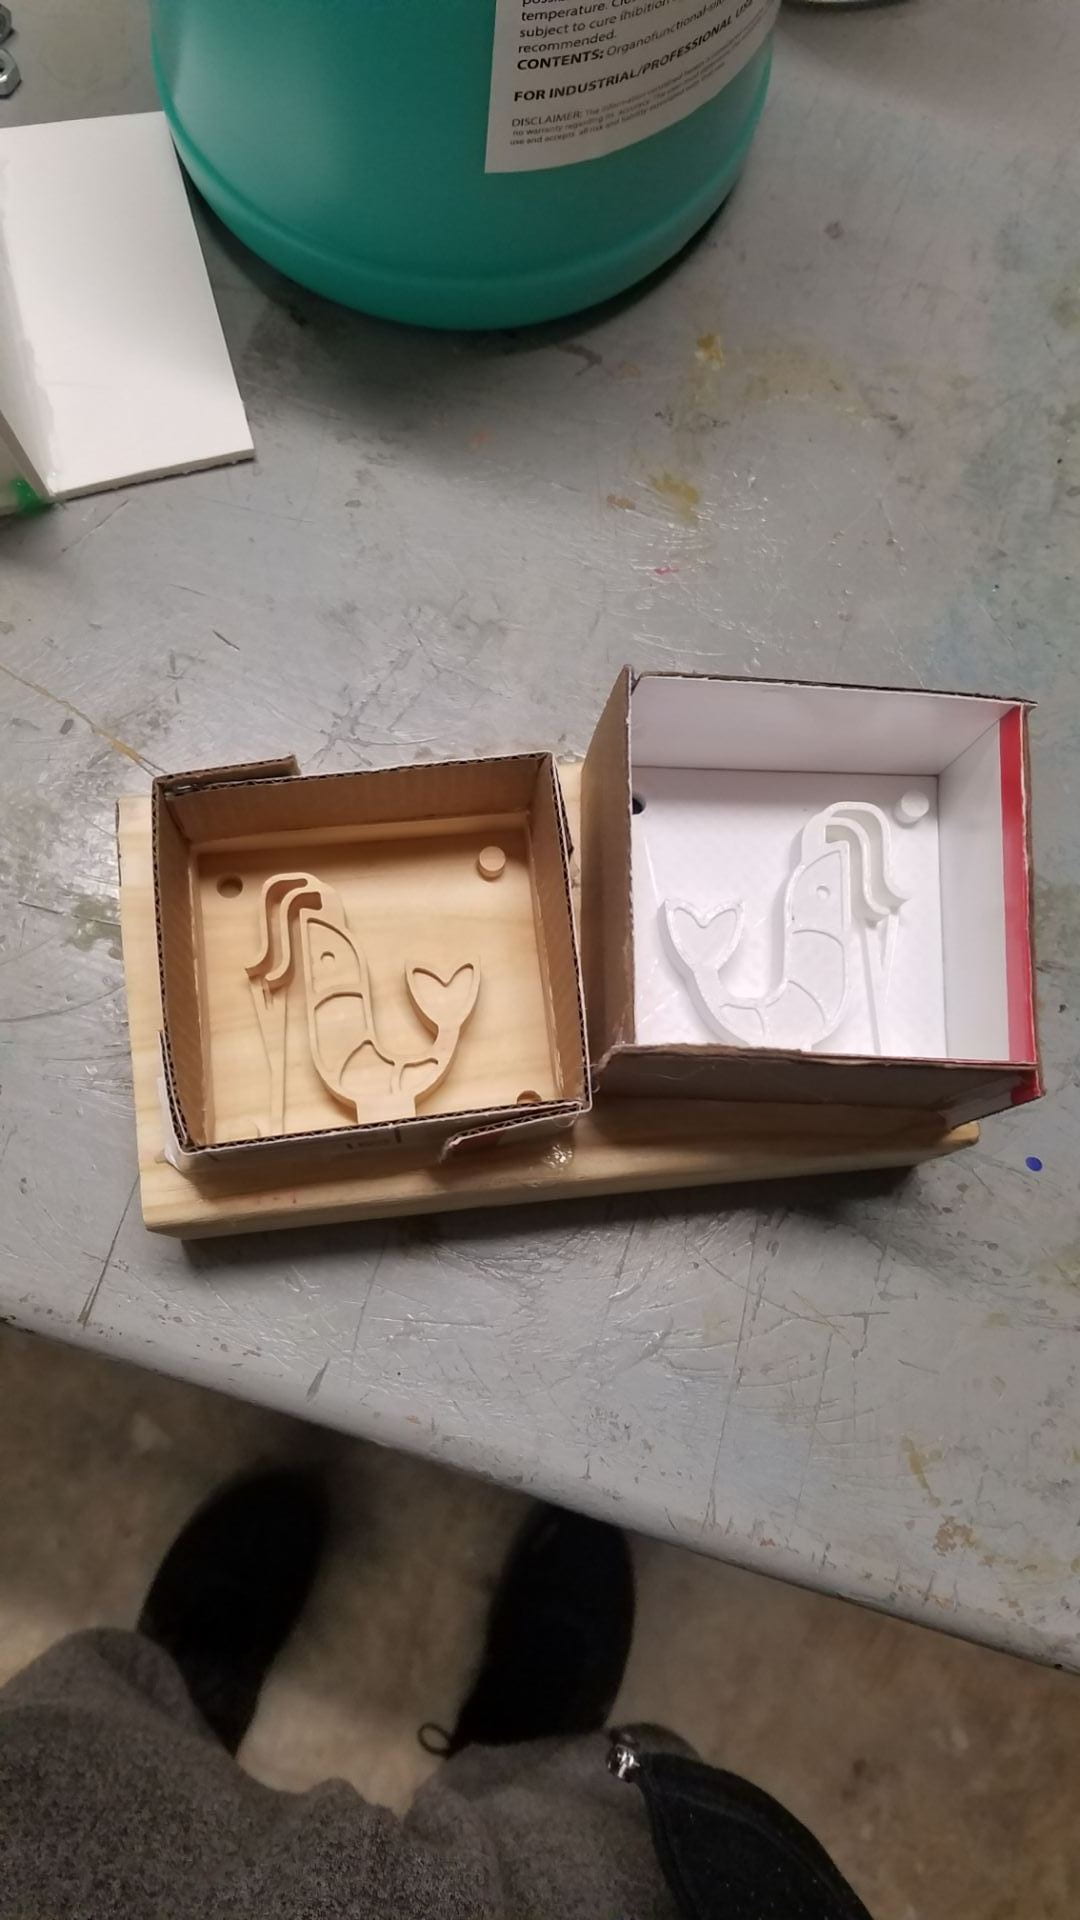
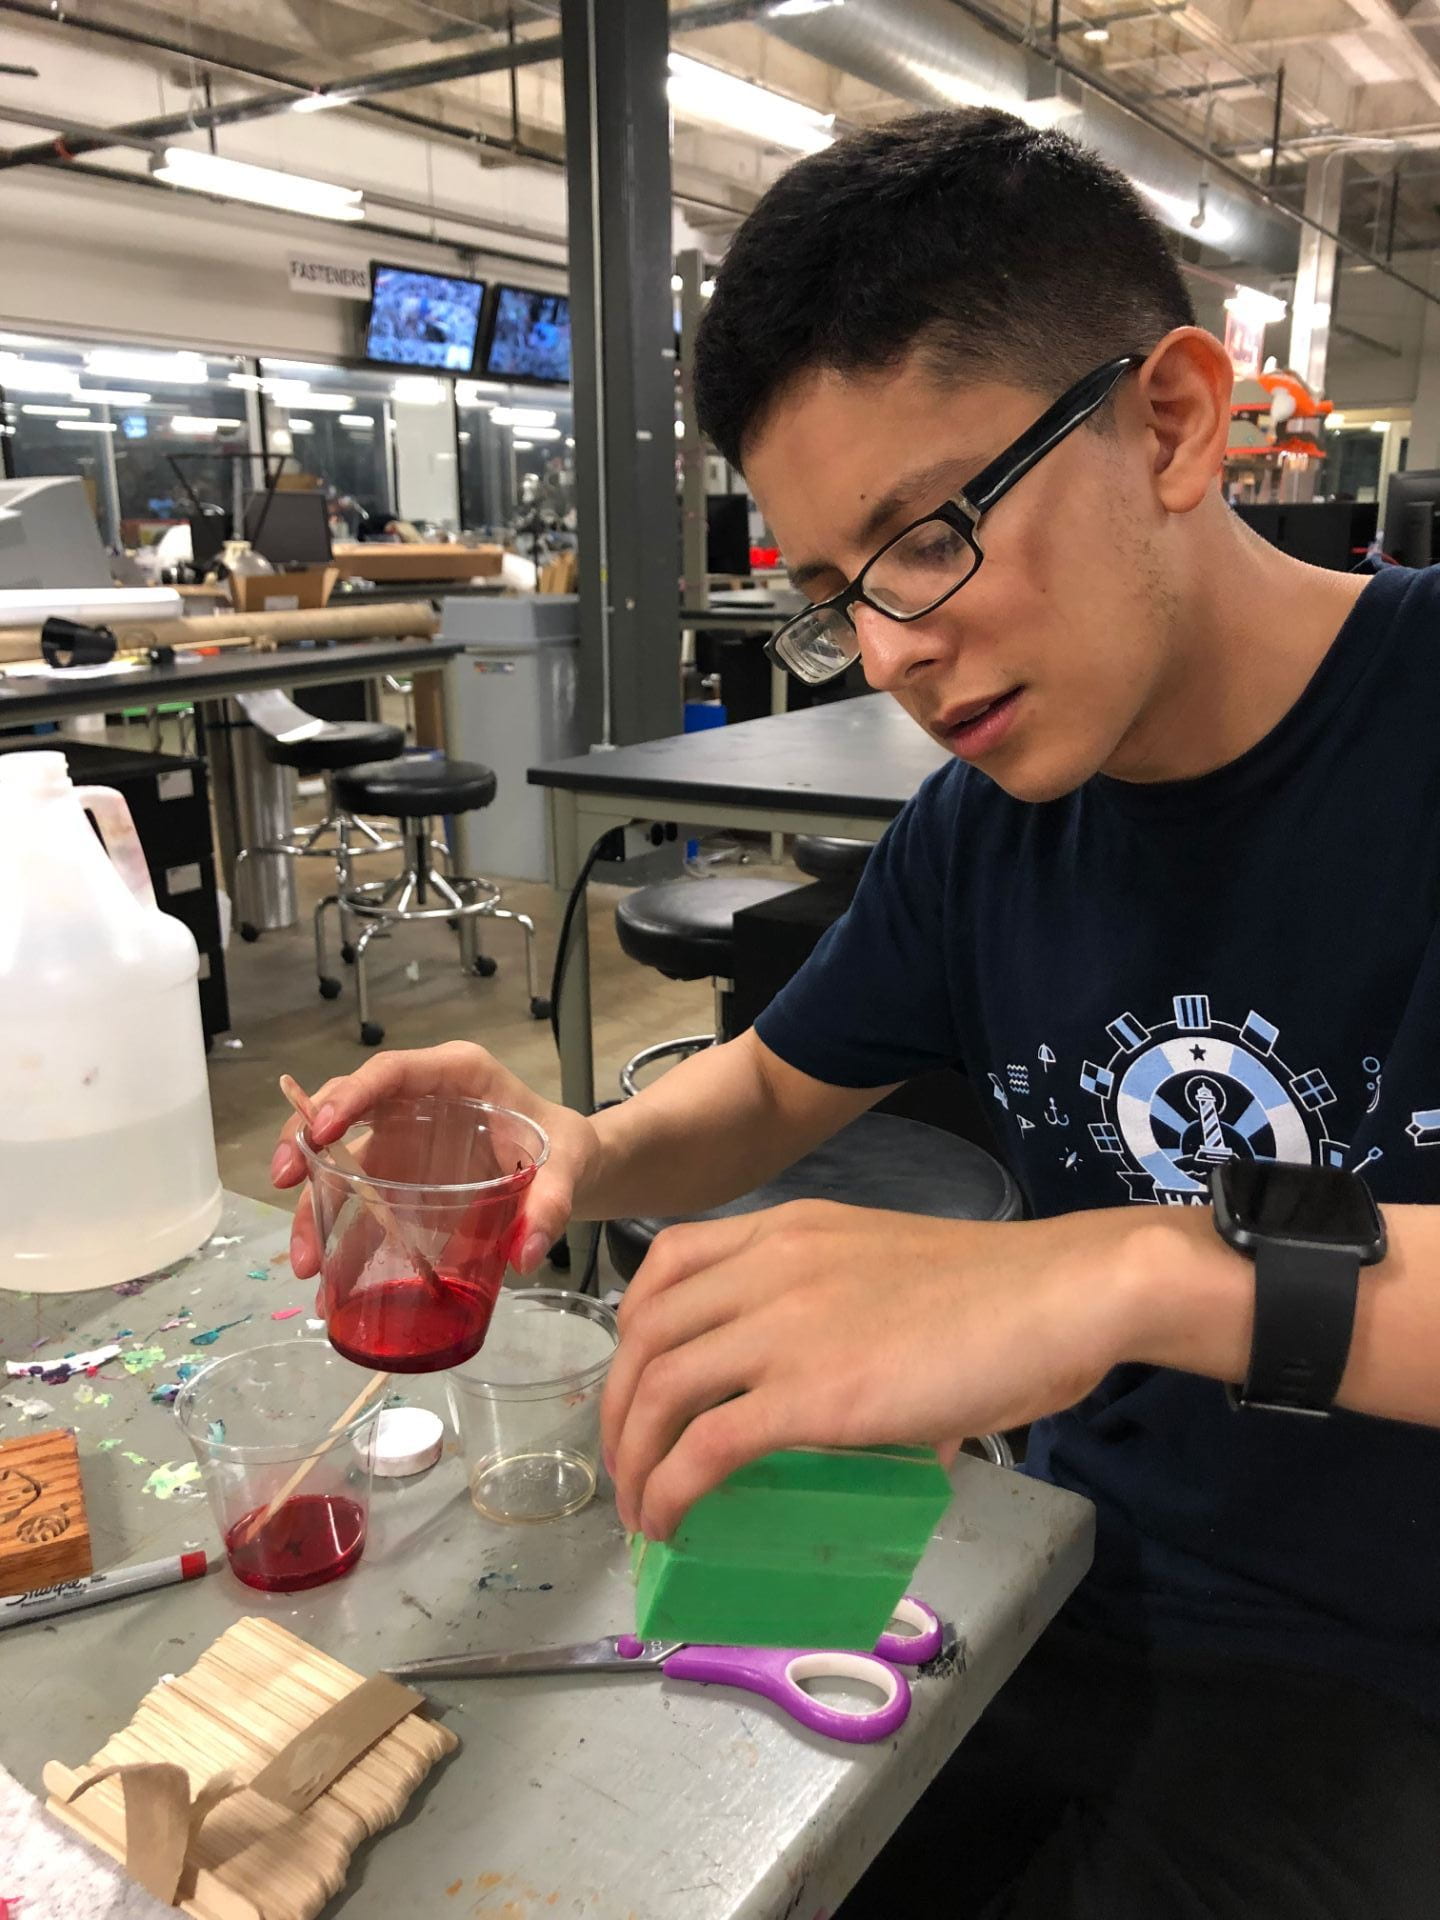
Making the molds was fairly simple, and we were pleasantly surprised to see how well they worked given that upon pouring, Maddie realized the mixture probably could’ve stood to have been stirred a few more times, evident by some subtle marbling in the color toward the end of the pour. However, after five hours, the pieces were ready to cast.
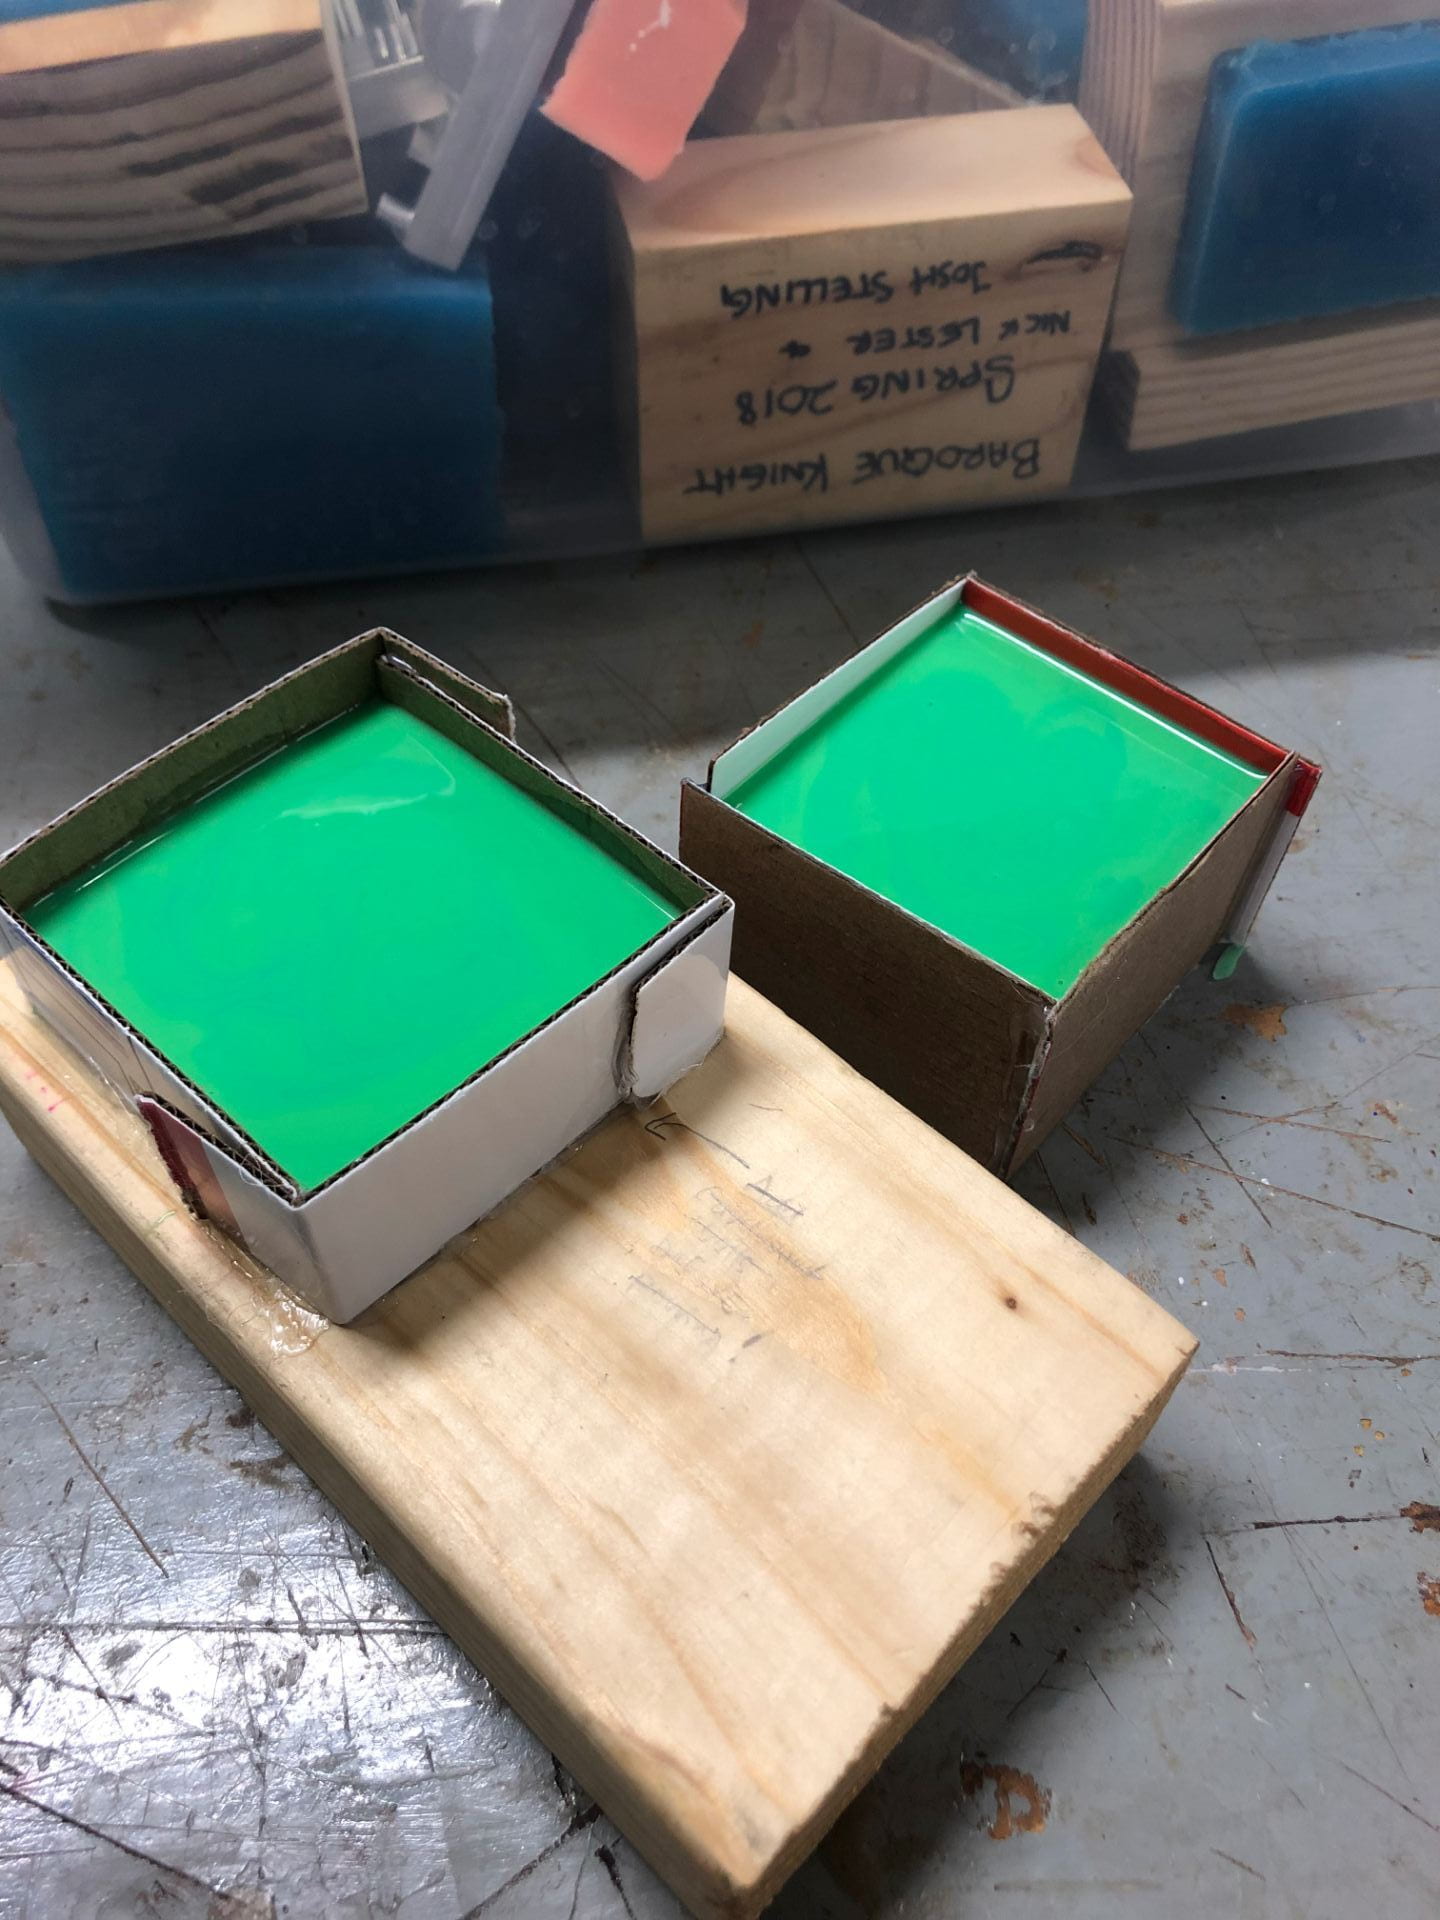
We carefully aligned our two molds and put rubber bands around them to keep them still as we mixed and poured our first piece. As advised on the bottle, we waited a half hour before demolding it, and we were pretty satisfied with our piece! It was plain white and definitely had some seams, as well as the air tunnel pieces that needed to be cut off in the final versions. While we experimented with the wonder knife on that first piece, we poured a second one, using the same process. Across those two pieces, we experimented with different ways of sanding: sandpaper (wet and dry), a sharp blade, and the wonder knife. We decided the wonder knife and wet sandpaper worked best.
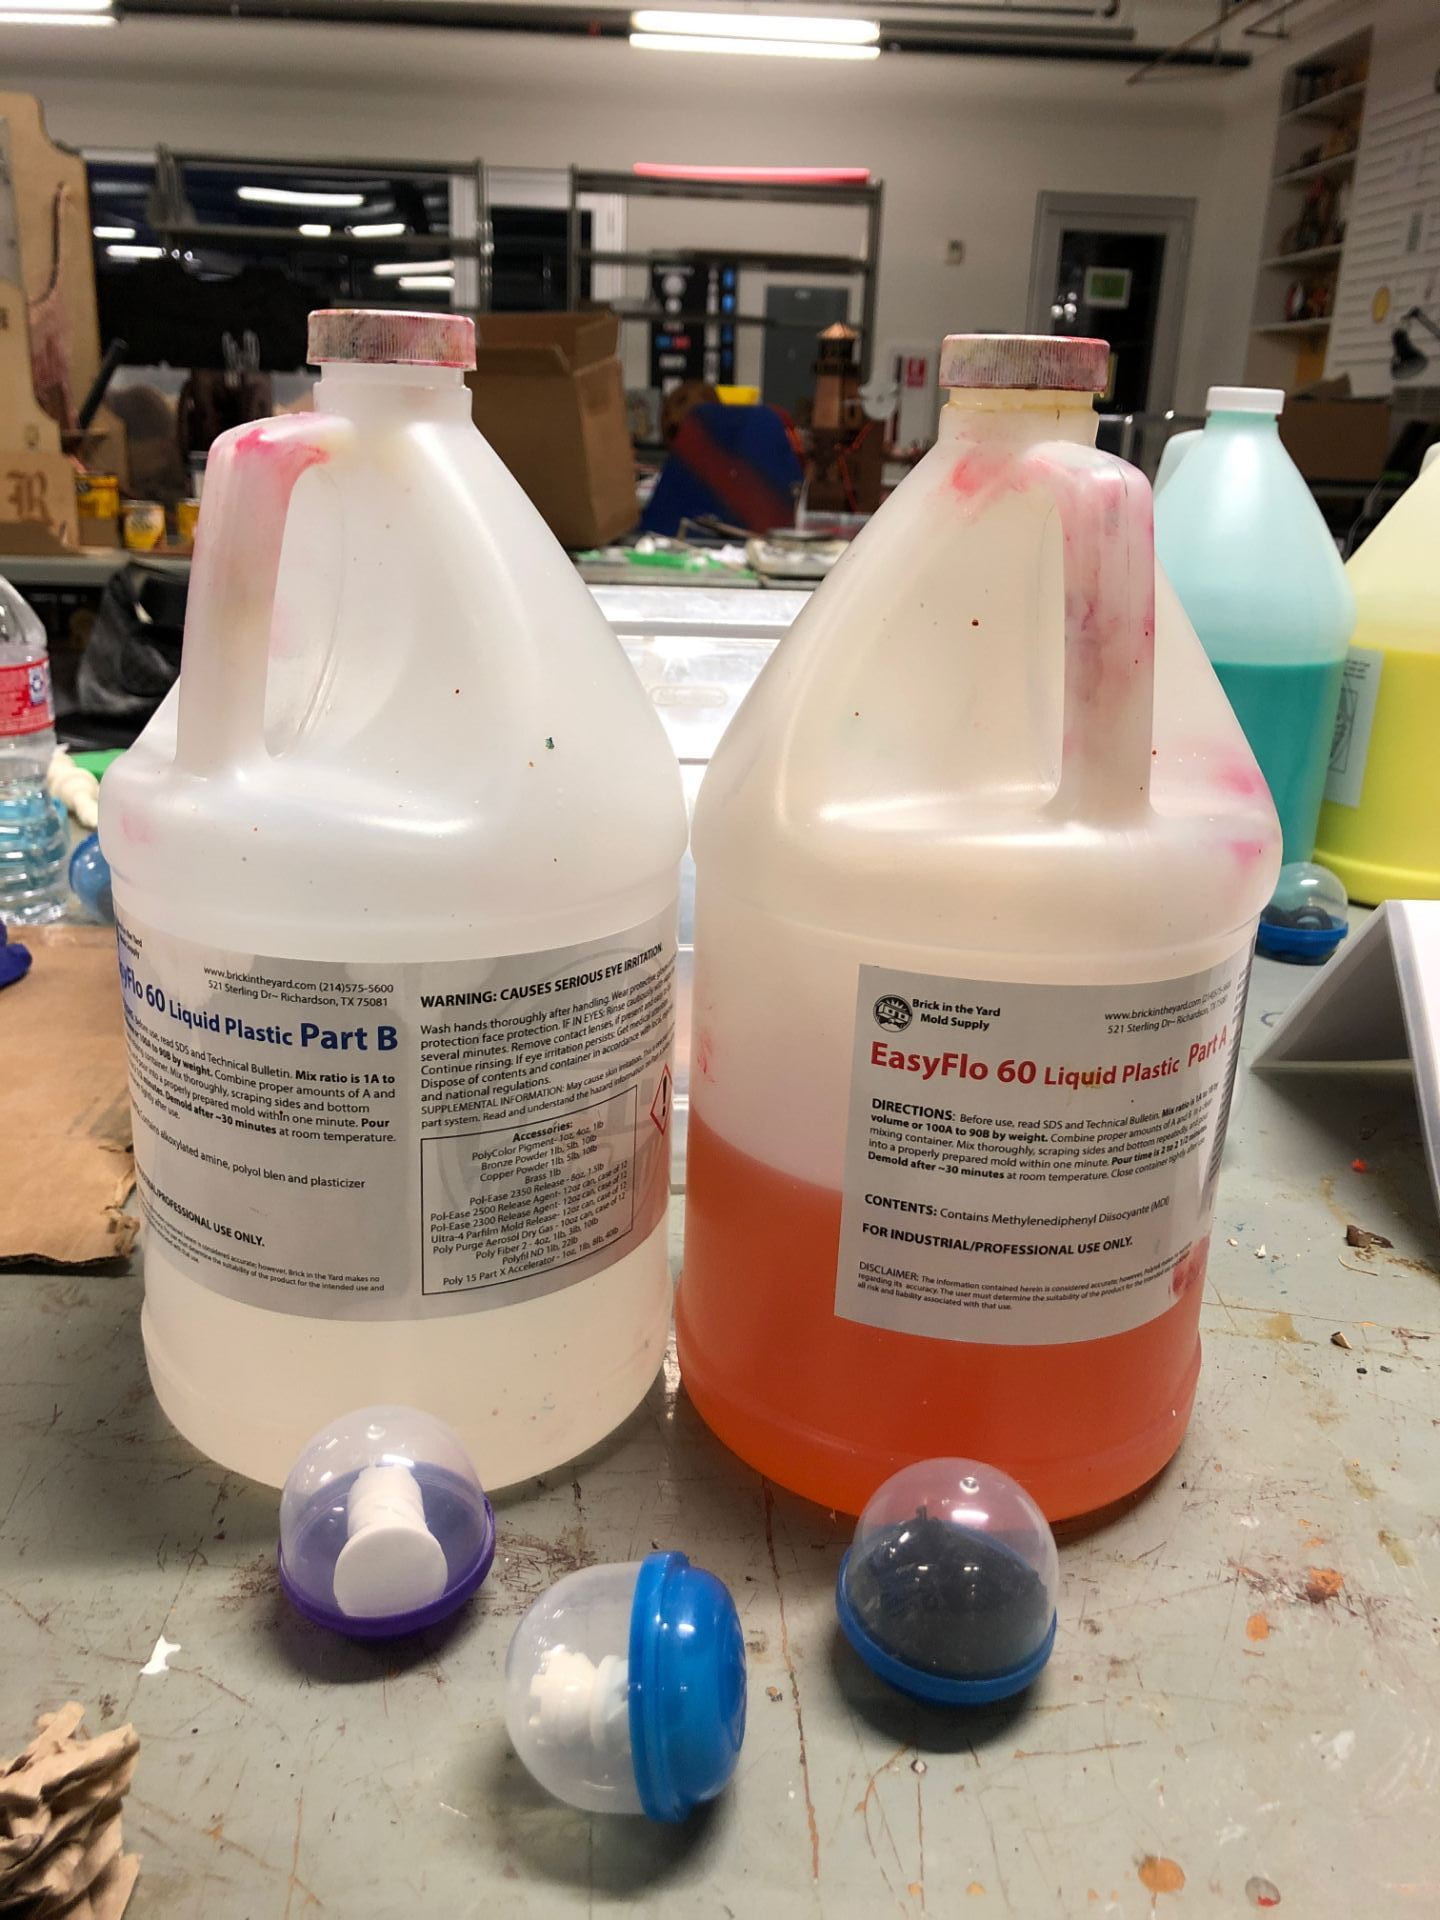

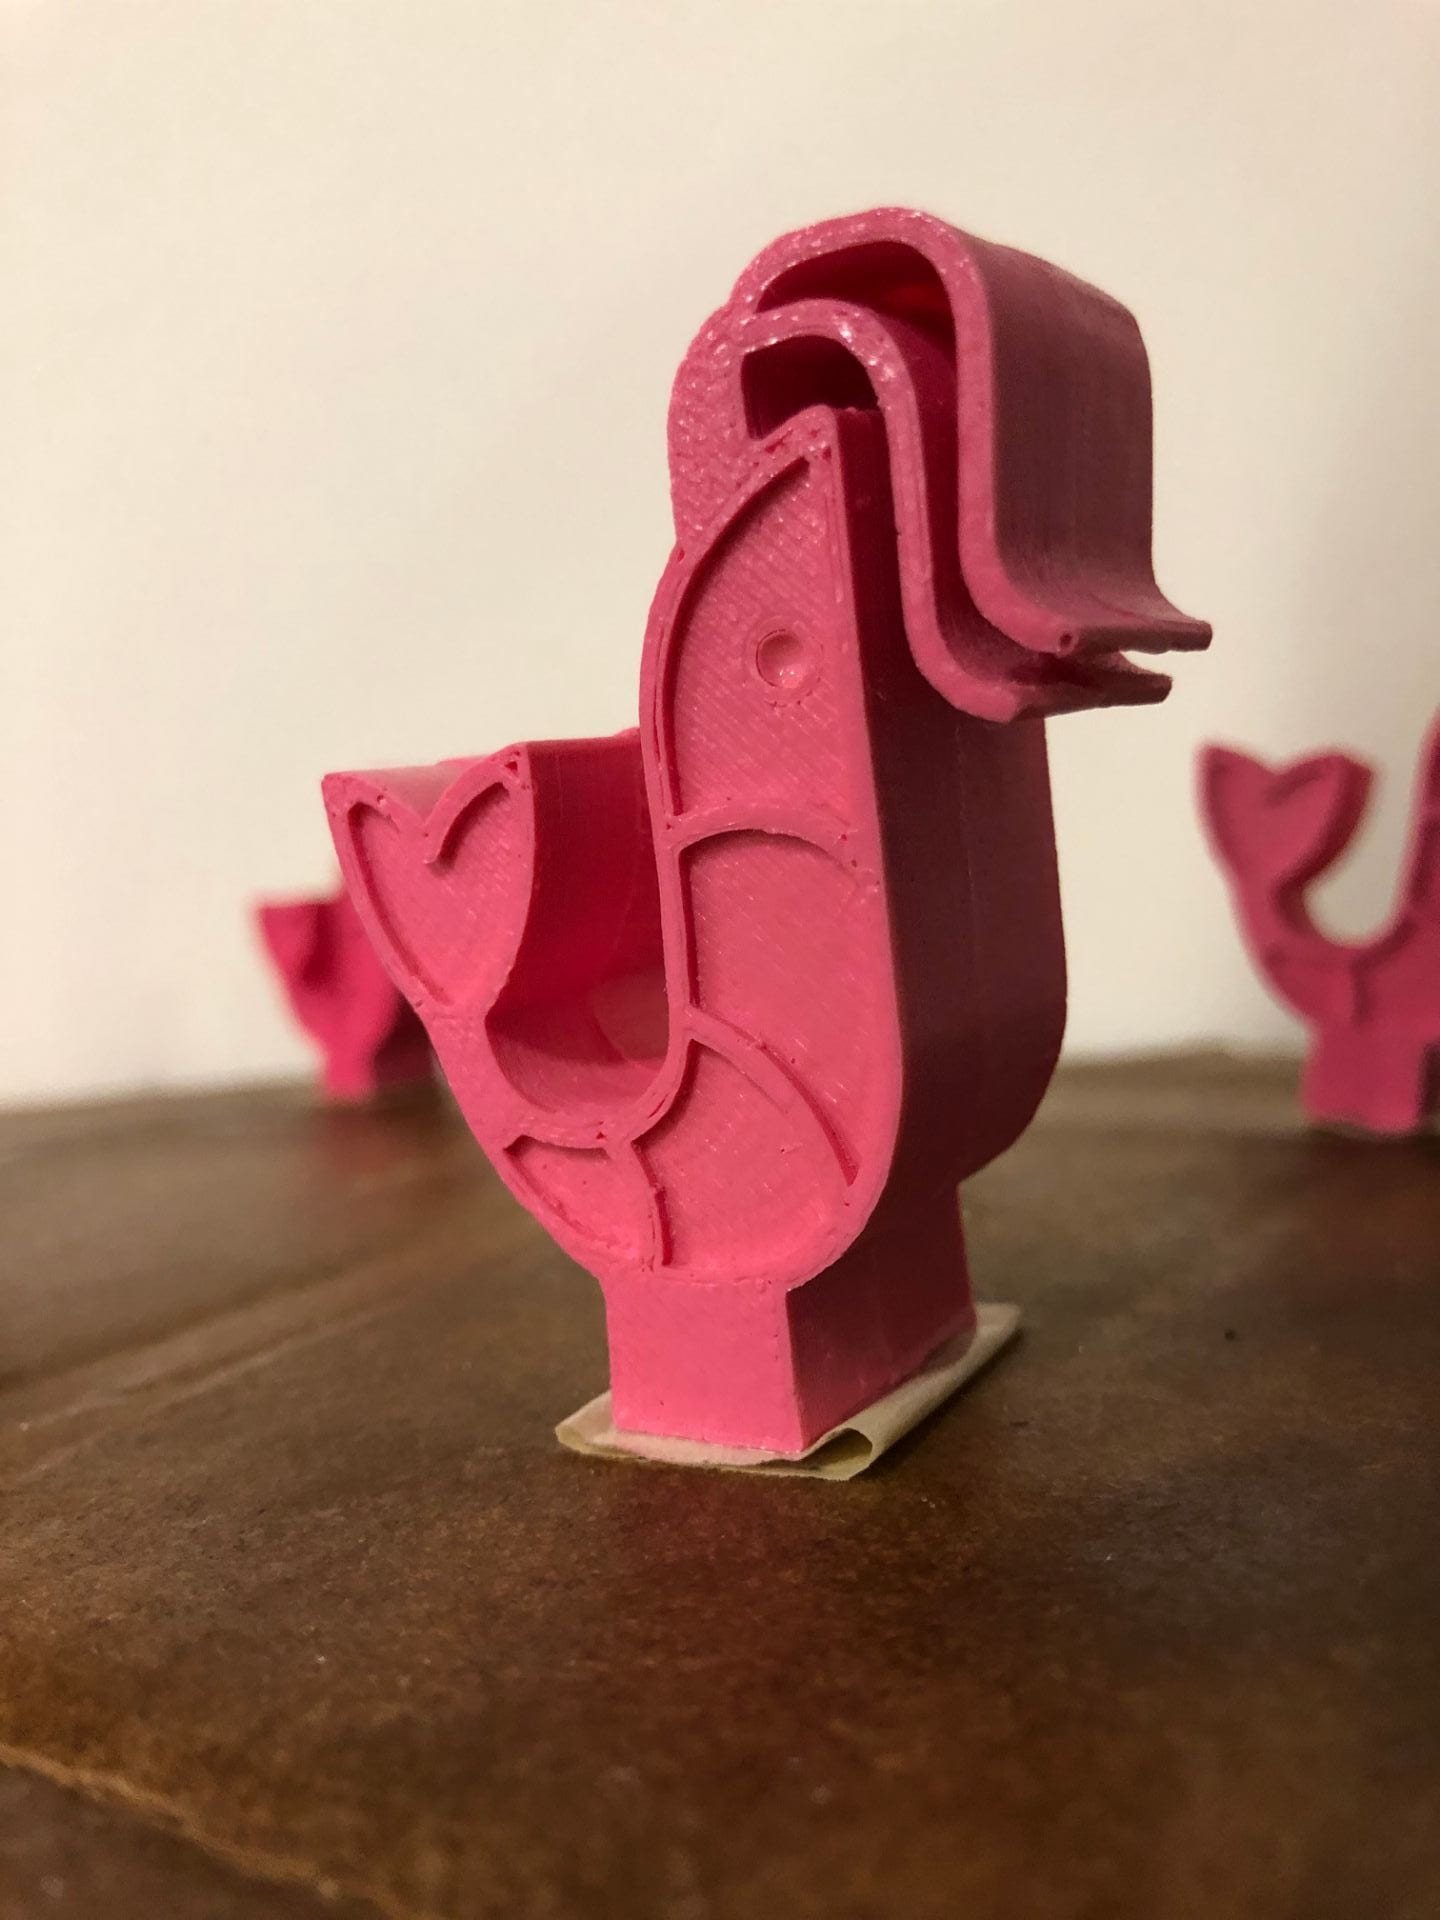
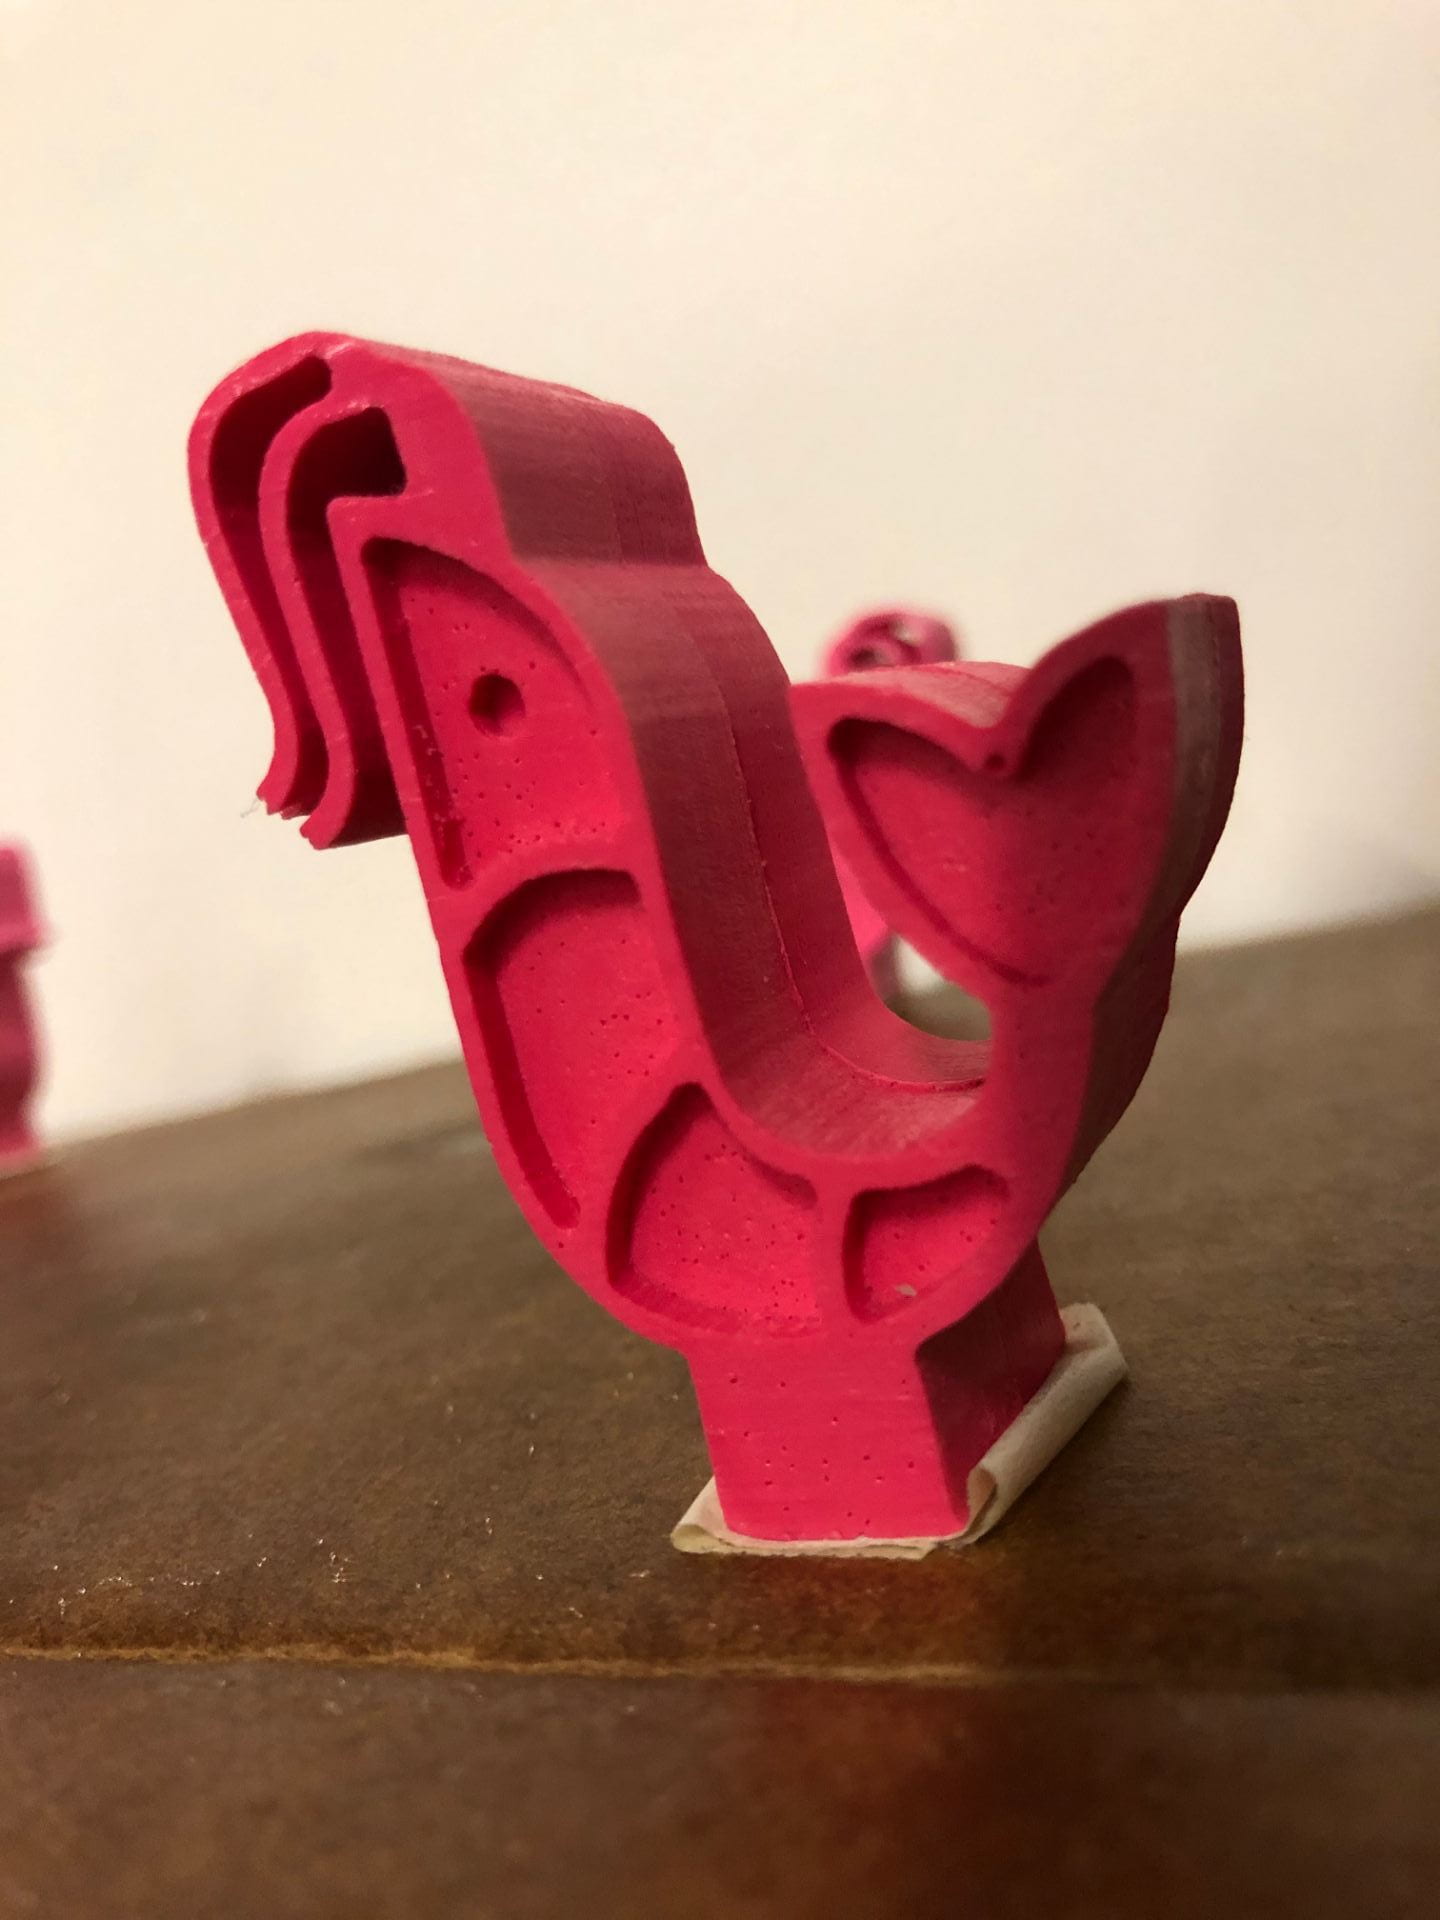
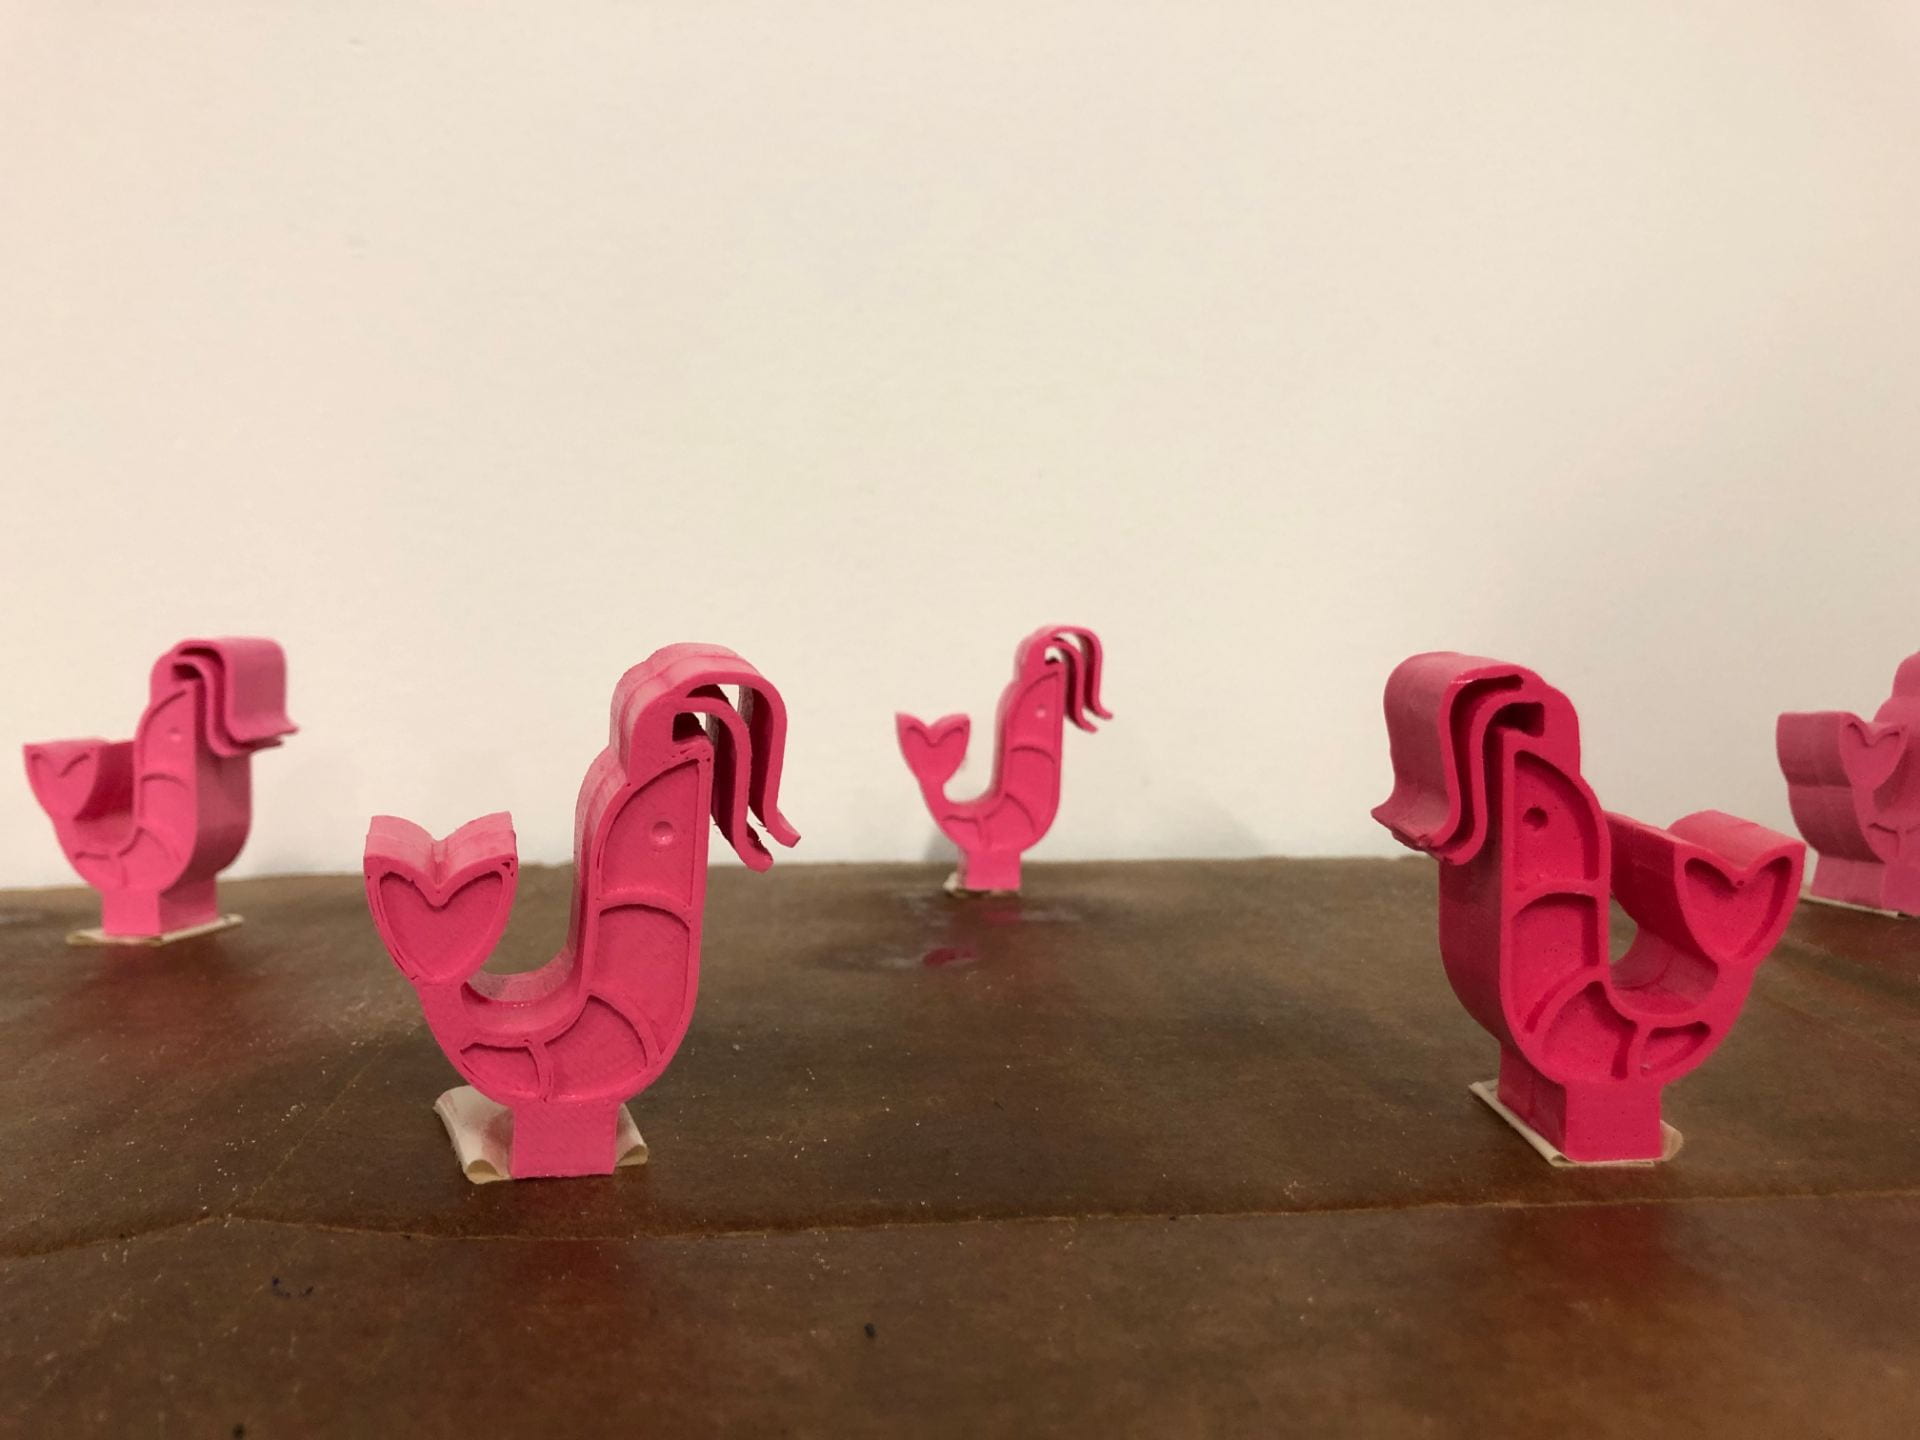
On our next attempt, we added color. 30 minutes later, we had a pretty pink shrimp in our hands. We were pretty smitten by the pink, and given that we had already experimented on the white pieces, we decided to do our final set in all pink. At this point, Wettergreen encouraged us to experiment with cutting the casting time down from 30 minutes to 7 minutes so we could easily snap off the air tunnel pieces while they were still soft. We attempted to do so on our next piece, but we found it difficult to get the fragile antenna pieces out of the mold without misshaping them when they were so soft. We used that second pink piece to further experiment with post processing, but this time paying attention to what the different sanding options did to the color of the piece.
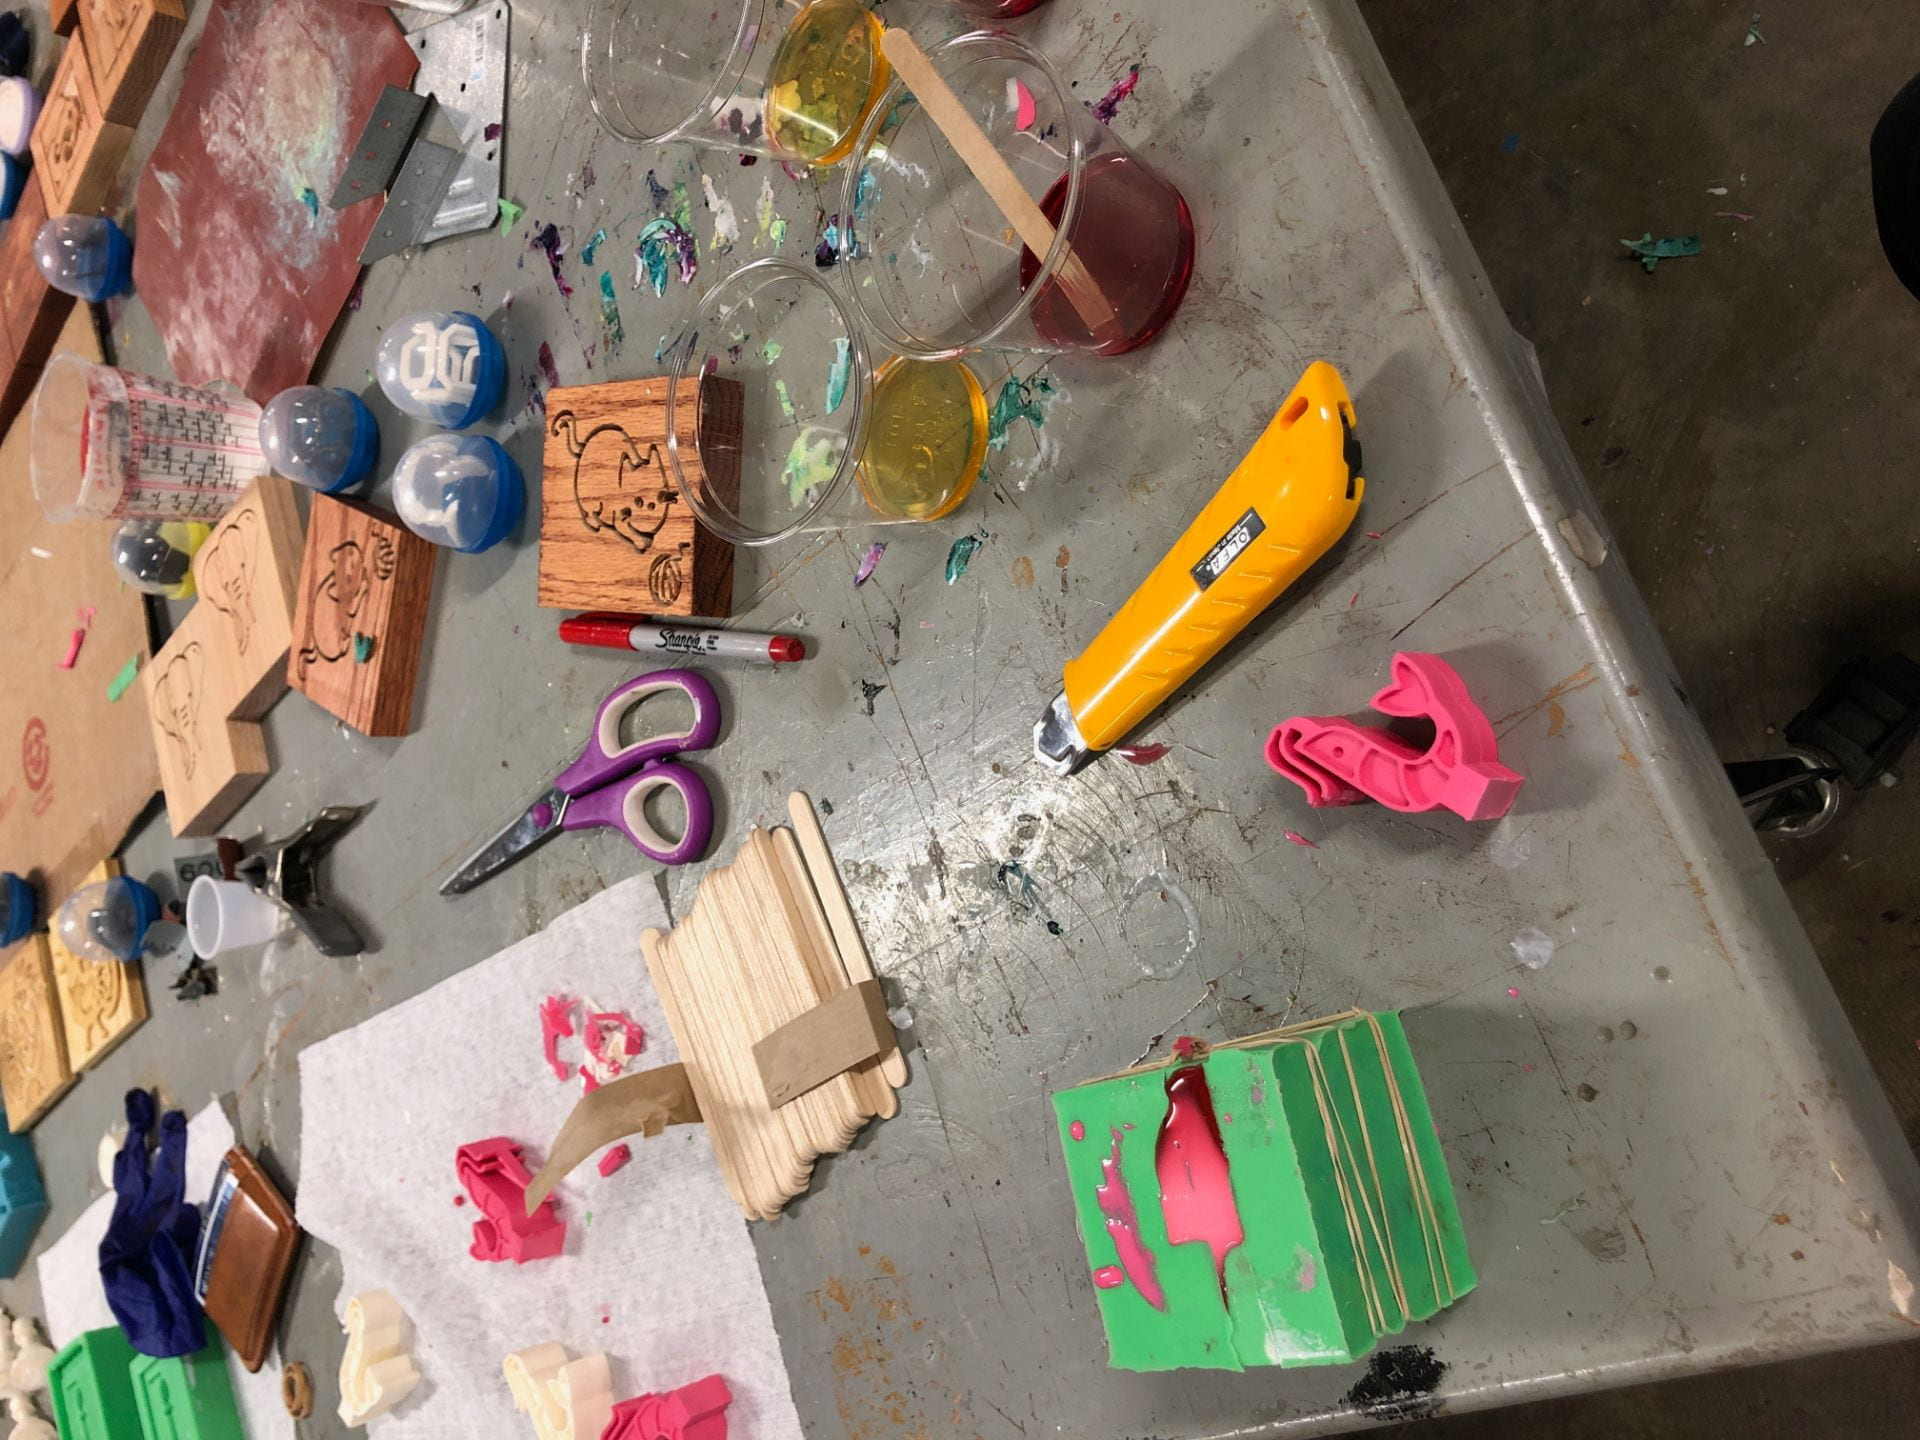
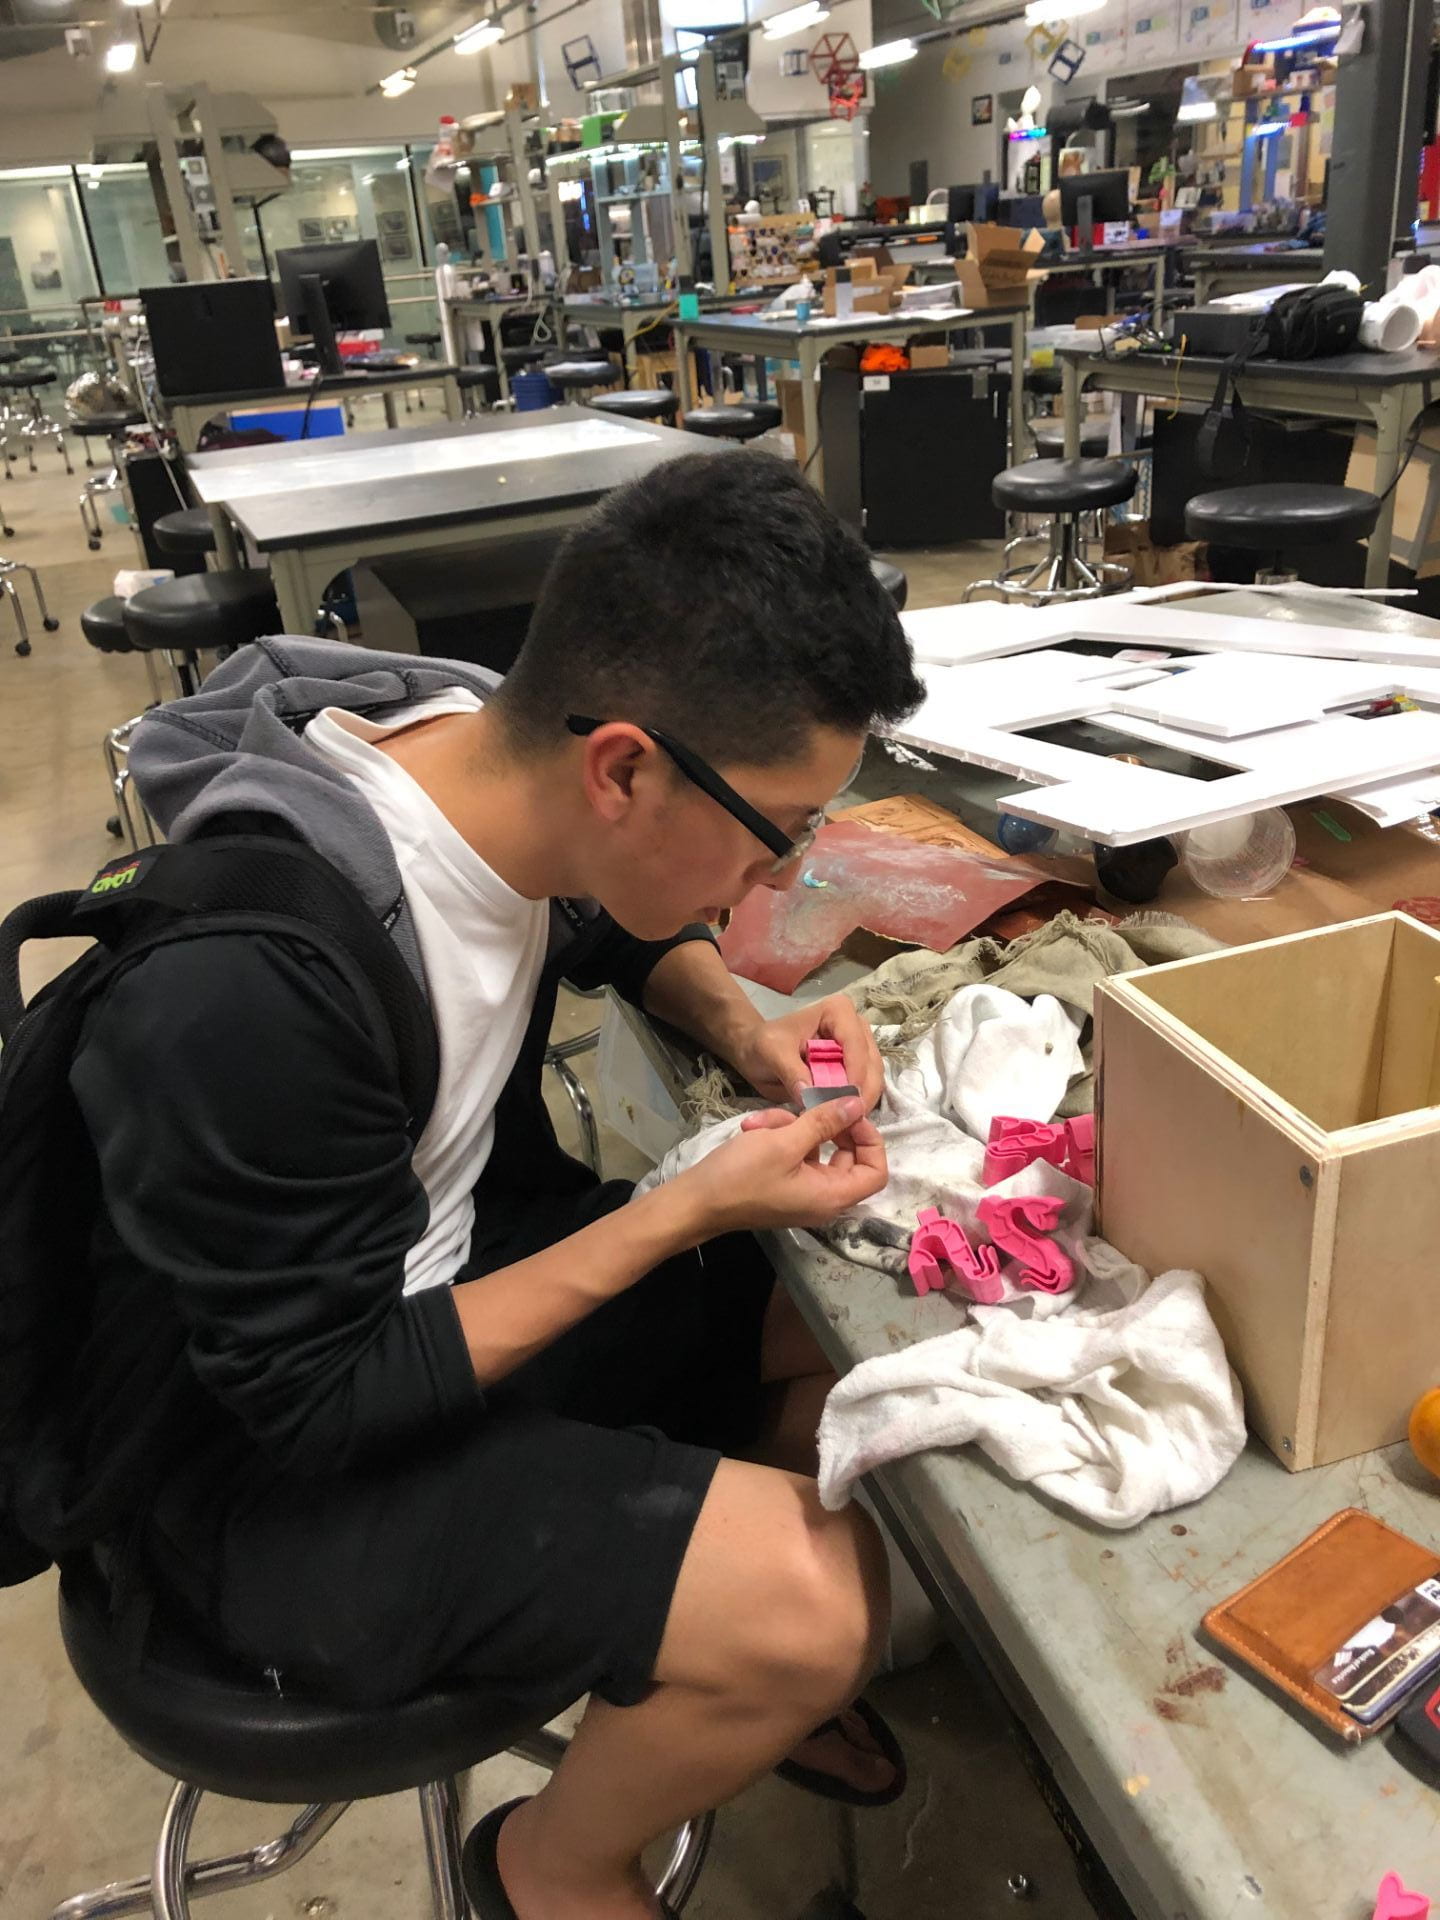
We found that 13 minutes was our sweet spot. At that point, we could demold our prawns without worrying about misshaping them, but they were still soft enough that we could easily cut anything off of them using the wonder knife. One thing we noticed was that with each pour, our mold was getting more porous, which gave our pieces a tiny bubble texture. We were happy with the texture, though, as there are certainly some bubbles under the prawn-filled sea! A few hours later, we had 8 pink prawns we were happy with. We wet sanded the lot of them and cleaned up fly-away pieces we were unhappy with. We finished our pieces with a clear coat of glossy paint, which made them shine!

Time cost: We spent 4.5ish hours to prepare the two files in Fusion360 and Illustrator. 1ish hour to set up both the 3D prints and CNC block. 1 hour to pour the molds. 2-3 hours to cast eight prawns, sand edges, and spray. In total 9-10 hours split between the two of us.
Cost analysis:
CNC mill + 3d Printer: hard to find a place to rent them, but can join a local makerspace with access to one for $50/mo.
Wood: $12.38 from the Hardwood Lumber Company, but we definitely used less than a 1/4 of the plank they’re selling. $3.10 for the wood we used
Adobe Illustrator: Illustrator is only available as a subscription, which has a minimum time and cost of $20/month = $20
Fusion 360: free for students!
Wonderknife: $419.95
Sand paper: $2.97 on Home Depot
Rubber bands: $4.02 on Amazon
Platsil Molding and Casting kit: $258
Casting pink dye: $12
Glossy clear spray paint: $3.97 on Amazon
Total cost: $774.01
Consistent with our previous projects, that wondercutter makes everything more expensive! Definitely worth it for our final, expensive project at the OEDK for 210!
