Our assignment for this week was to laser cut the Rice War Owl. The goal was to make a recognizable war owl with good color differentiation, minimal charring and clean cuts. While I had use a laser cutter before, I had never tried to engrave something with several different colors, which definitely required more thought than simply cutting out shapes.

To begin, we downloaded the Illustrator file, and modified each of the layers by setting all the inner strokes to 0.003in and the outline to 0.001in so that only the owl would be cut out (not the individual pieces). We then opened up the Epilogue printer settings and saw that there was a color mapping tool to set different speed and power settings for specific colors in the file. 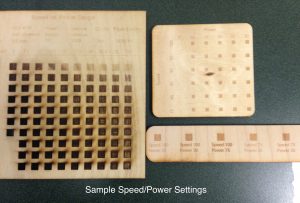 We used one of the tables of power/speed settings to identify a few colors that looked like they would work well as the blue, grey and yellow of the war owl. We then used the color mapping tool to input the RGB values of the blue, grey and yellow and set their respective power and speed settings.
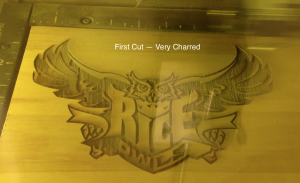 Our first cut was looking great, until it started to cut out the owl. Somehow it thought all the shapes were supposed to be cut out, so rather than just the outline, each of the individual shapes was traced and vector cut. We think that this may have been because the colors of the outlines matched those inputted into the color mapping feature. To fix this, we set all the strokes to have no fill. Looking at the coloring of this first cut, we found that although there was good contrast between the colors, the background was pretty charred. The other thing we learned from this first cut was that due to the size of the owl and not using the max speed setting, it was taking ages to cut out each of these owls.
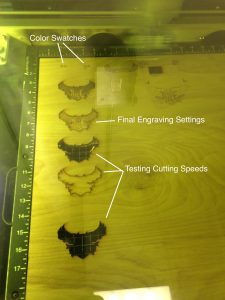
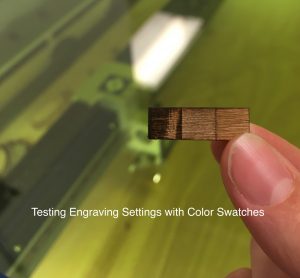 Before cutting out more owls, we decided to instead cut out several small color swatches so that we could see how the engraved colors looked – making sure they weren’t charred and were distinguishable. We decided to increase the speed to 100s and vary the power to create the different colors, as well as decrease the size of the owls, in order to make the engravings more efficient.
Once we had the colors about right at 100 speed, we moved on to engraving and cutting out the war owl. The raster settings we chose were 60 power for the blue, 20 power for yellow and 10 power for grey. For the vector cut, we started at 10s / 100p.
 There was one fluke cut that engraved all different colors of the owl all at once. We weren’t sure how this happened, but it was a lot quicker than the 3 passes we were doing with the color matching. Unfortunately, we weren’t sure how to replicate this, and the colors that were engraved into the owl didn’t look quite right.
  On our next cut, we continued using the color matching tool and engraved with the settings we had found for each color. While our colors looked fine together, it took us a few tries to get the cut to actually cut through. We refocused the laser thinking this may have been part of the problem. We ended up successfully cutting through at 5s / 100p.
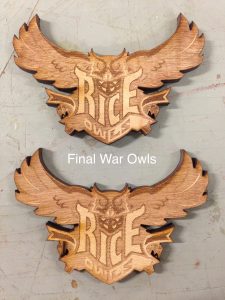
After a few hours on the laser cutter, we finally cut four owls that were pretty much identical and weren’t burnt. We got good contrast between the colors too. The only thing I wasn’t super happy about was the pixellated finish of the grey. While the texture helped differentiate the that color from the blue background, I preferred the smoother finish of the blue. Nonetheless, we were pretty happy with our cut and the fact that we were able to get four identical ones.
Here’s a time-lapse video of the final engraving process: IMG_0230.MOV-12bk8u4
Talking to a couple lab techs after we had finished our cut, we learned about a much more efficient process, and a couple other techniques to make a cleaner cut/engraving:
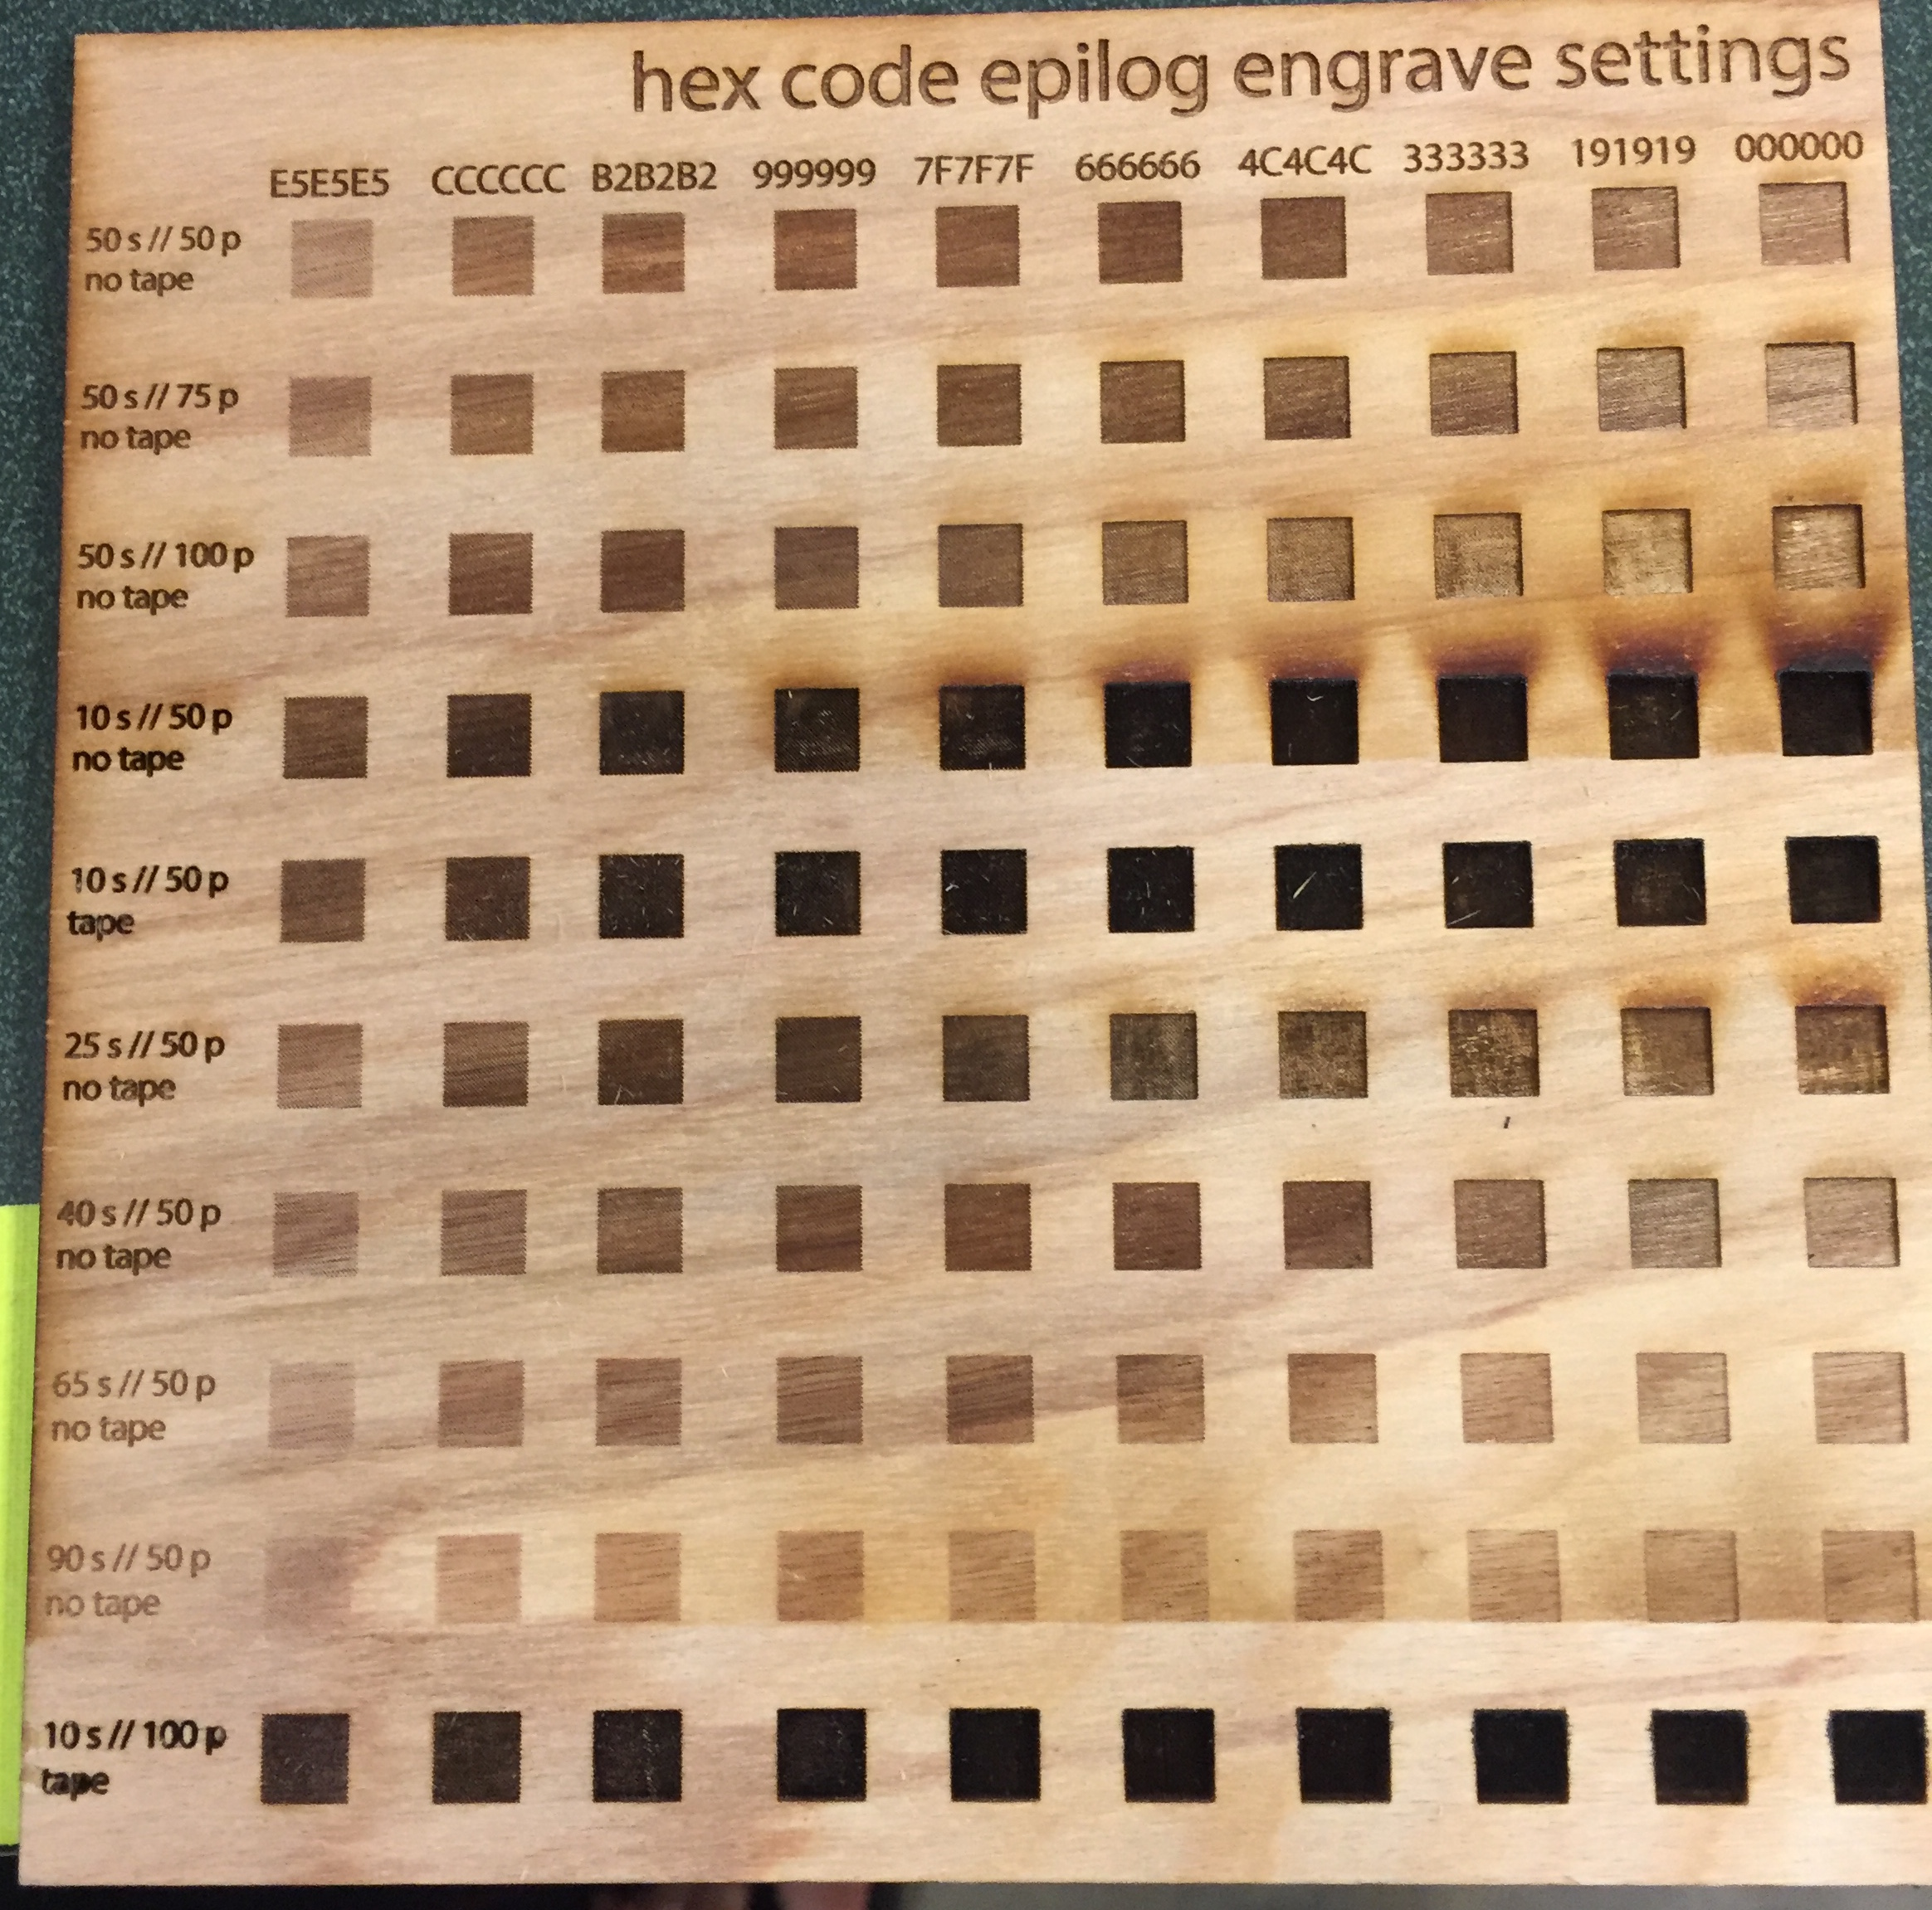
 Among the table of etched samples of different power/speed settings was a table that had power/speed combos on one axis and different hex codes on another axis. This showed that a given power/speed setting could engrave different colors depending on the hex codes of the colors in the file. Setting each of the colors in the illustrator file to one of the hex codes listed was sure to produce the given sample. Using this technique wouldn’t have required any color mapping – just reassigning of colors in the file to greyscale hex codes that matched the desired engraved color, and engraving the whole war owl at the given power/speed setting. Because there was only one engraving setting, this also would have only required one pass over the image which would have taken much less time.
- We also were told about an option to etch from the bottom up. Because the smoke is pulled to the back of the machine, this would help prevent scorch marks over what was already etched.
- The lab techs also helped explain to us how the dpi changes the look of the engraved image. They showed us how to increase the dpi and use Jarvis rather than standard mode to produce a smoother rather than pixelated finish.
Unfortunately, because other people were waiting to use the laser cutter and we already had cut 4 identical owls, we weren’t able to try these technique out ourselves. But, it was good to hear how to more efficiently and effectively engrave on the laser cutter, so I know how to do it next time!
This homework was definitely a learning experience. Because we did so many cuts and played around with all the different settings, I feel pretty comfortable using the laser cutter and now know about a lot more of its functionality.
