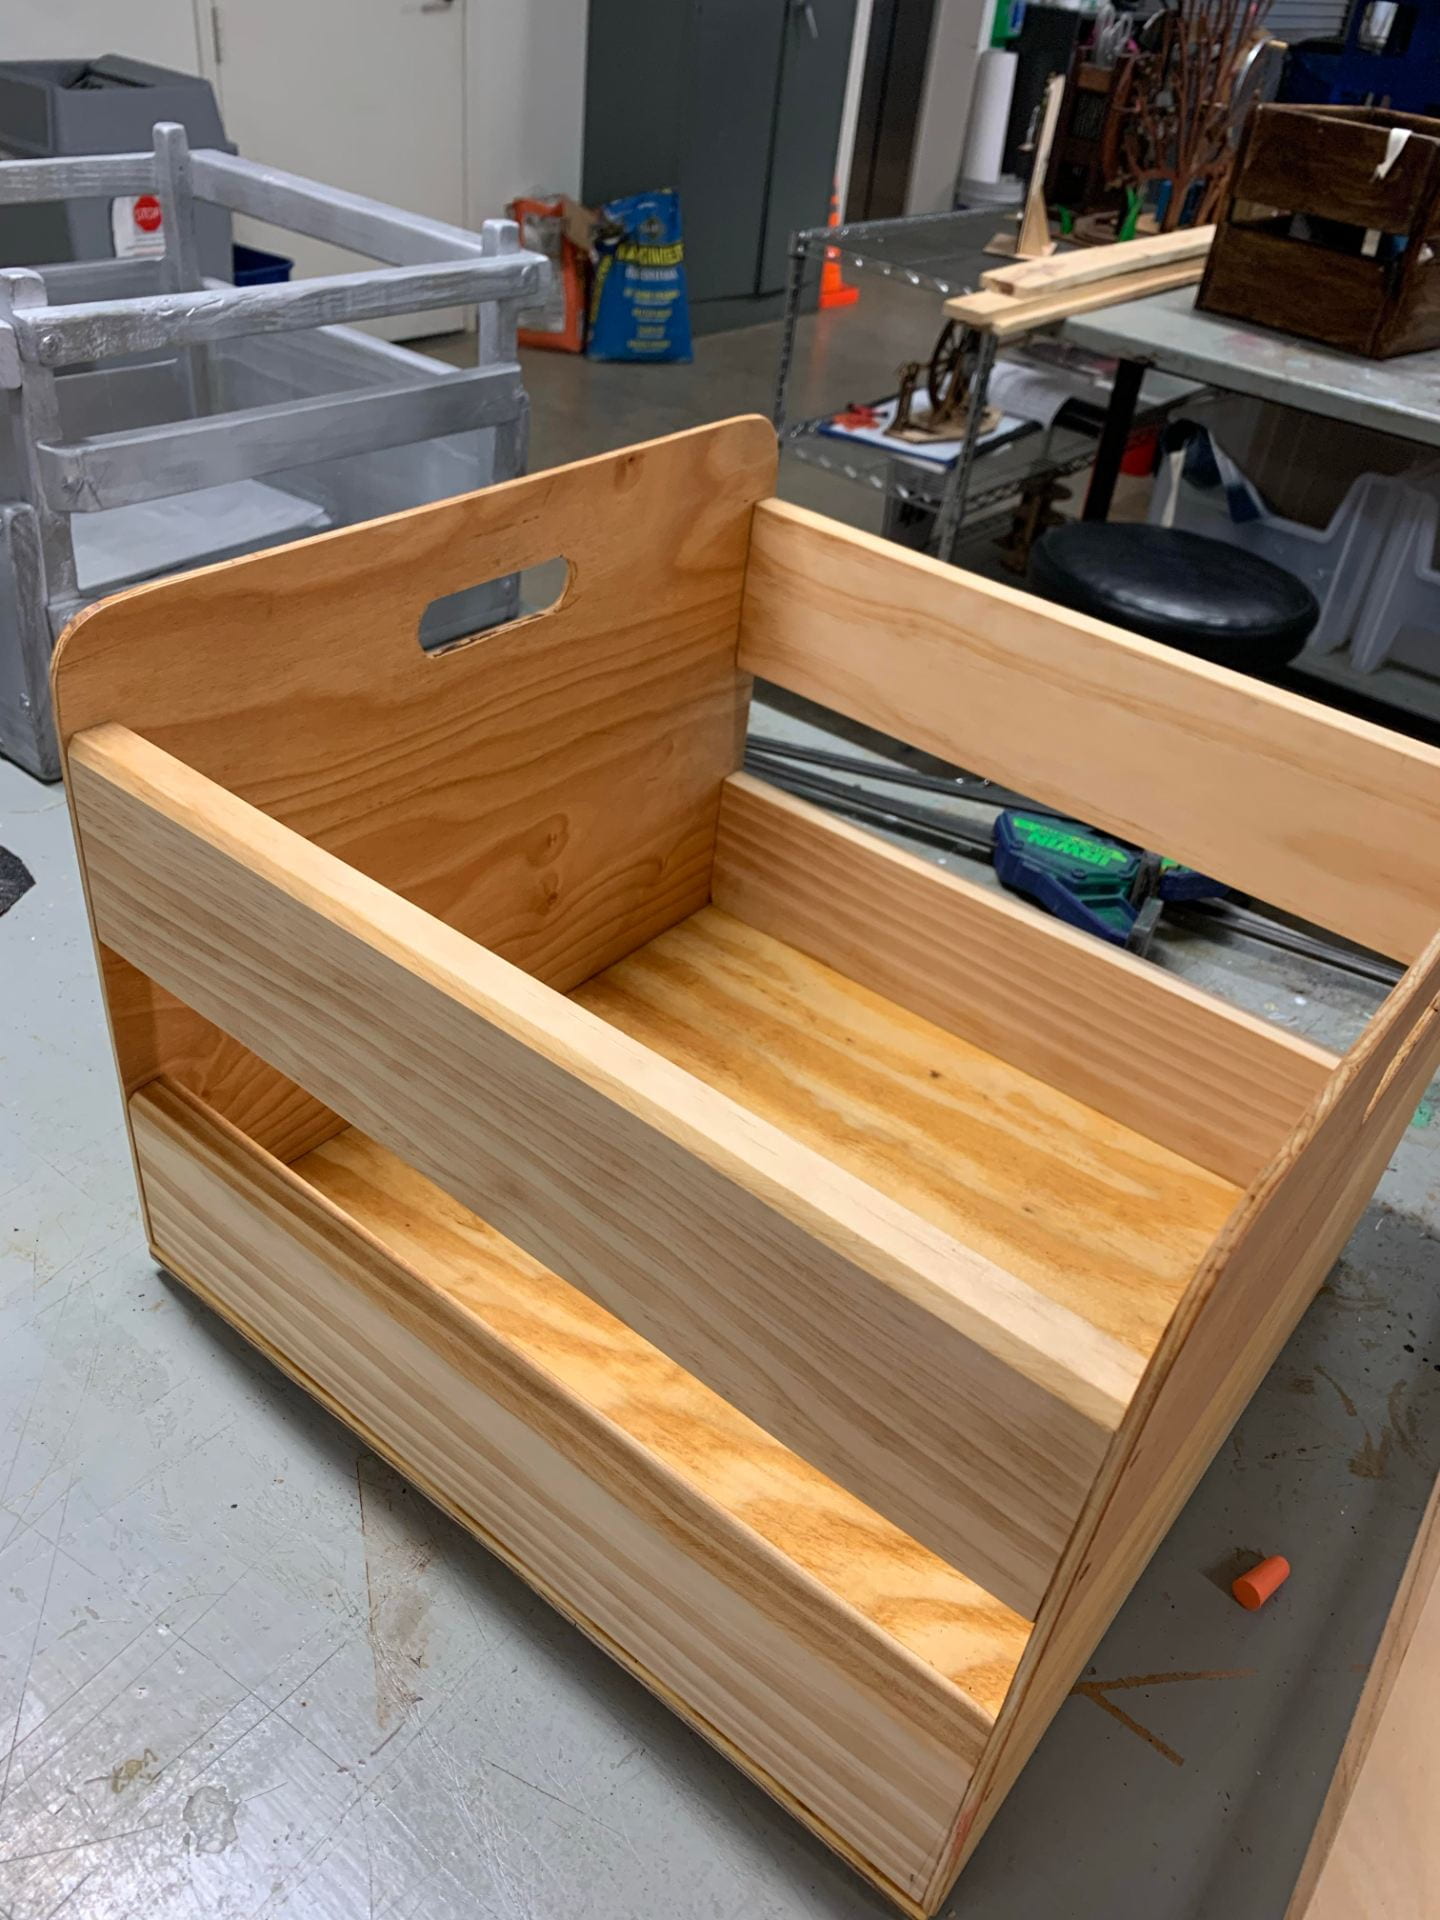
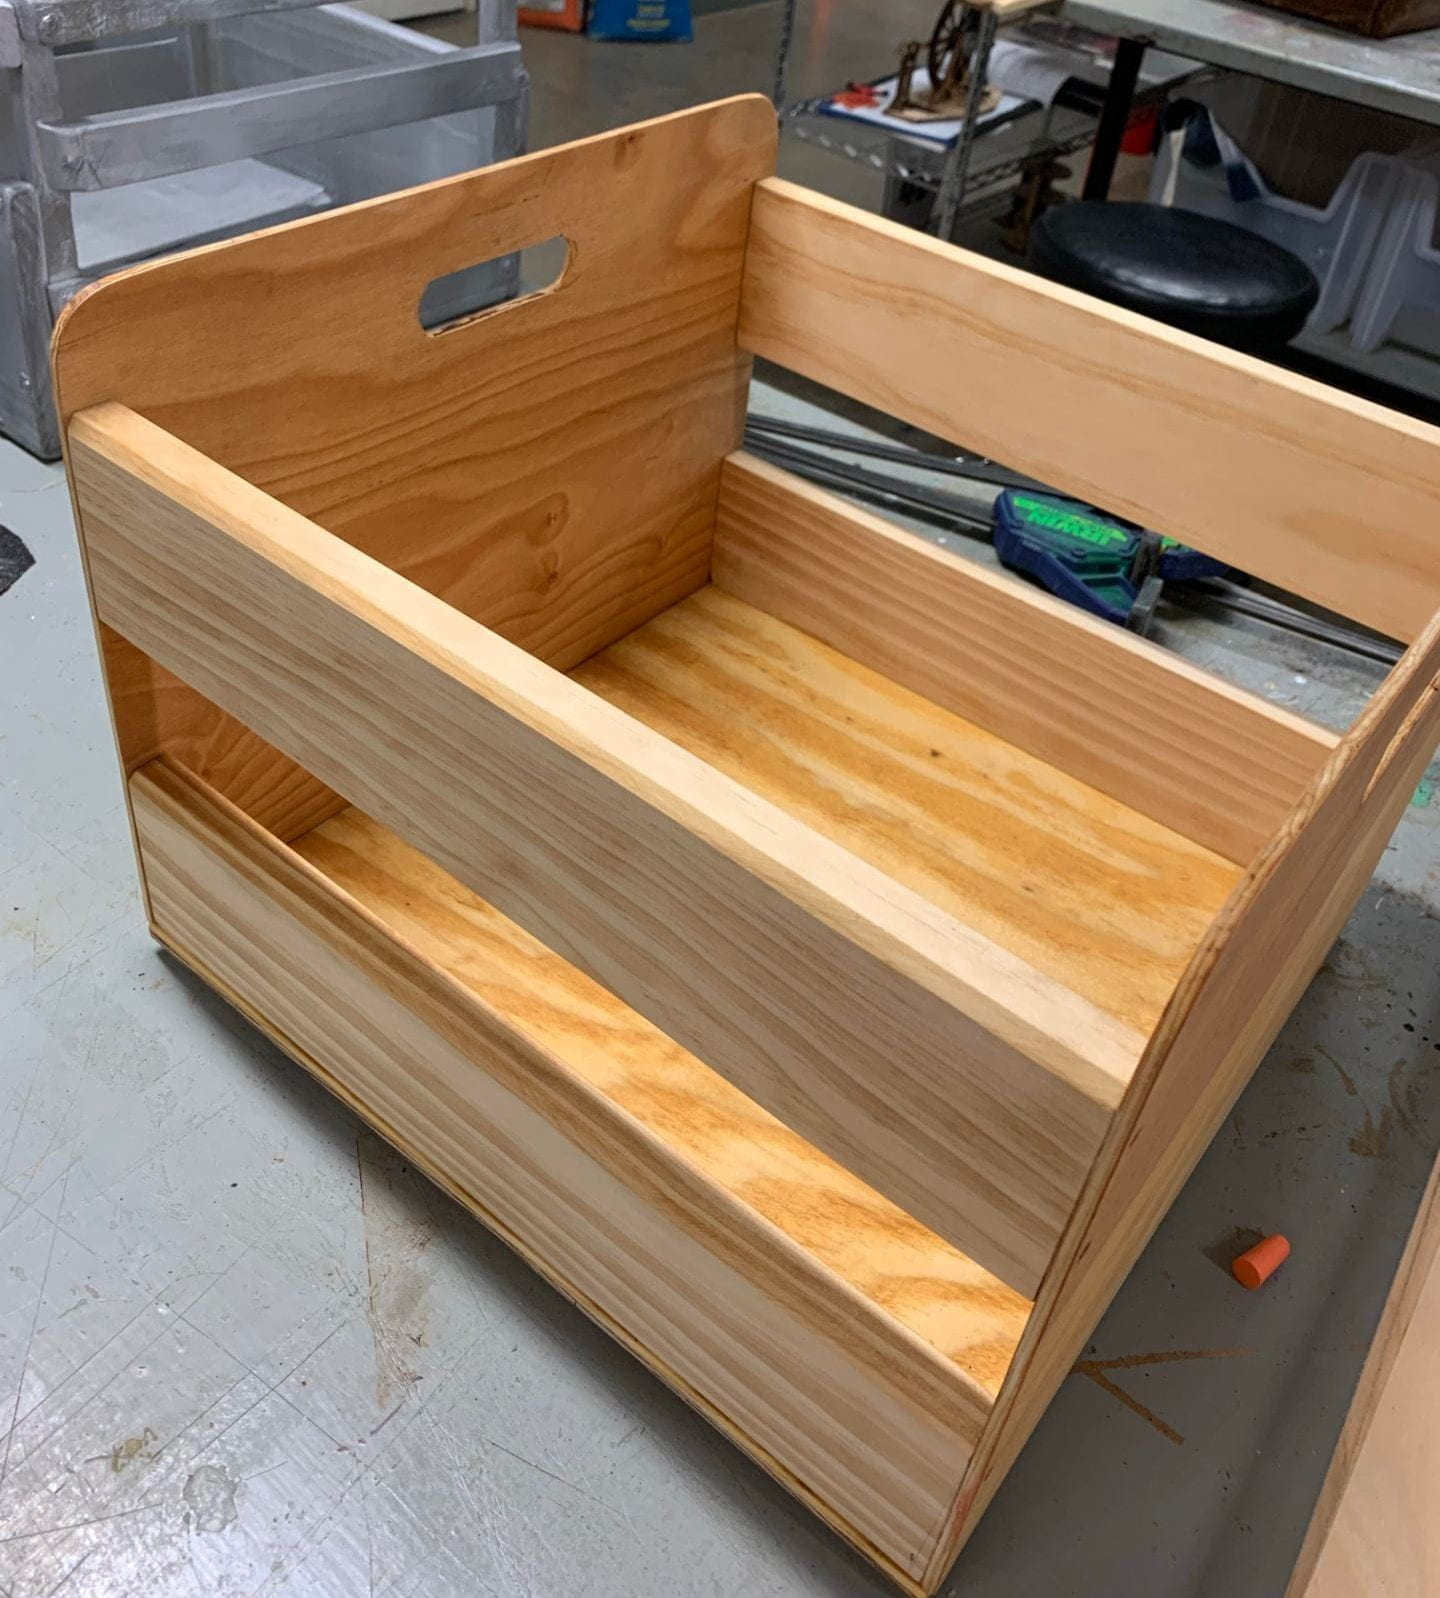
I made a box! I’m very proud of it:) Here it is:
Here’s how I made it!
I started off using the miter saw and table saw to cut out all my pieces. The base of the box is ~1 inch thick plywood, the sides with handles are ~1/3rd inch thick plywood, and the planks on the sides are ~3.5 inches wide by ~1 inch thick.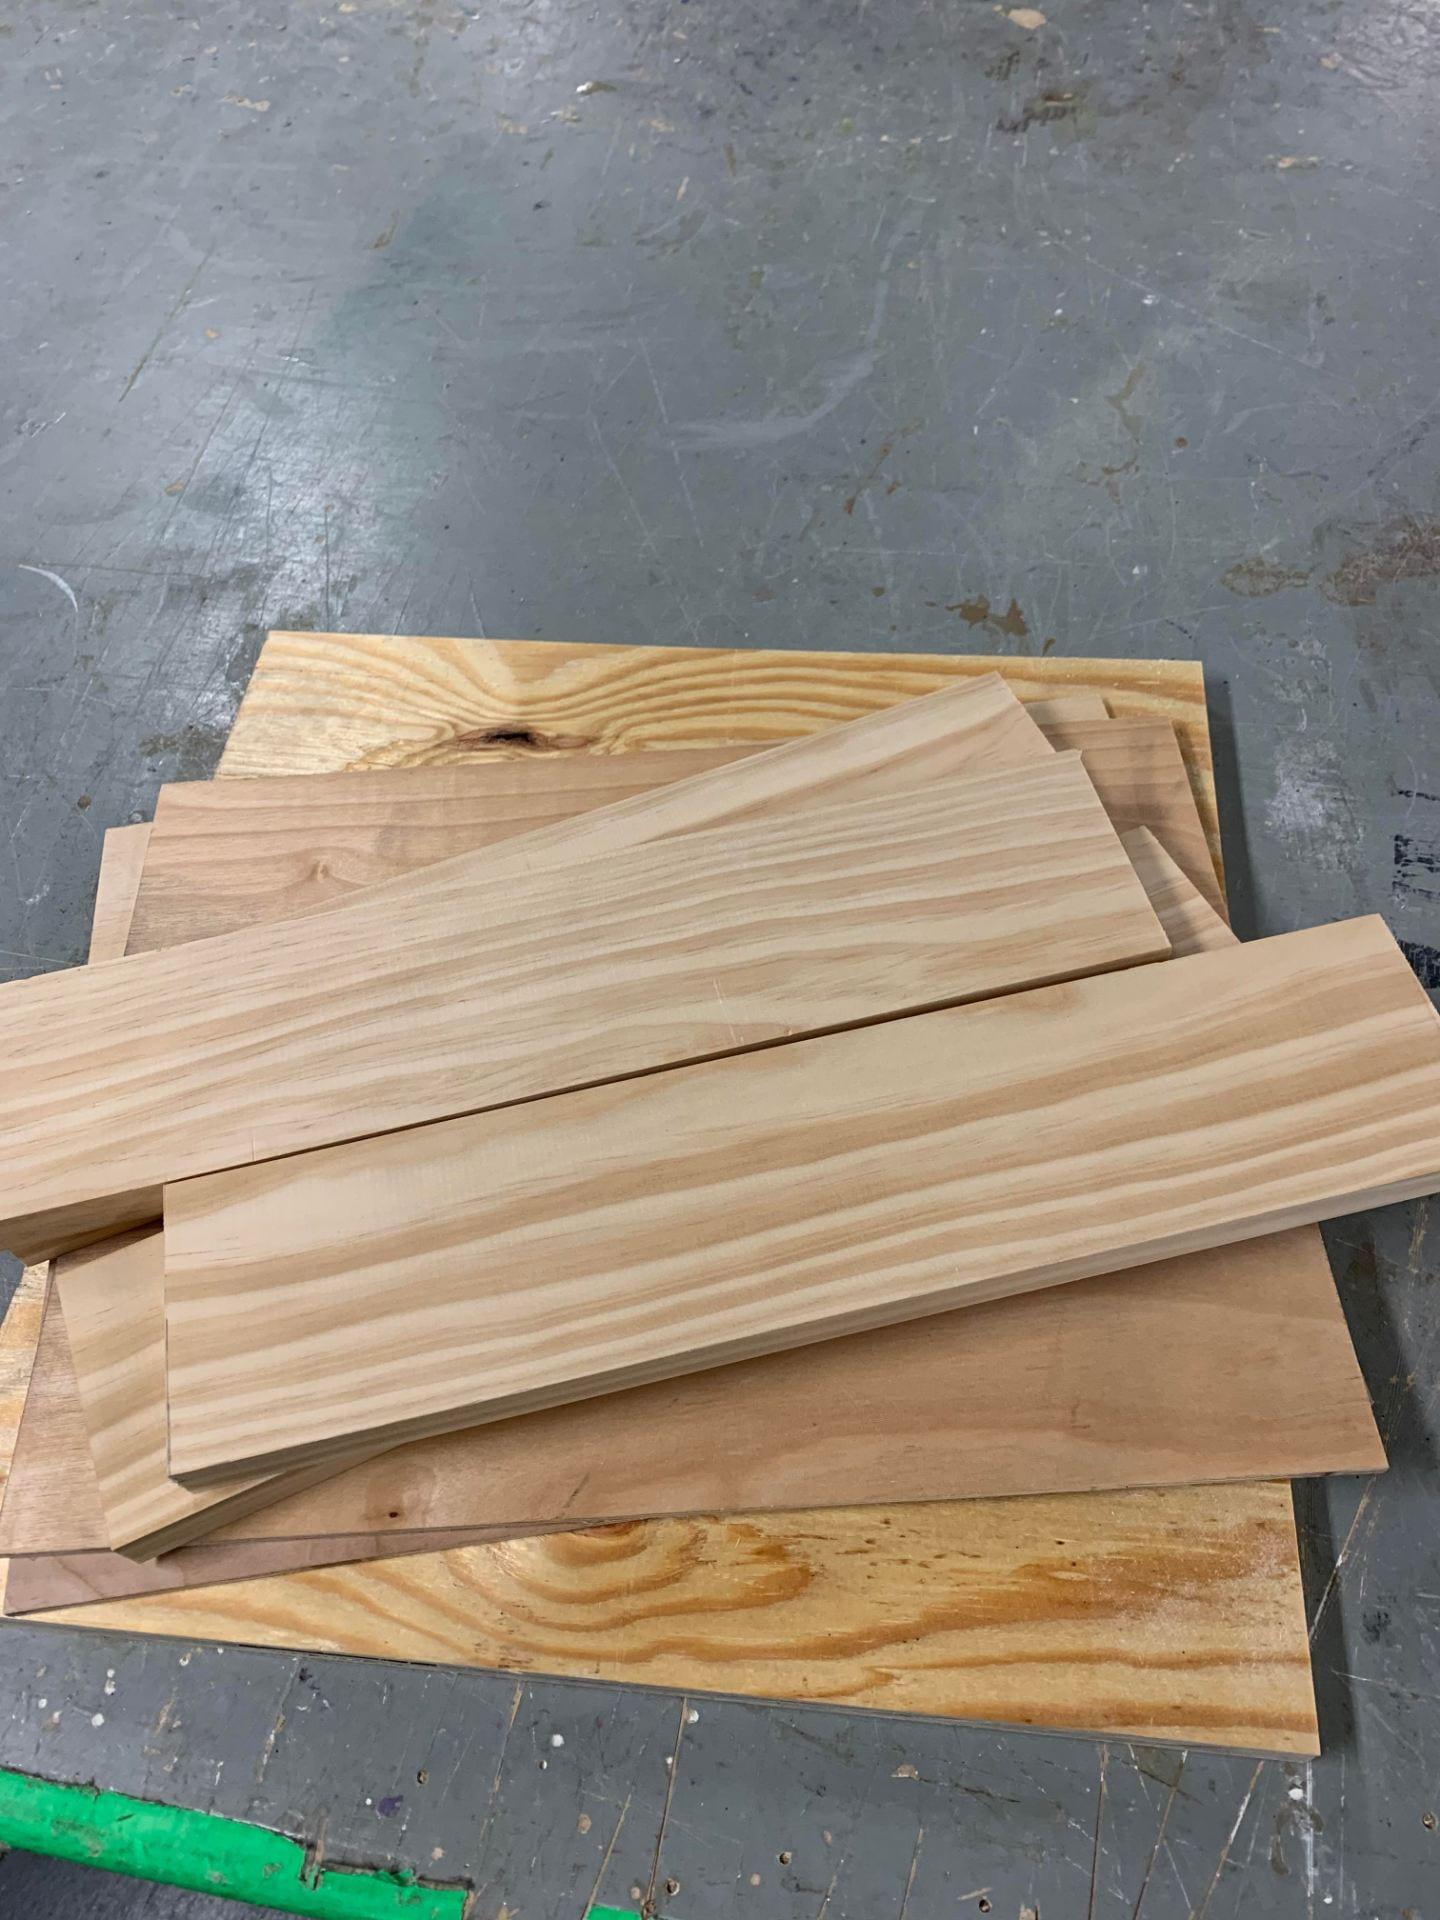
Next, I took the wooden planks to the belt sander, and sanded two of the edges on each plank to around 45 degrees. I sanded them on the side I planned to face out. 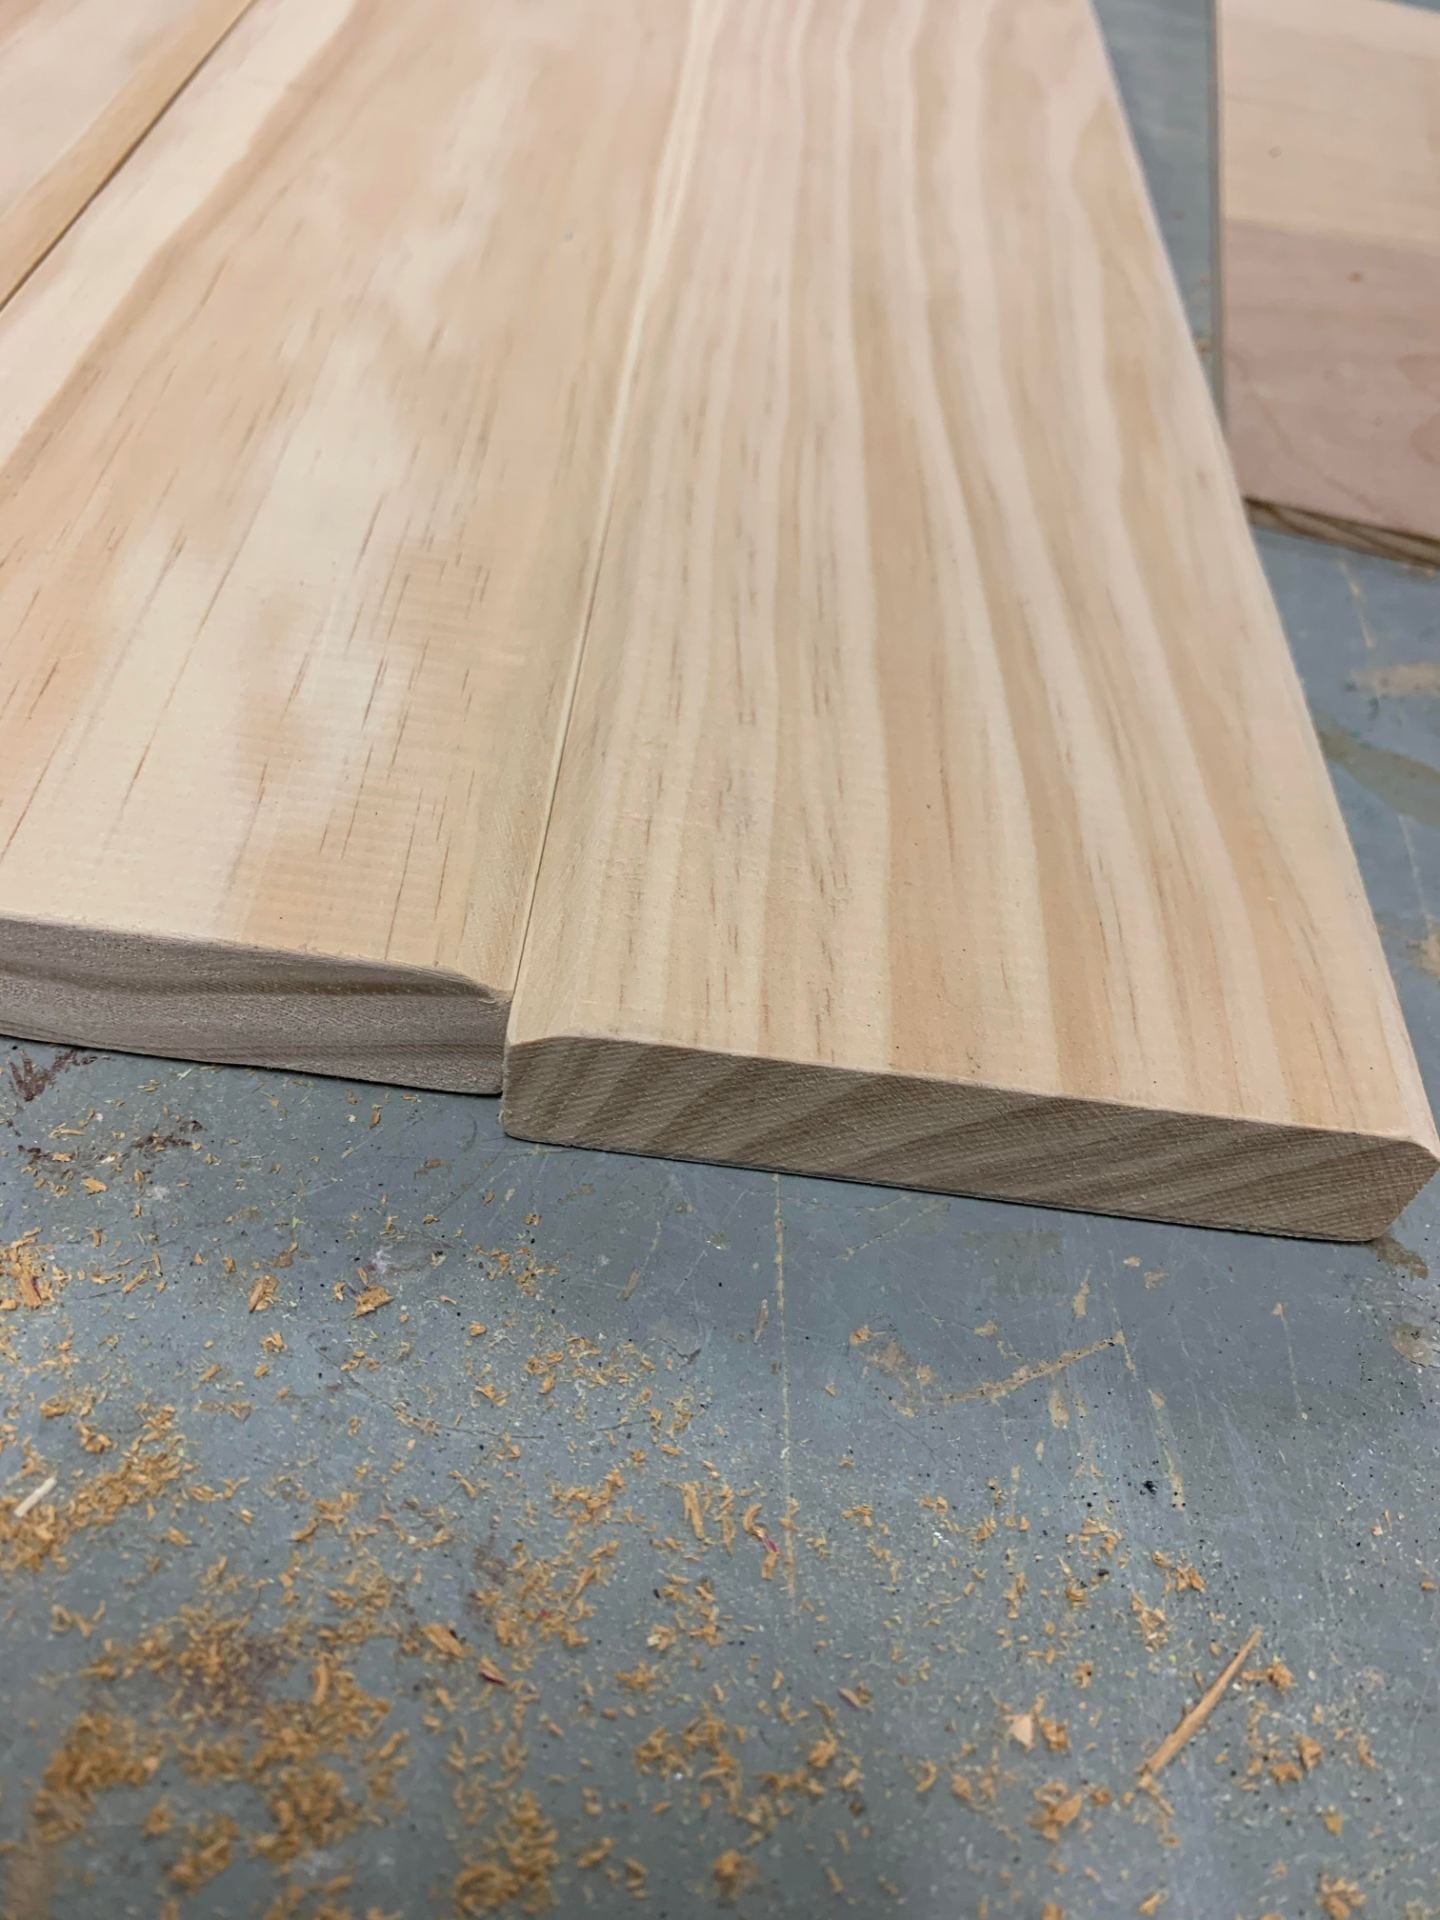
I also used the palm sander to smooth out the plywood boards, and sandpaper to soften all the corners.
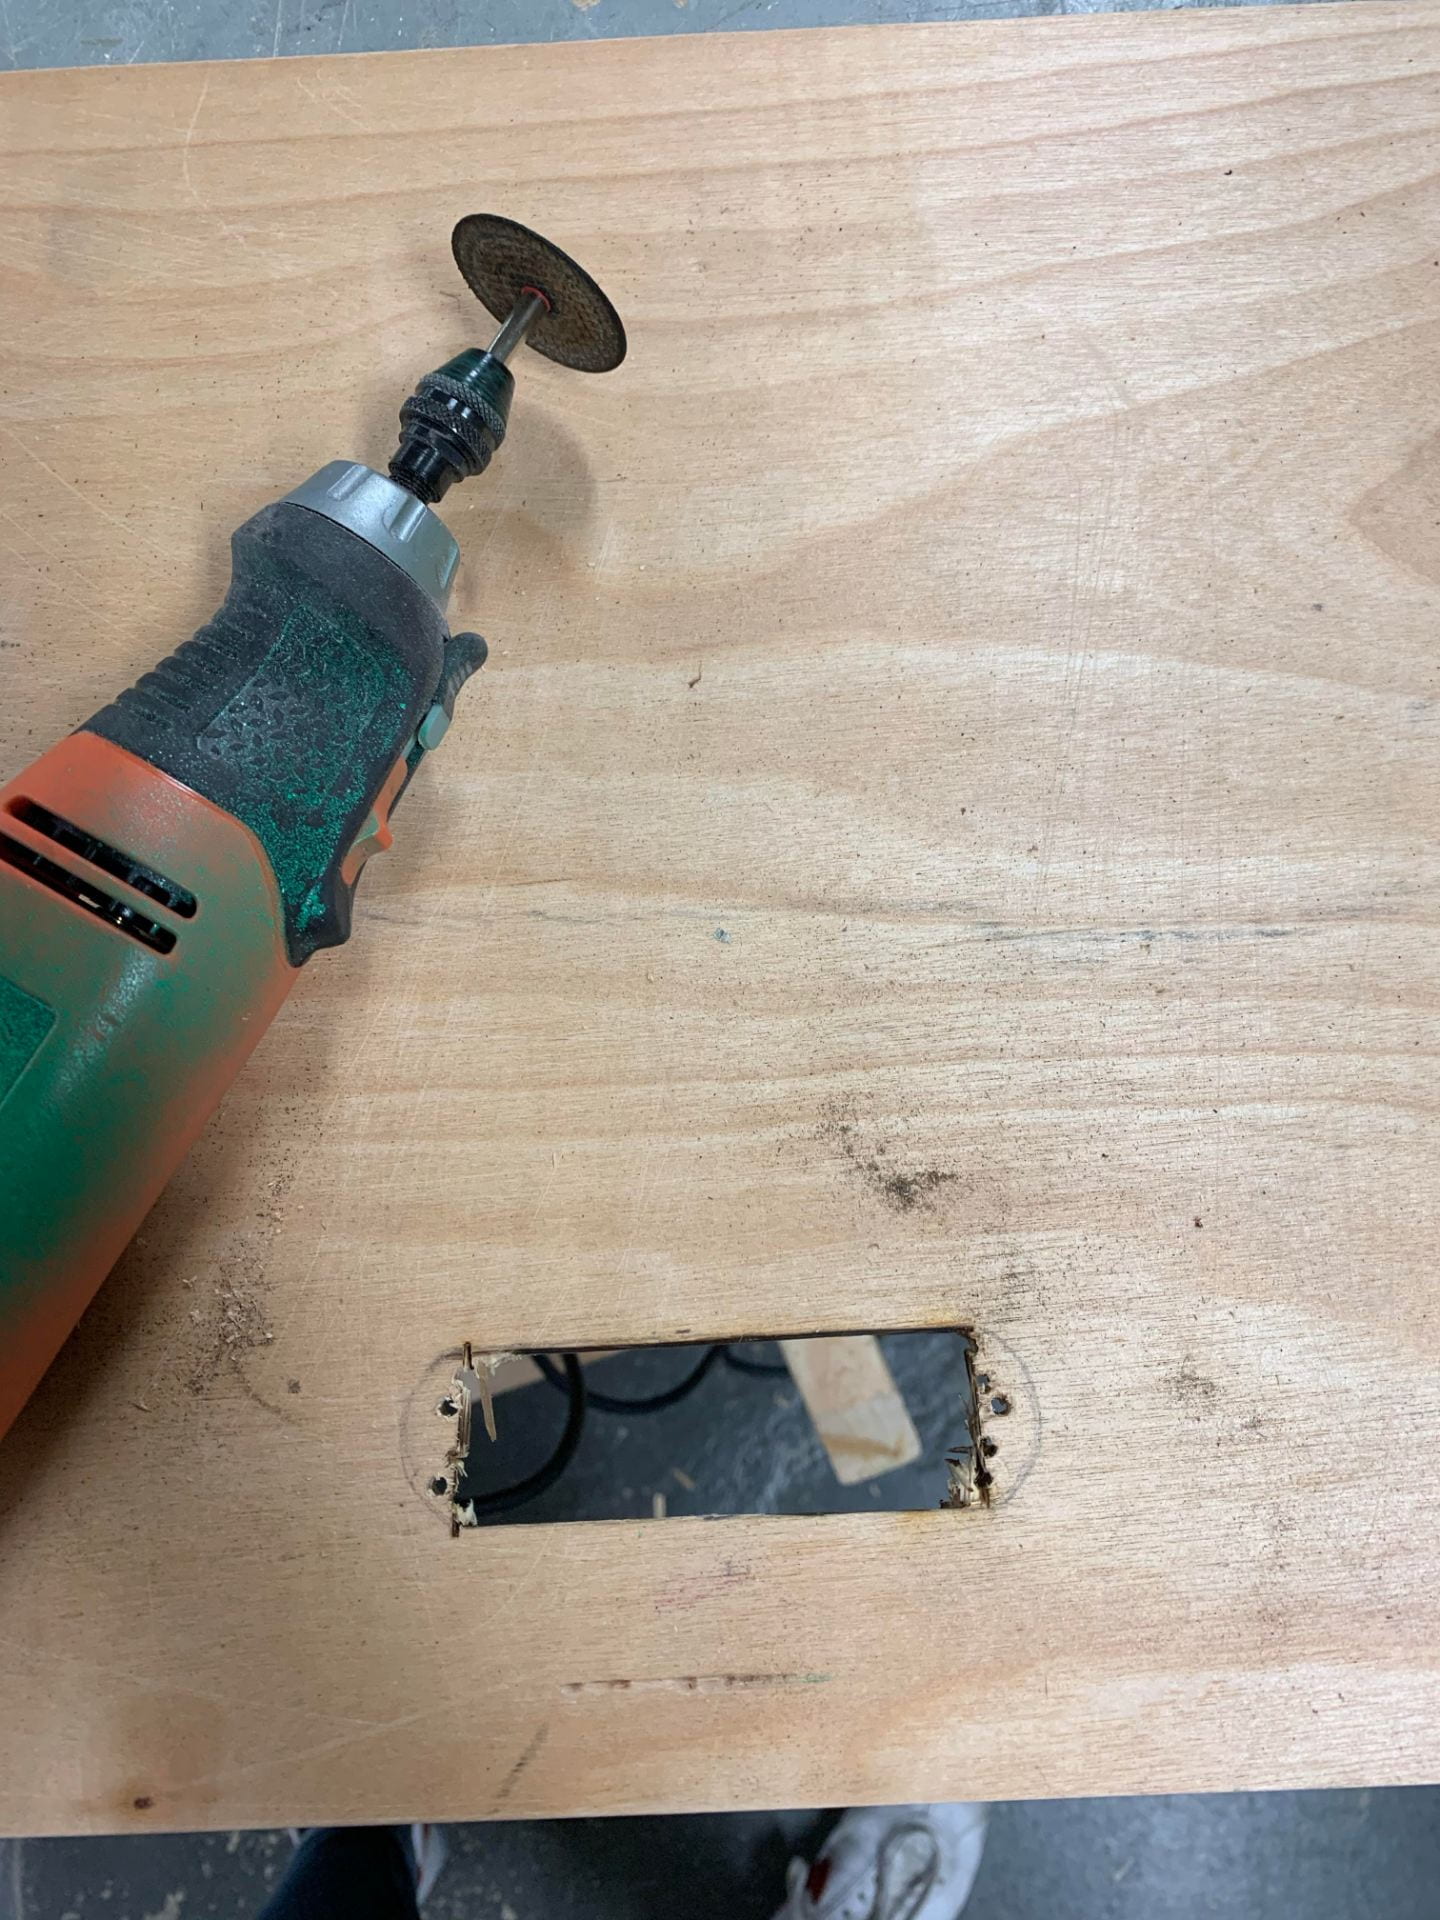
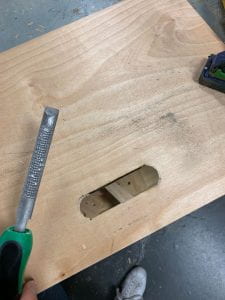
Now comes my favorite feature. I decided to challenge myself and try to create handles in the plywood sides. I used a Dremel to cut out a rectangle first, then took a drill and made a bunch of small holes, then punched out the rectangle. This left a very rough idea of a handle. Then, I took a rasp and furthered the sides of the rectangle until they turned round, leaving a long pill-shape. Finally, I took the cylindrical sanding head for the Dremel and smoothed out everything.
Assembly time! I used wood screws to put everything together. I first attached two planks 90 degrees to the plywood base. Then, I screwed the plywood sides to the two bottom planks. Finally, I put in the last two planks that were sandwiched between the two plywood sides. I had to use creative clamping techniques to make sure everything was held in place perfectly while I was drilling pilot holes and putting screws in. 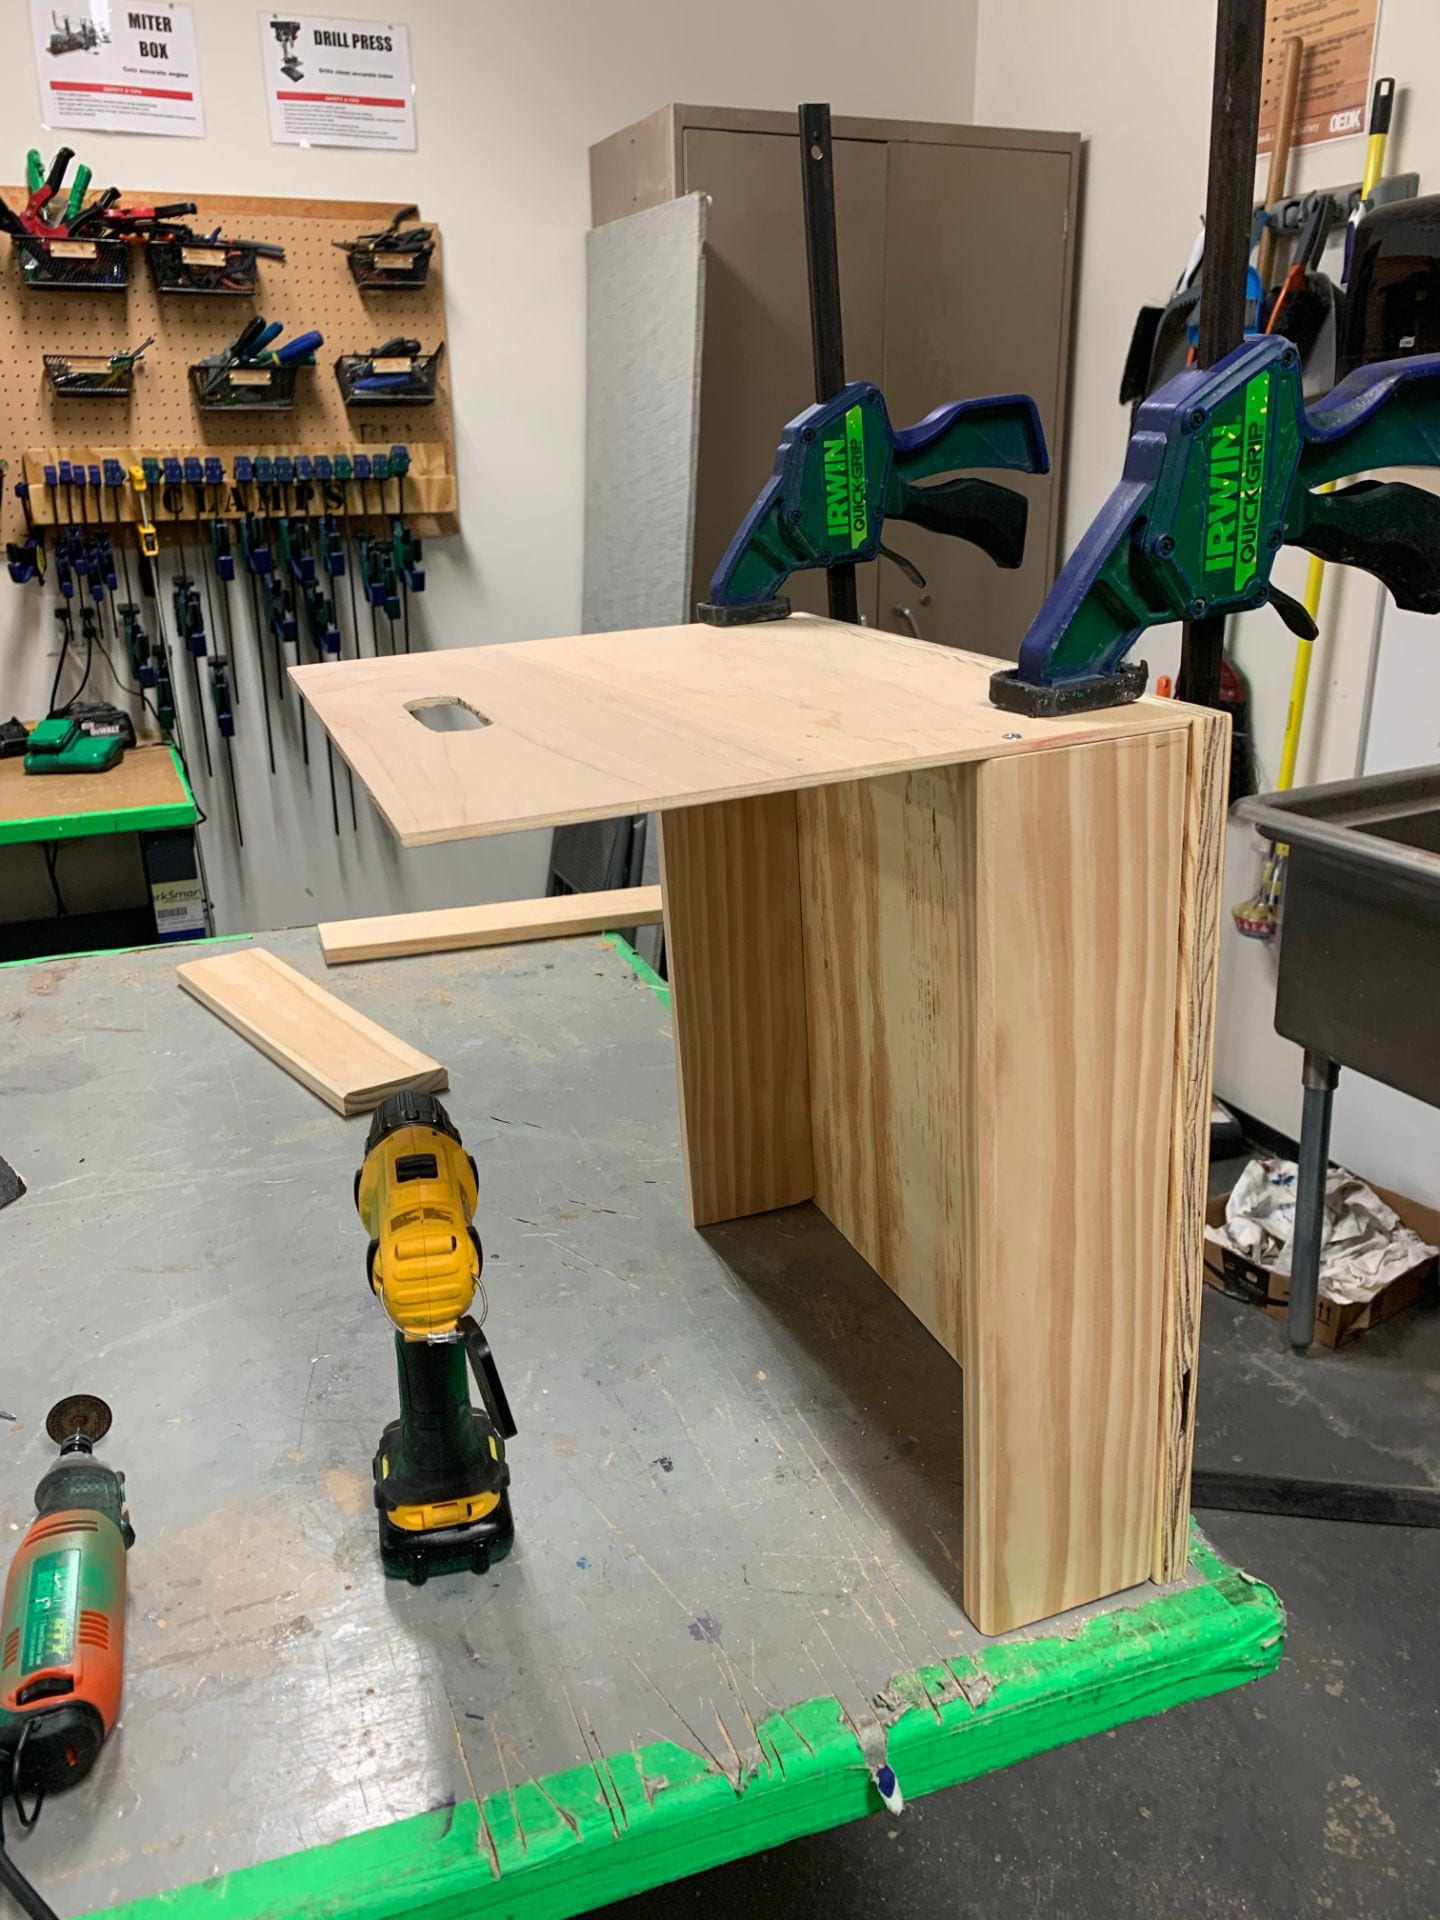
I had a box, but I felt like the corners of the plywood sides looked awkward and would also catch on things. To fix this, I decided to round all the corners with the cylindrical sanding head of the Dremel. Once I got it how I liked, I smoothed them out and removed burn marks with sandpaper.
Finally, I routed the bottom edges of the box, and stained the box with a near-clear finish (I wanted the wood grain to show through.) I’m very happy with my finished box–it turned out way cleaner than I thought it would. I think this is because I used more precise woodwork tools than I normally would, such as the router, miter saw, and table saw. Overall, I would improve on the handles because they’re a little uneven, and the base piece of plywood could have been sanded to be even smoother. I’m excited to use my box!

Cost estimate:
Plywood sides: ~$5 if bought from OEDK (since I found it as scrap wood, it was actually $0!)
Thick plywood bottom: ~$7 for a 2 ft by 2 ft square from Home Depot
Lumber side pieces: ~$8 for a 1×4 plank from Home Depot
Wood Screws: $4 for a 1 lb box of screws (more than enough) from Home Depot
Sandpaper: ~$13 to get 3 packs of different grit sandpaper
Belt sander: $108
Router table: $125
Miter saw: ~$150 on the cheap end
Table saw: $400
Dremel+bits: $80
Wood finish: $8 for a quart
Labor cost: ~4 hours of work; if I paid myself how much I’d make as a lab-ass next year, it’d be ~$40.
Total: $943. Since the handy-dandy OEDK has all the tools I need and this is unpaid work, material cost alone is around $25-35.
